.JPG)
.jpg)
"Your source for standard gauge modeling in 1:20.3"
|
|
|
"Your source for standard gauge modeling in 1:20.3" |
|
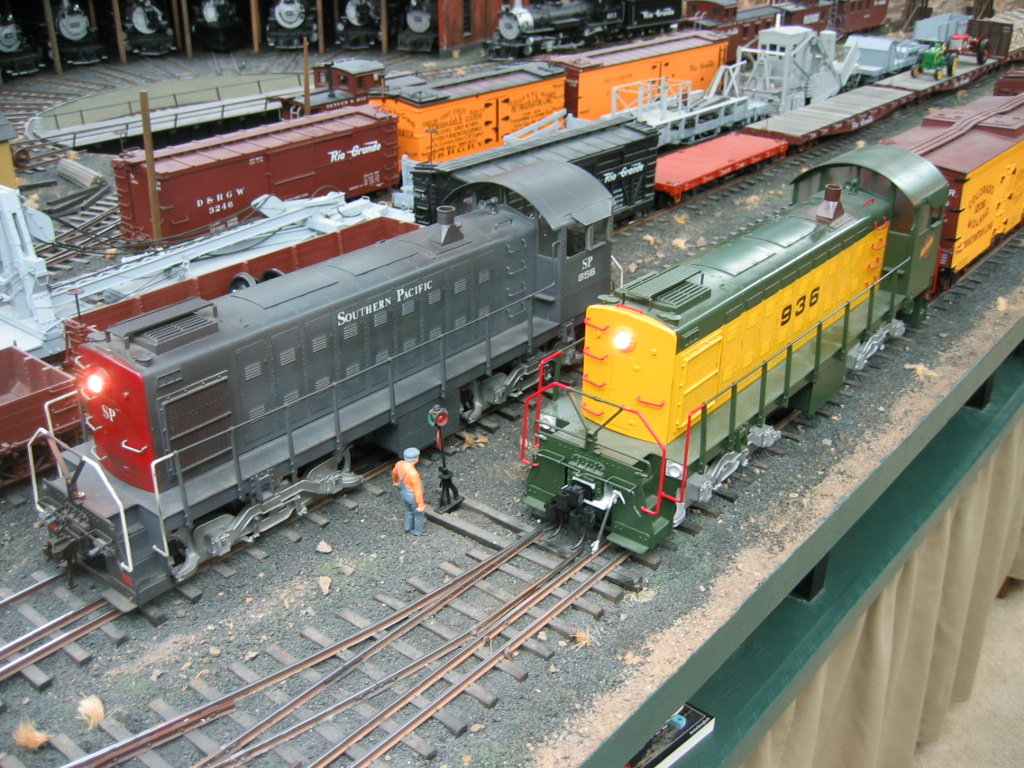
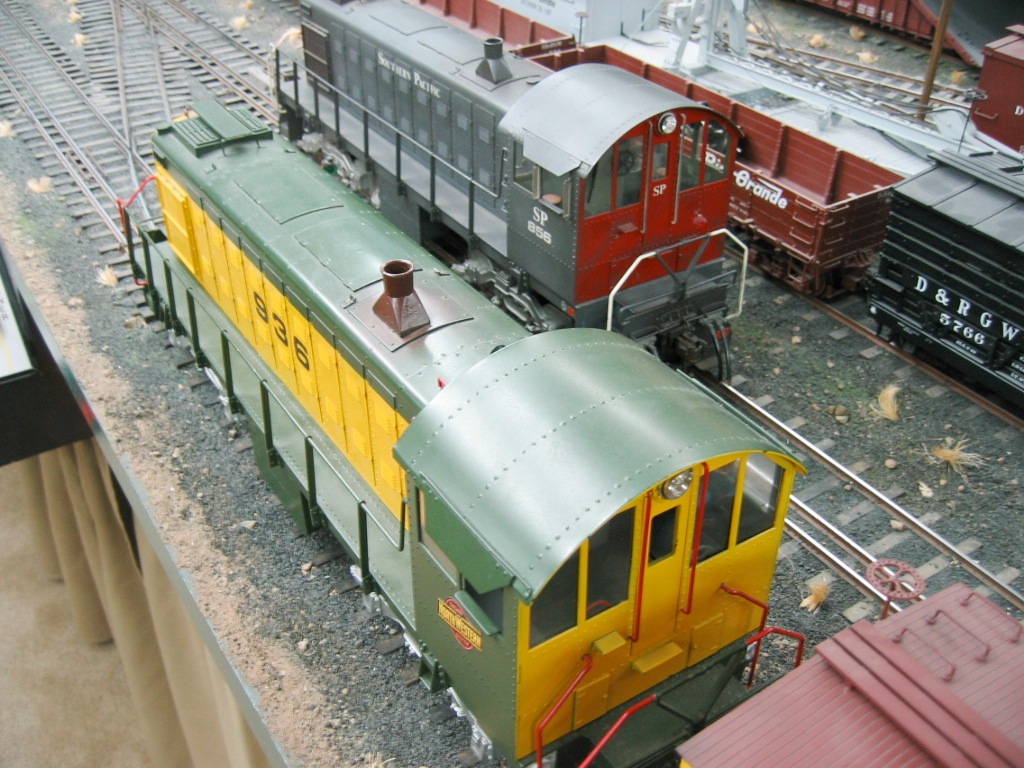
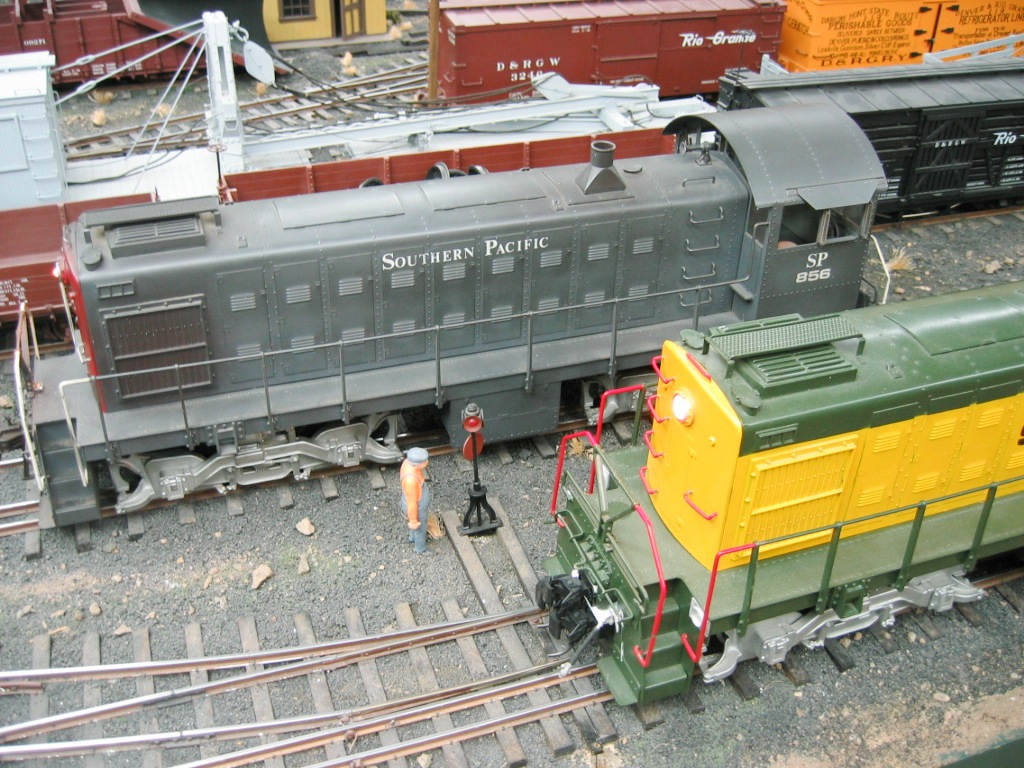
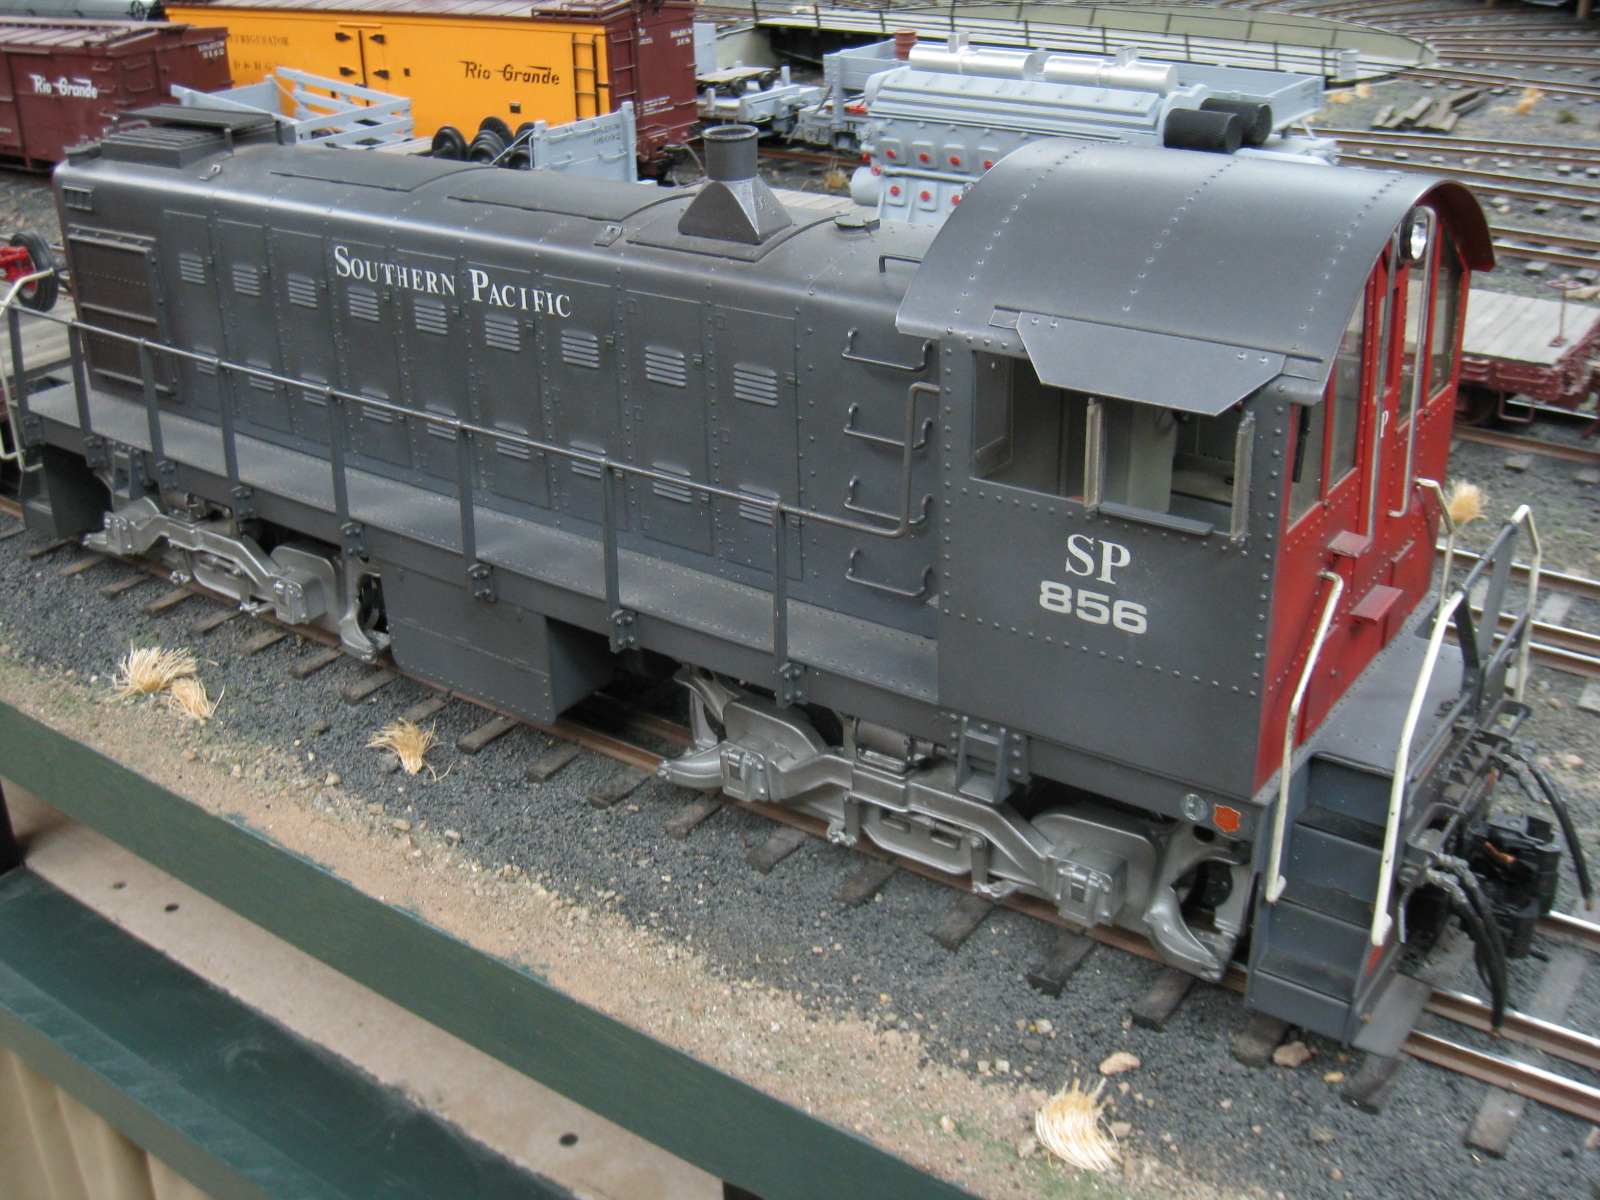
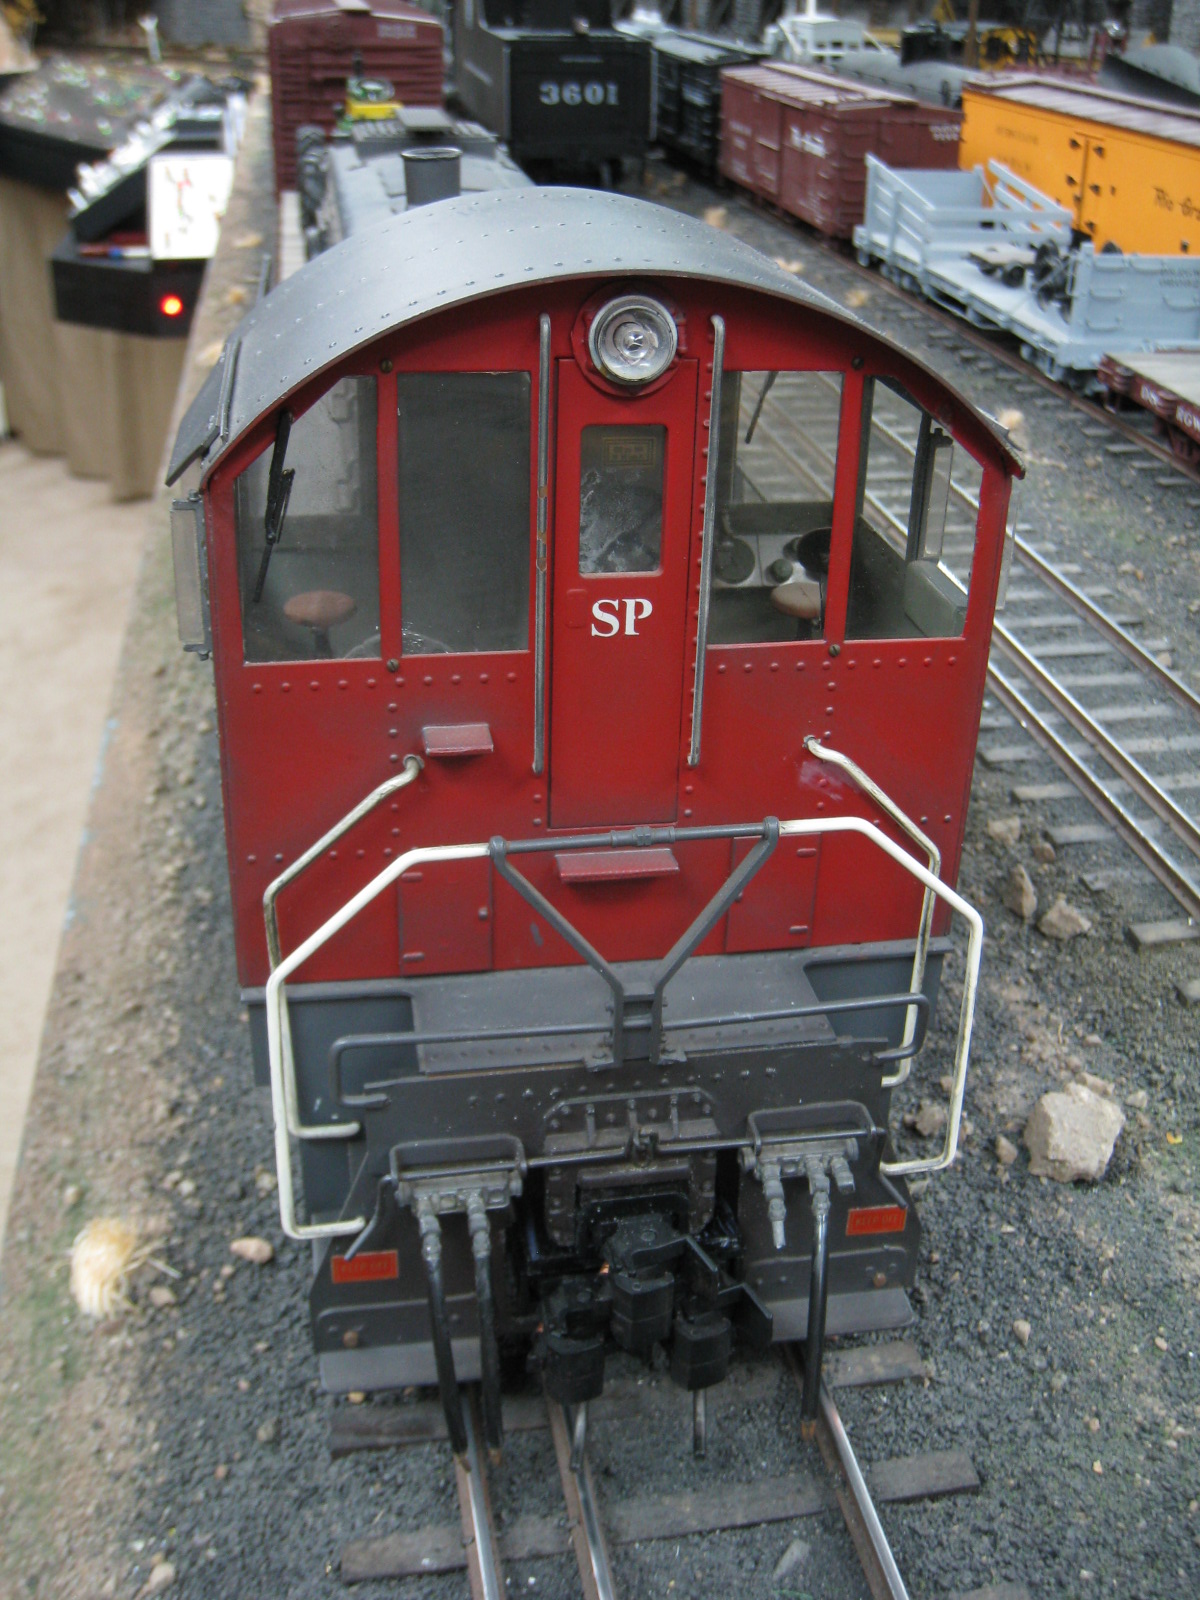
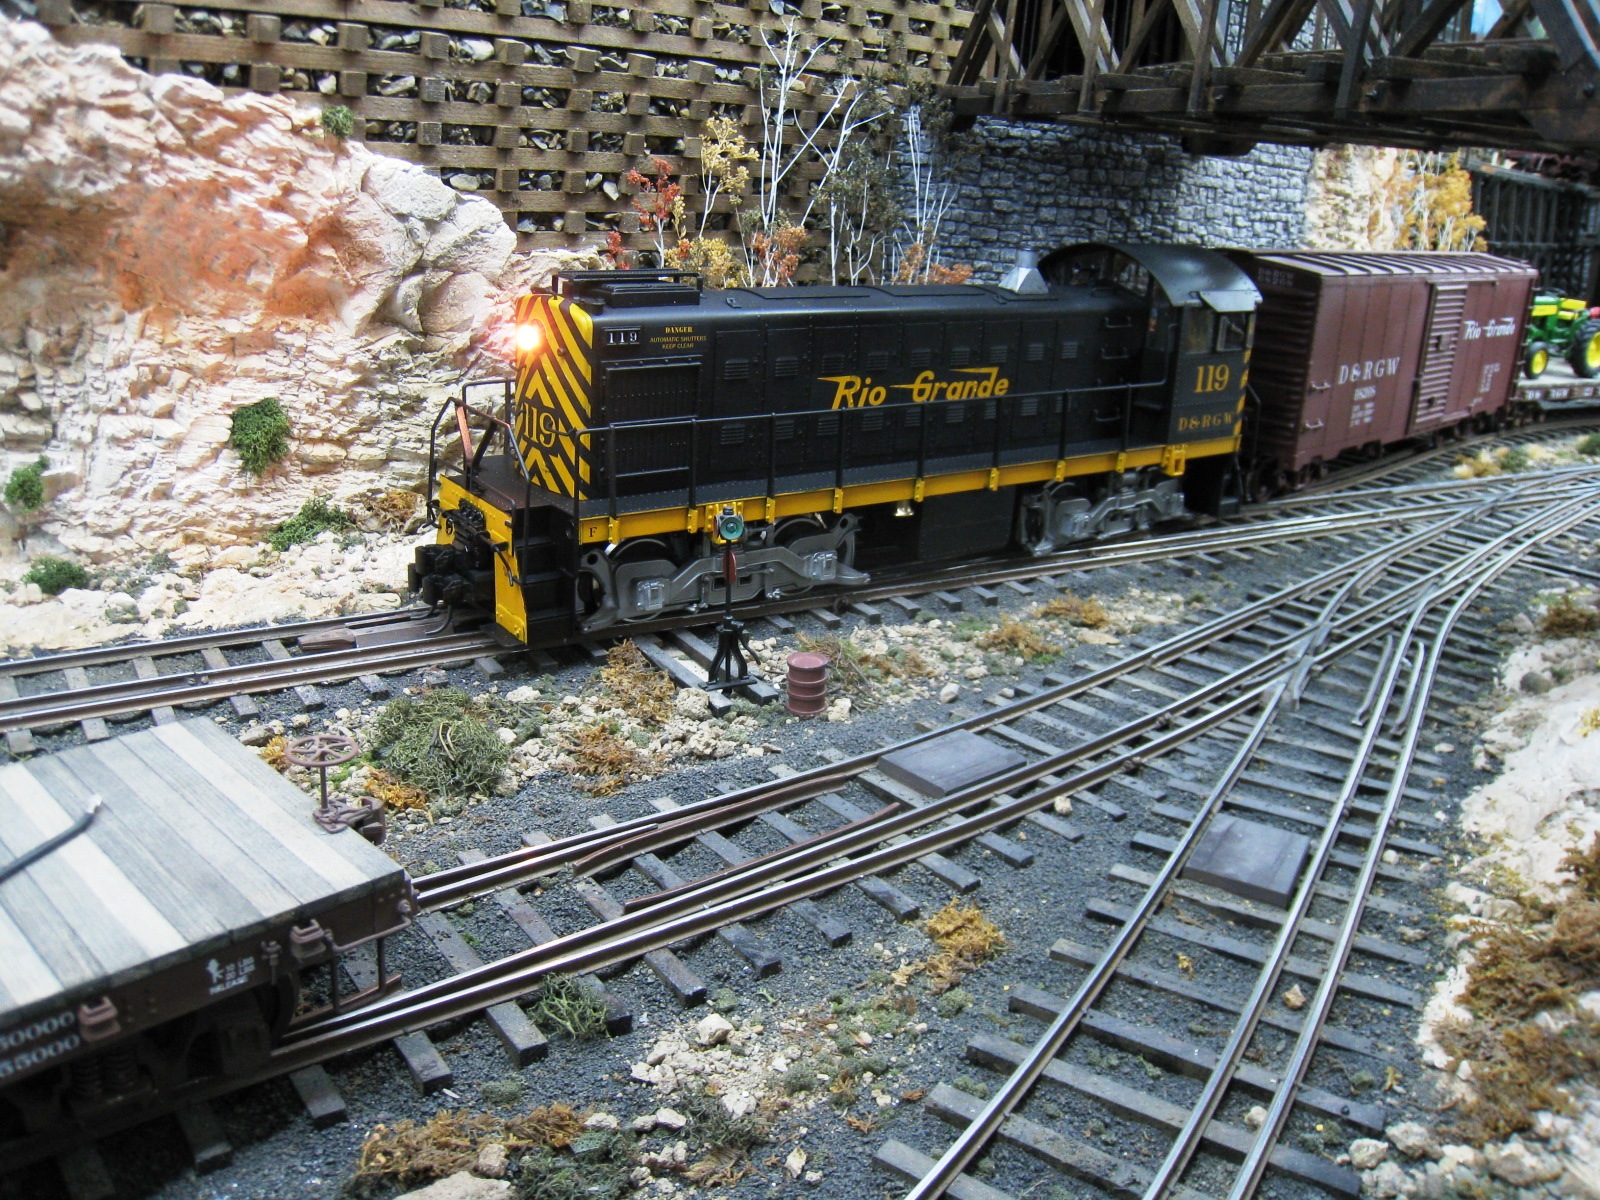
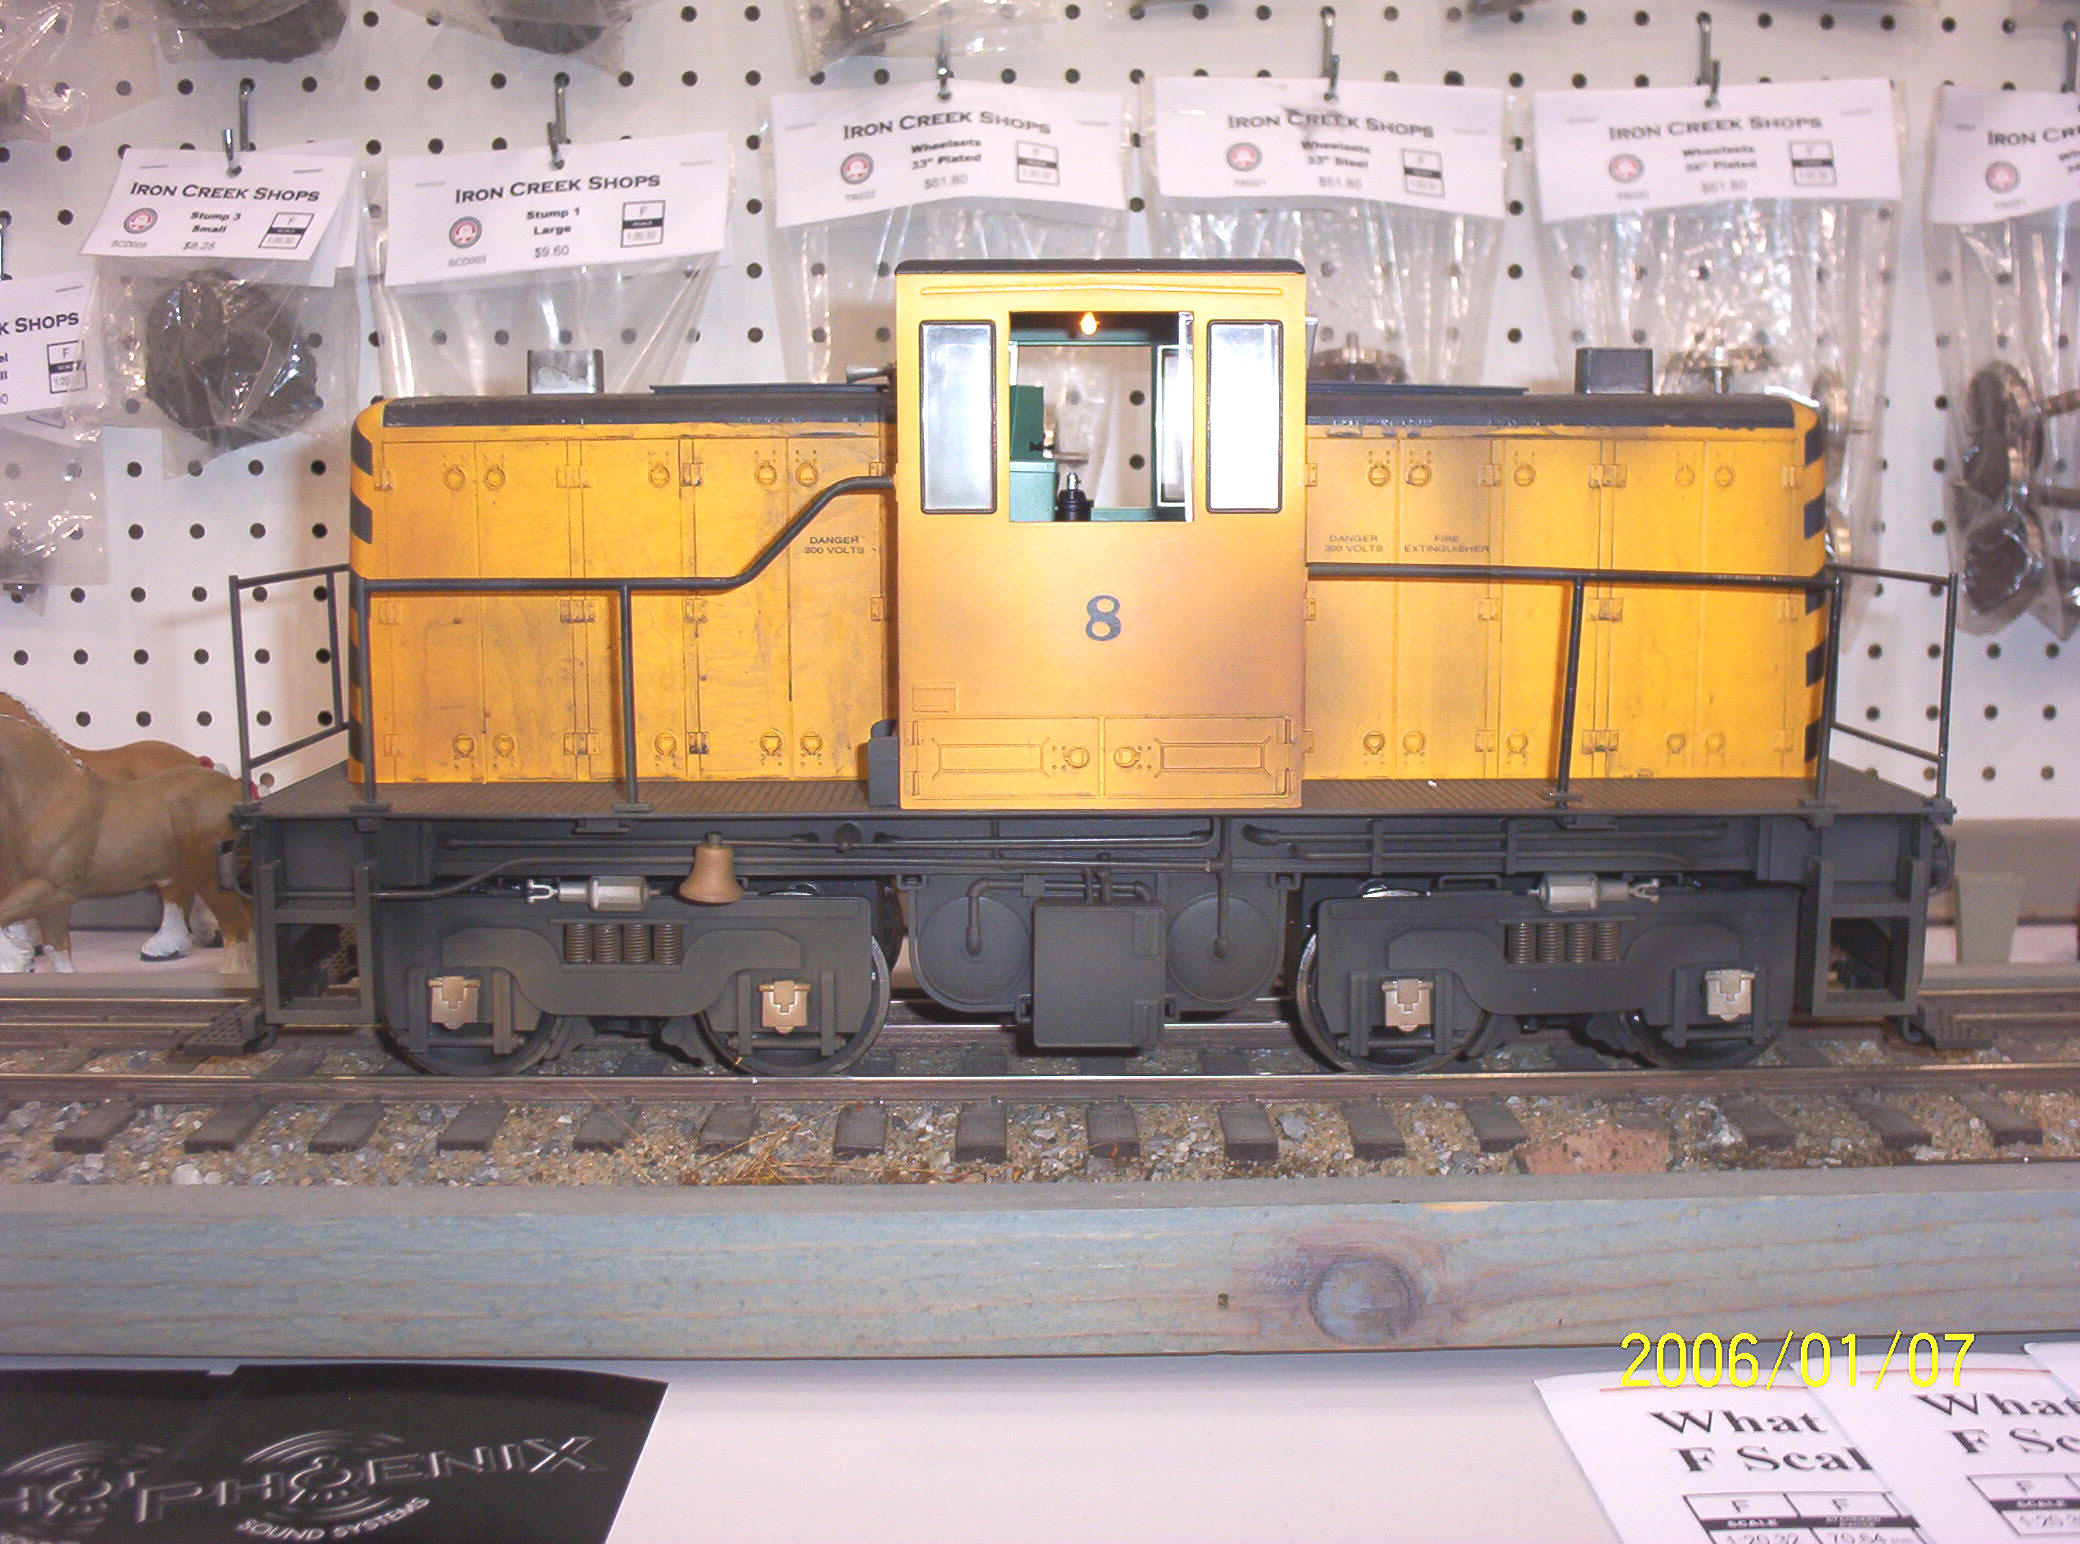
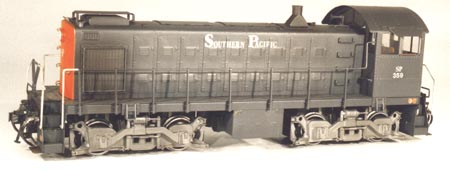 Repowering the Magnus S1 Repowering the Magnus S1(2005) Although at heart, Barry is a died-in-the-wool steam man, he has been dabbling with diesels for several years, mainly since he models the D&RGW in its late steam / early diesel years. First generation diesels have also become as rare as the steam giants which they replaced, so their appearance on Barry's Colorado & Western is not totally unfounded.
Barry's first diesel is in reality a
rebuild of an imported Alco S1 switcher built by
Magnus
of Germany. In the past, Magnus has had a reputation for
building good looking locomotives
that ran poorly; and their
Gauge 3 Alco S1 diesel switcher produced in the mid-1980s was not an exception to this
unfortunate reputation. The Magnus S1 is equipped with a unique, at
least in the world of large scale, truck contained drive system that
might best be described as a poor man's motor block. The Magnus
truck, with it clunky and somewhat brittle white metal side frames,
at least looks the part of Alco's distinctive Blunt trucks, but the
mechanism is the product of trying to make a motor block on the
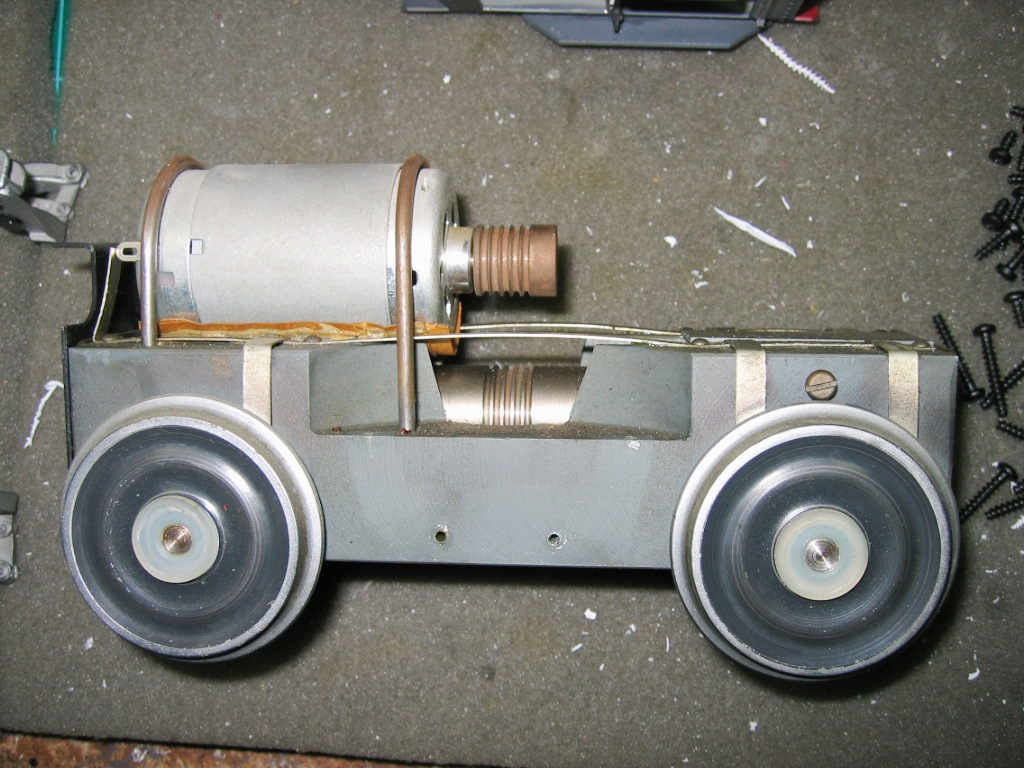
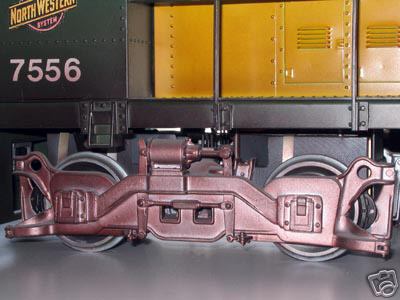
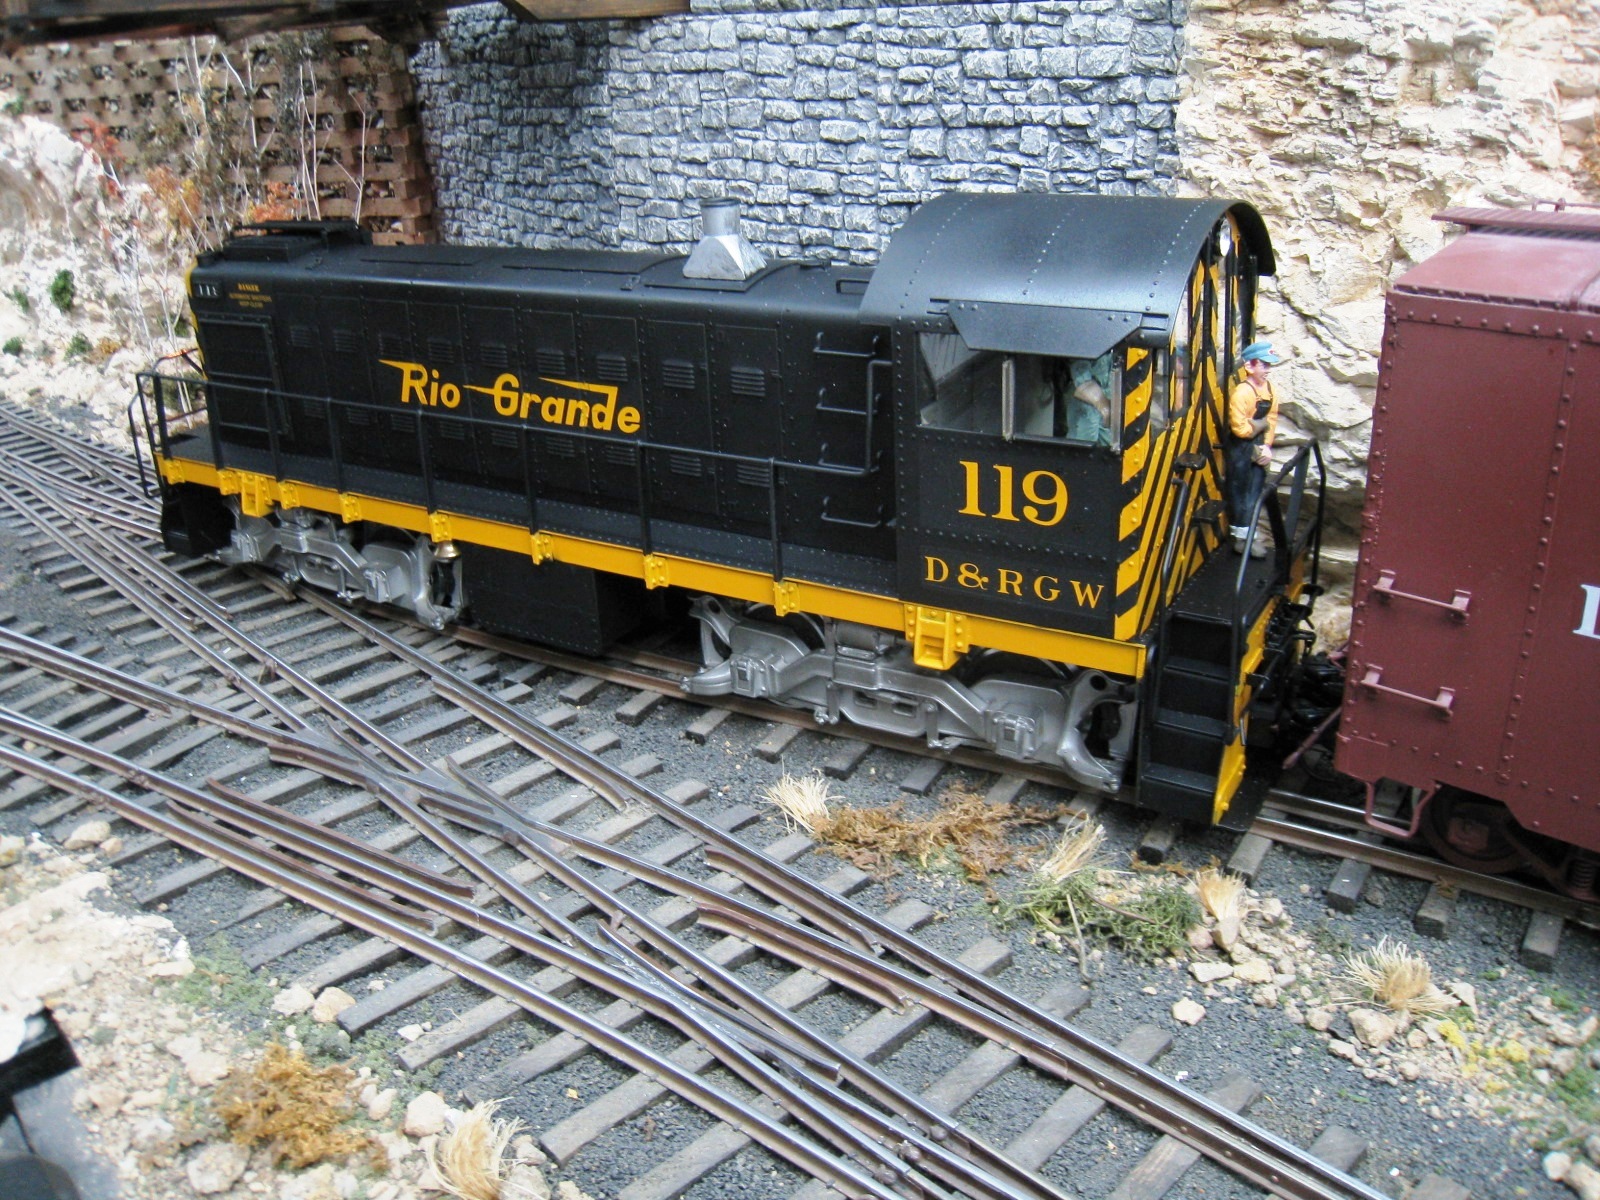
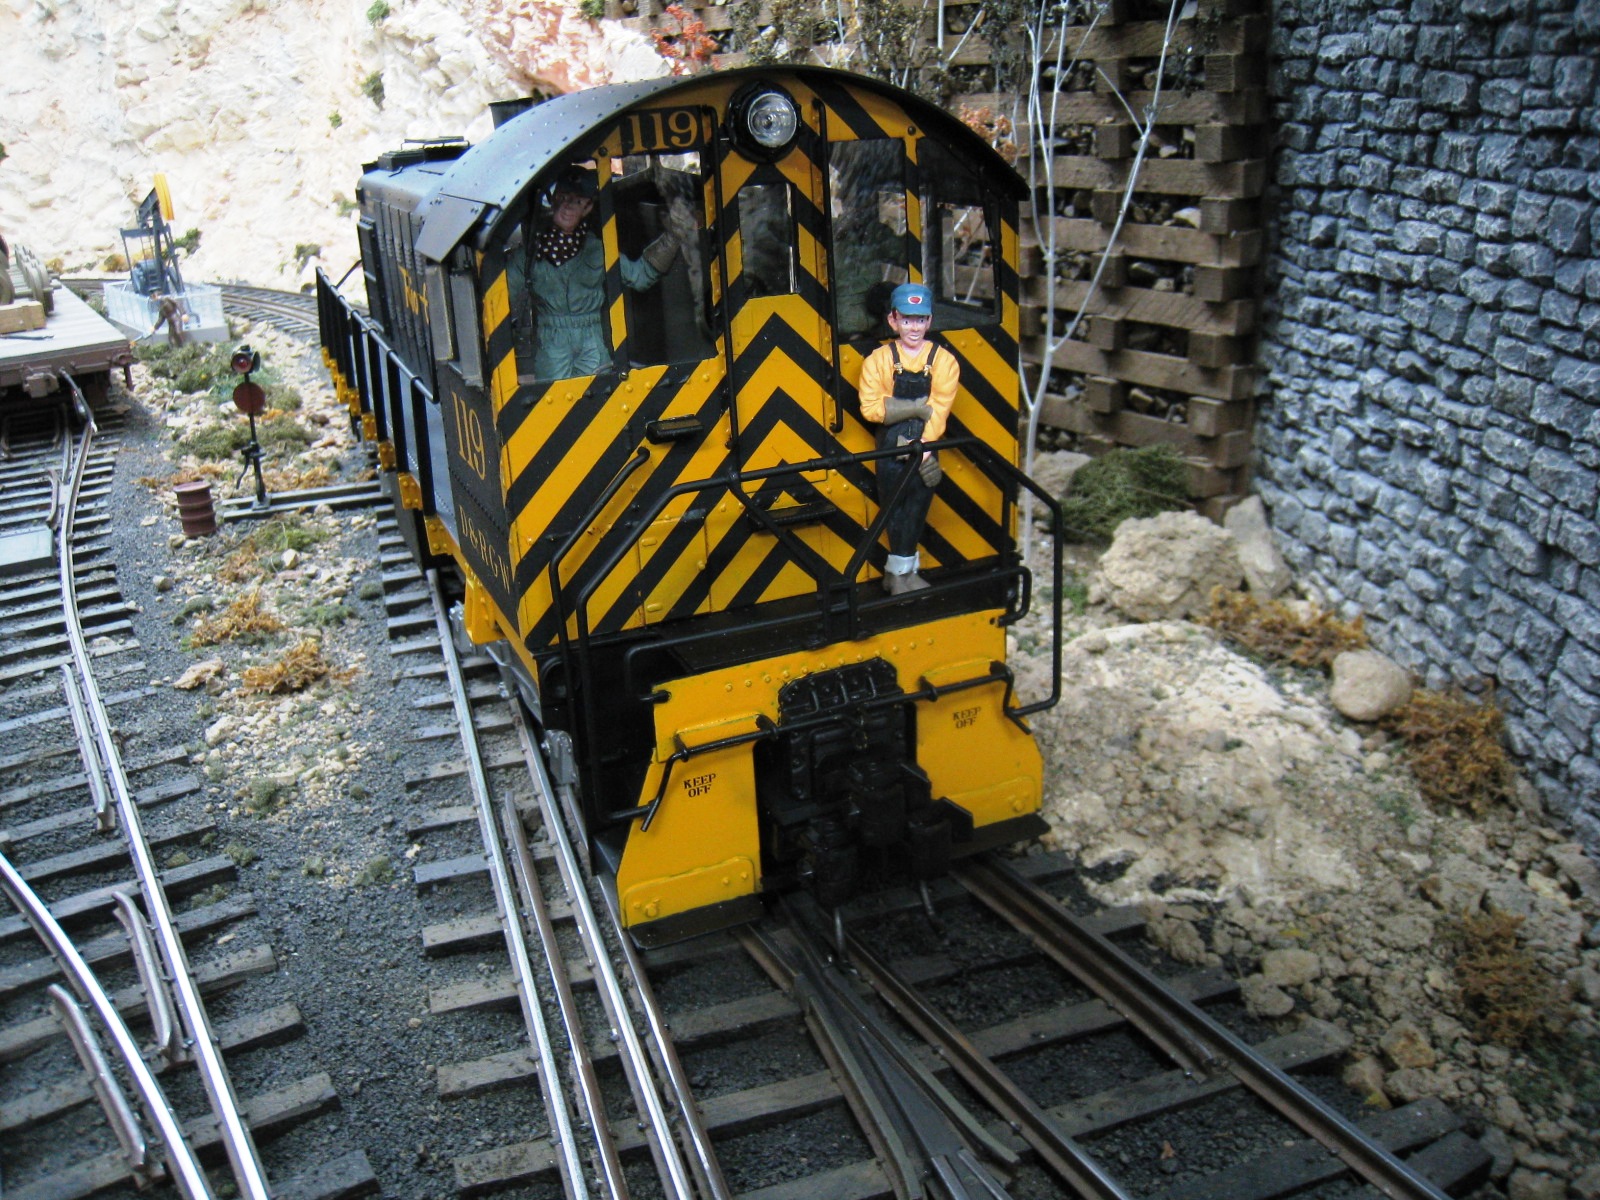
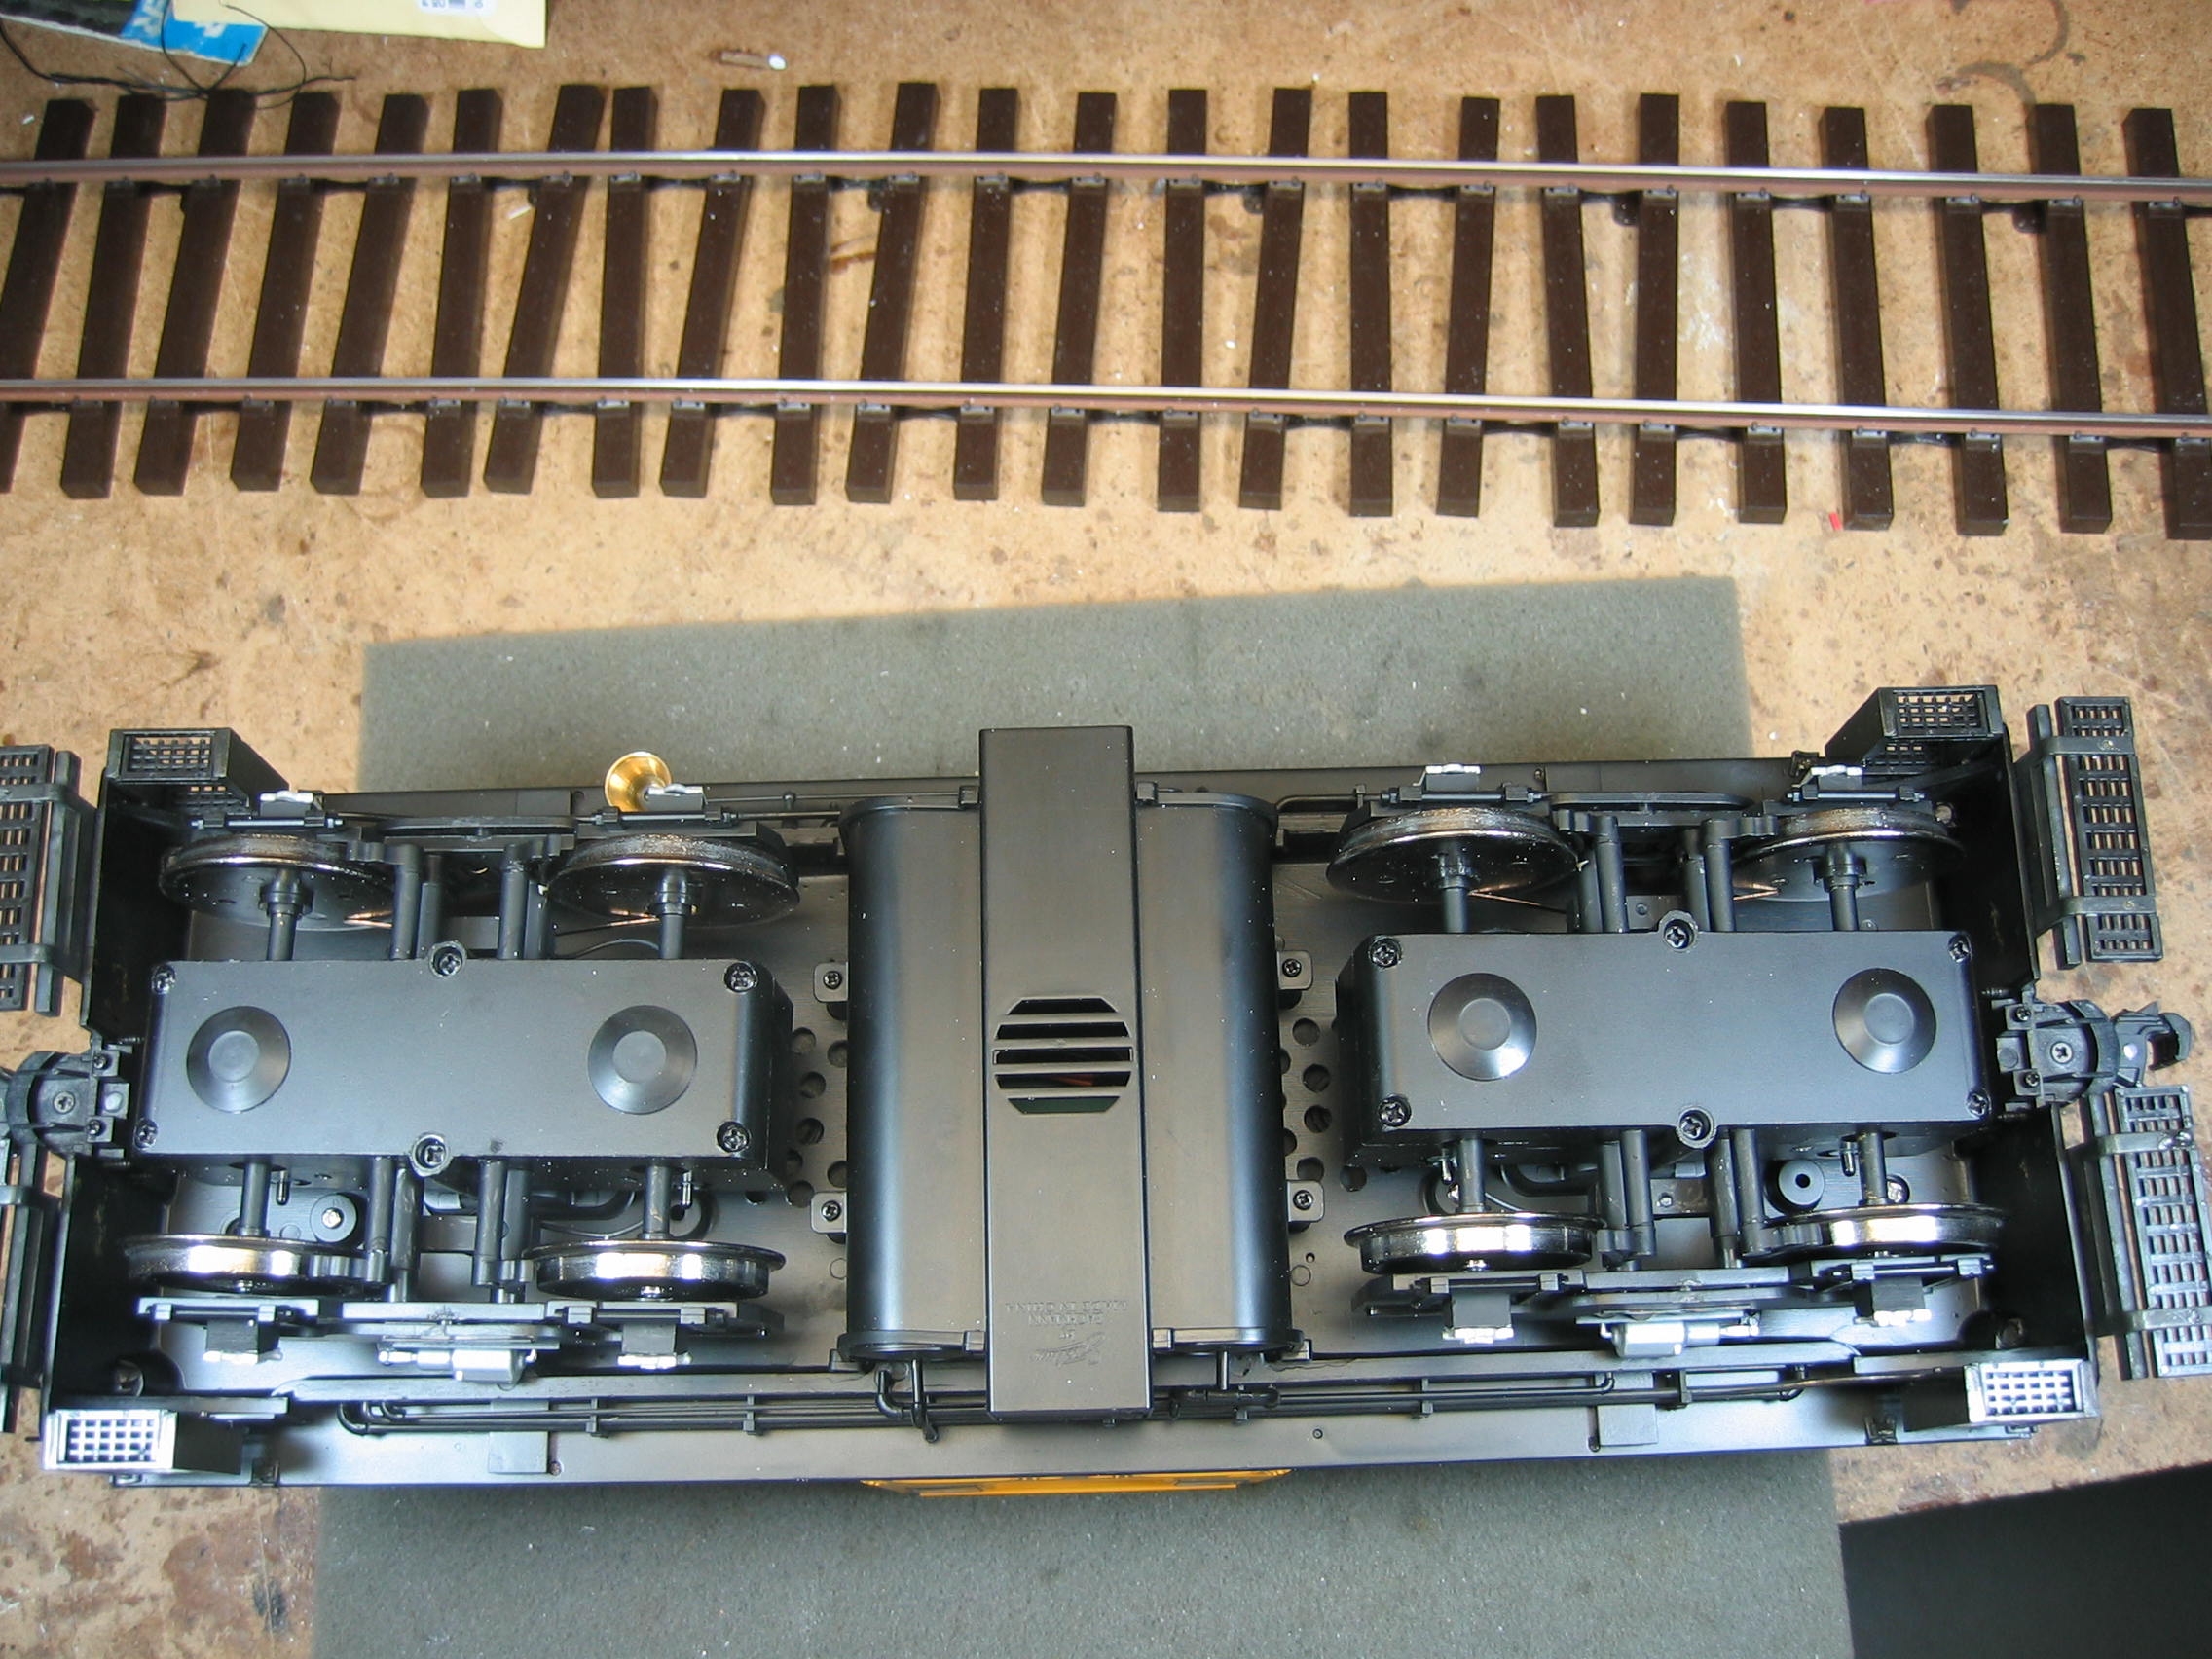
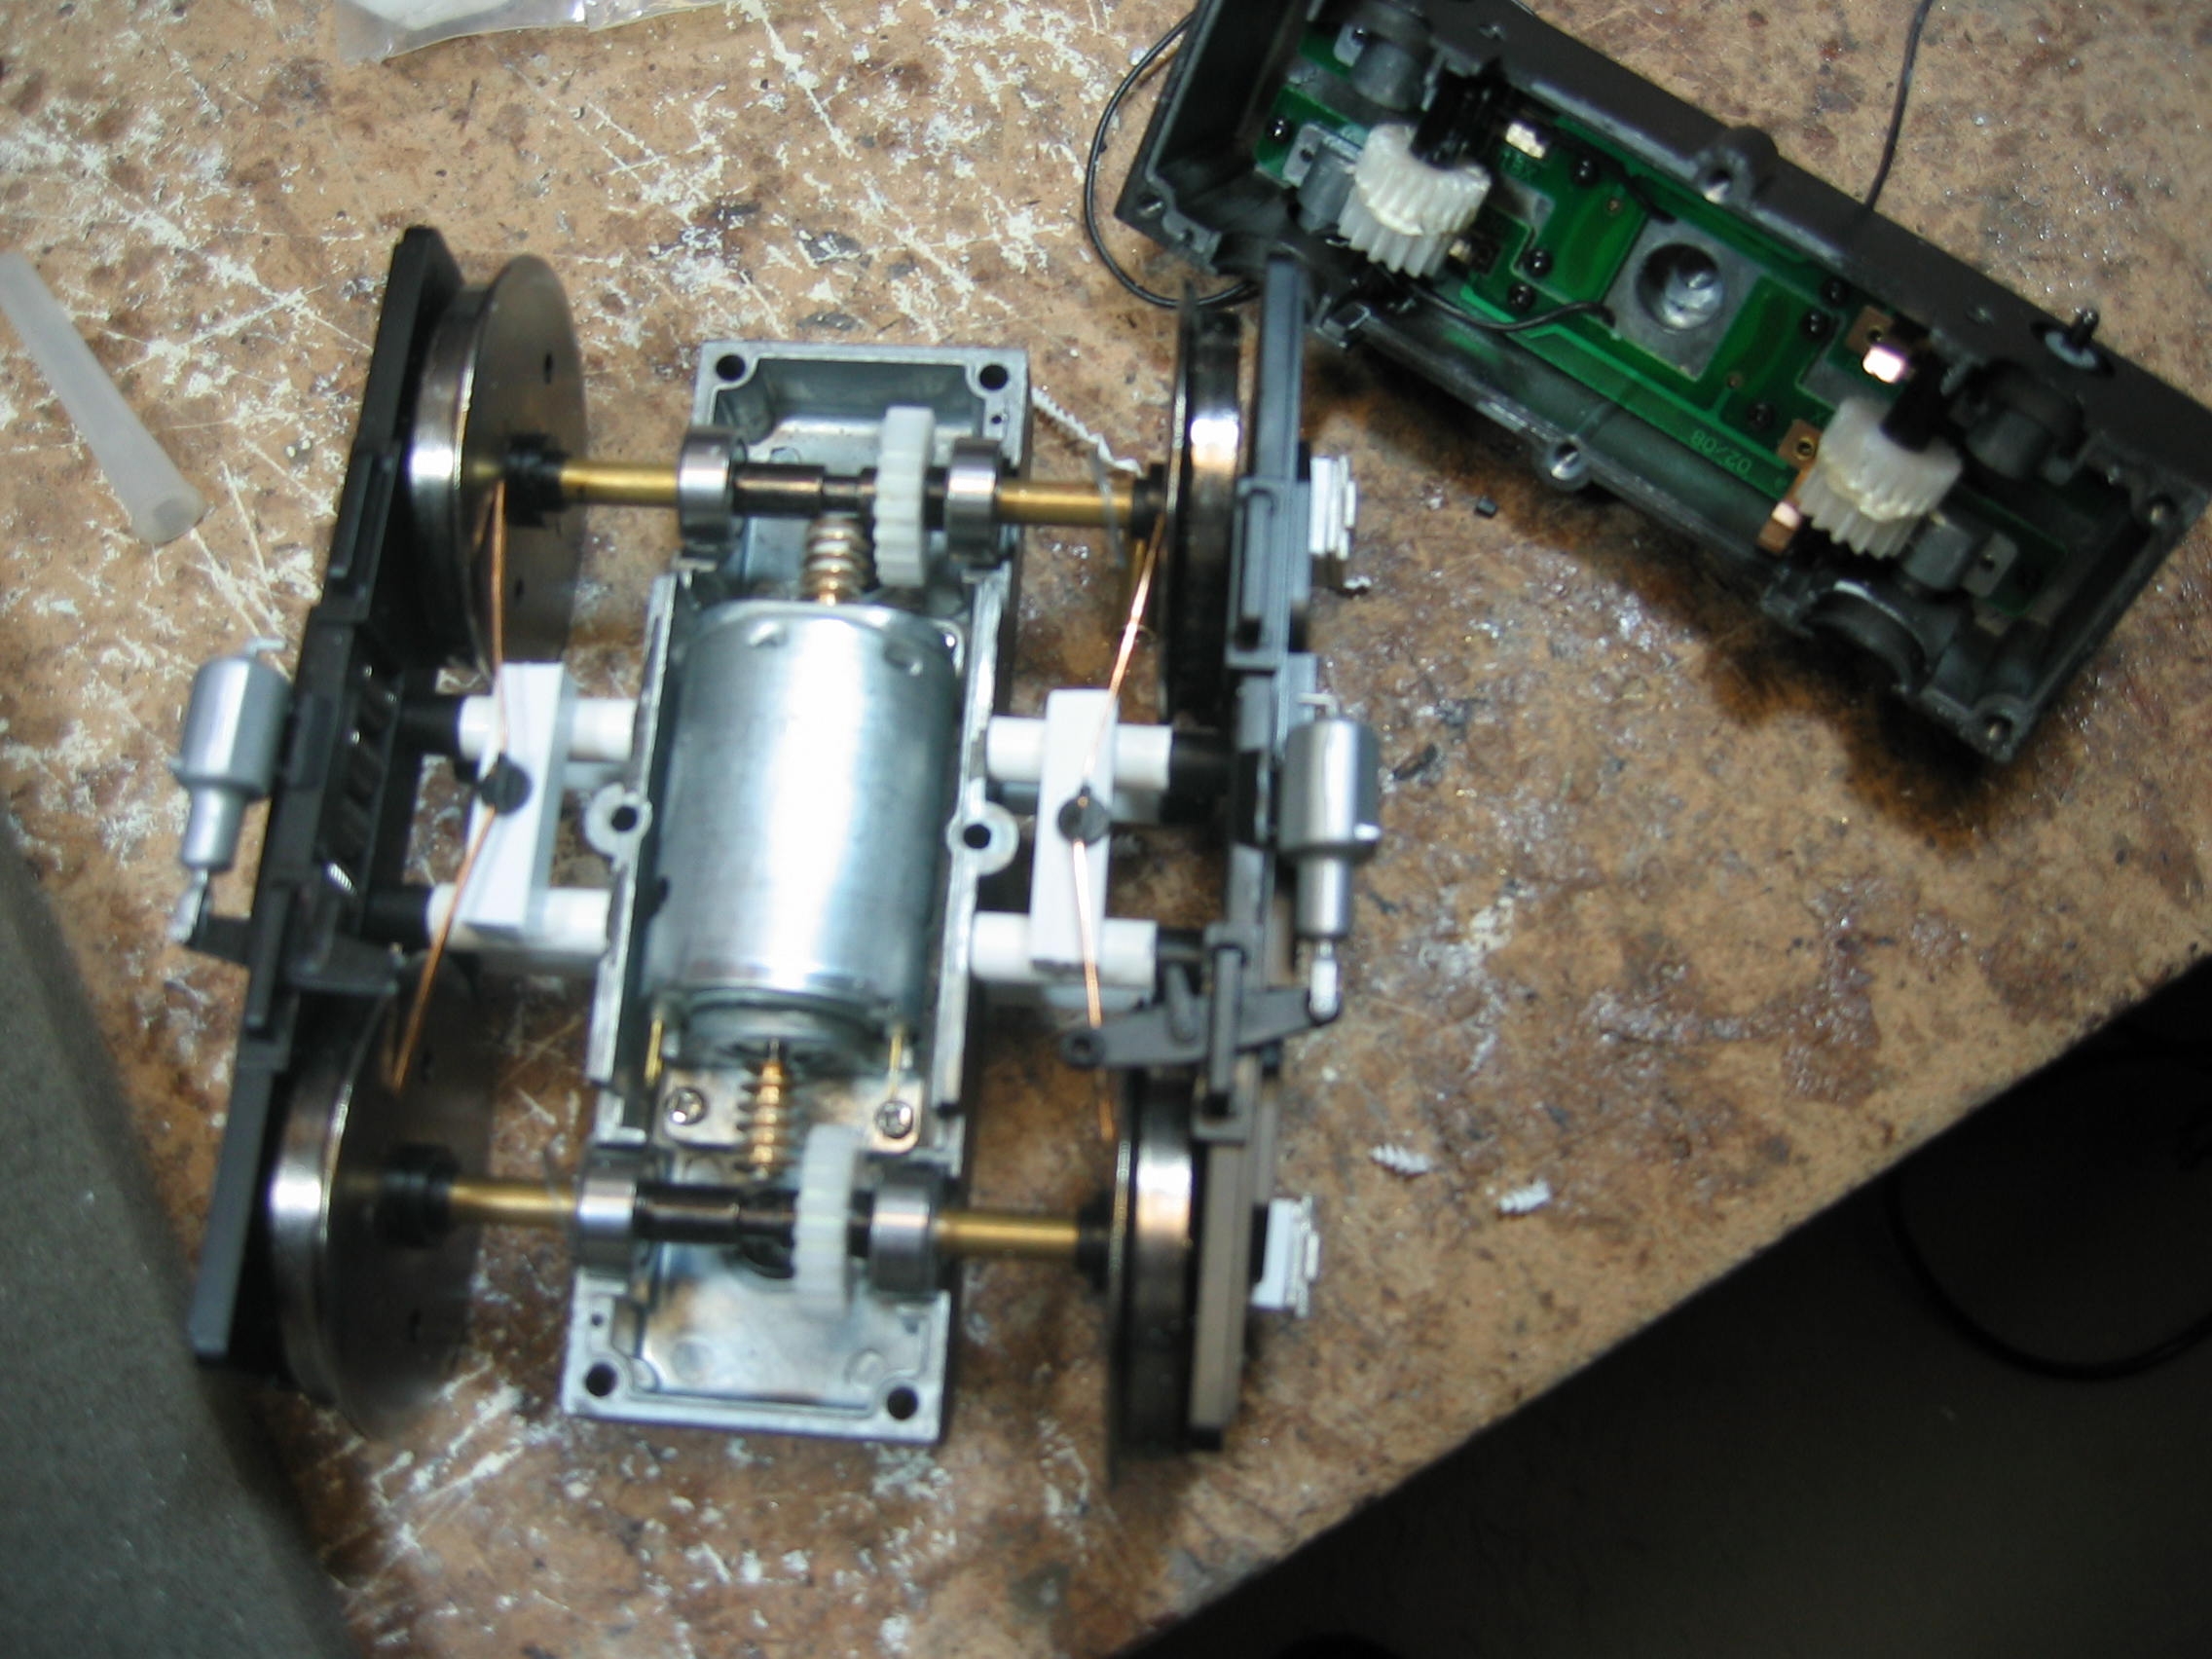
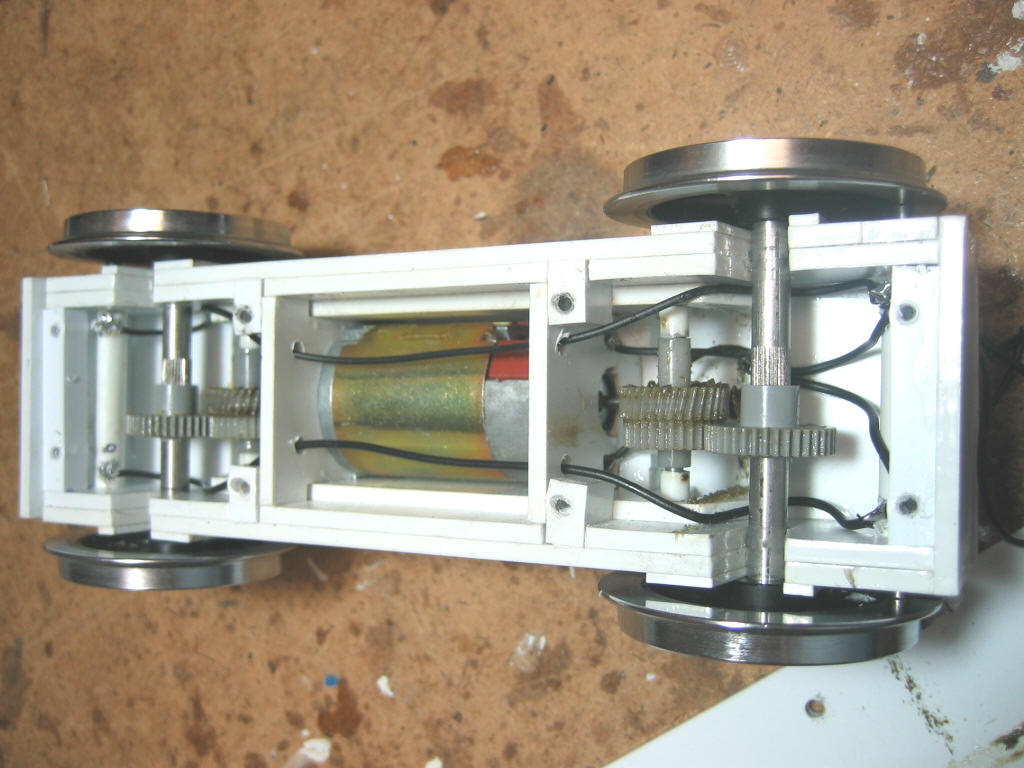
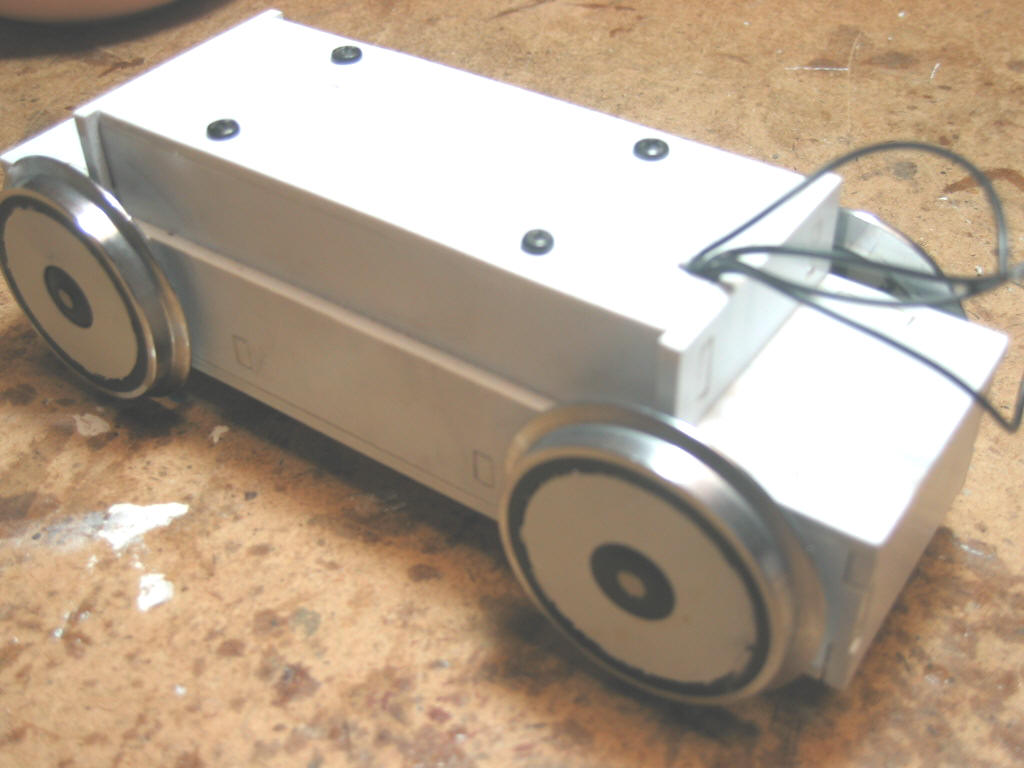
My solution to the electric light show for one customer was to change out the wheels with nickel plated steel ones--that eliminated the arcing problem. Barry's initial solution was to change out the Magnus O ring drive for a chain and sprocket one (see the pic on row #2 below), but this was unsatisfactory. His second solution was much more radical: The entire Magnus truck was discarded, save for the side frames, and a new motor block was fashioned using LGB 2063 motor blocks, themselves re-equipped with LGB Mogul drivers. After covering the face of the Mogul drivers to make them appear as disc wheels, and reattaching the Magnus pot-metal side frames to the new motor blocks, the conversion was complete. The Magnus S1 carbody now runs like a champ with low noise, plenty of power, and good low speed control.
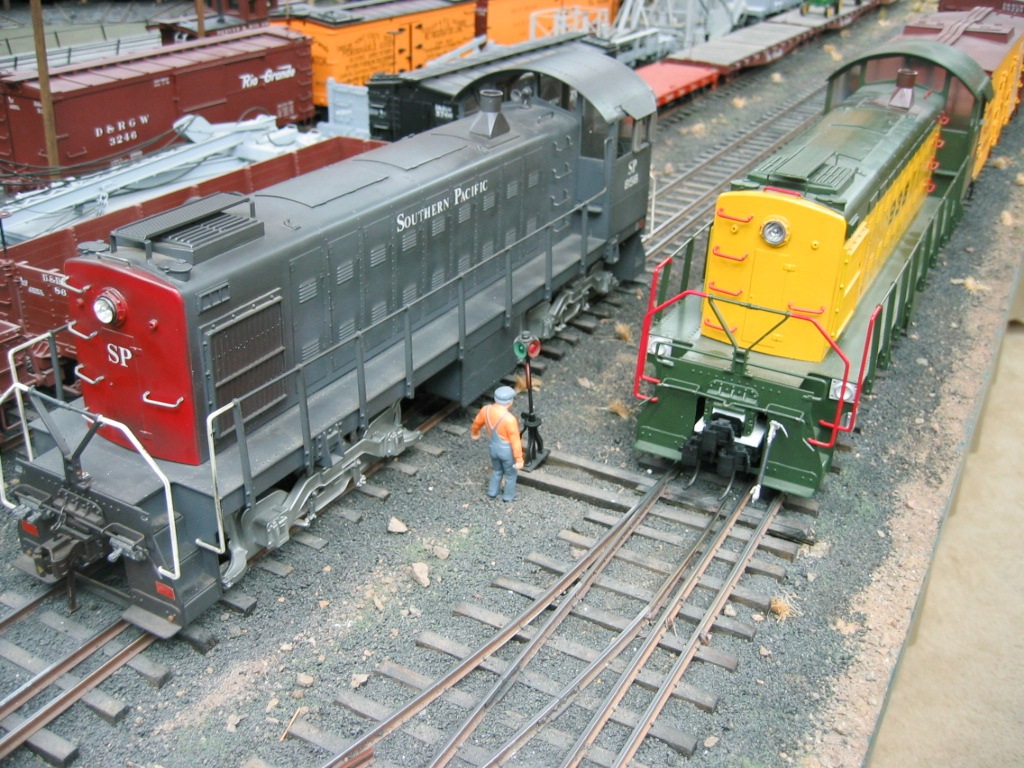
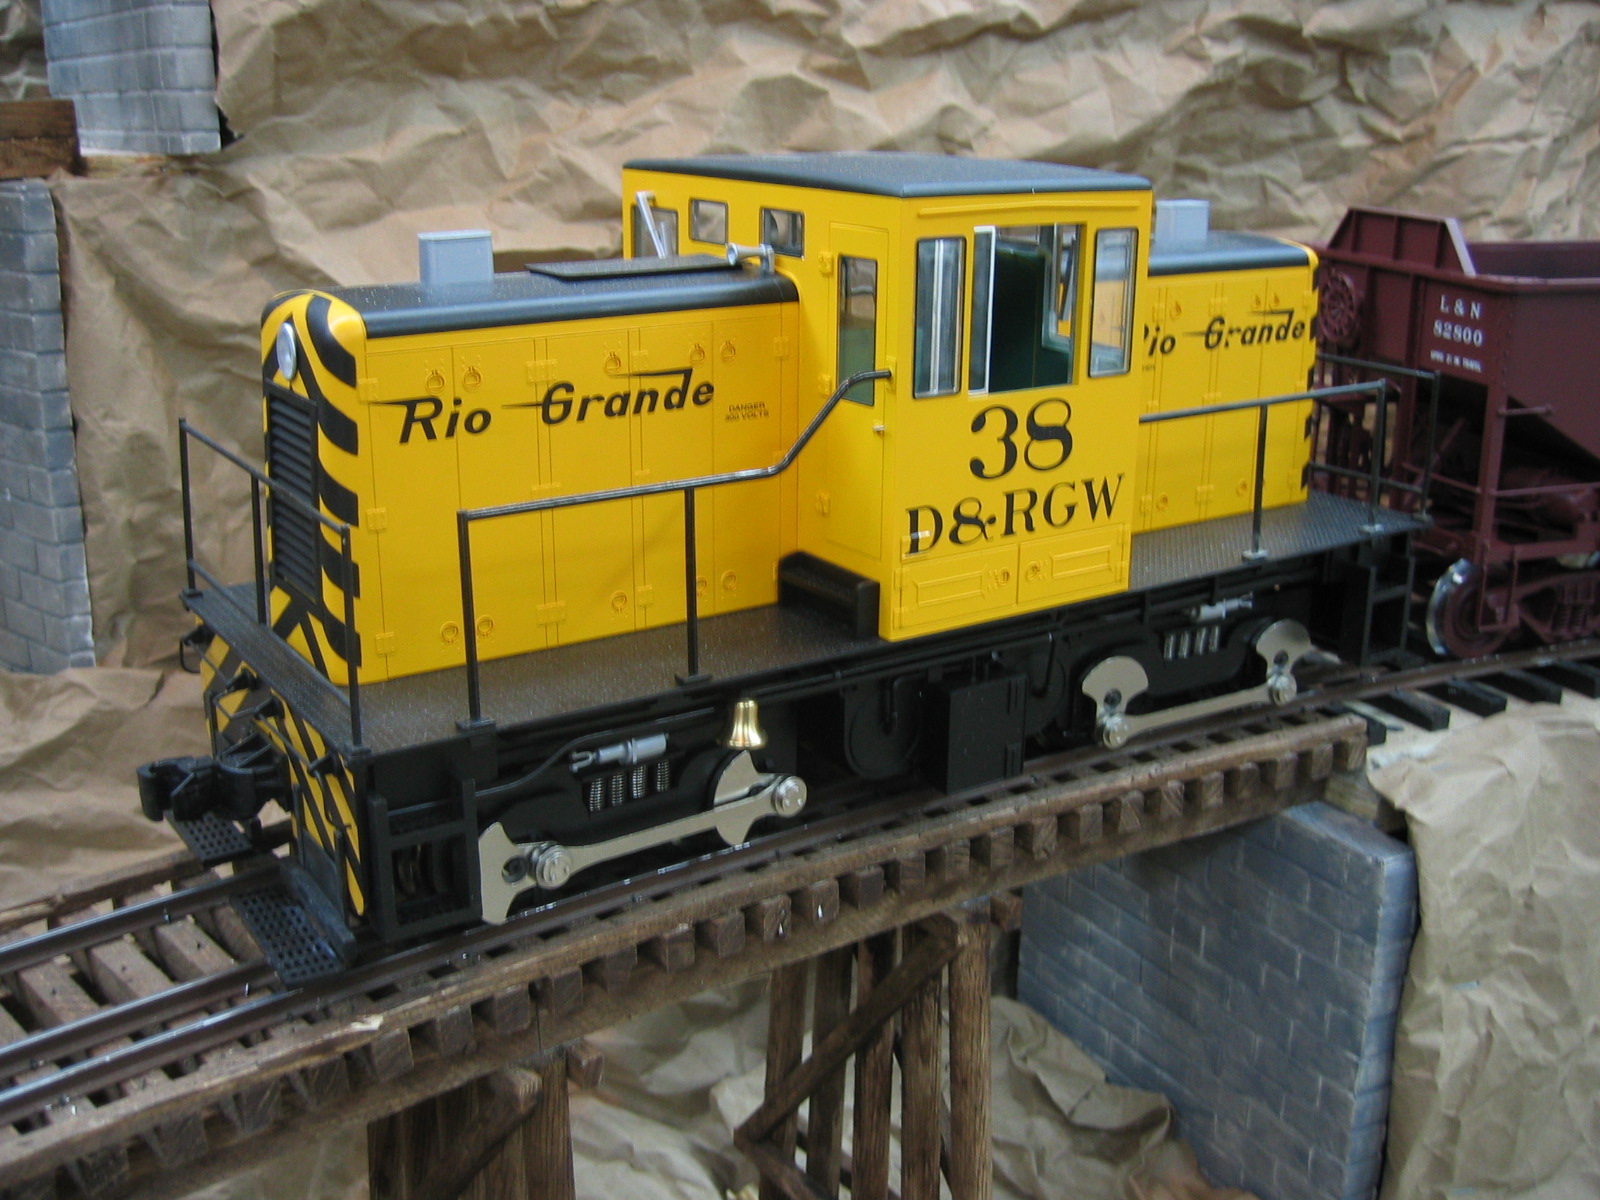
Barry gave his Magnus Southern Pacific S1 a repaint in August of 2009 into D&RGW colors. Here is the result:
|
||
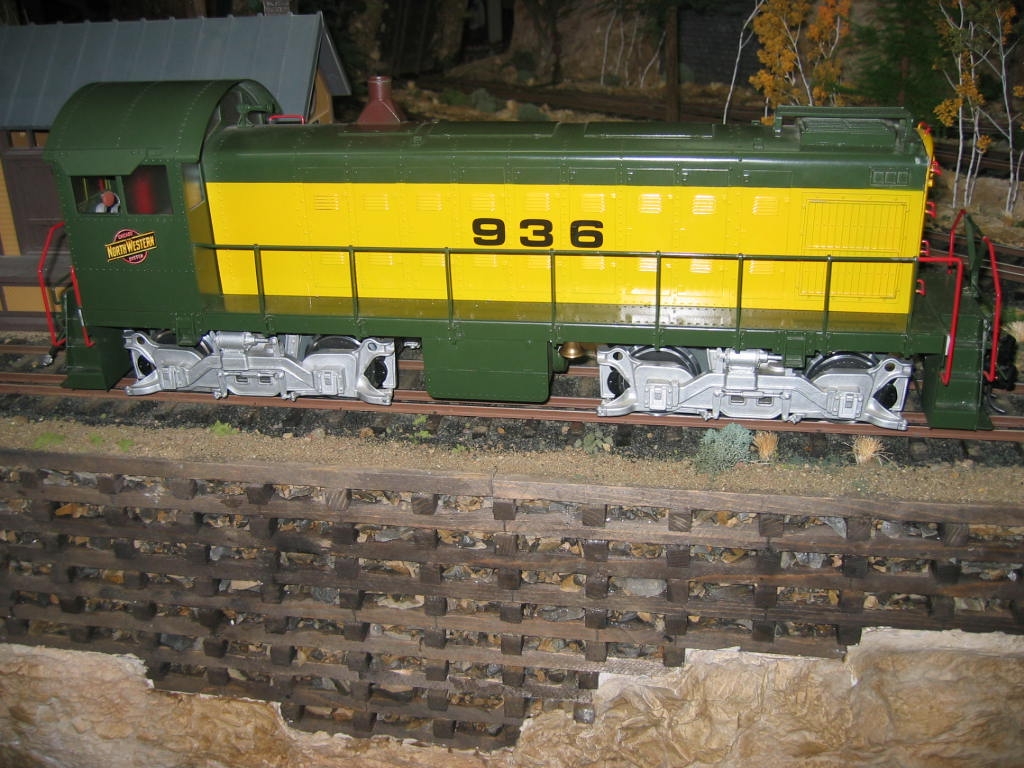
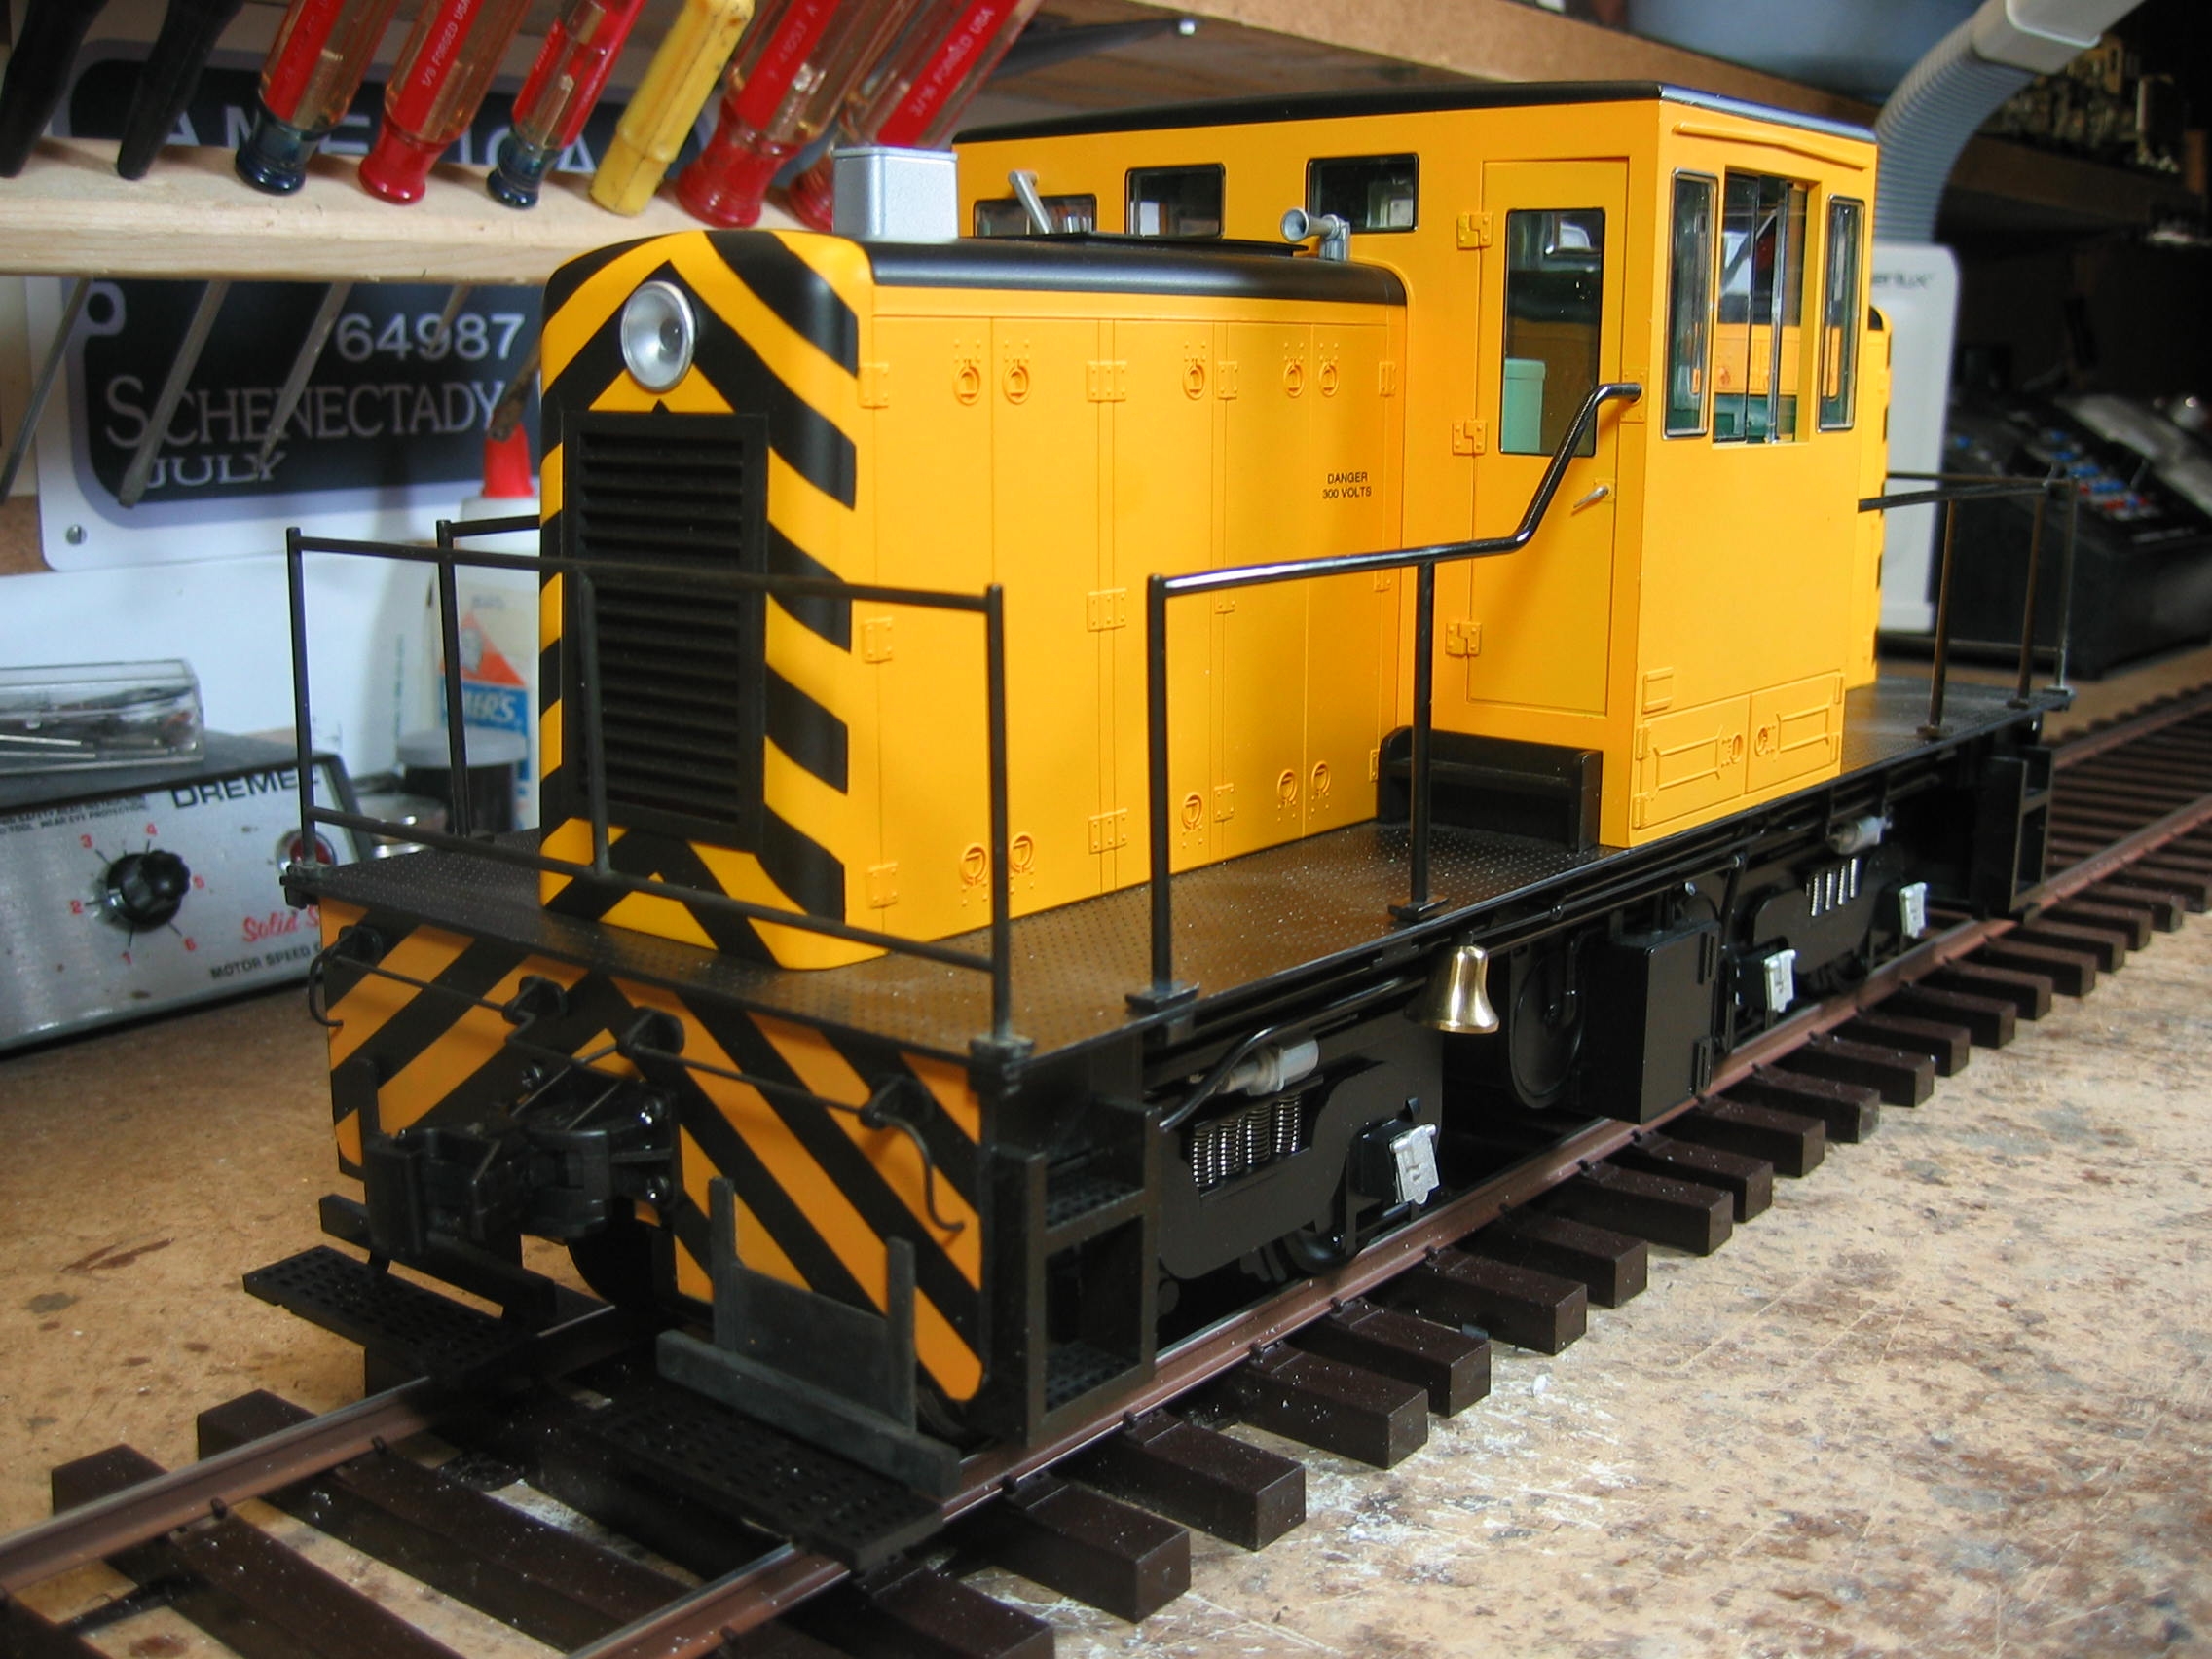
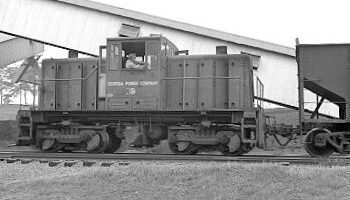 Regauging the Bachmann 45 Tonner Regauging the Bachmann 45 Tonner(2005) Unlike the Magnus Alco S1, Bachmann's 45 ton diesel switcher is a dream to operate right out of the box. It runs smoothly and quietly and gives every indication of offering many years of trouble free service; plus, it represent an accurate scale and gauge combination: 3' narrow gauge represented by 1:20.3 scale operating on 45 mm gauge (Fn3) track. Unlike the prototype, however, this little engine is not offered by Bachmann for operation on multiple gauges of track. The General Electric original could have been ordered with either standard gauge trucks or ones aligned for various permutations of narrow gauge, and with either external side-rod drive (as pictured at right) or an internal chain drive on its one traction motor trucks. So this little locomotive is just begging to be converted to standard gauge!
|
||
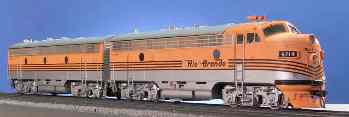
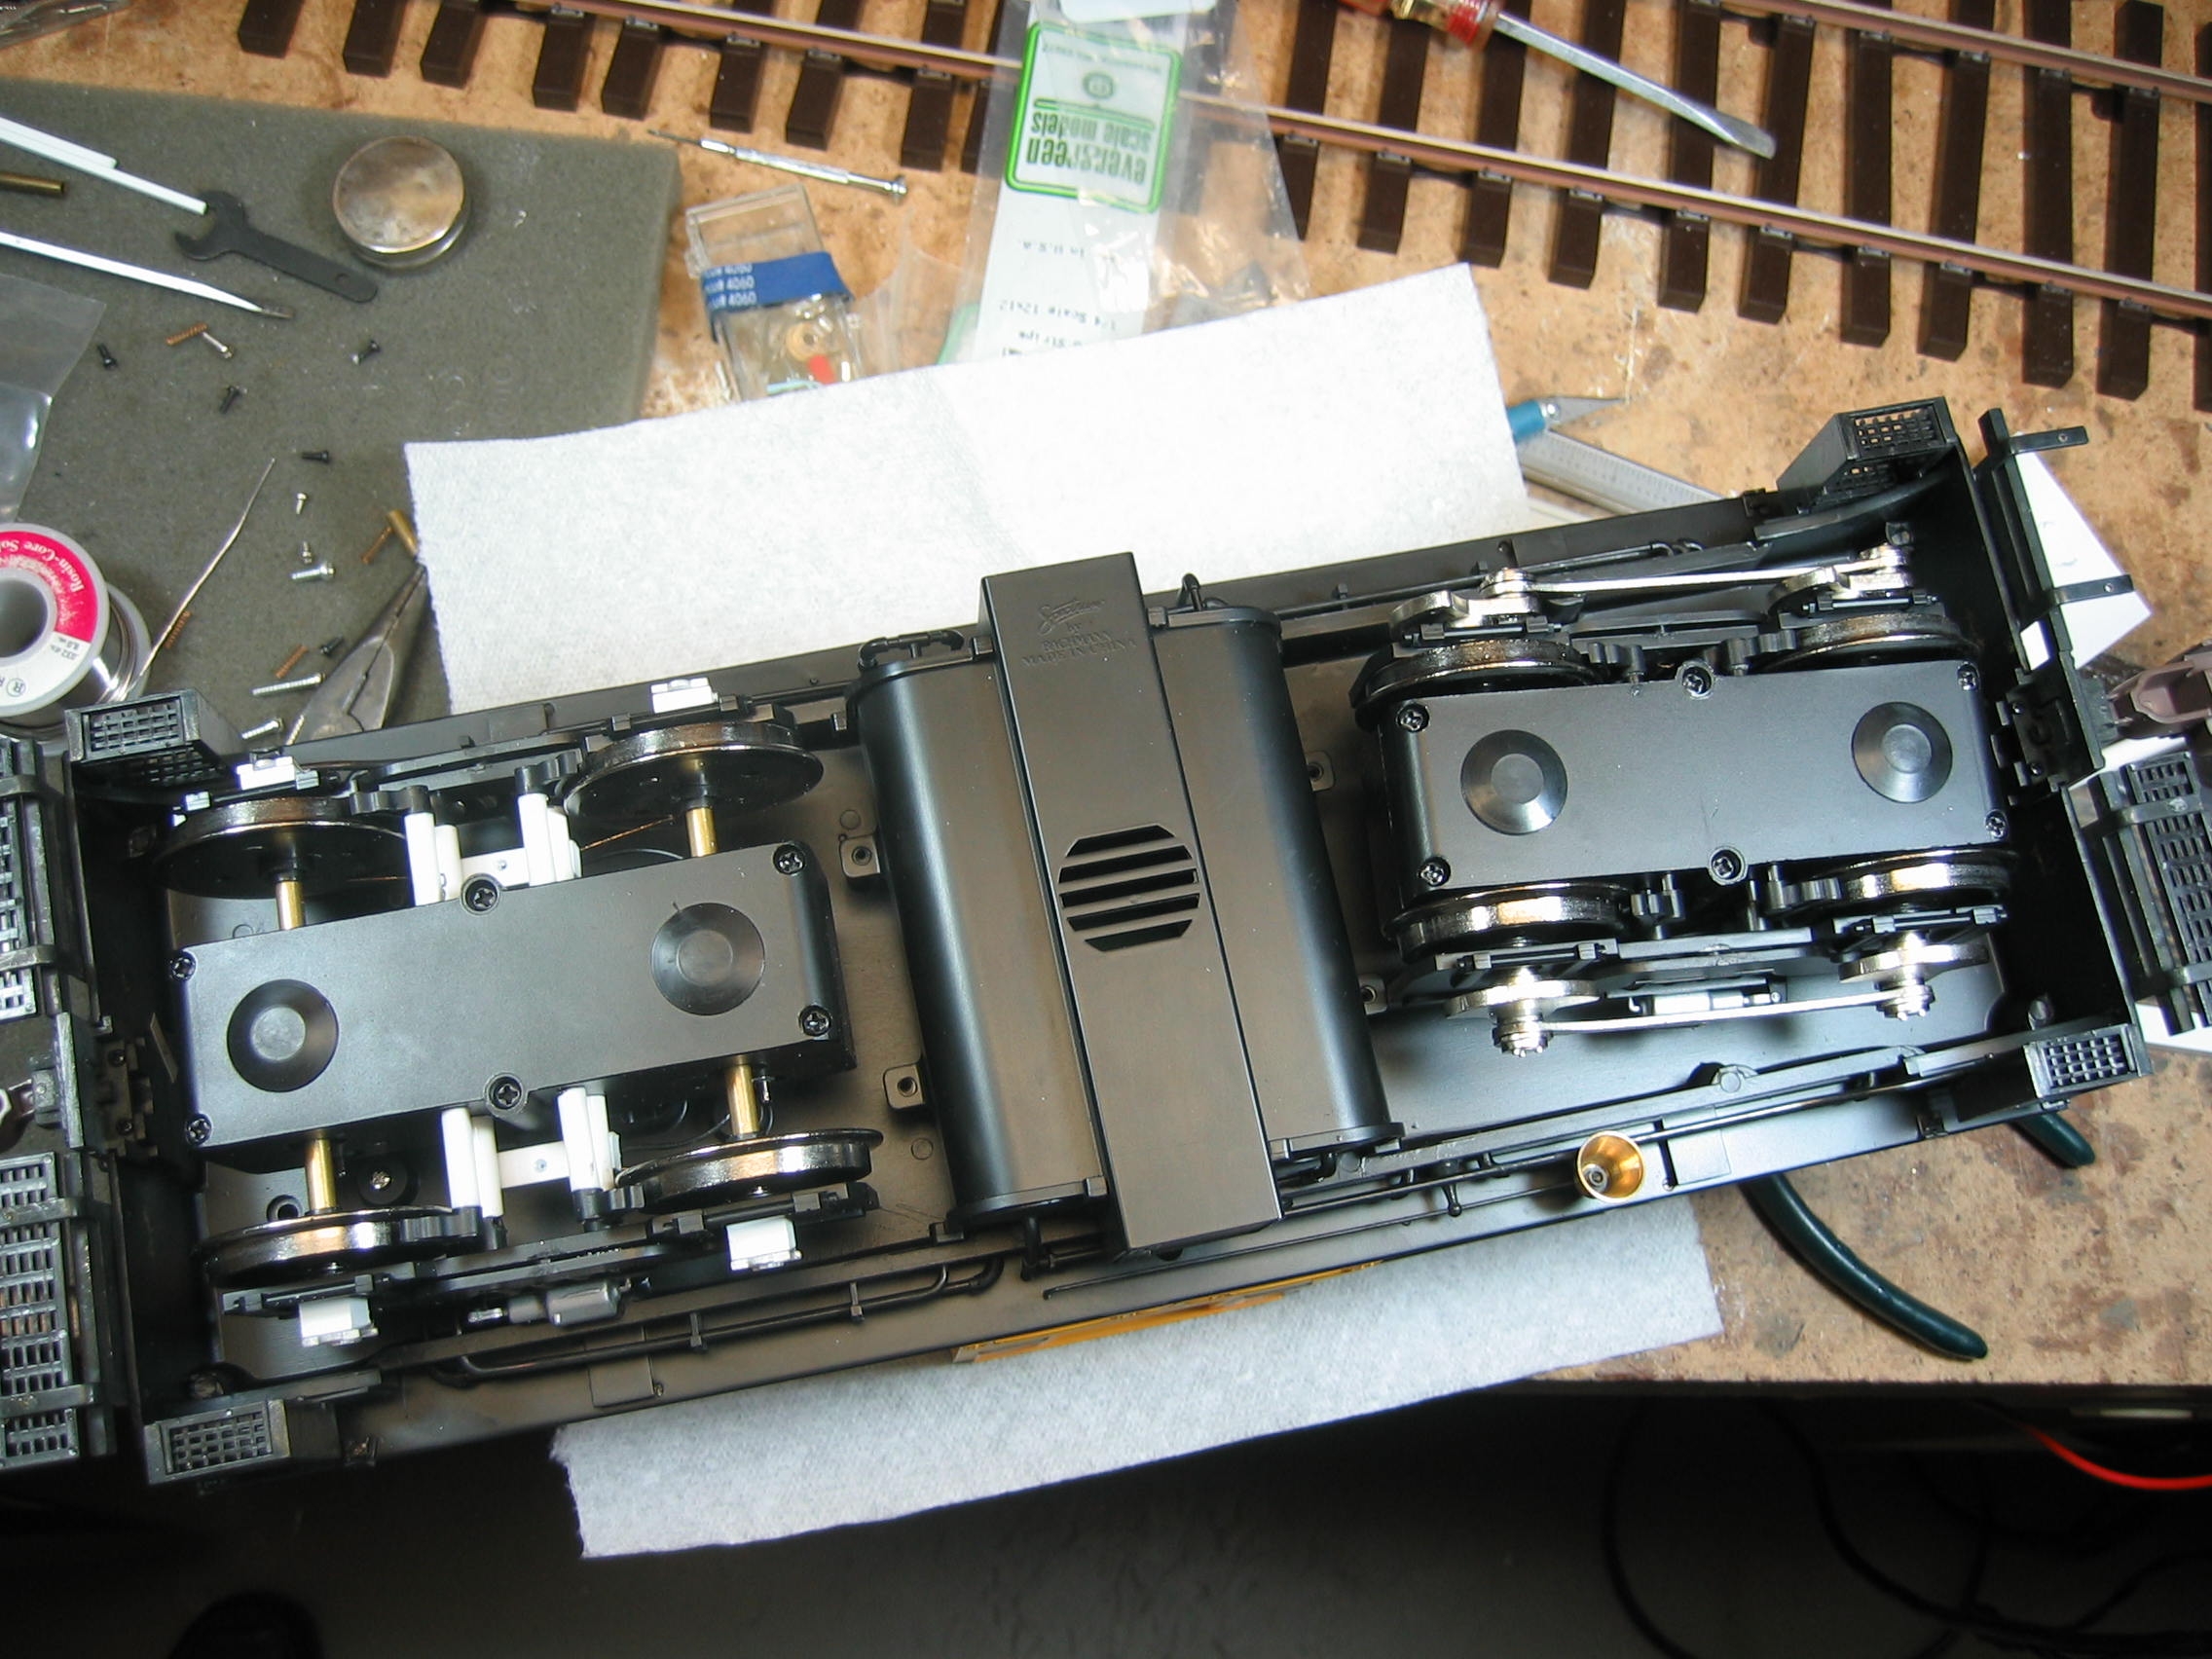
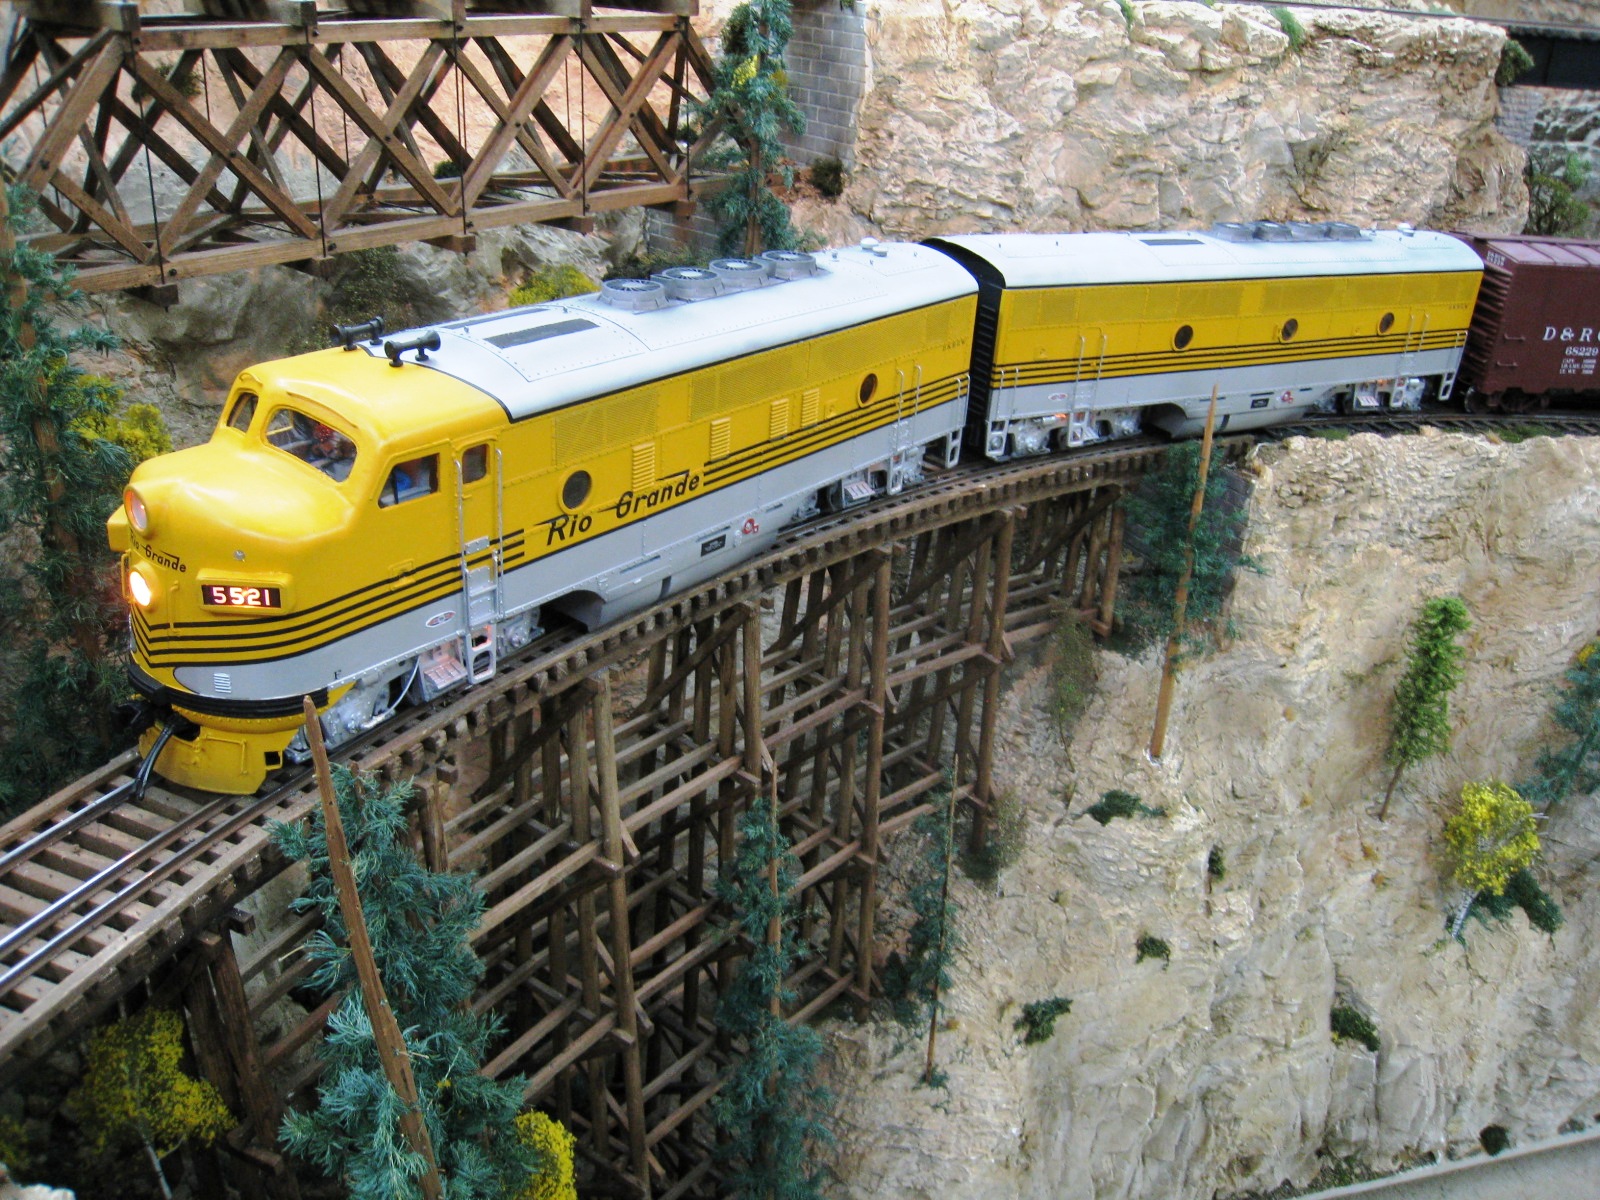
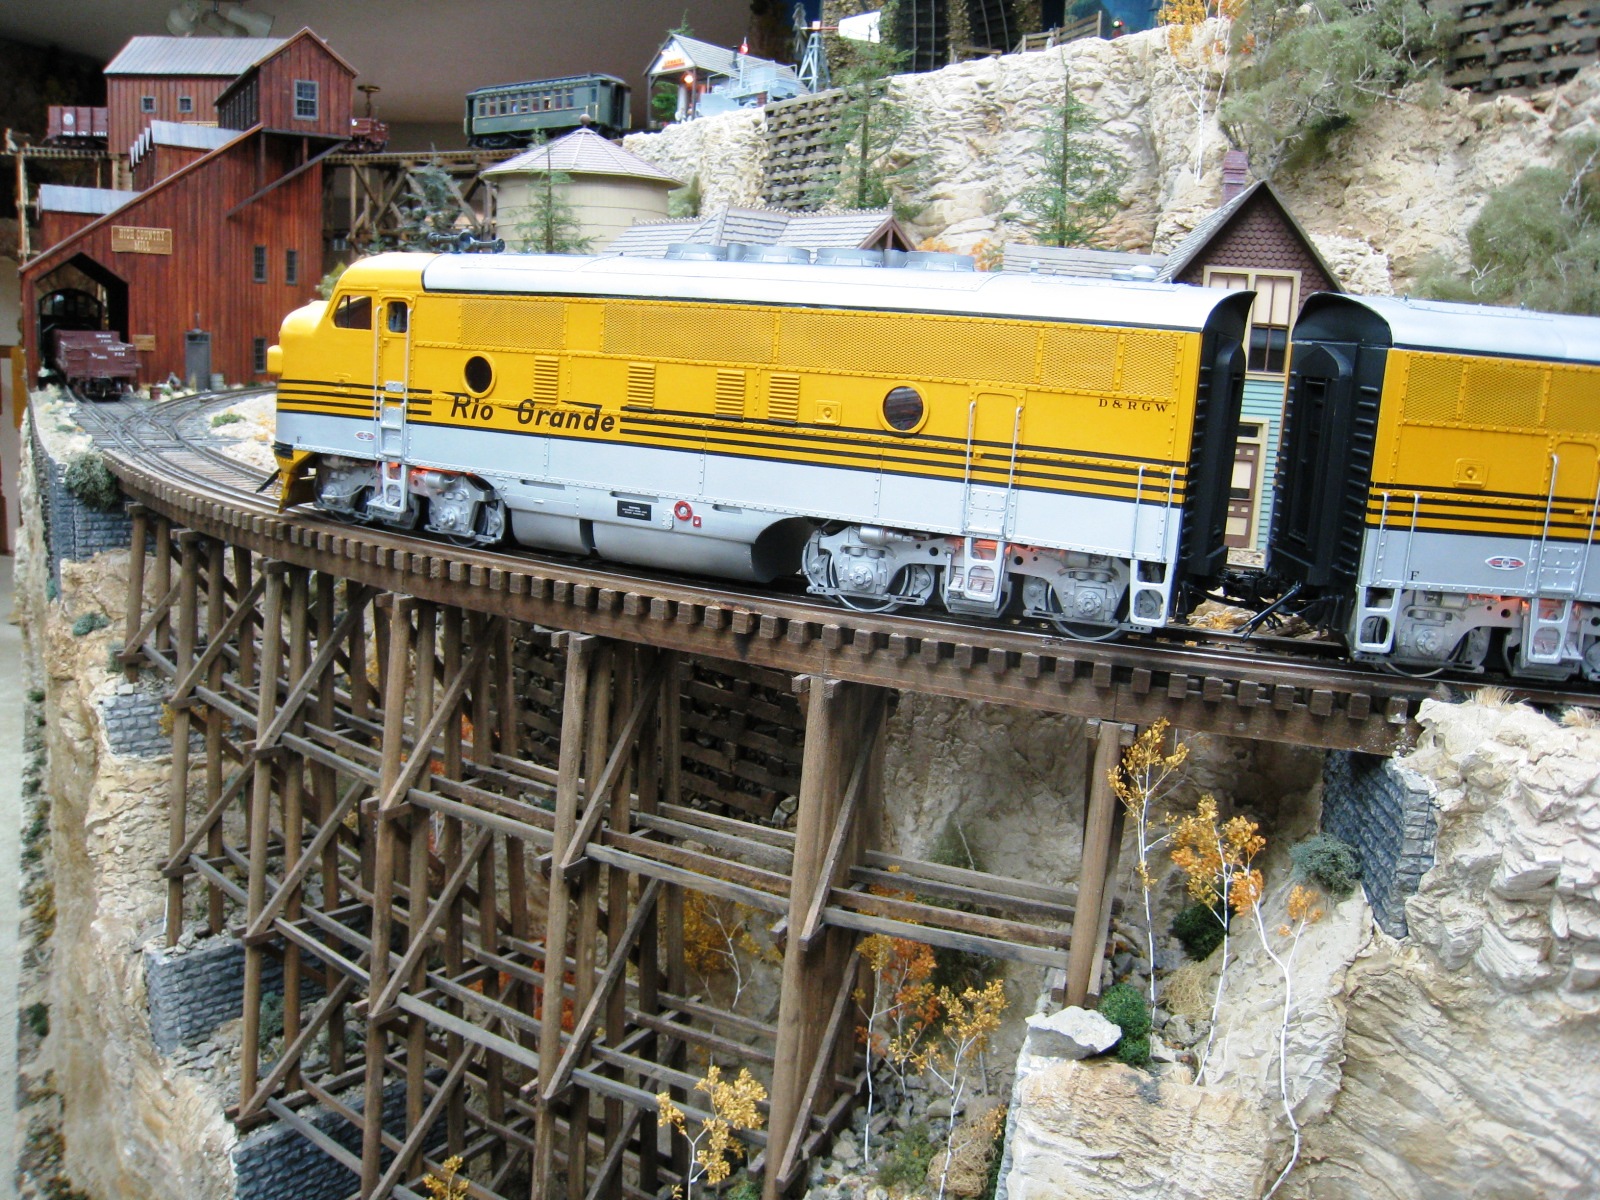
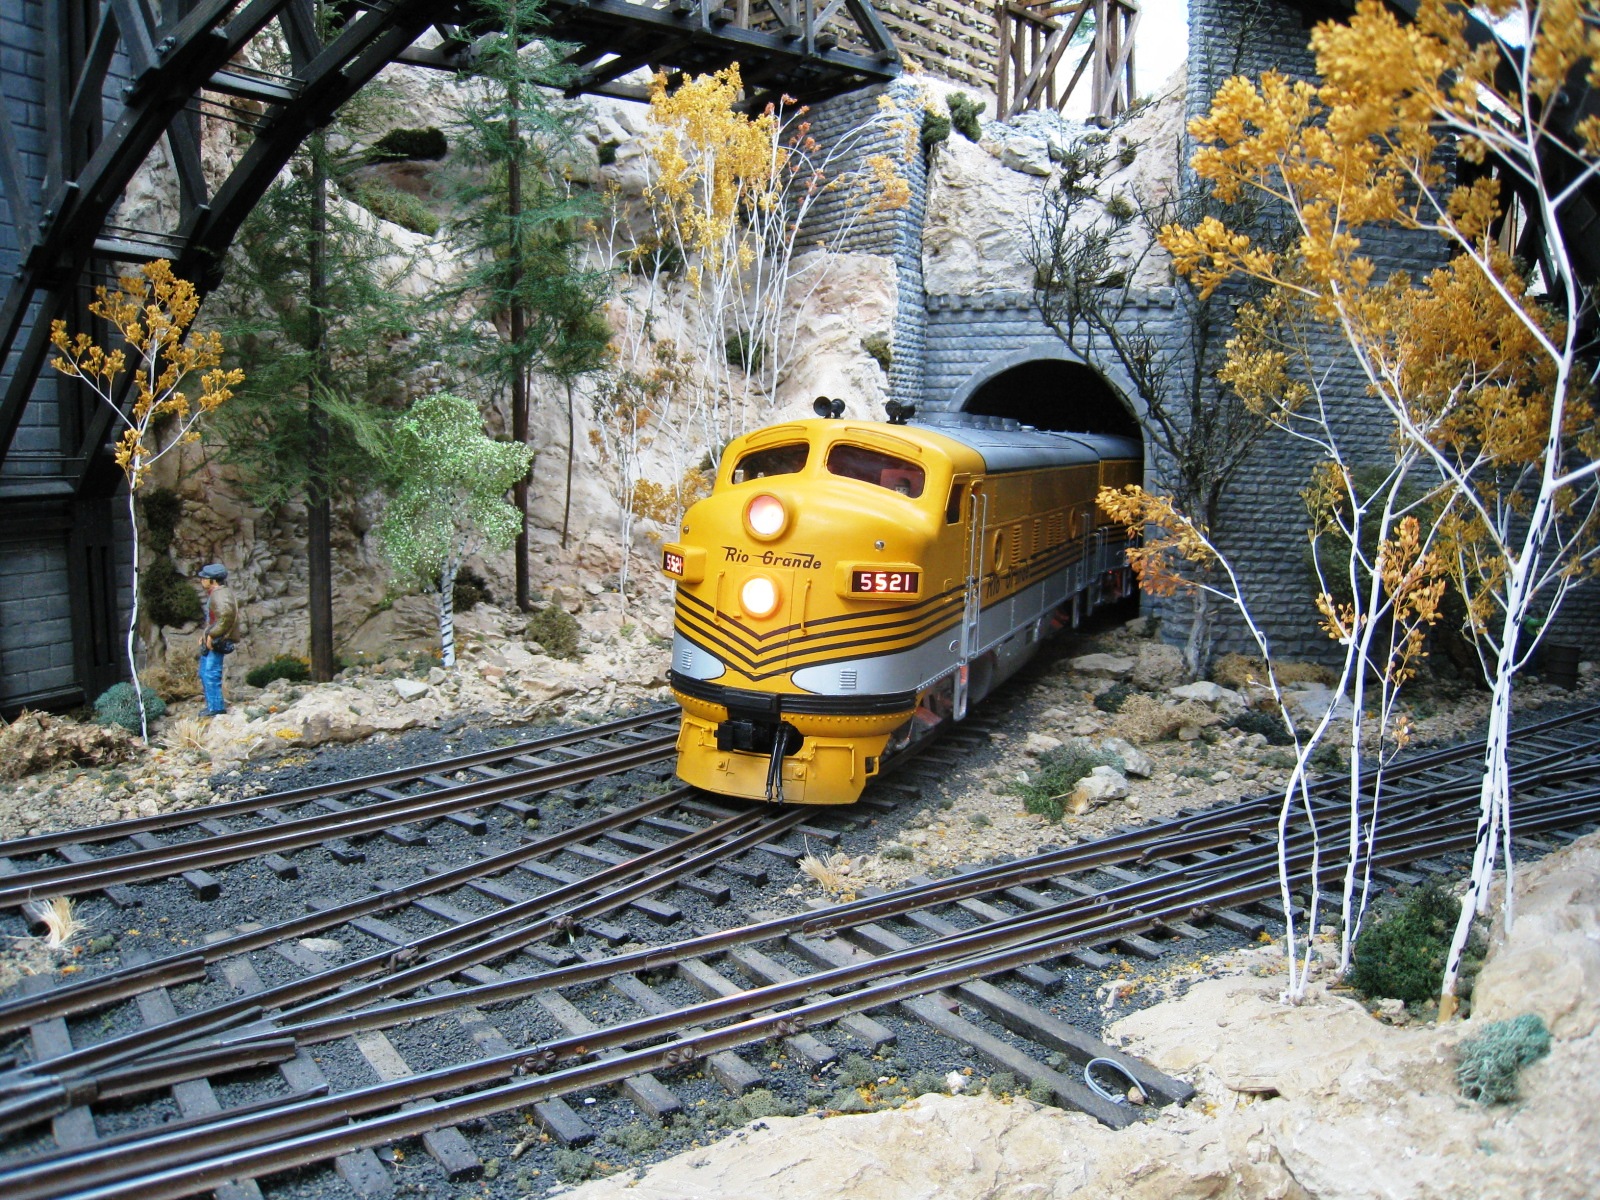
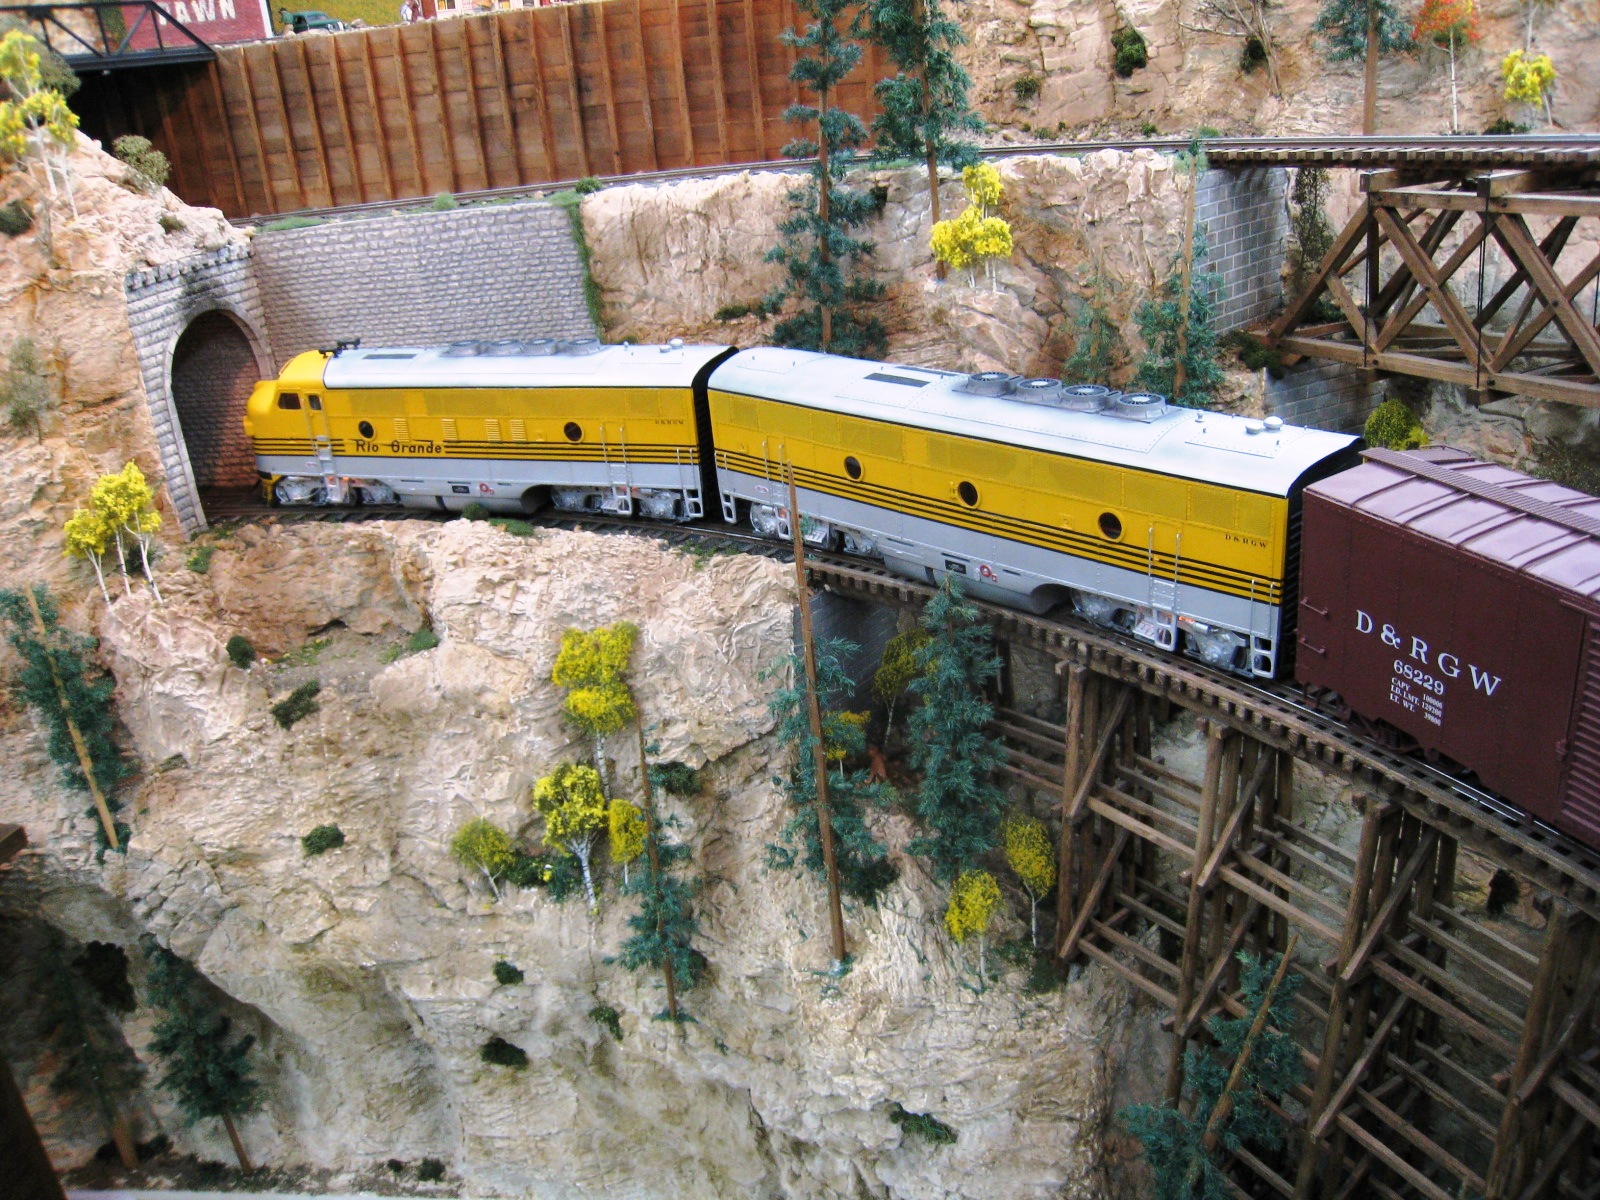
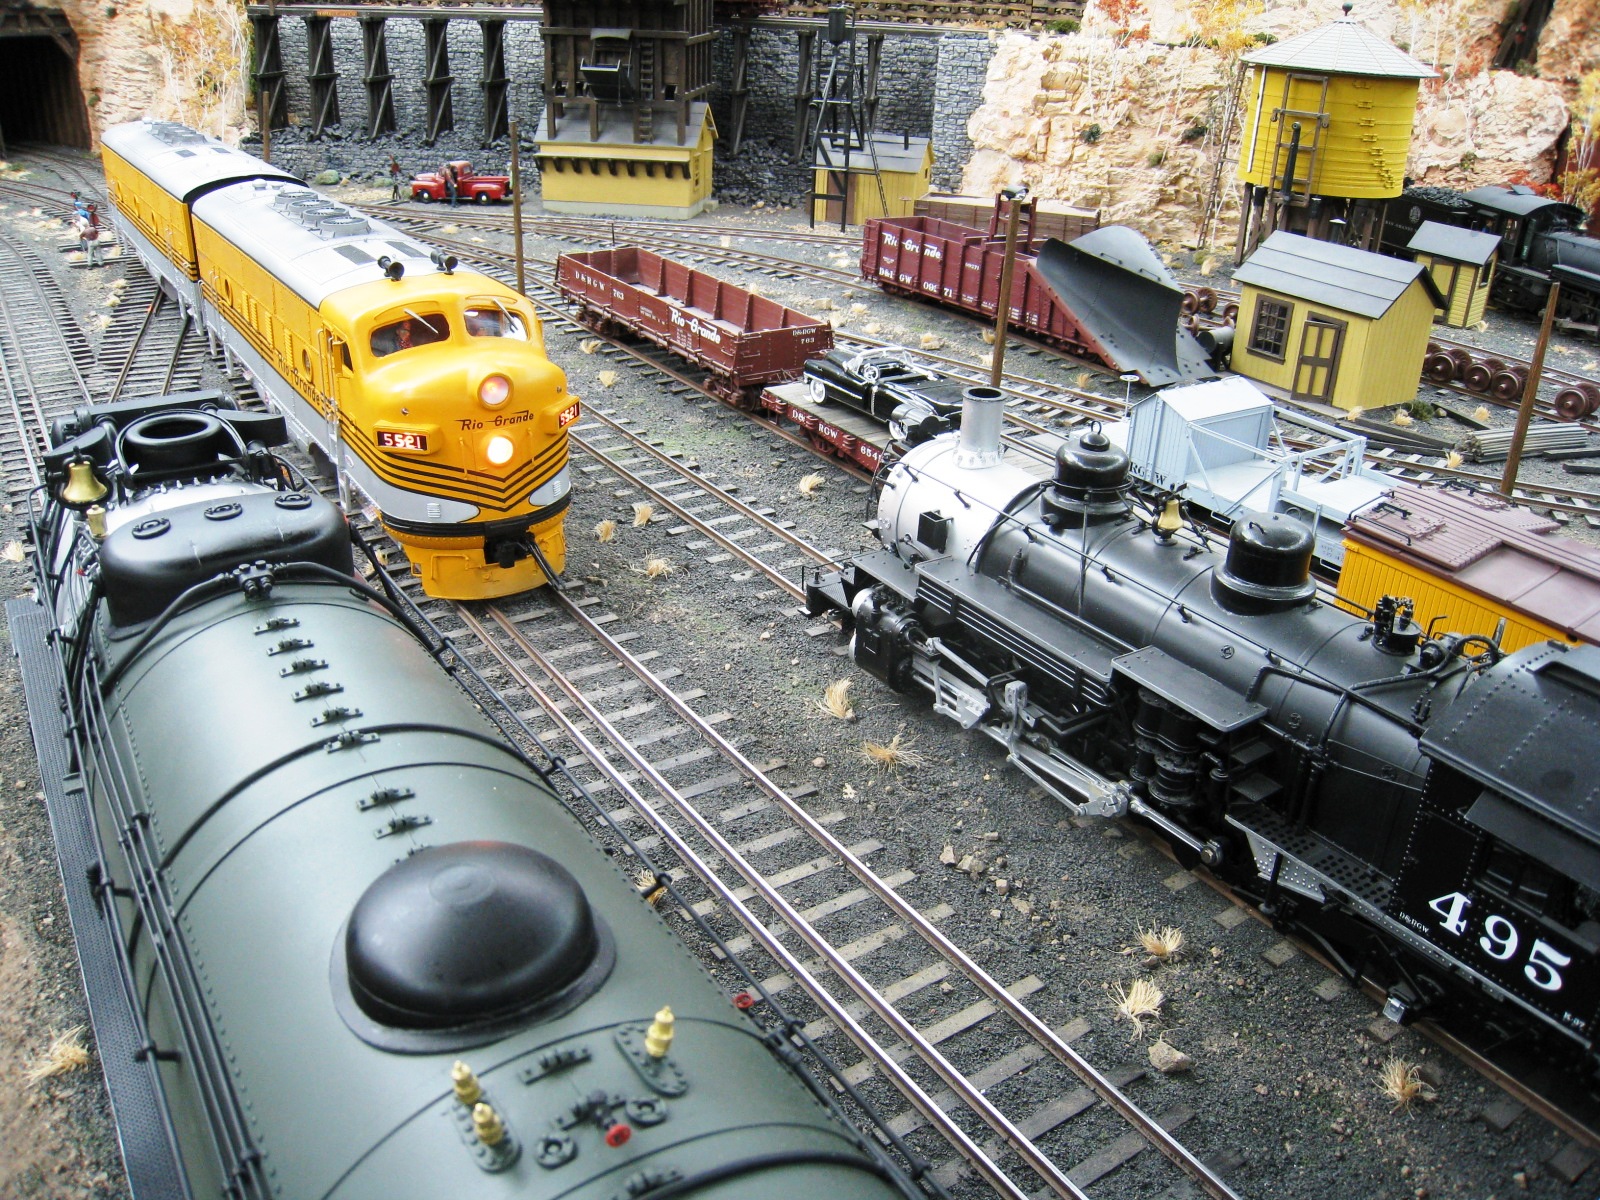
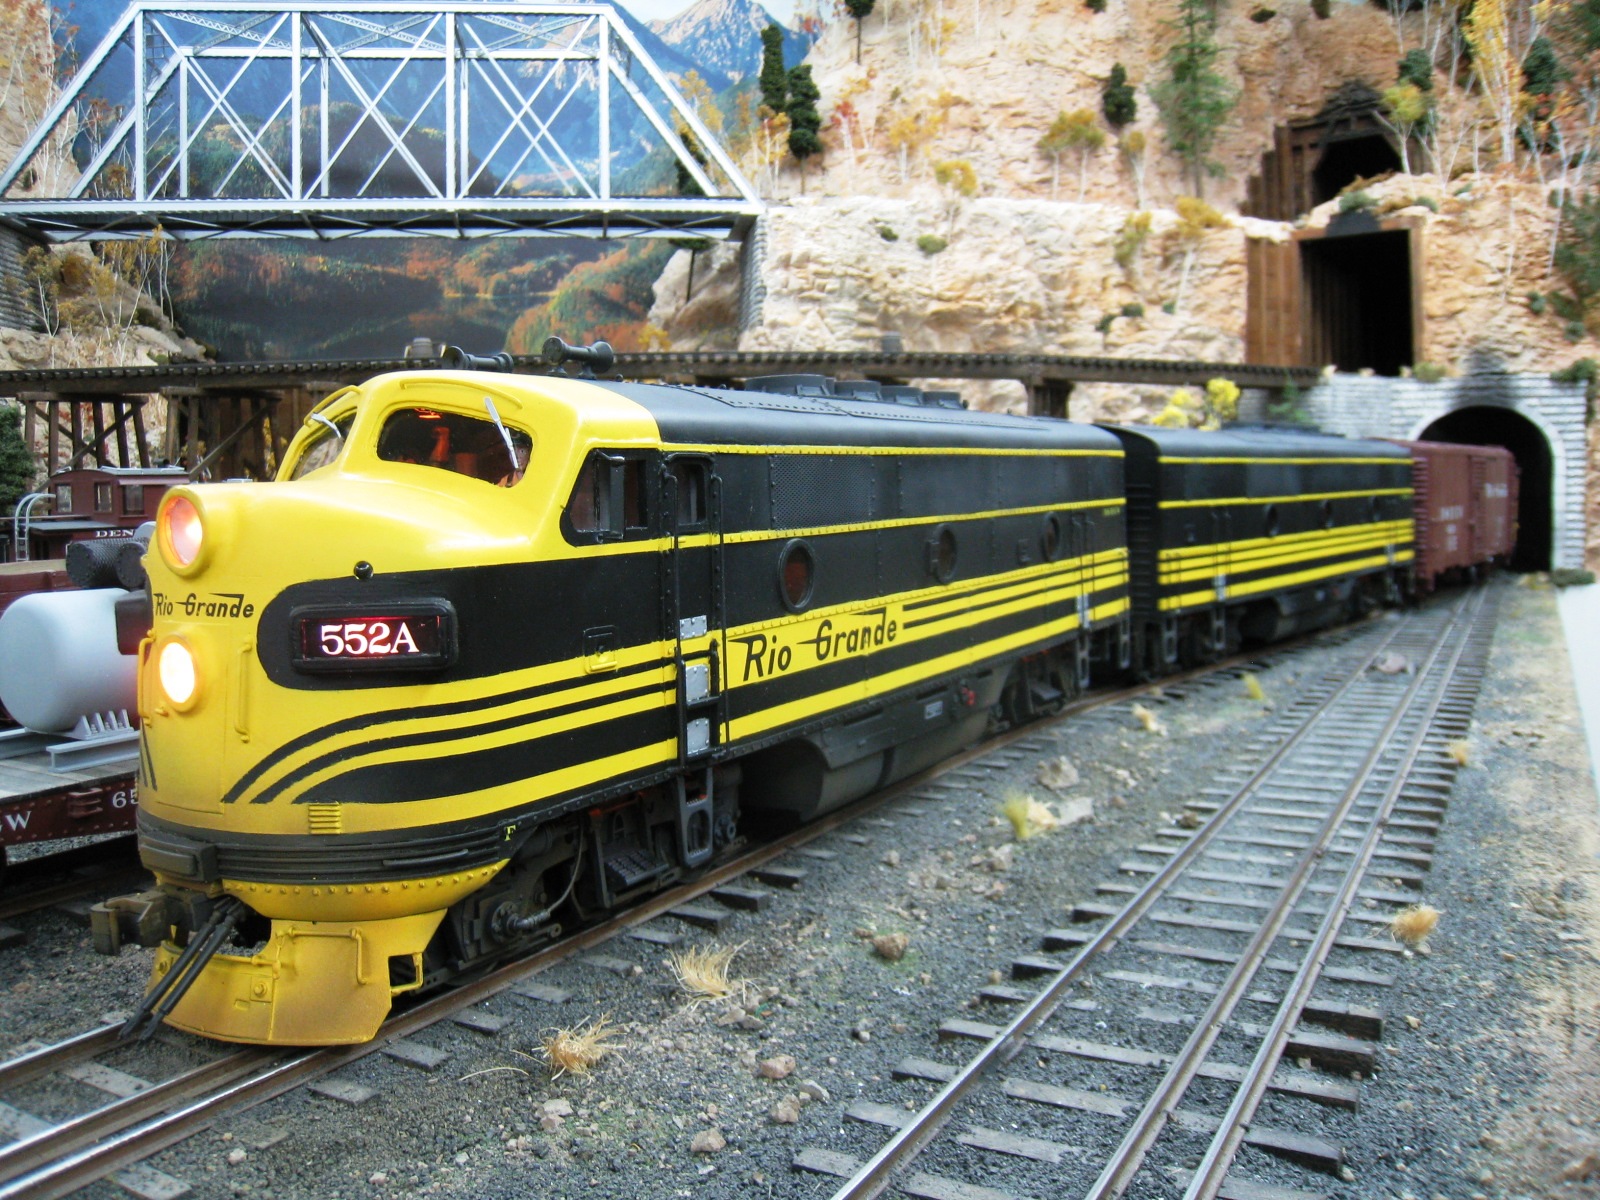
 D&RGW
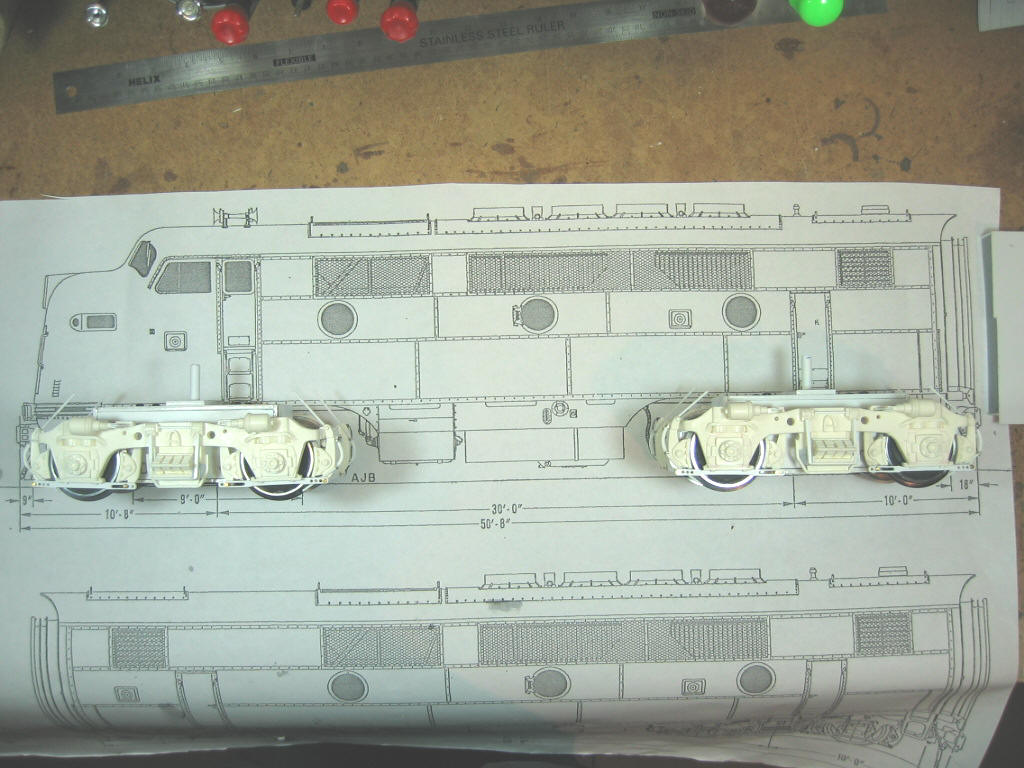
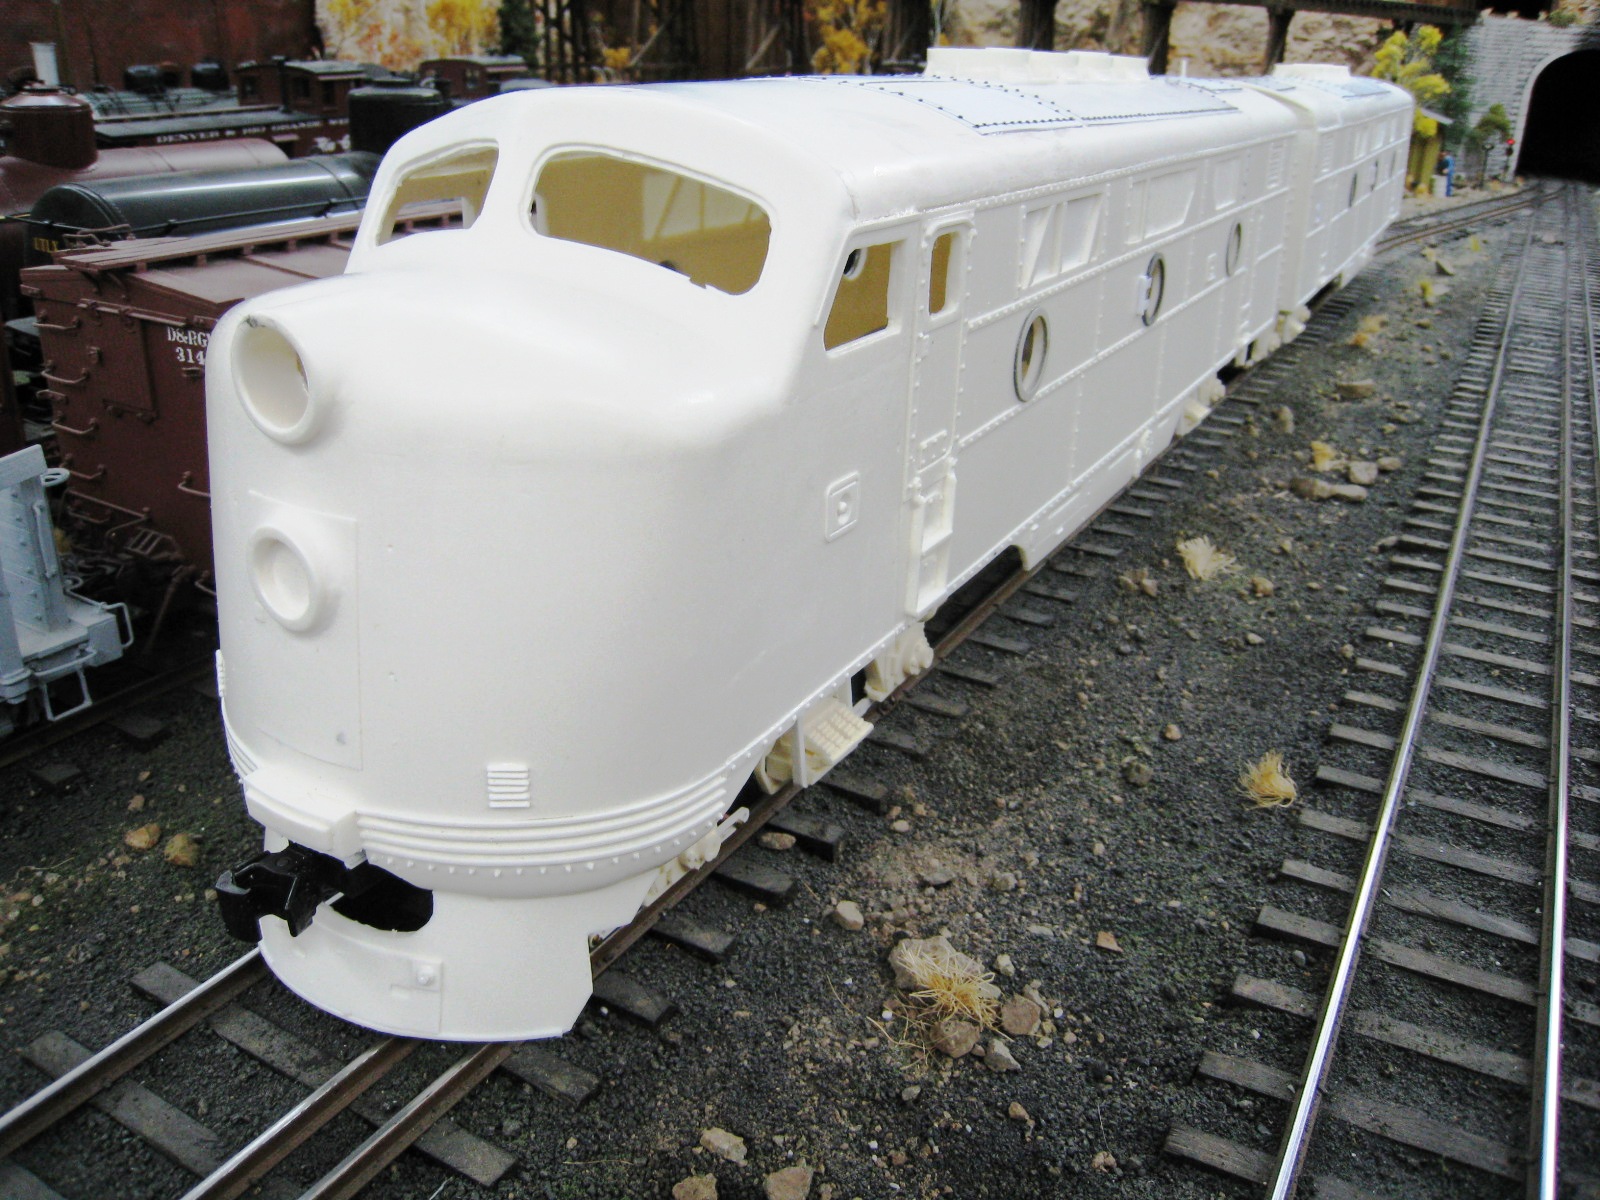
EMD F3A & B Phase I Units D&RGW
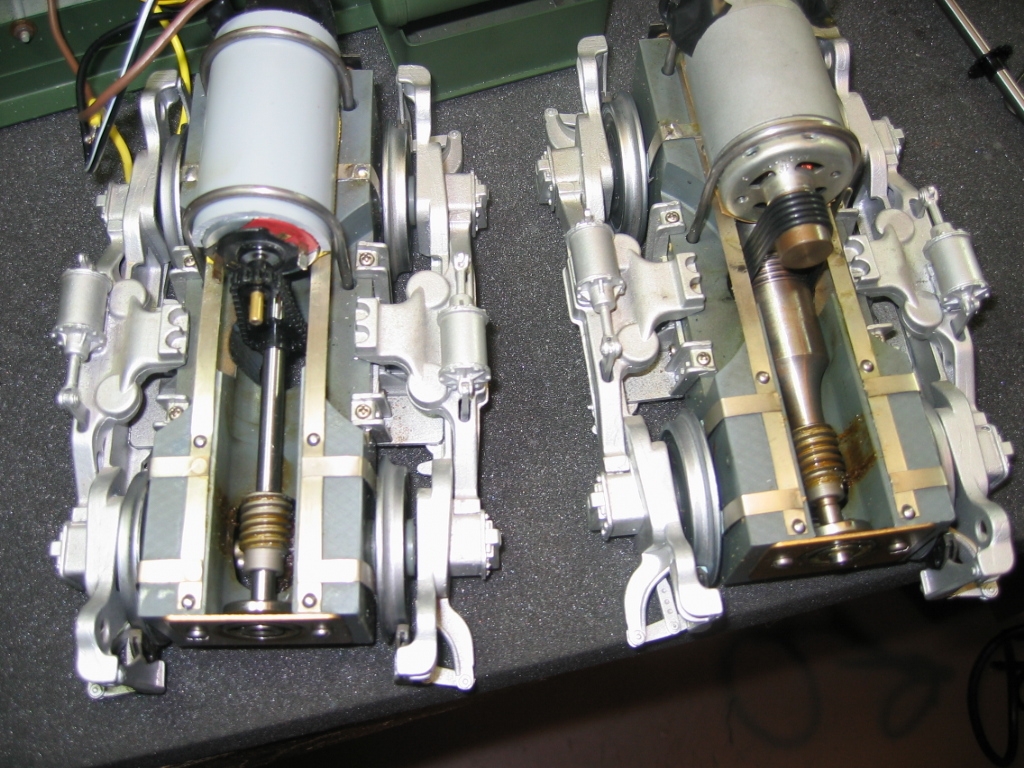
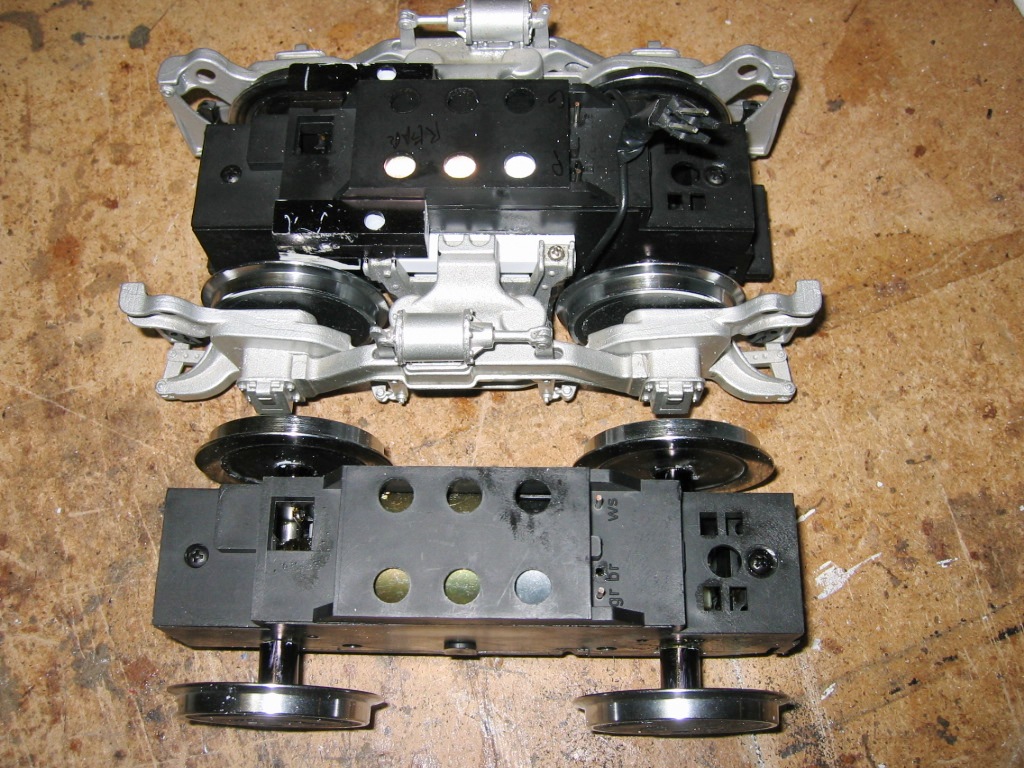
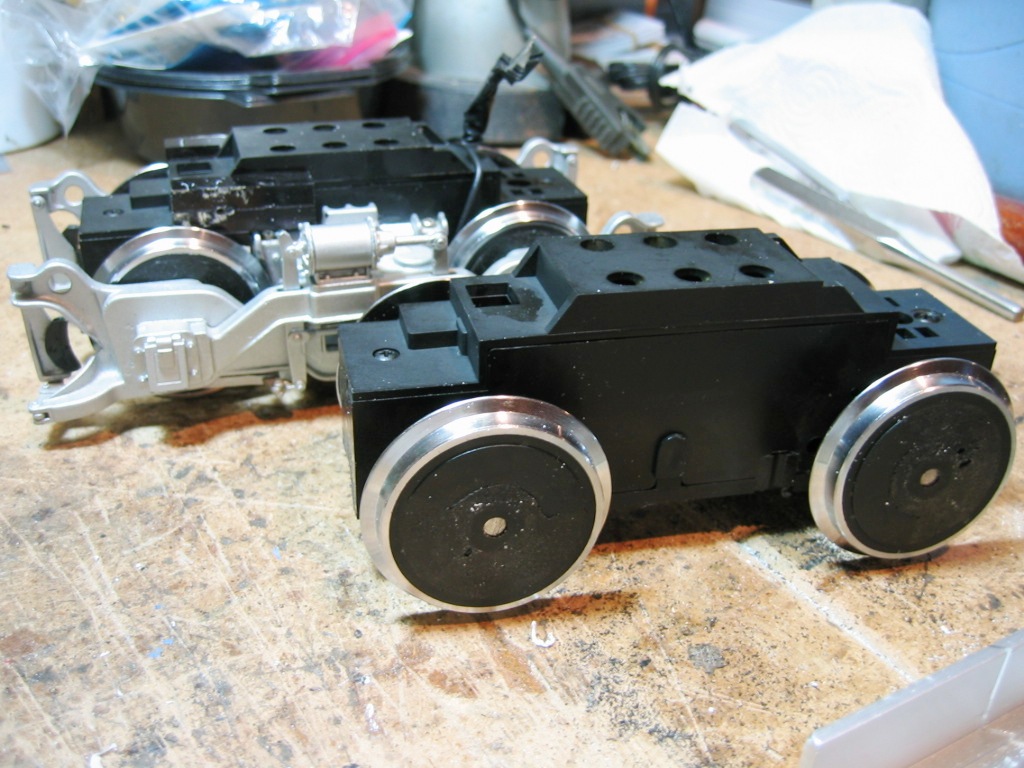
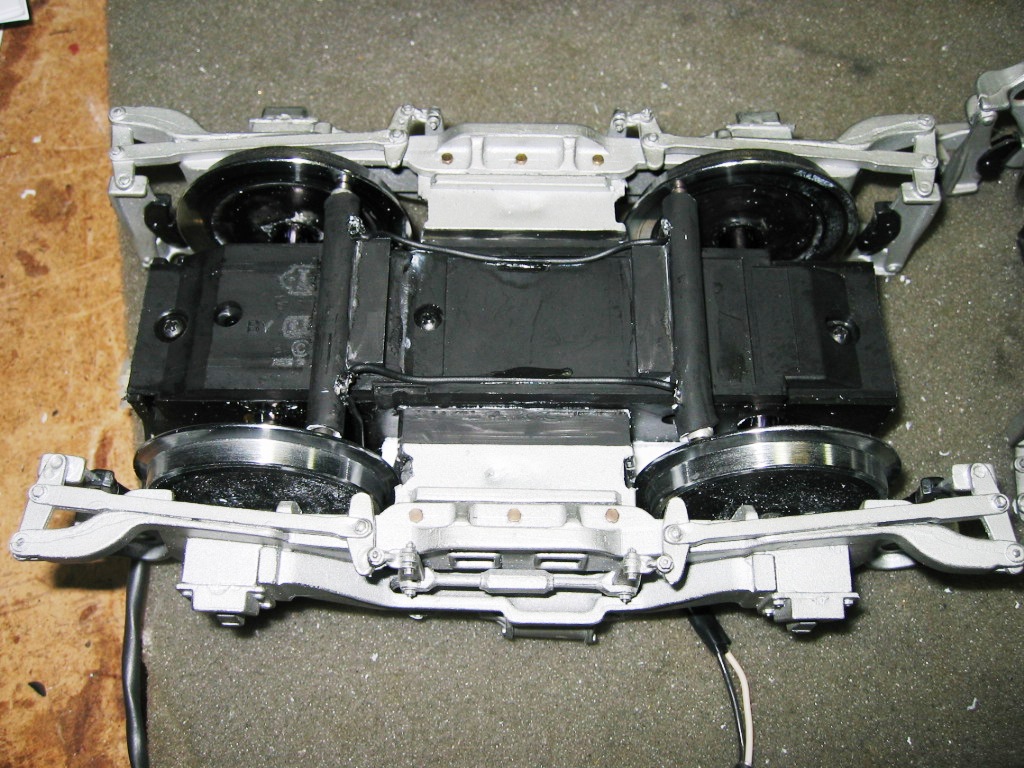
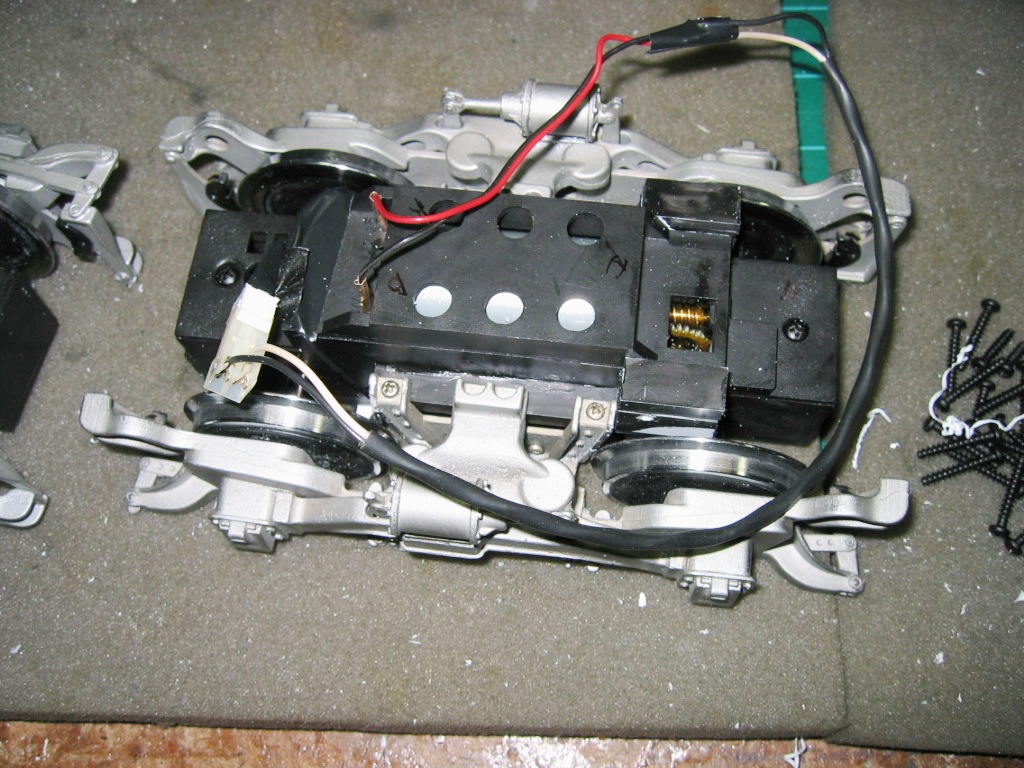
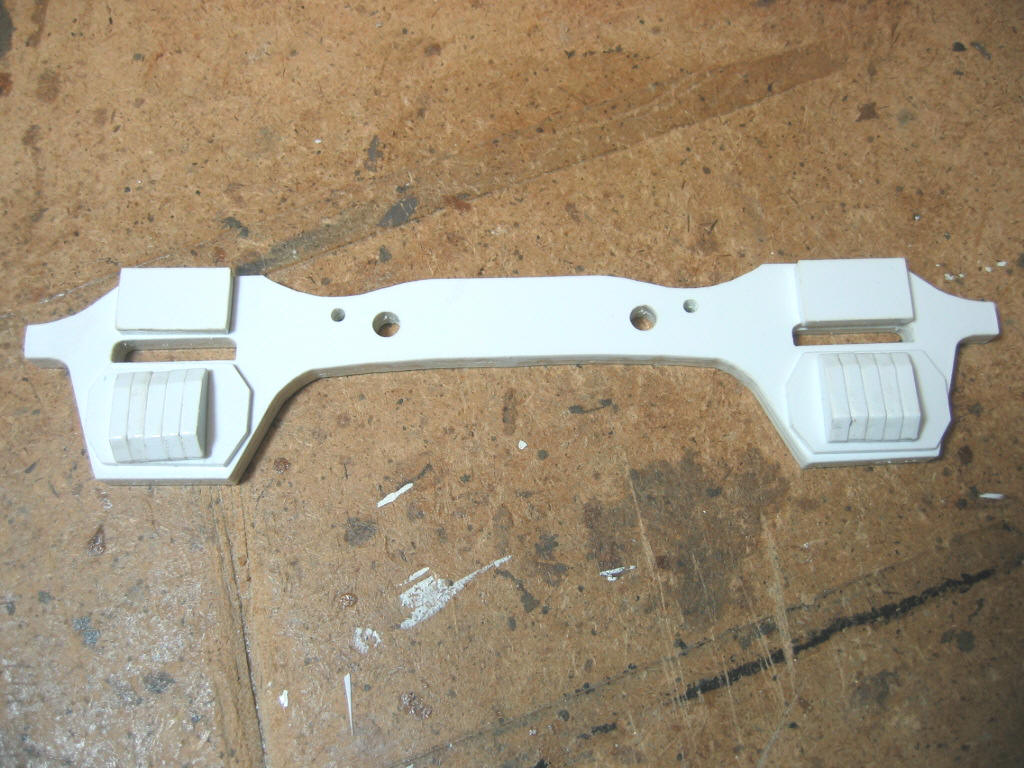
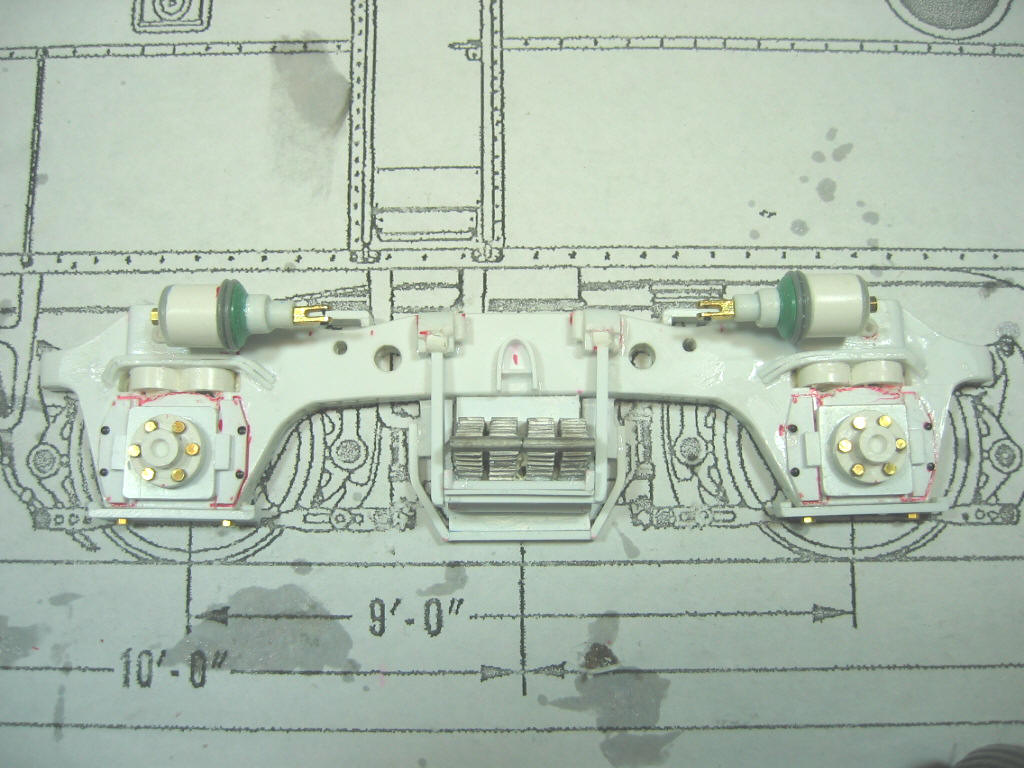
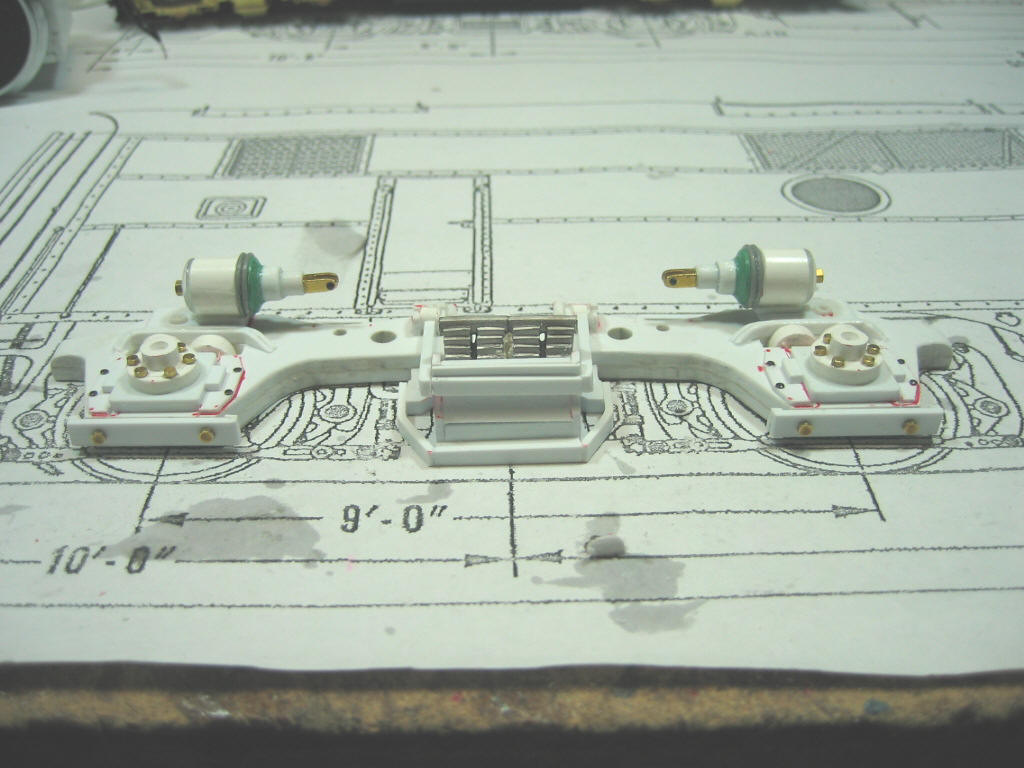
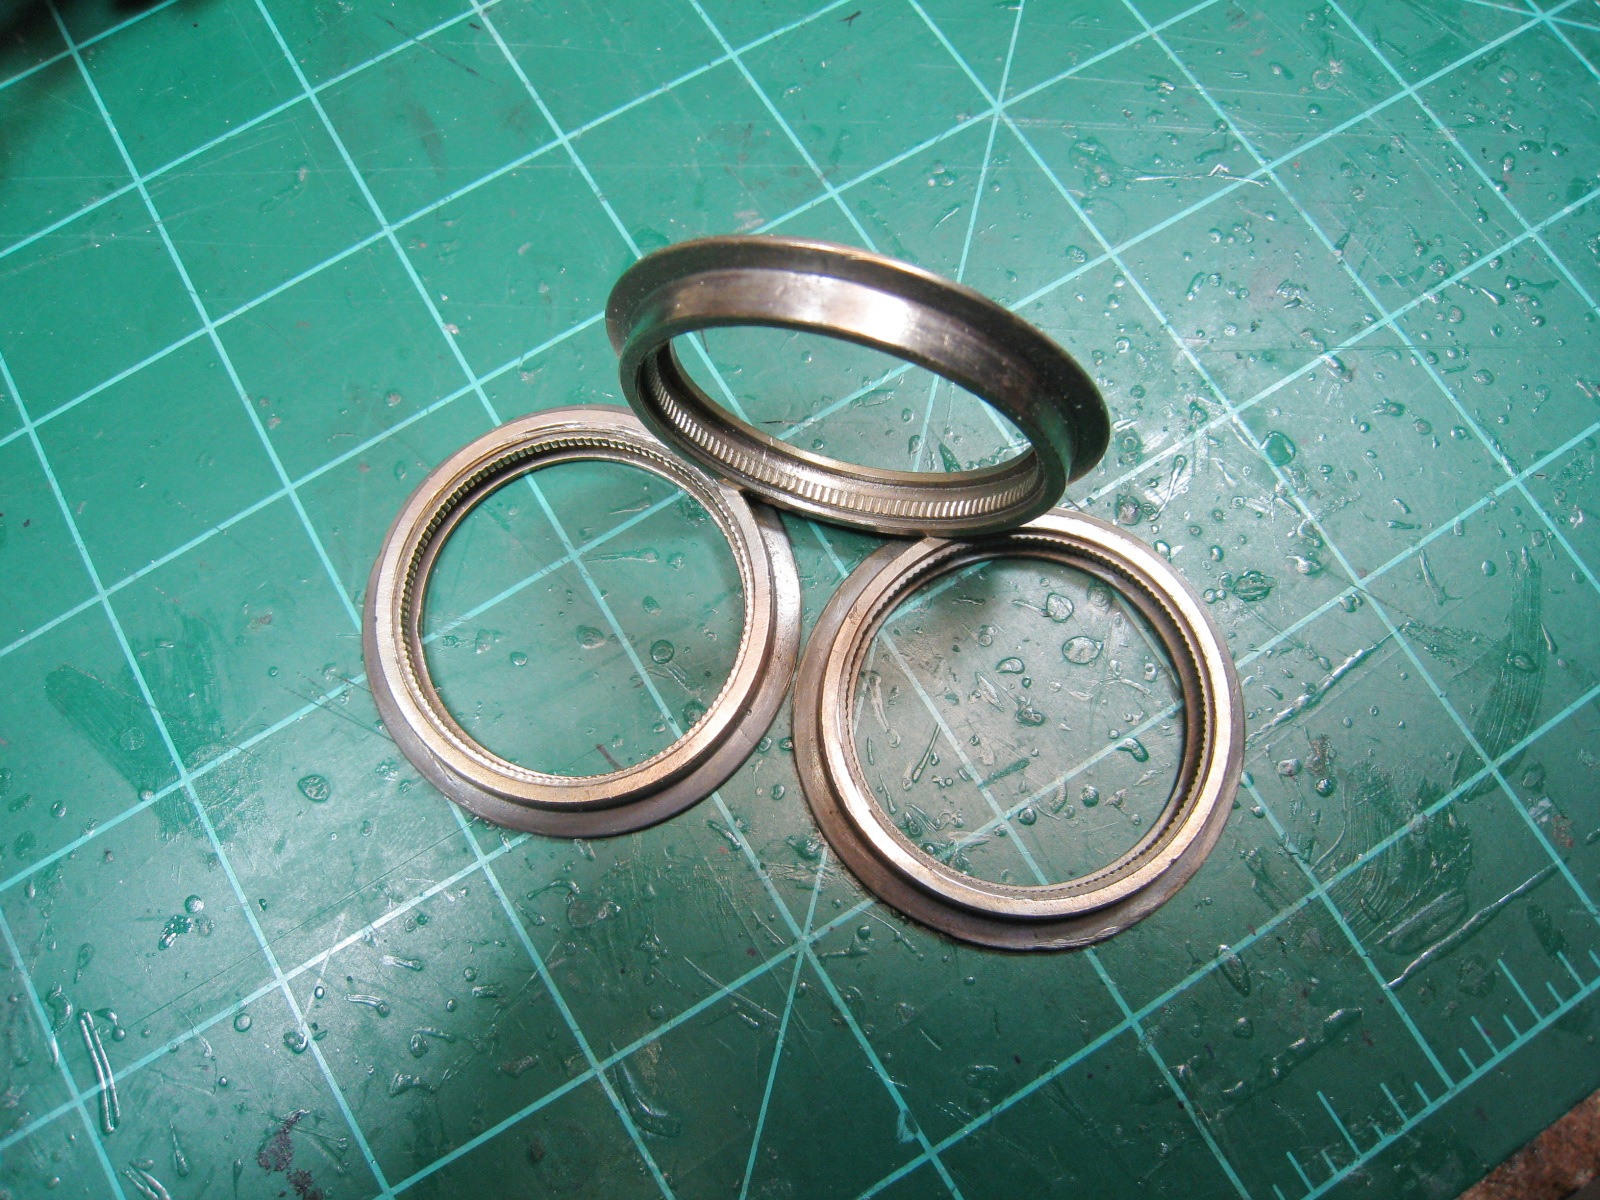
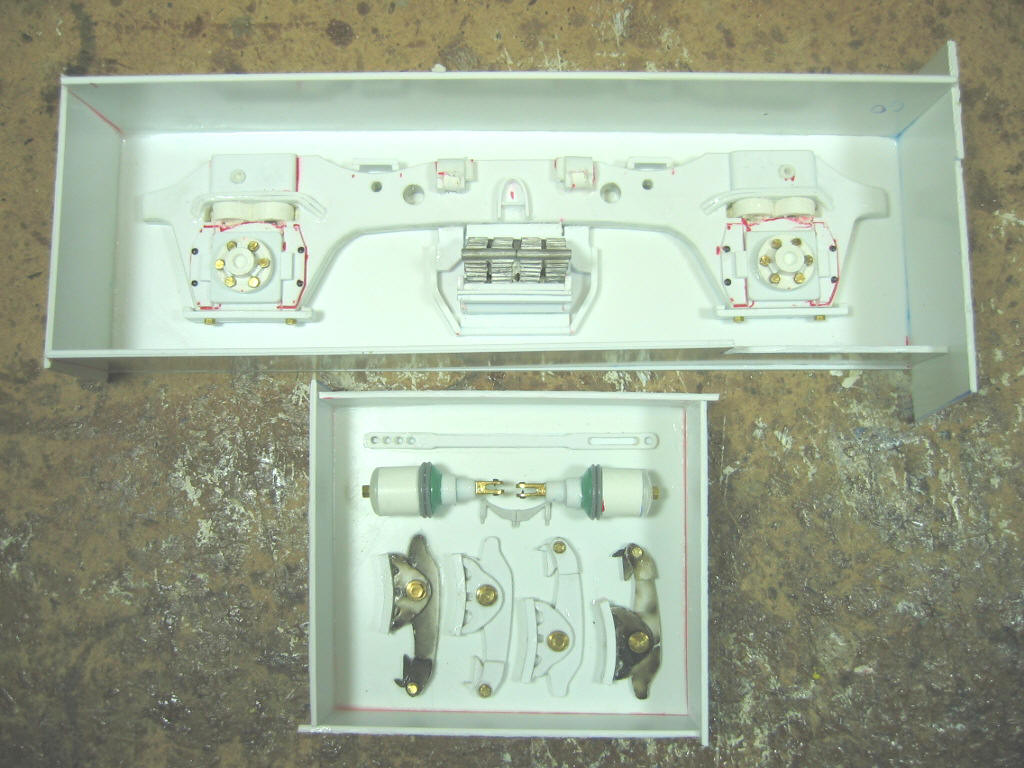
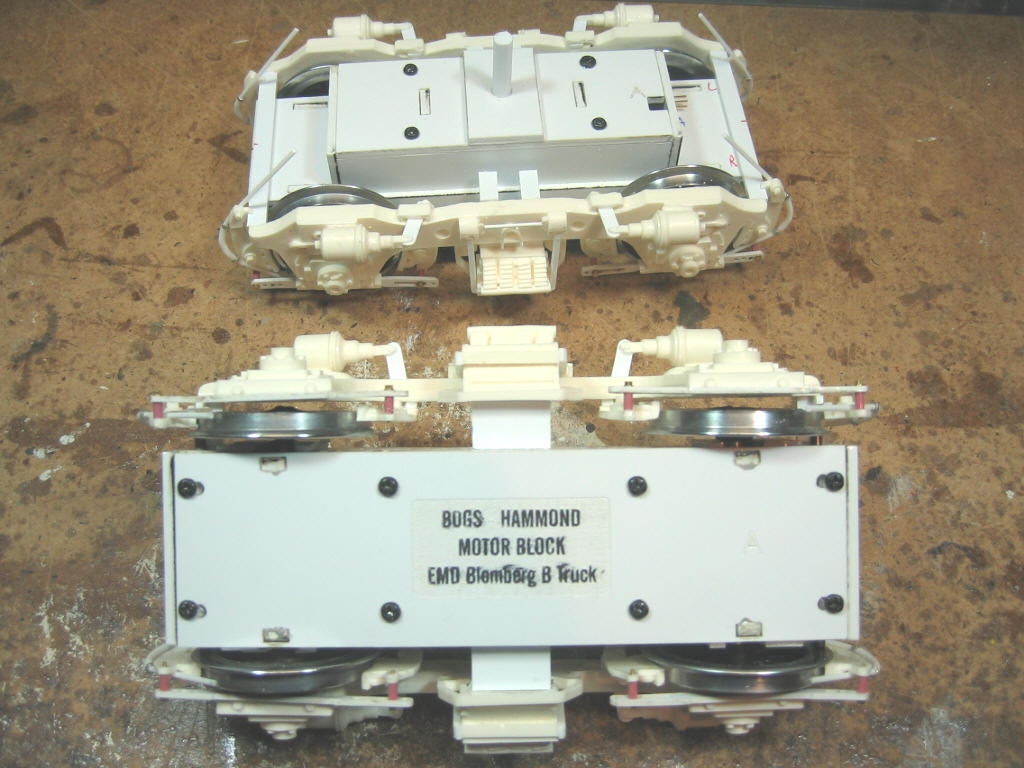
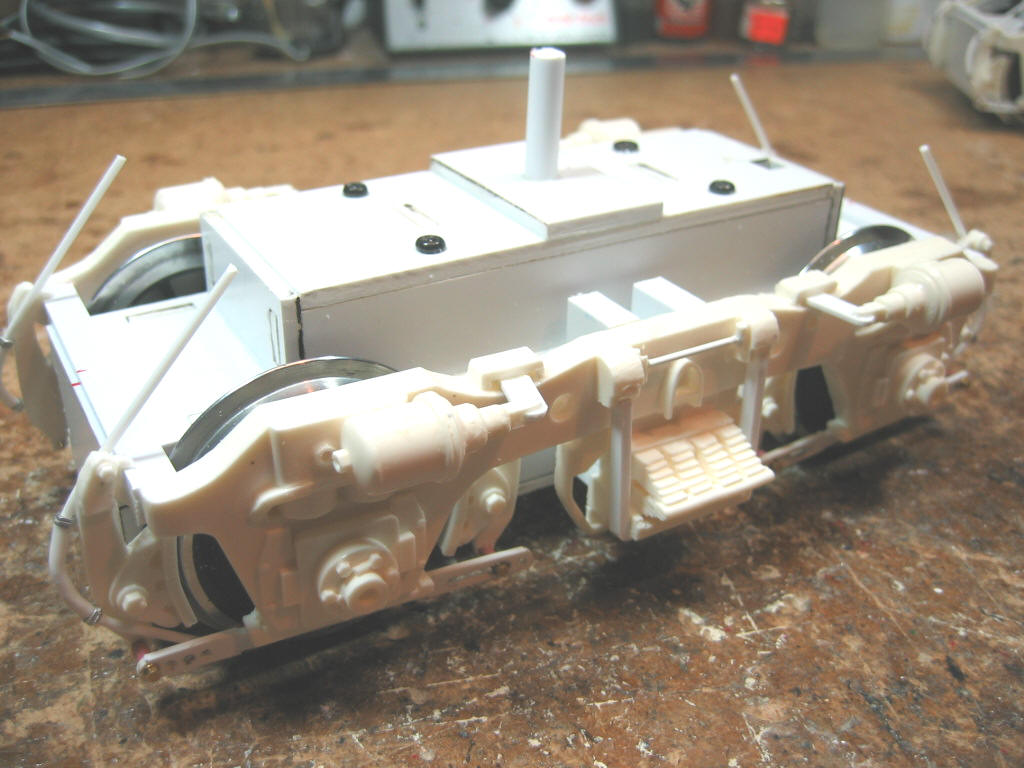
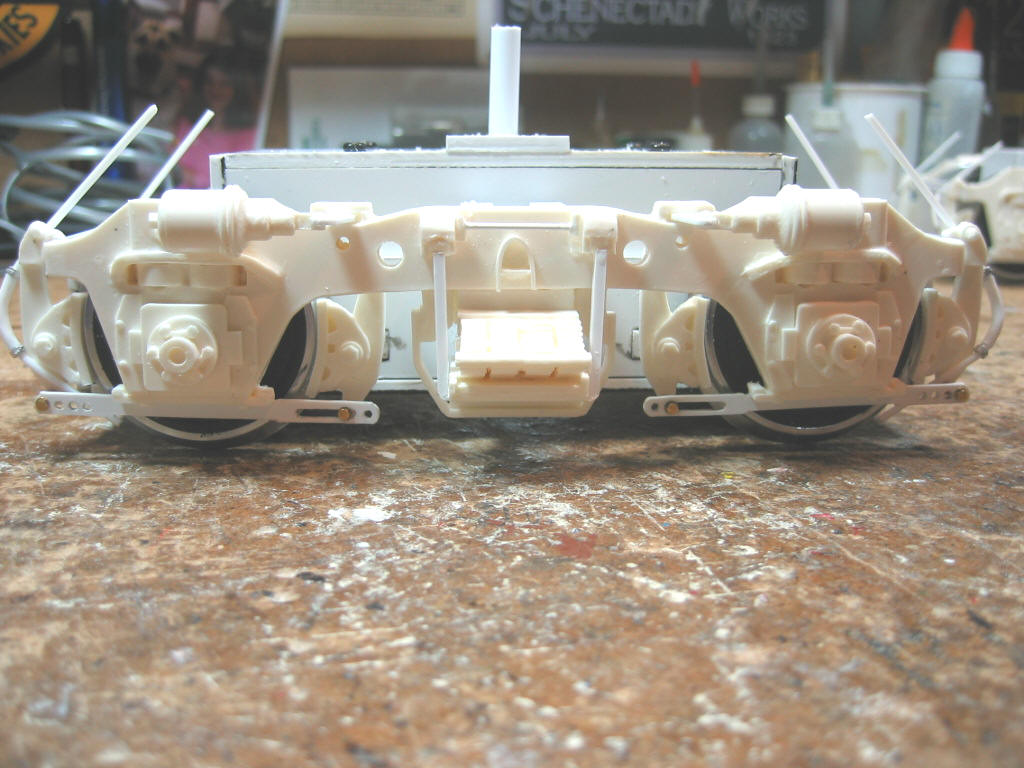
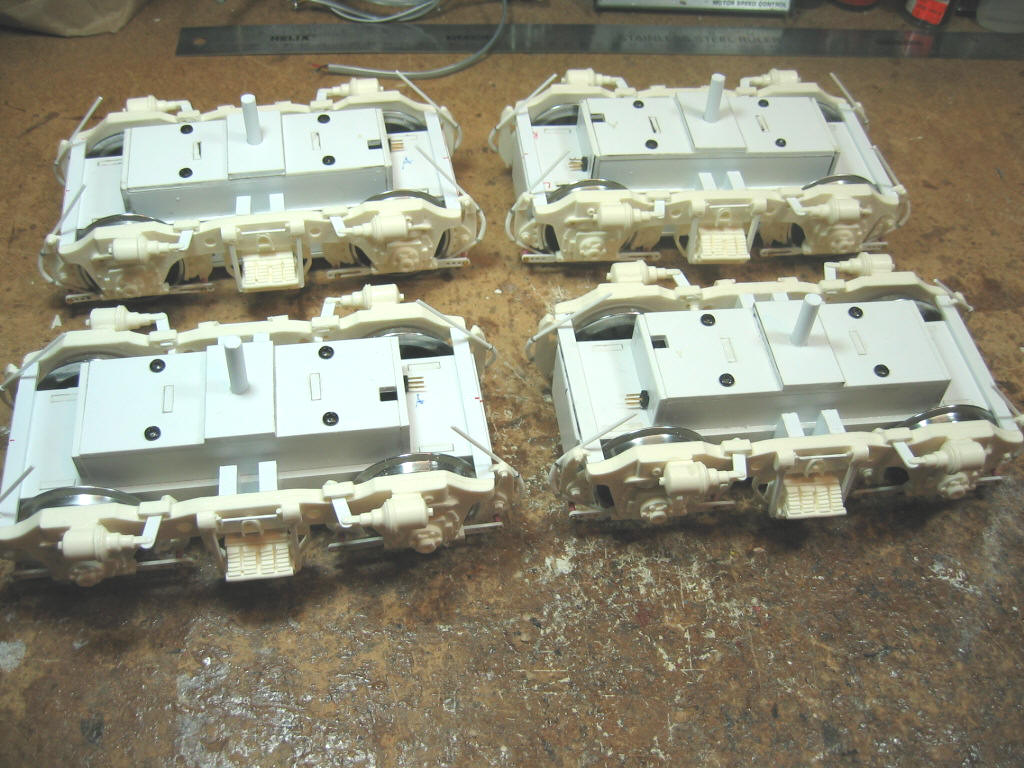
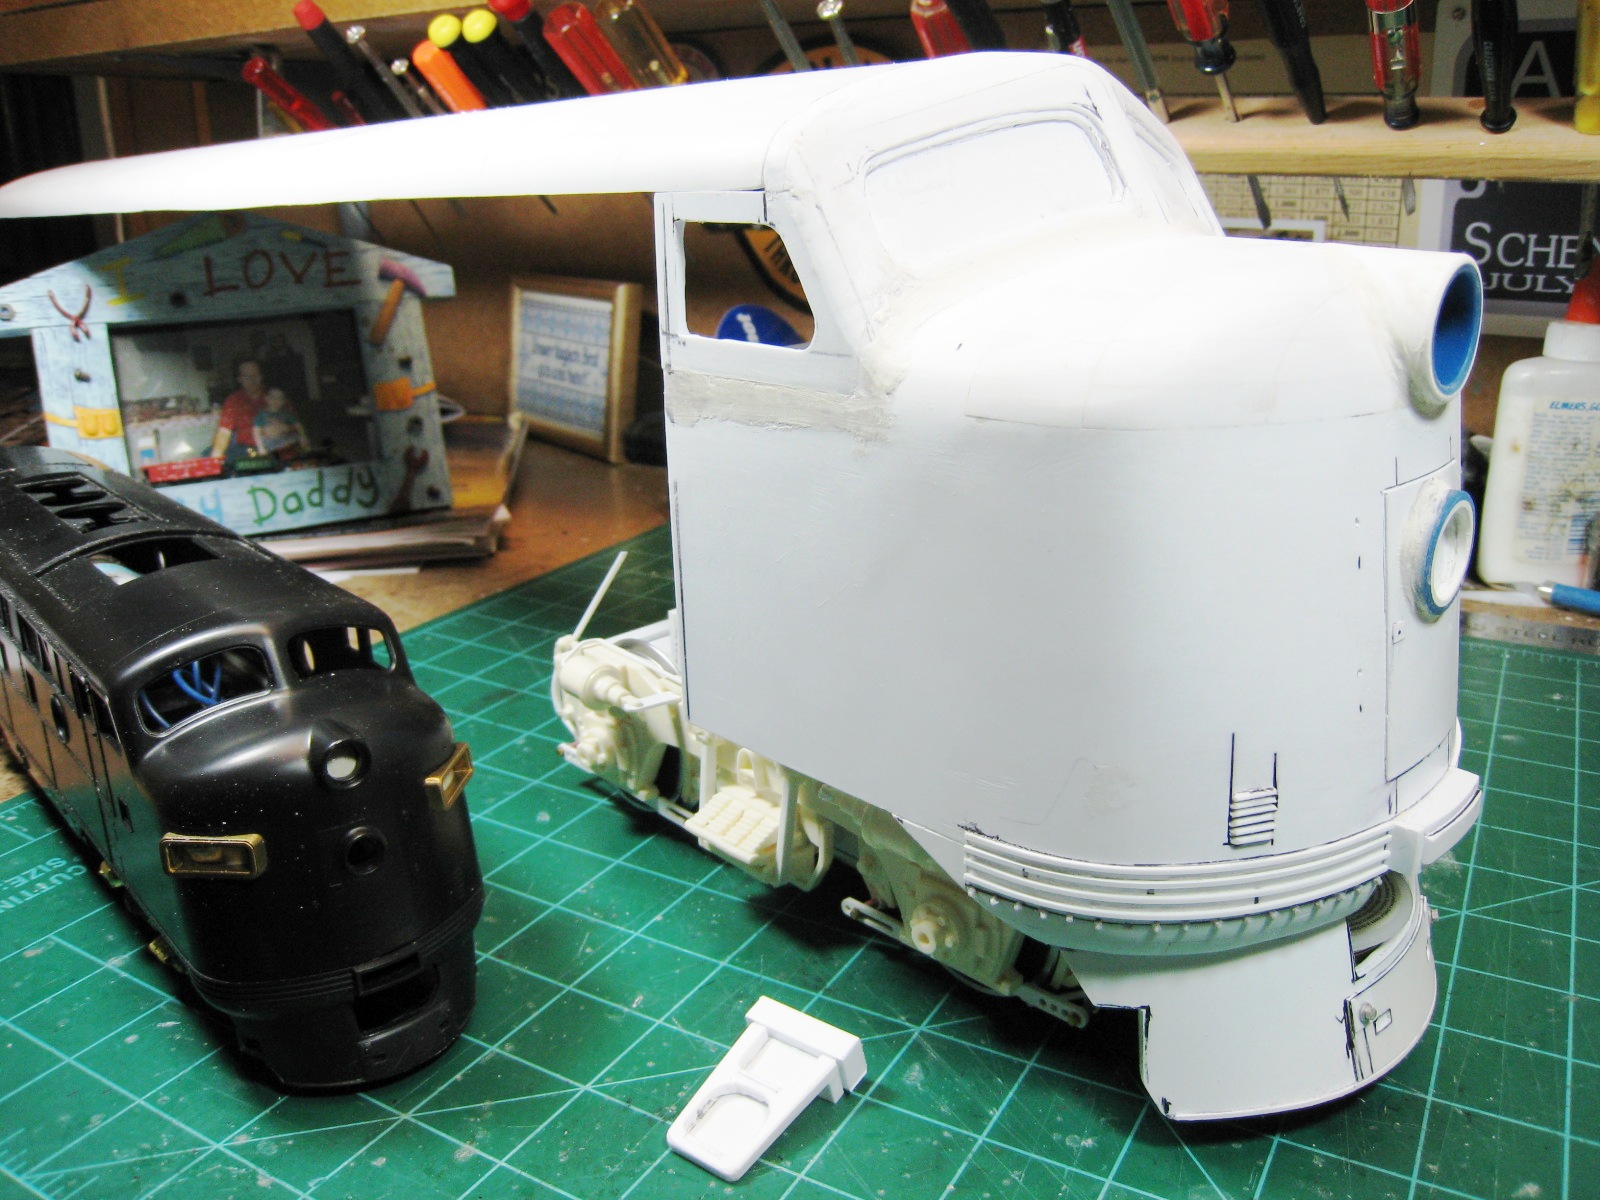
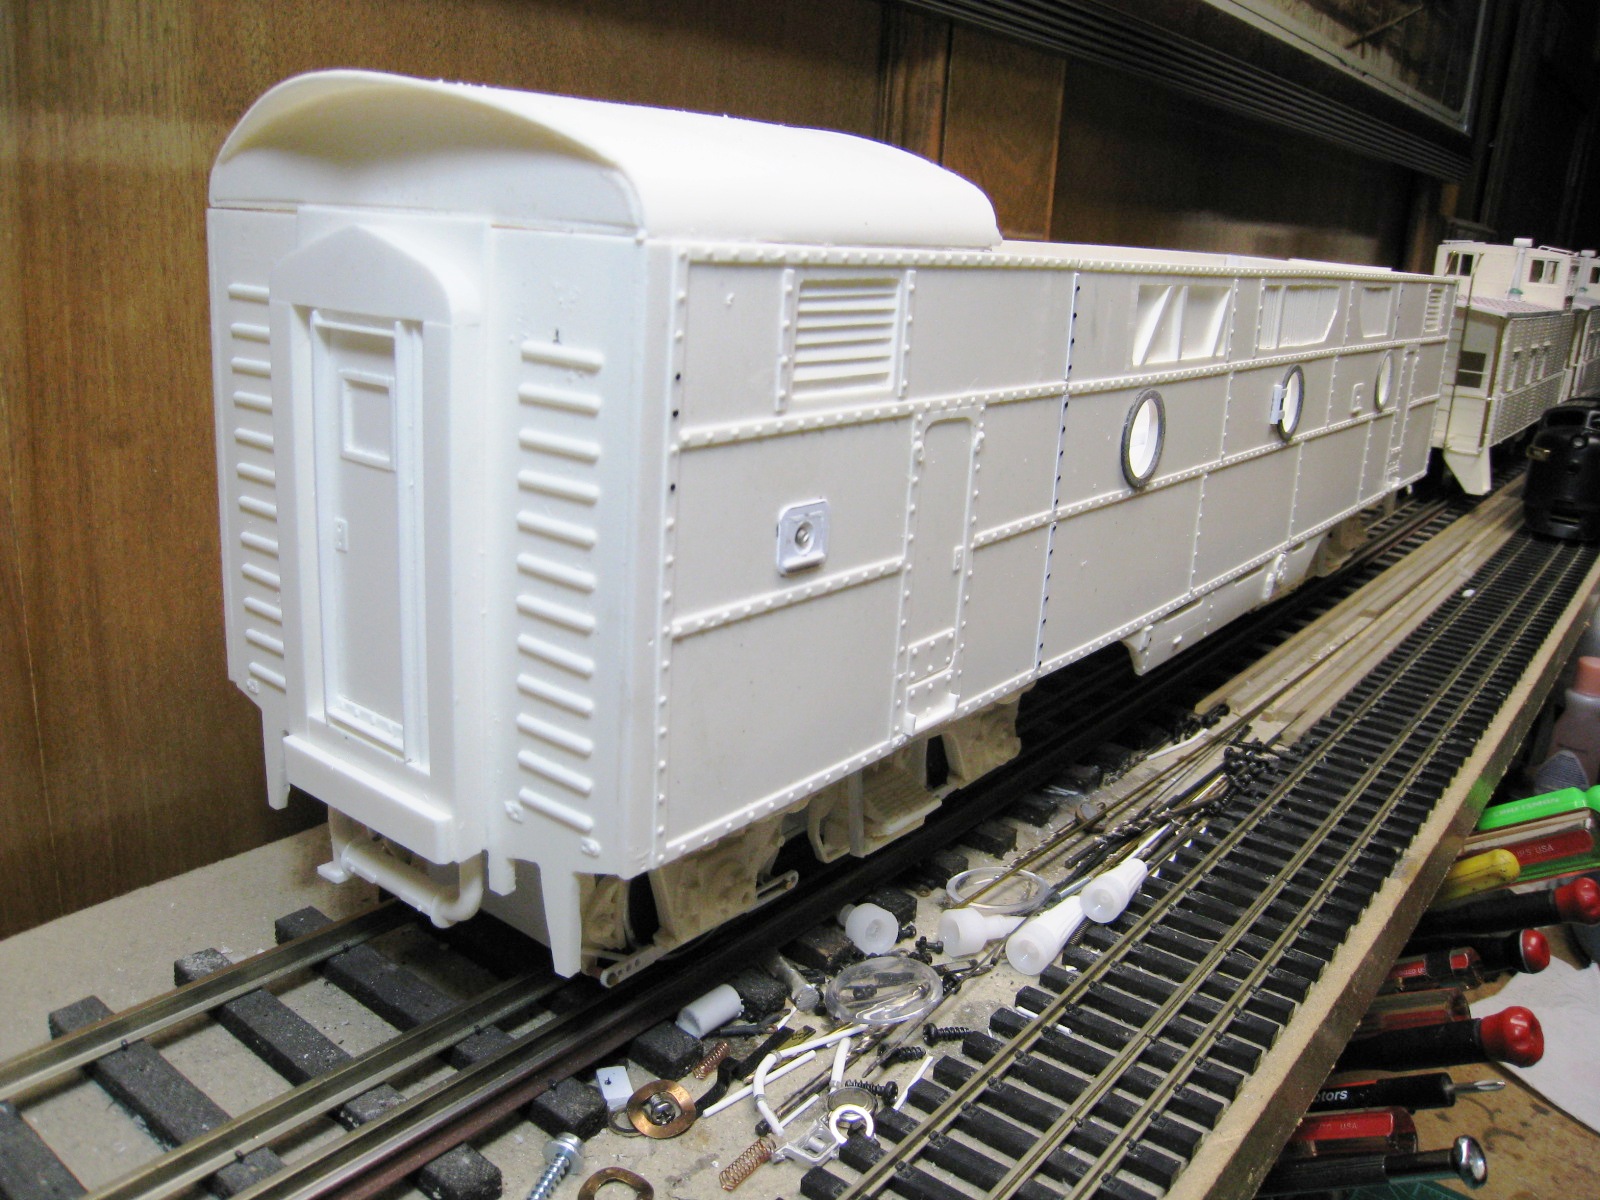
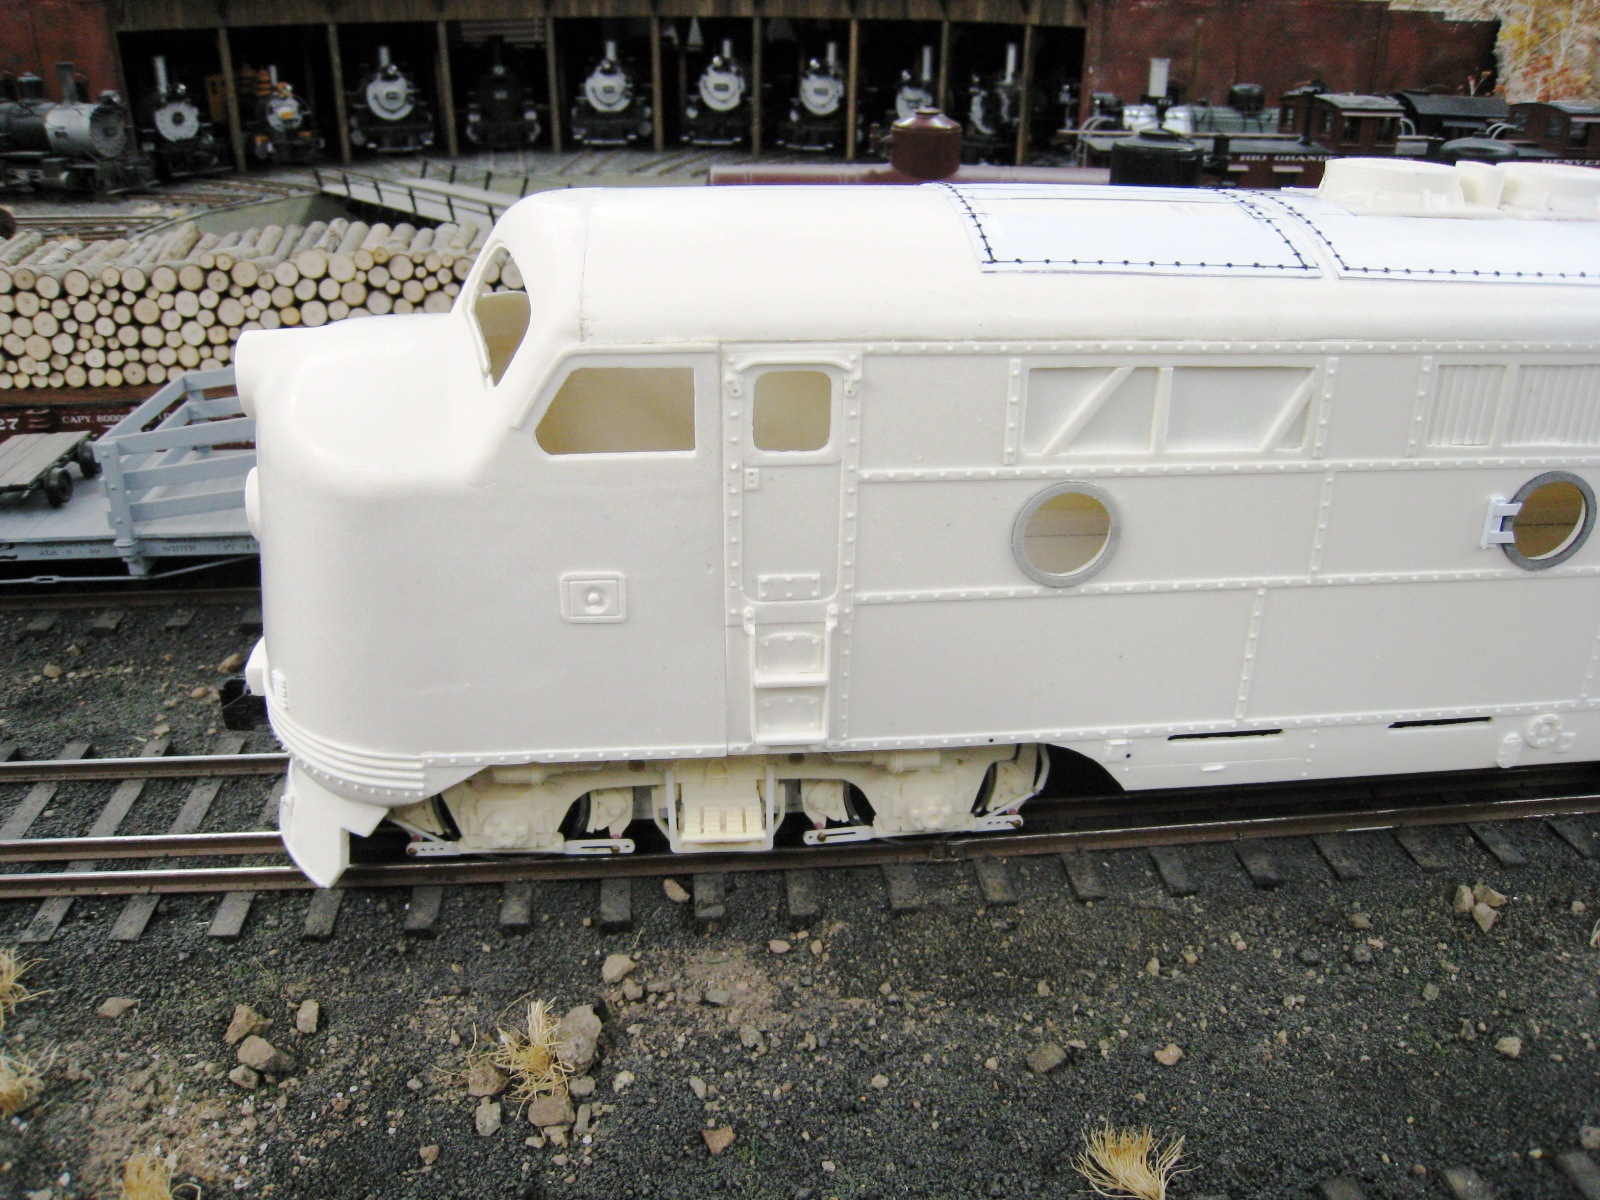
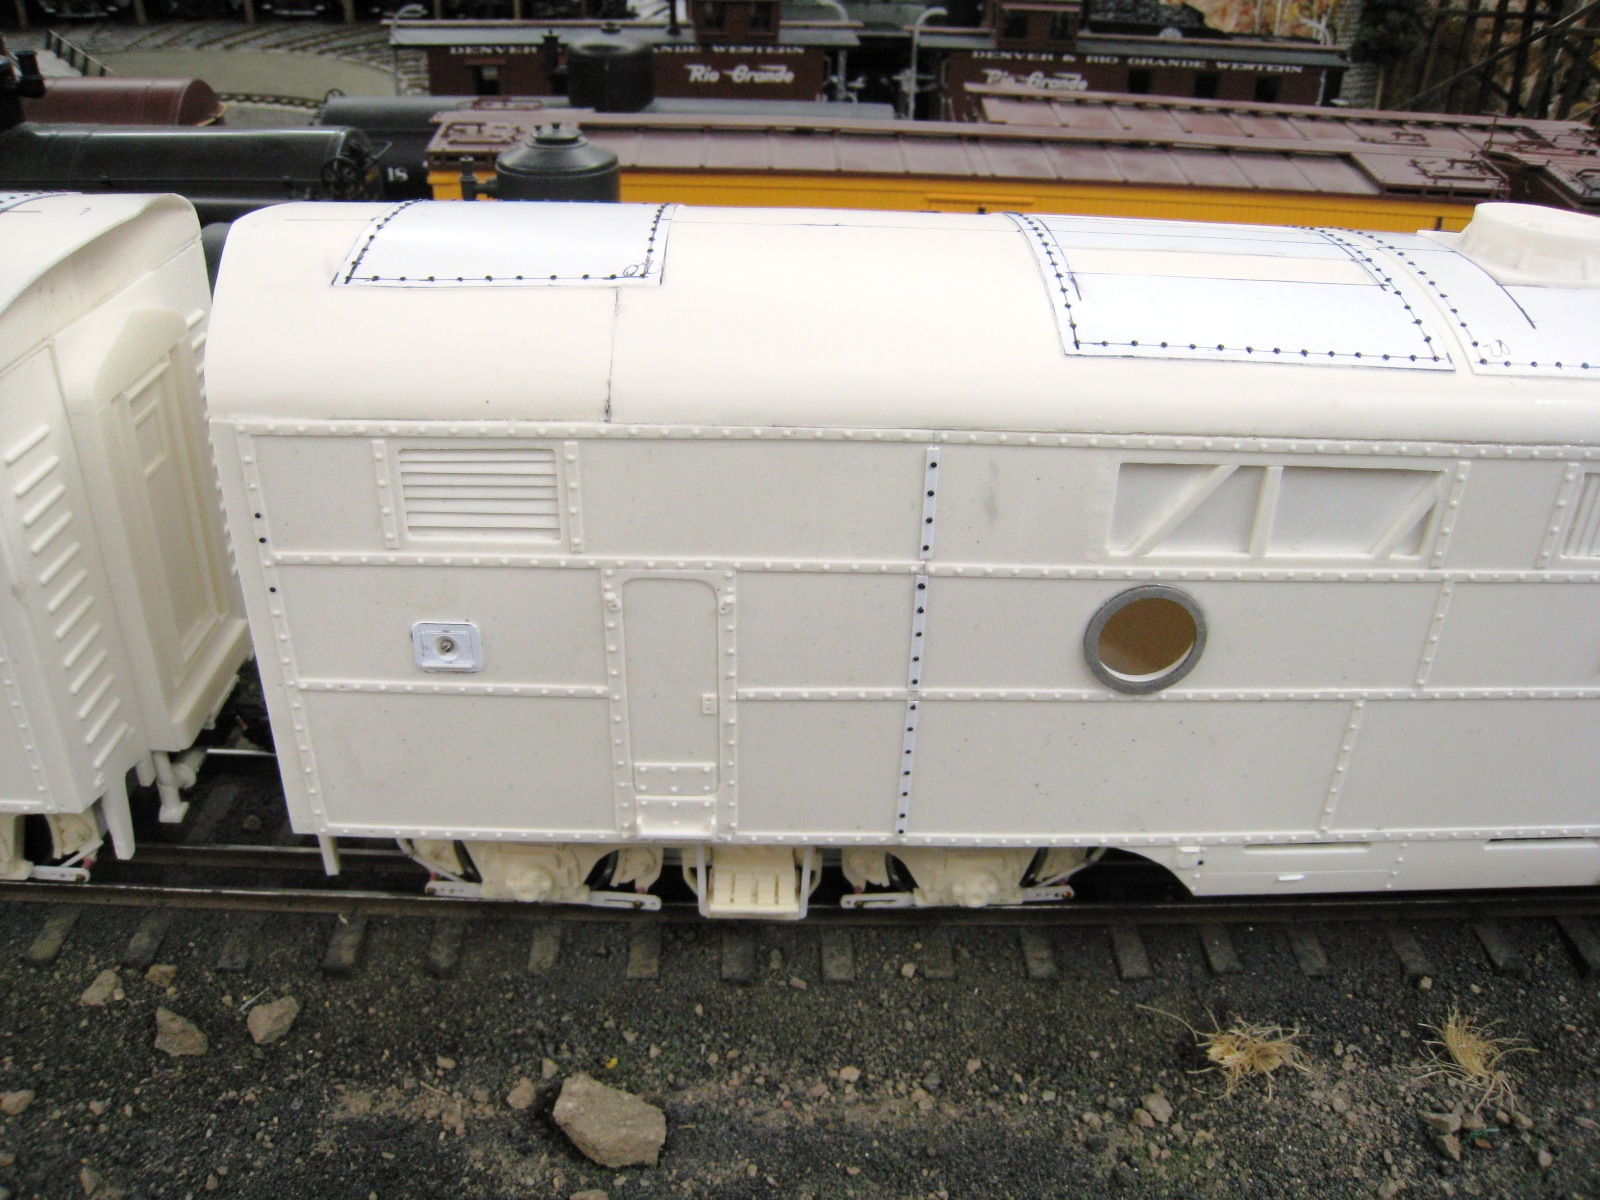
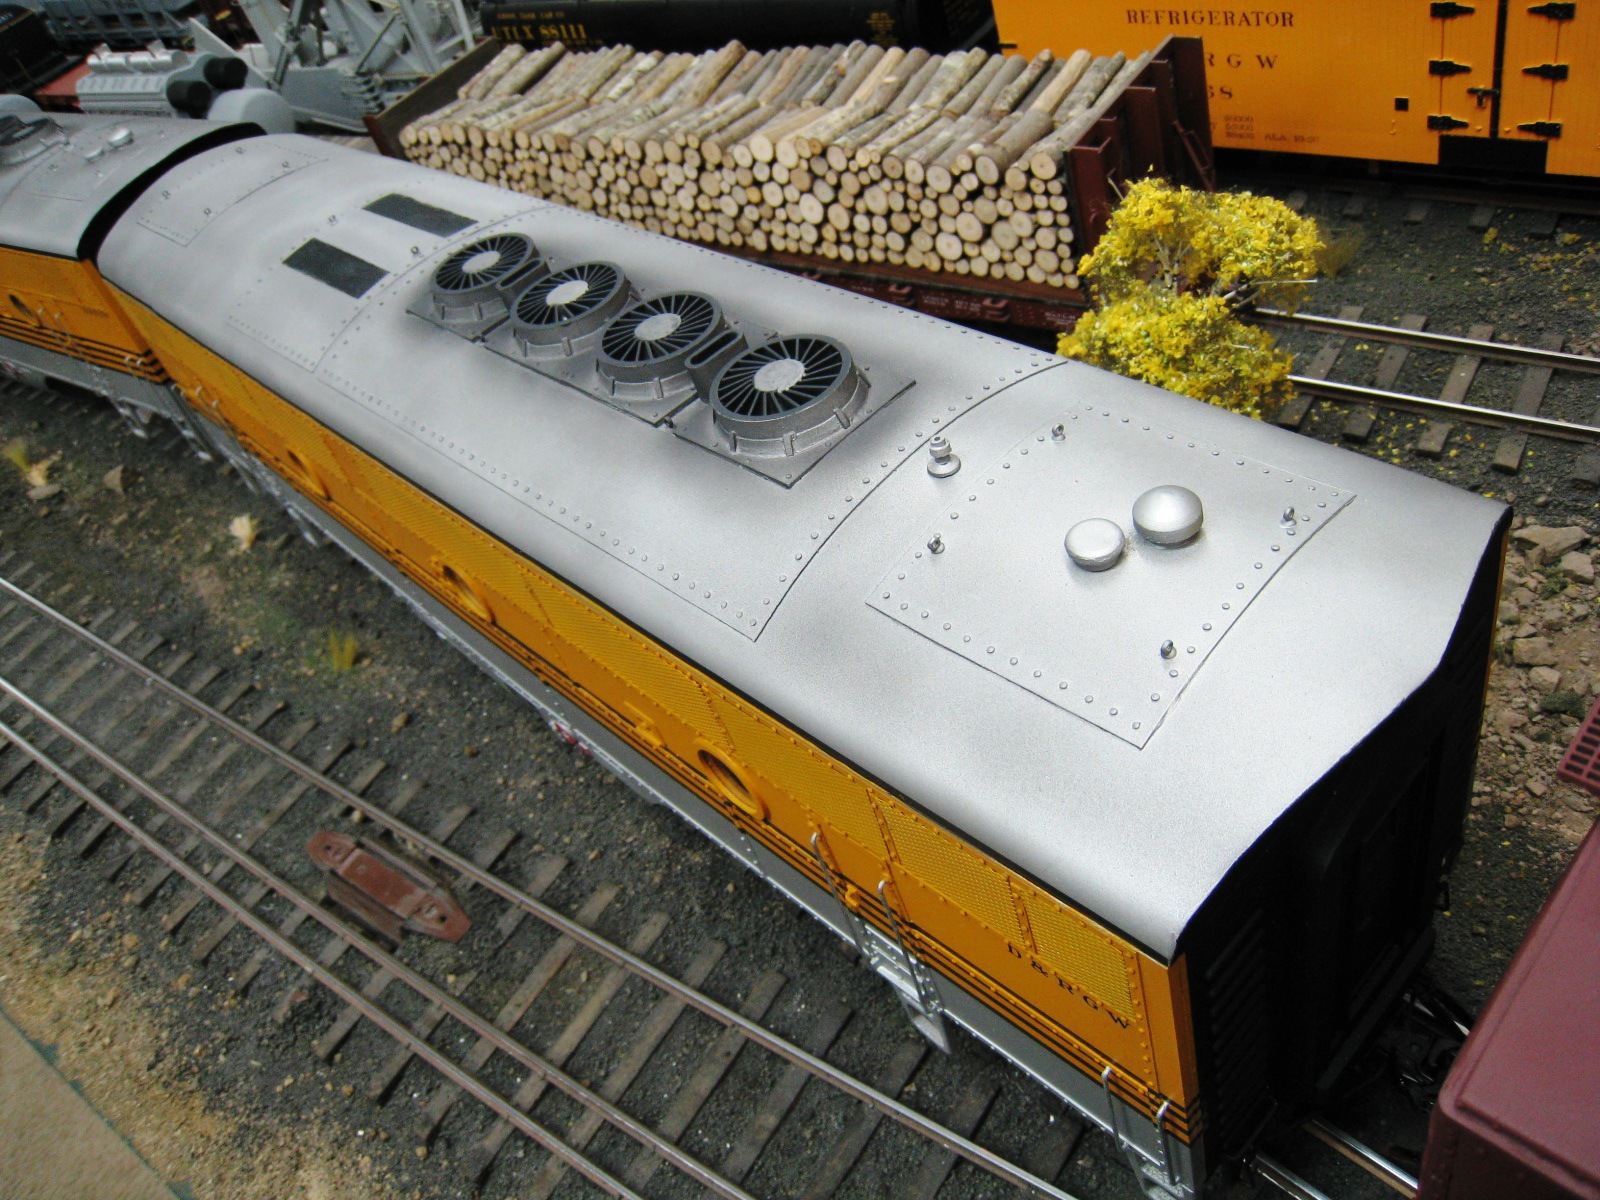
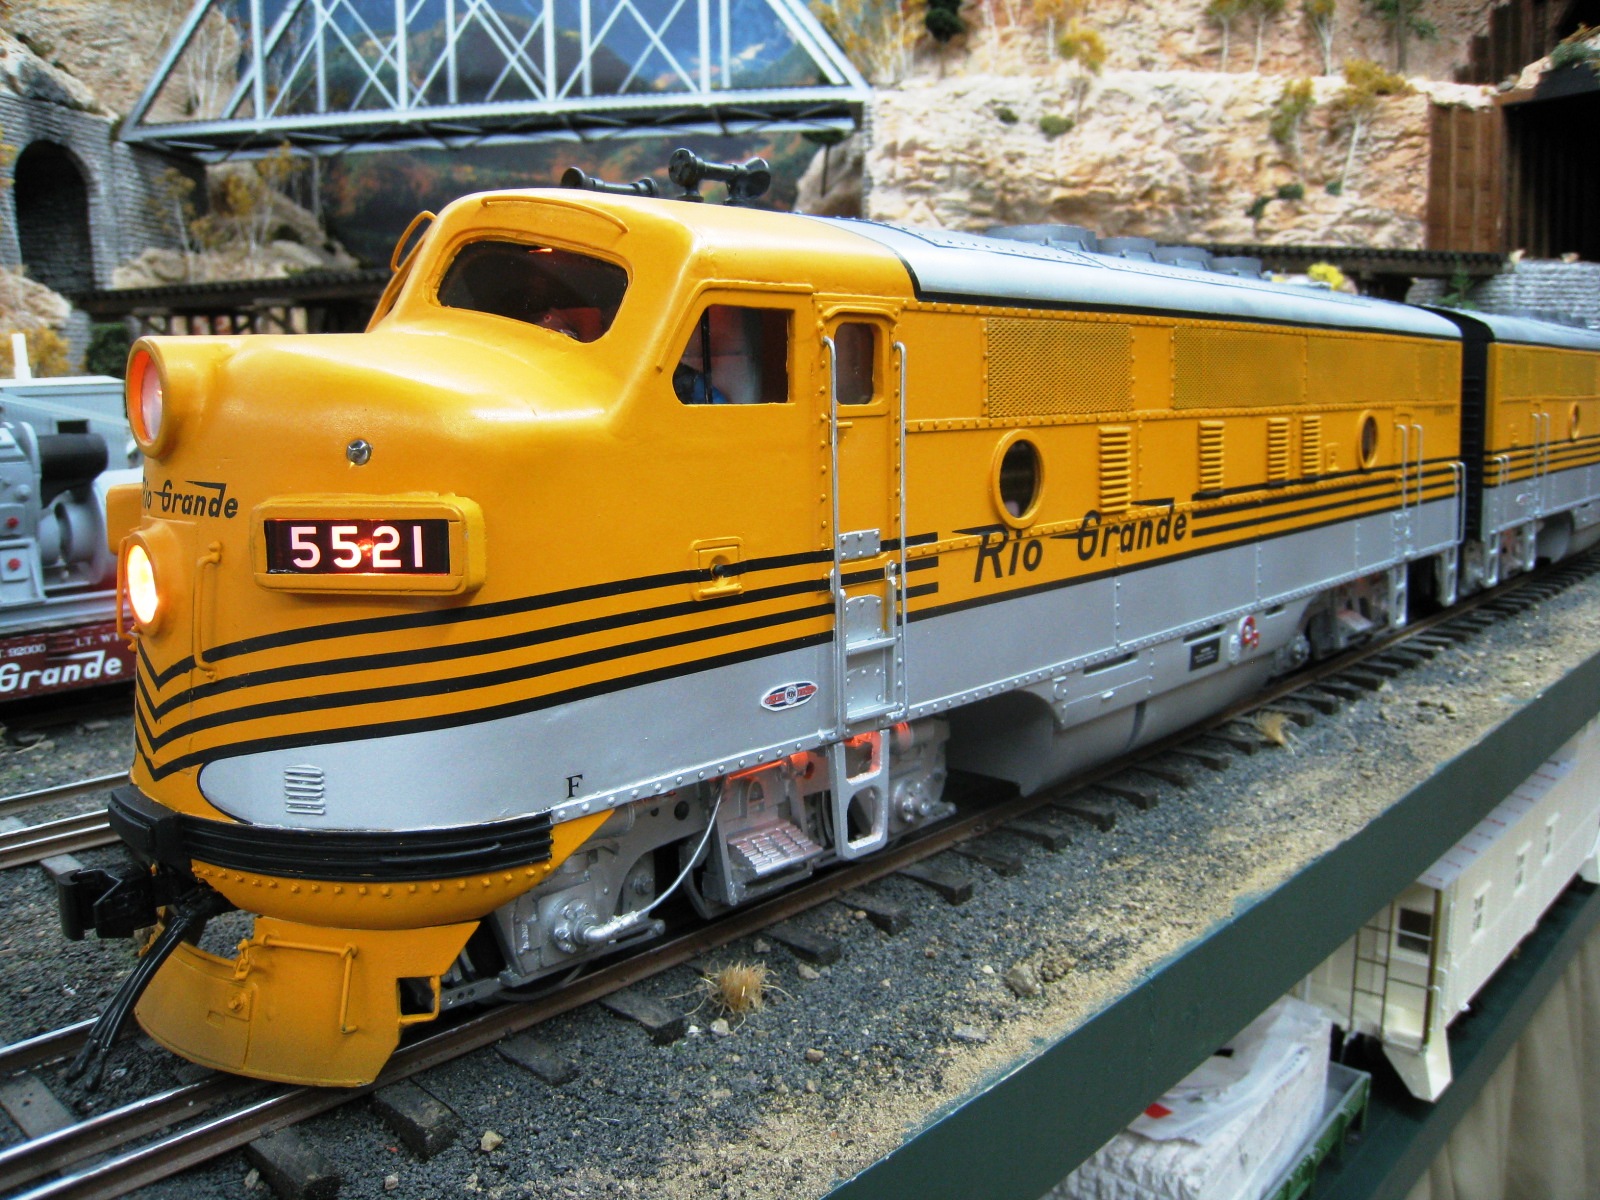
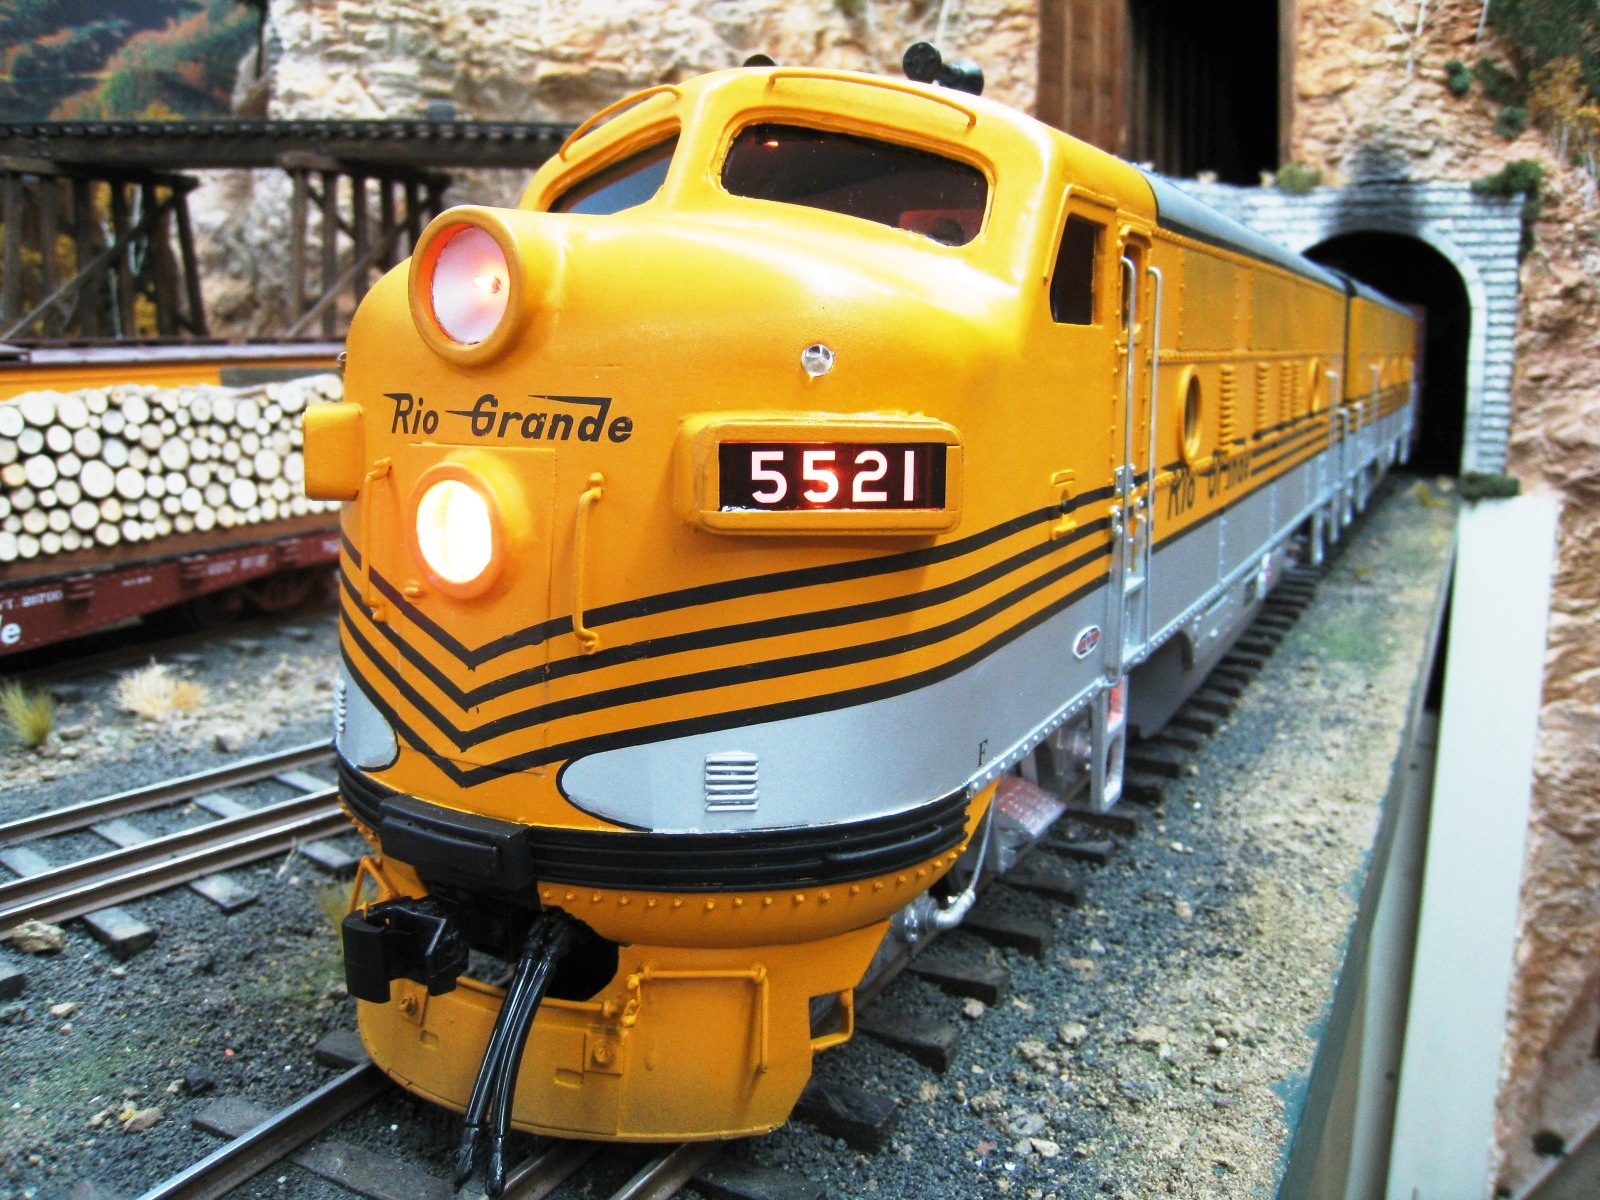
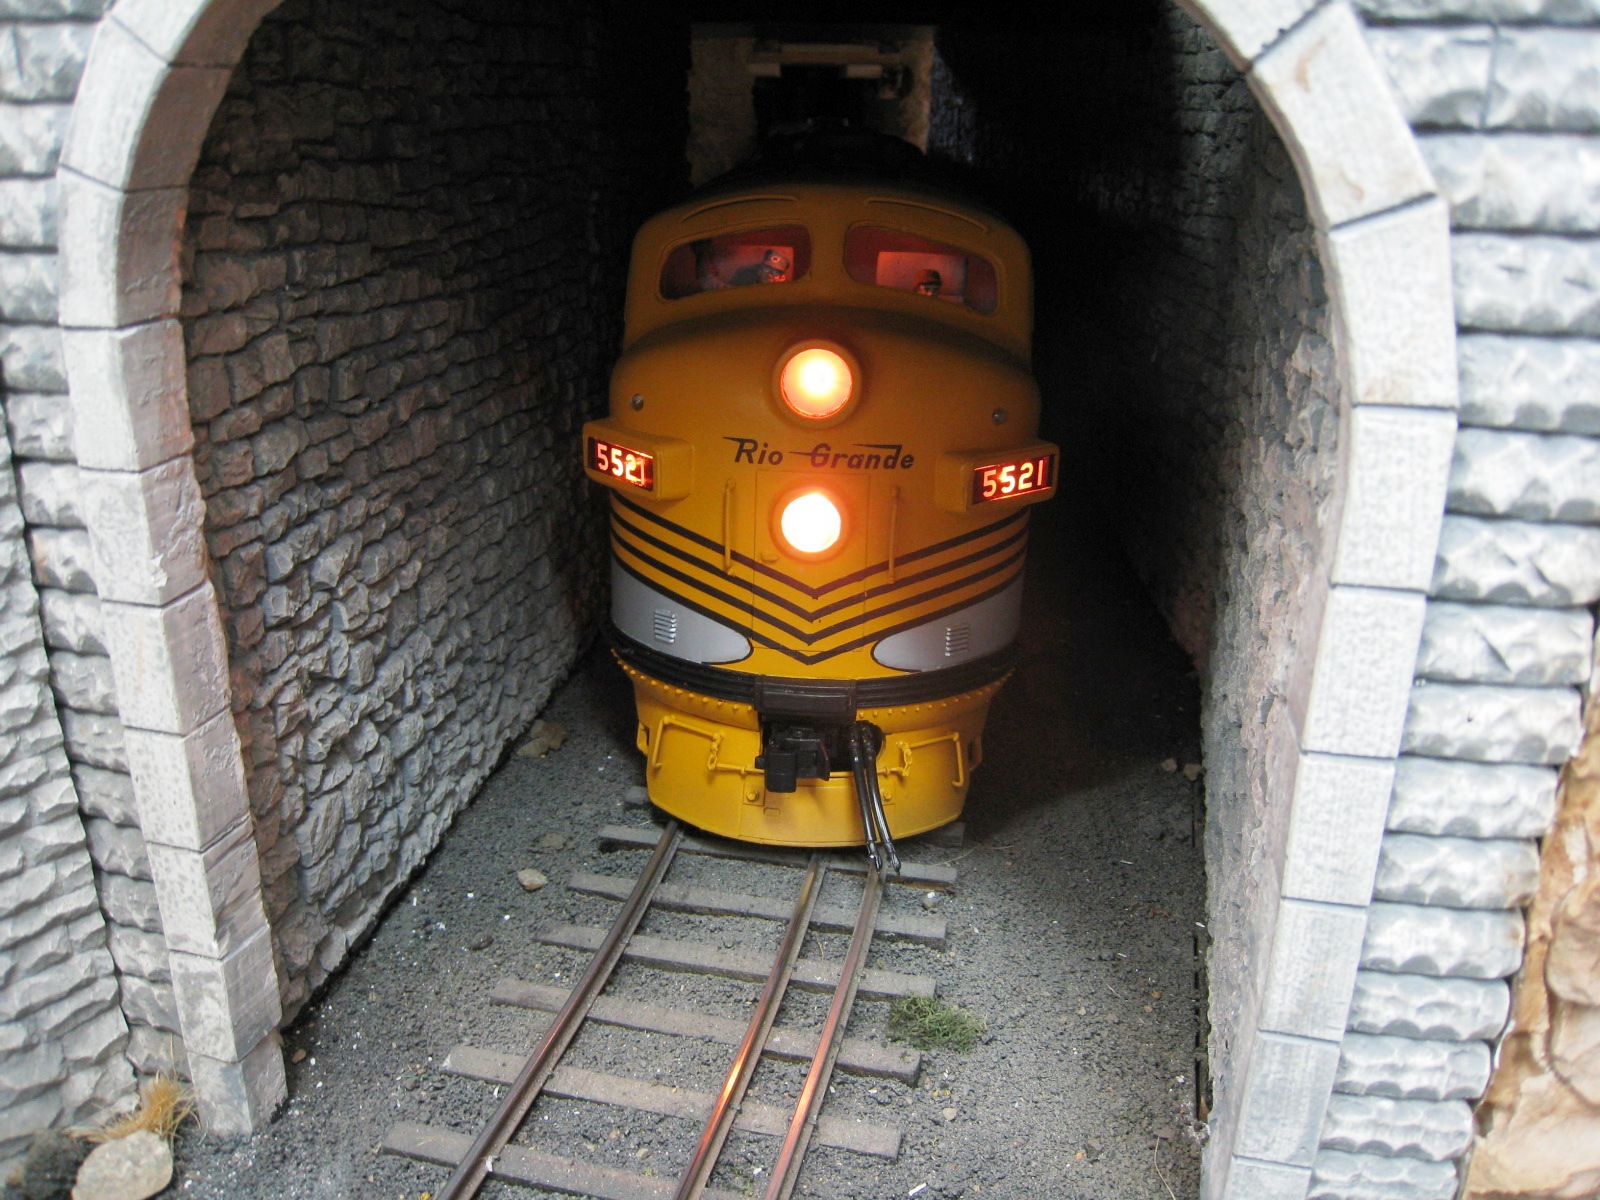
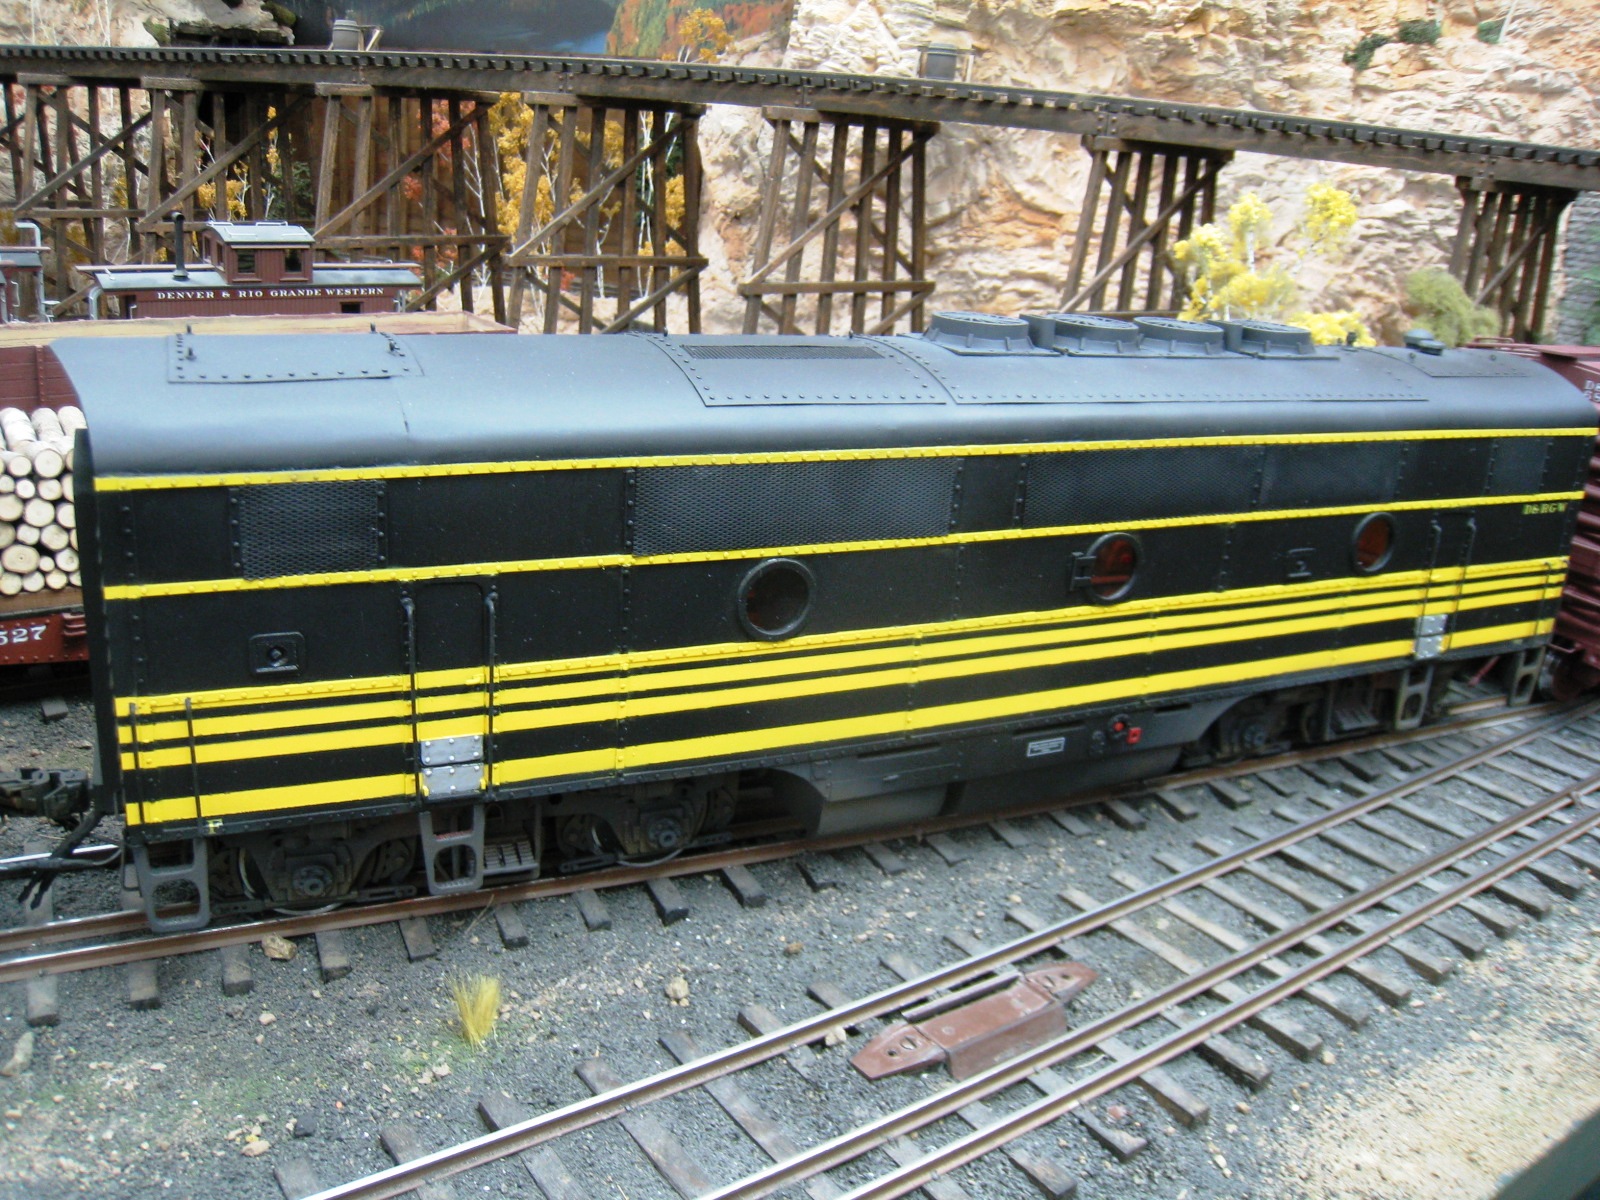
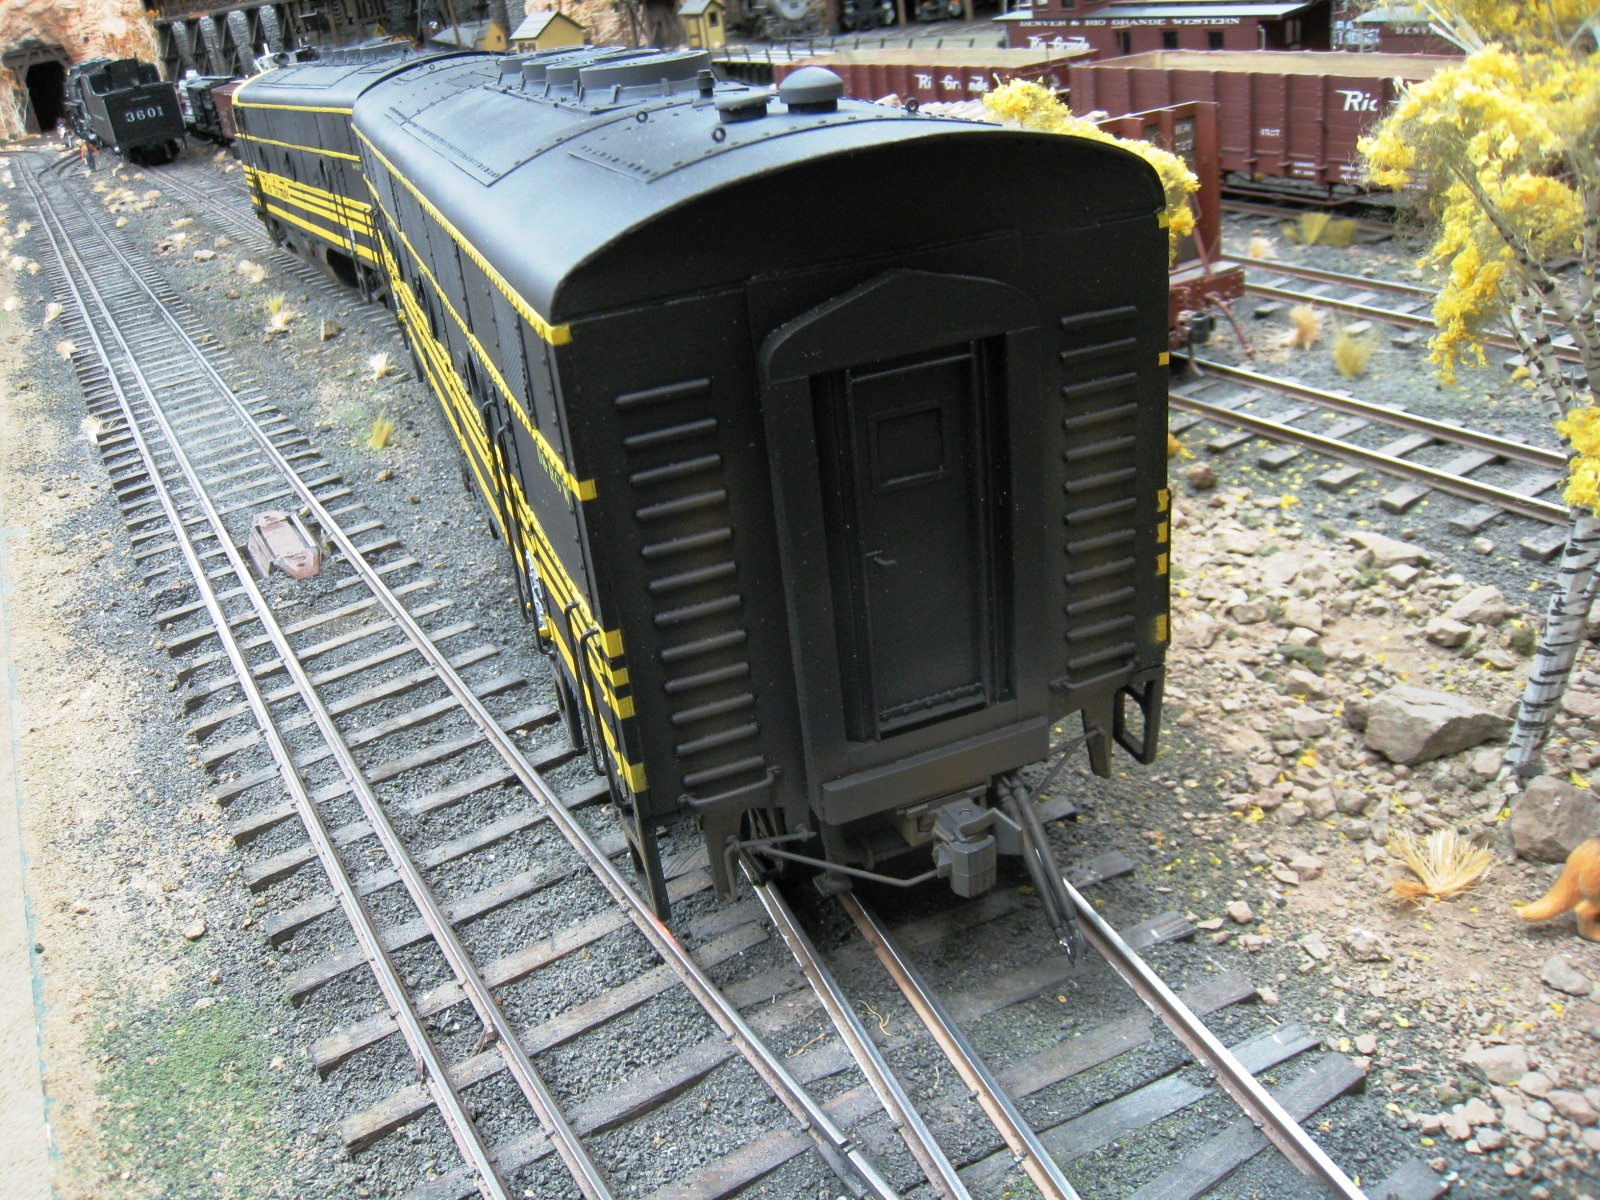
EMD F3A & B Phase I Units(2007-2009) With their bulldog snout and classic good looks, the EMD series of F-units became the ubiquitous symbol of dieselization. The first F units owned by the D&RGW were the FTs, first produced in 1939, and continued through the F9s. D&RGW was one of the last holdouts for the passenger hauling F units on a class I railroad, some of them lasting well past the Amtrak era on the D&RGW's Ski Train. Unlike the L-131 2-8-8-2s and M-68 4-8-4s that they replaced, the F units live on in museums and on tourist railroads throughout the country. A few sojourn on in shortline service. Barry's F unit is not the first to be built in Gauge 3. Both the Fairplex Railroad and Mr. George Brown had them as part of their extensive Gauge 3 empires (see the Gauge 3 History page). Barry's, however, weil be the first plastic Gauge 3 F unit, more precisely an F3, and it is powered by his own motor blocks using LGB motors, gears and wheels. That work has already begun, and a completed set of motor blocks for his A & B units can be seen below. Barry has had the assistance of Ward Hammond and his laser cutter in working up the initial set of motor blocks and patterns for the Blomberg type B truck side frames. And since LGB parts are getting very hard to come by, Barry commissioned Dennis Mashburn of KD Castings in Abilene, Texas to reproduce the metal tyres in white bronze which LGB applies to their locomotive drivers (see pic, second row, left, below). |
||
|
Blomberg Type B Trucks
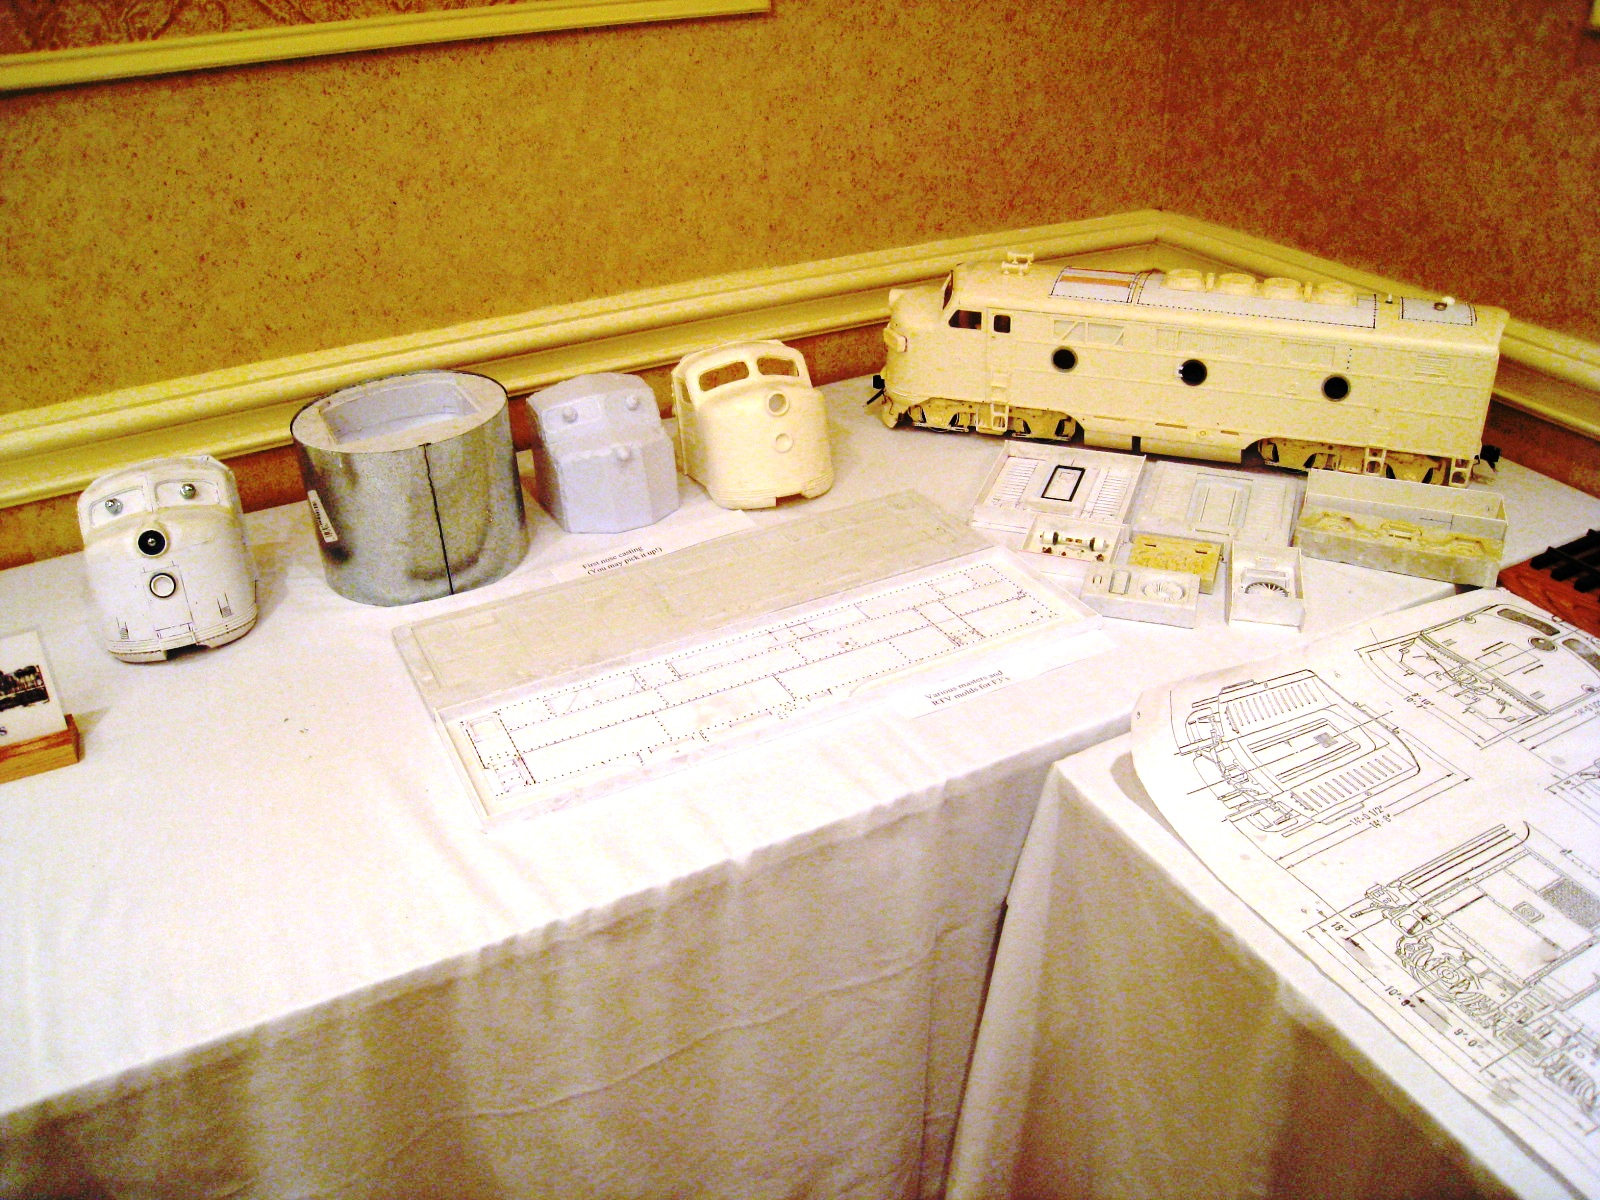
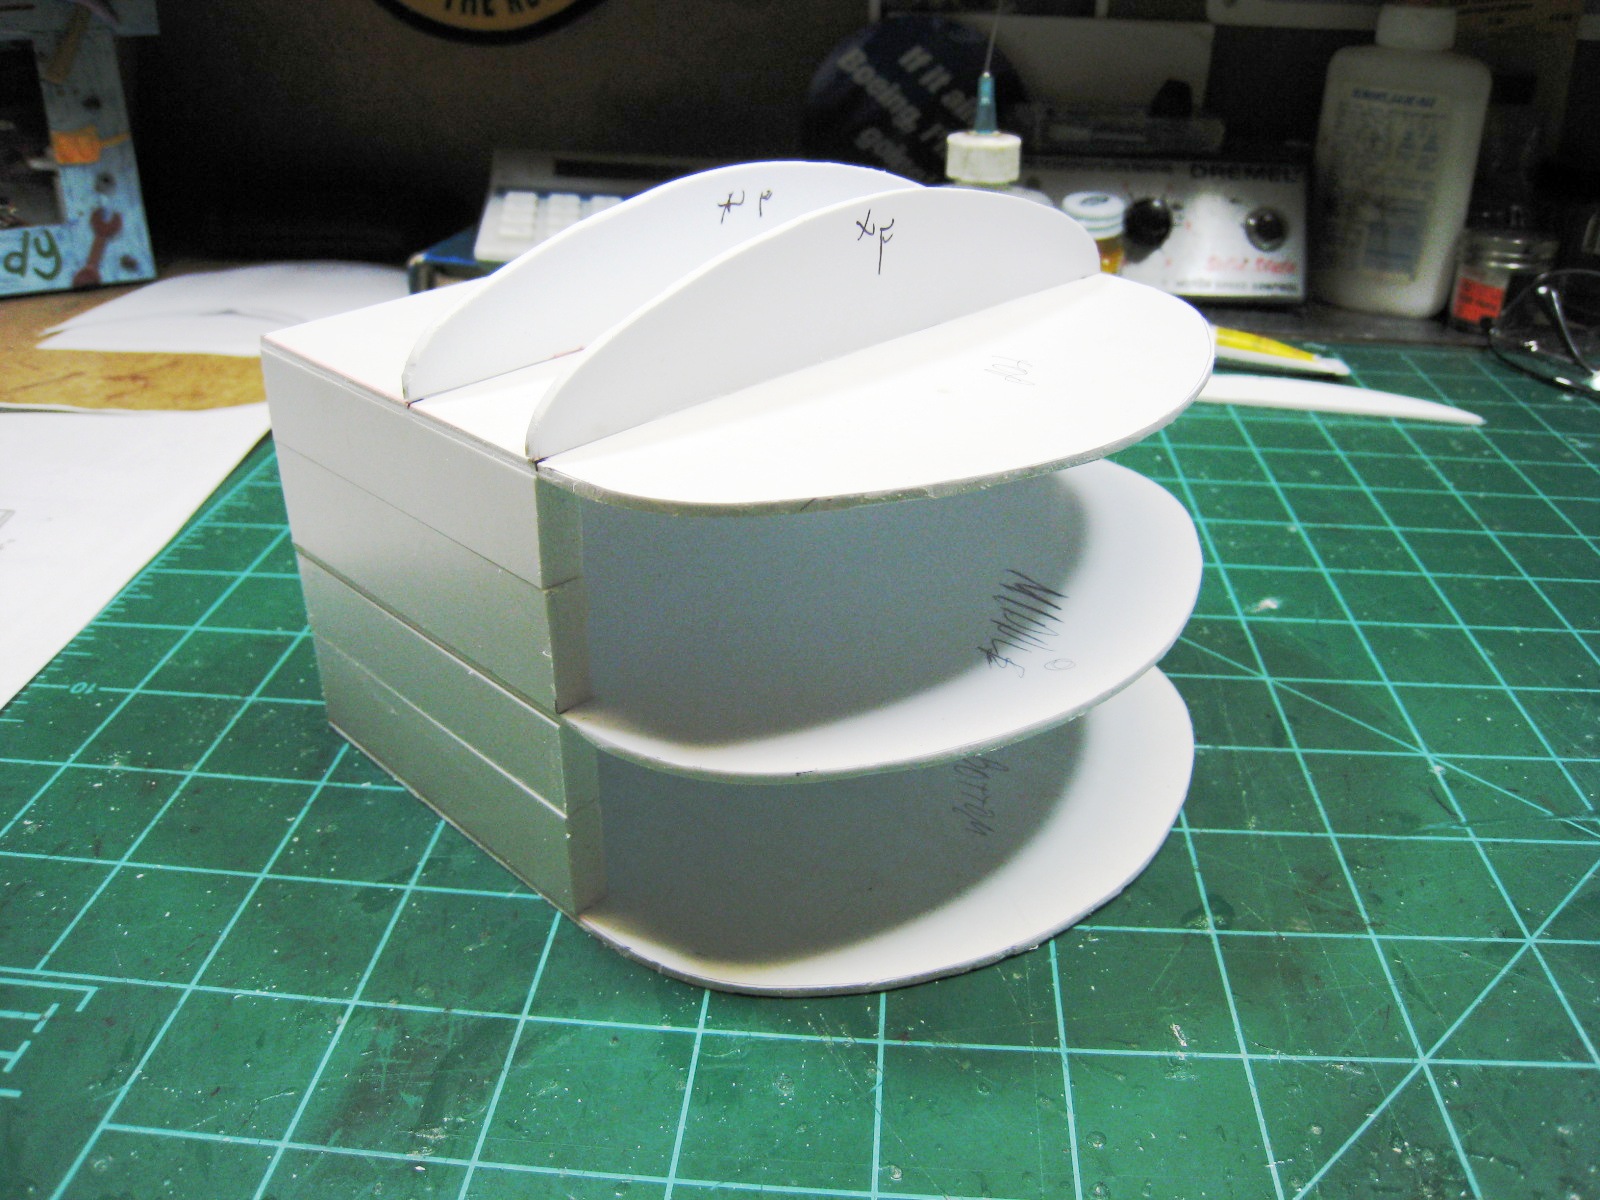
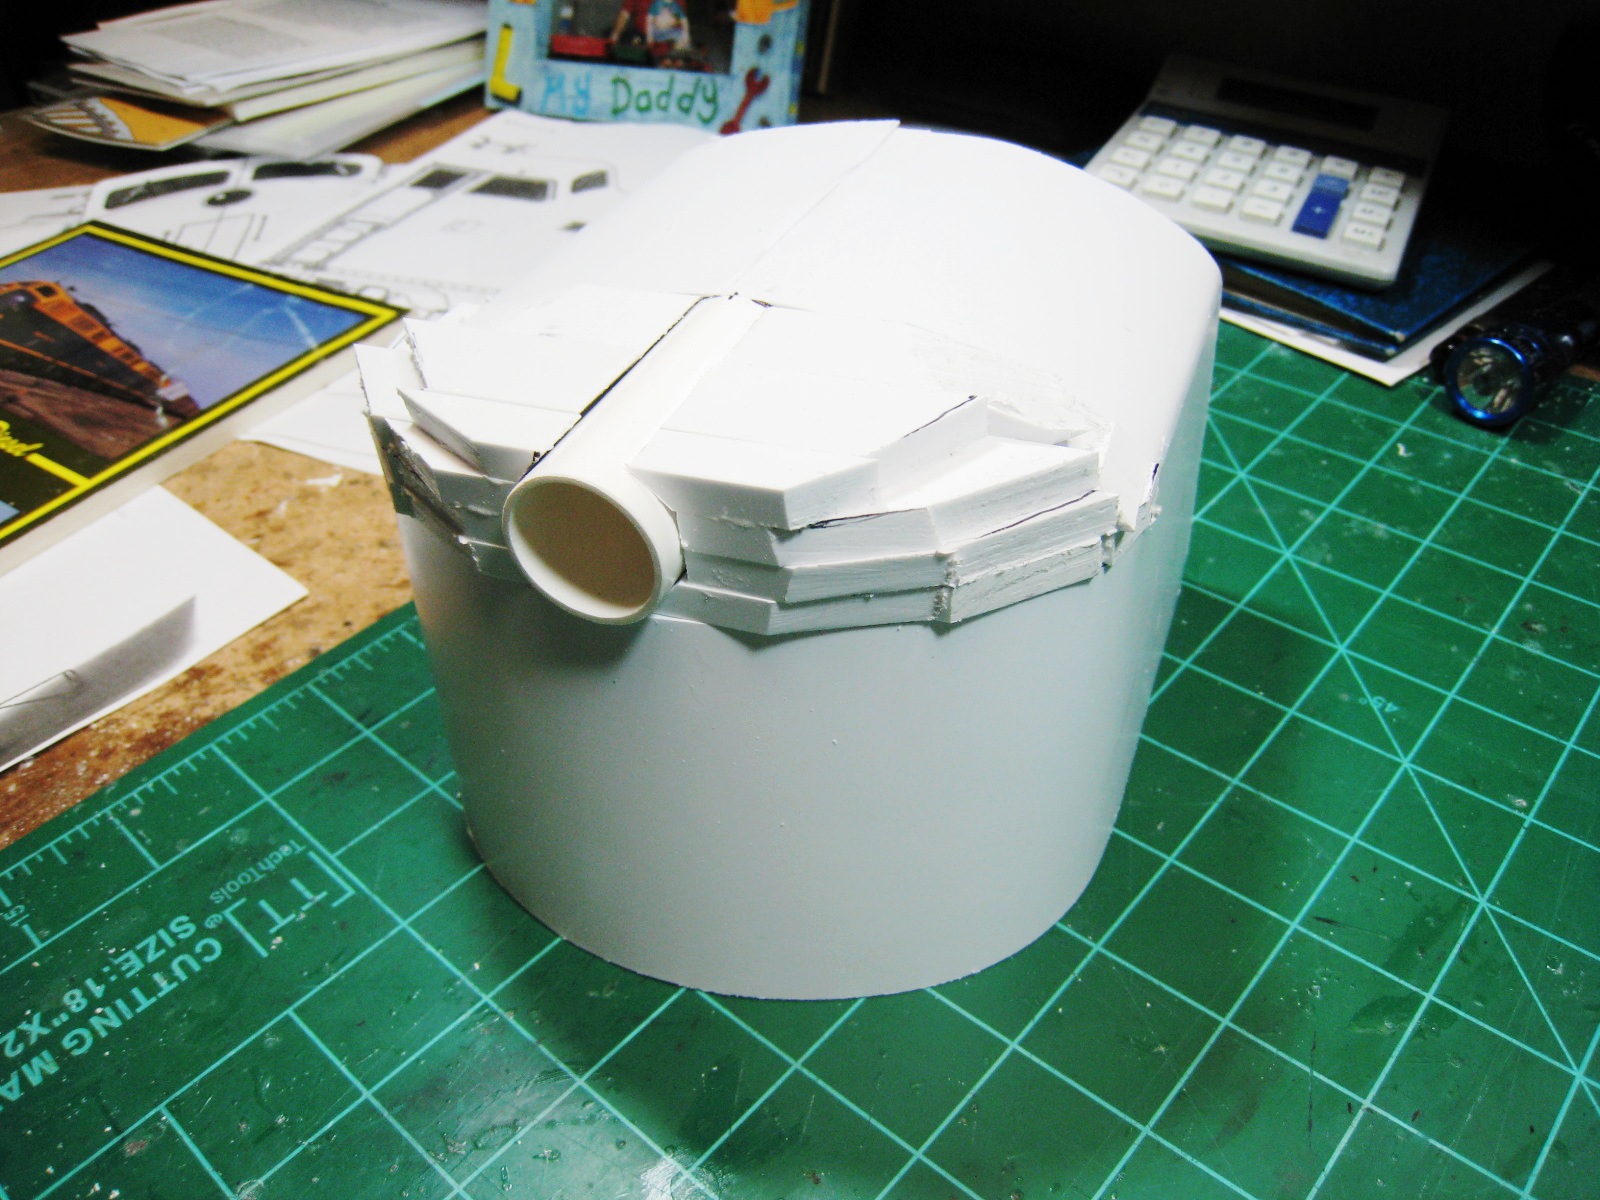
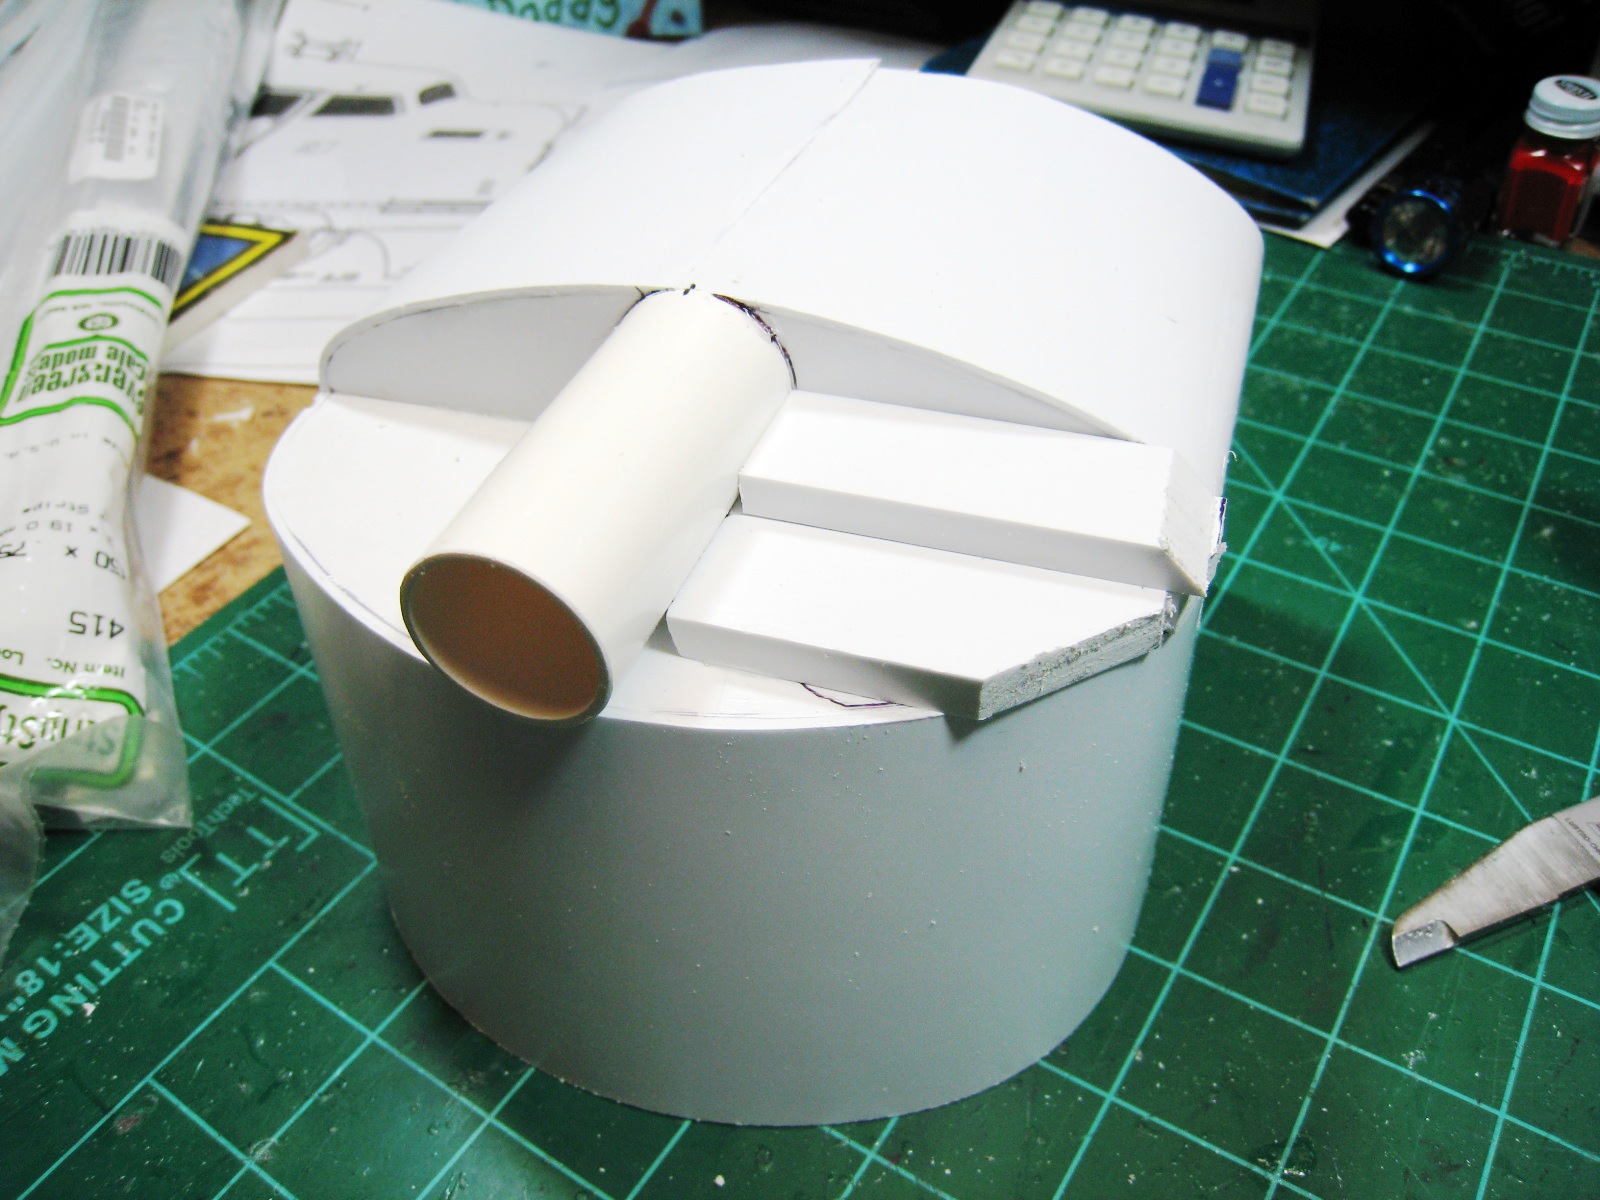
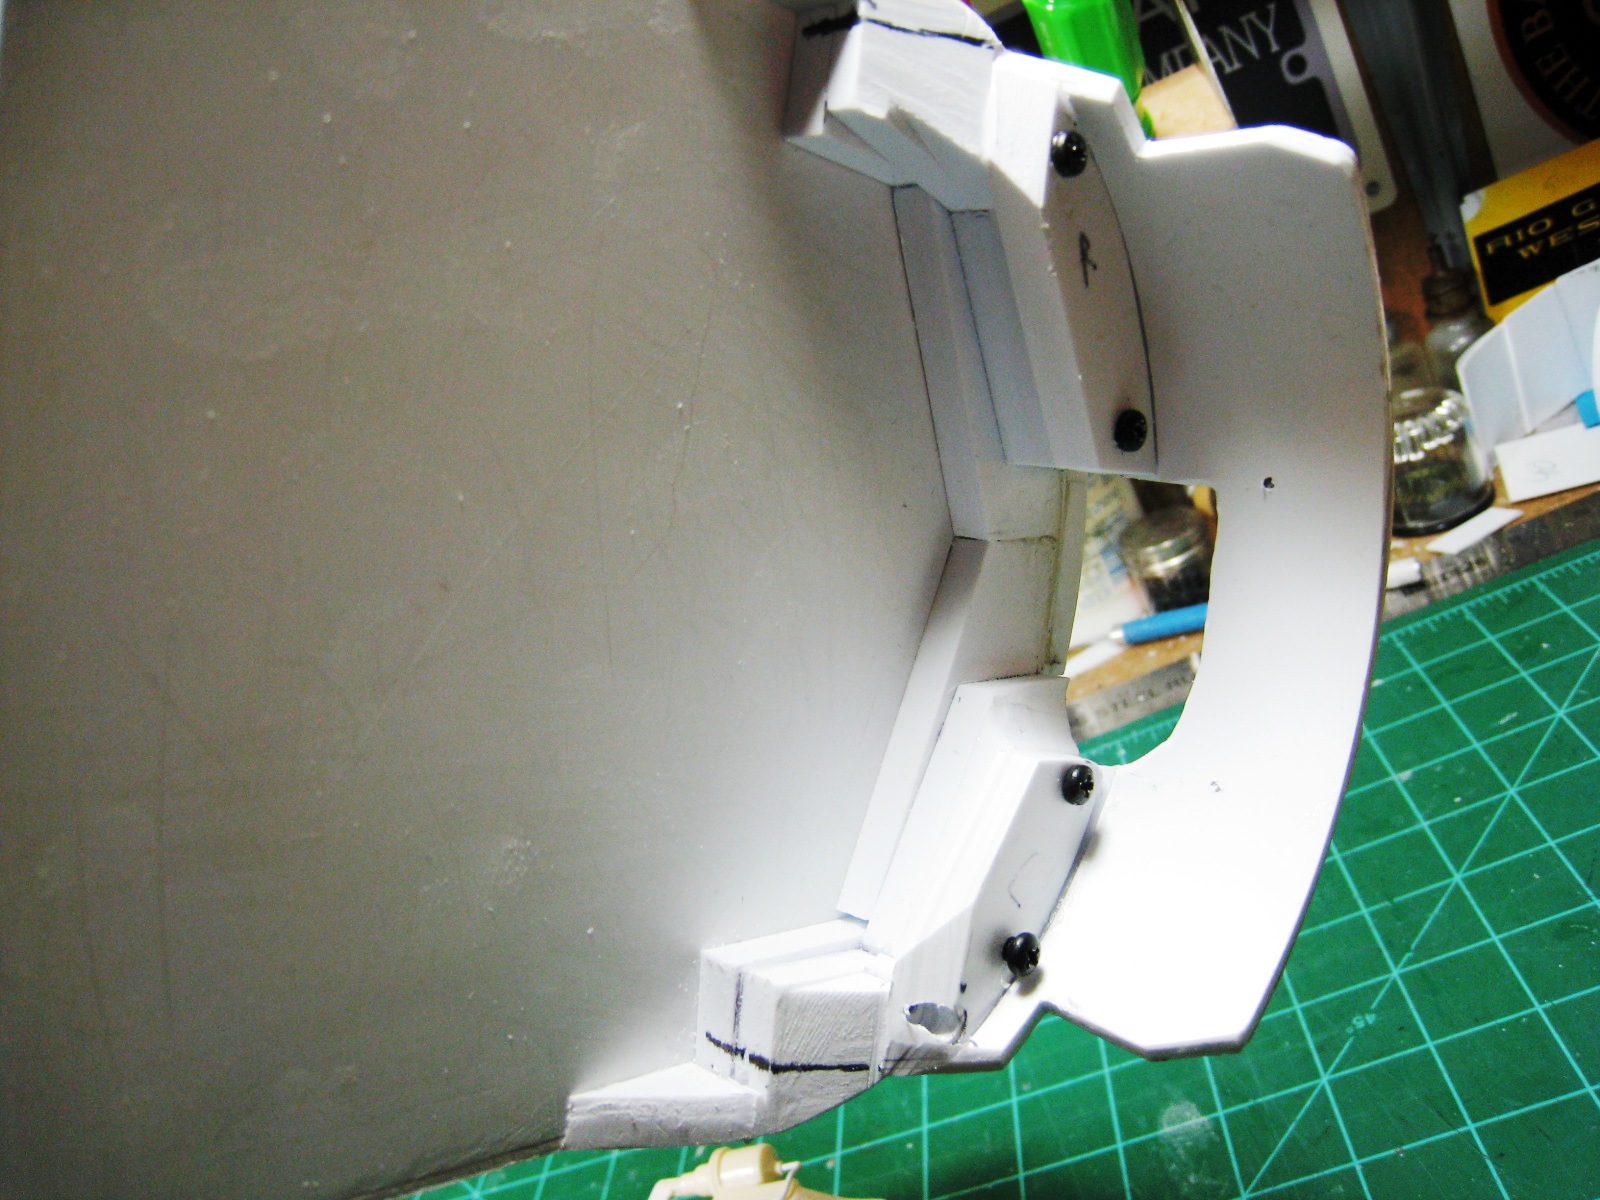
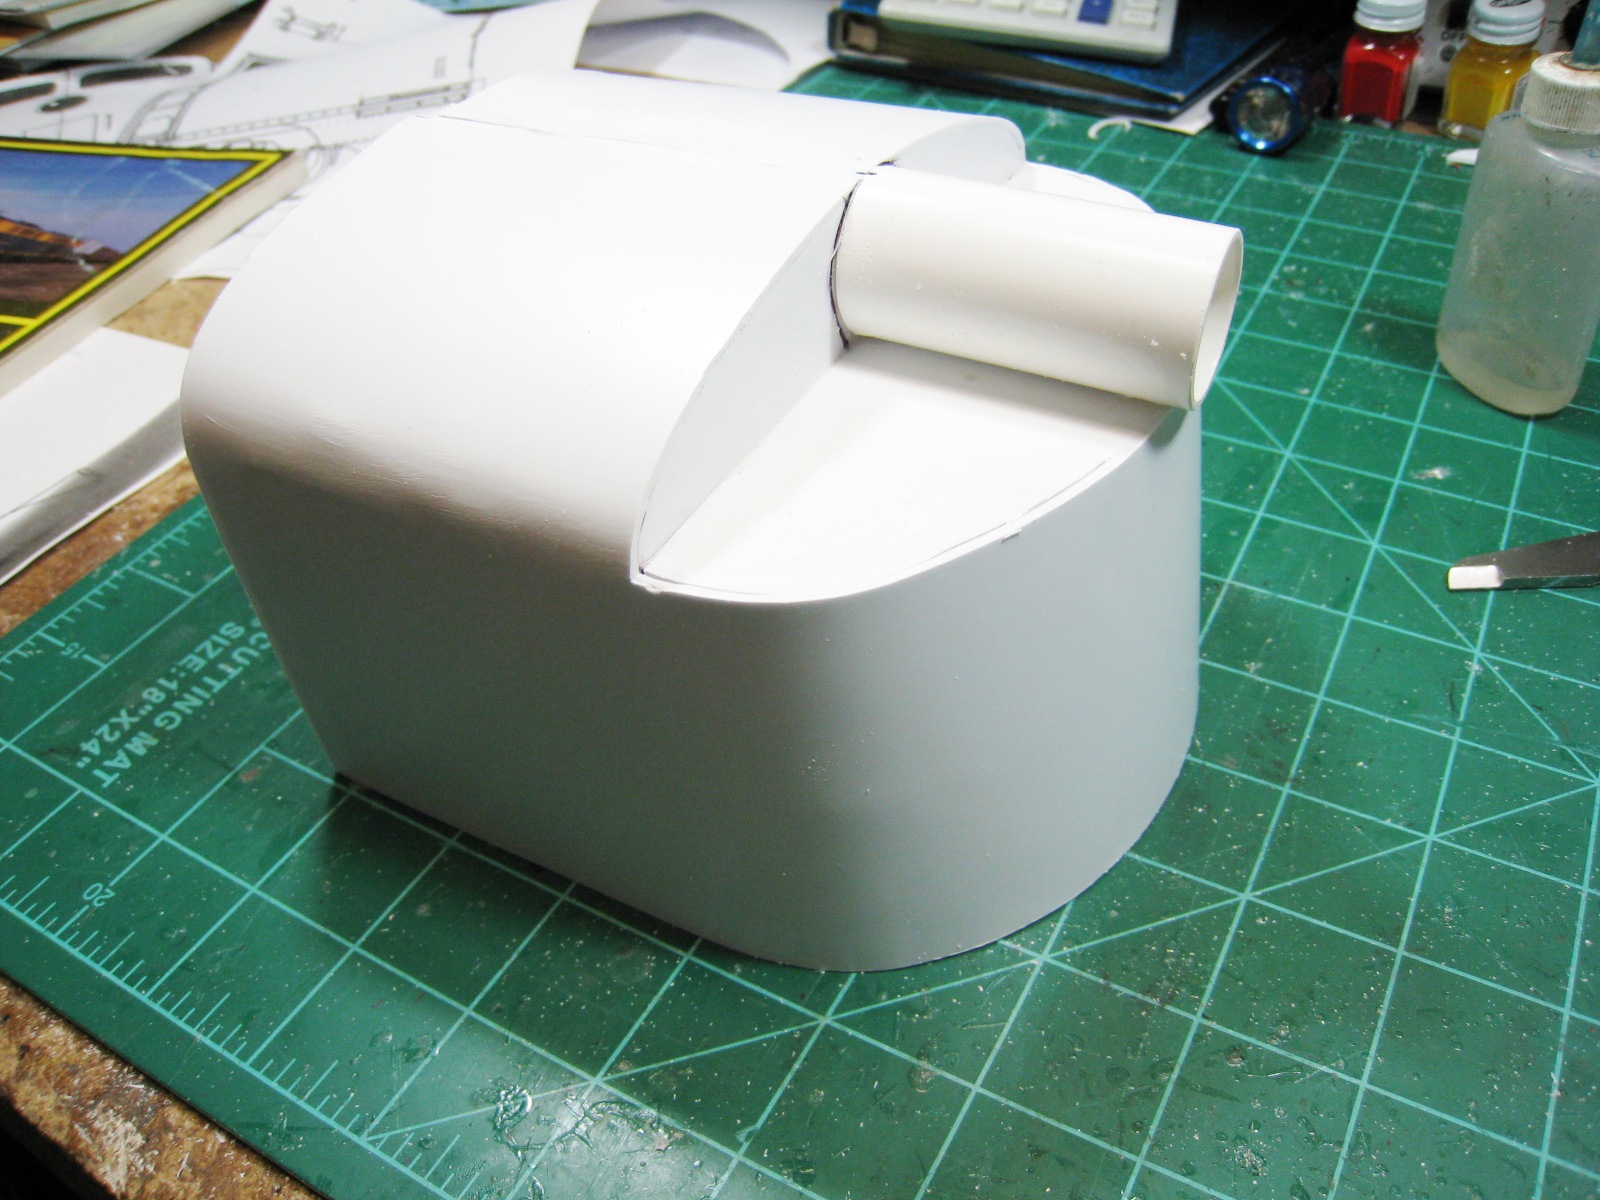
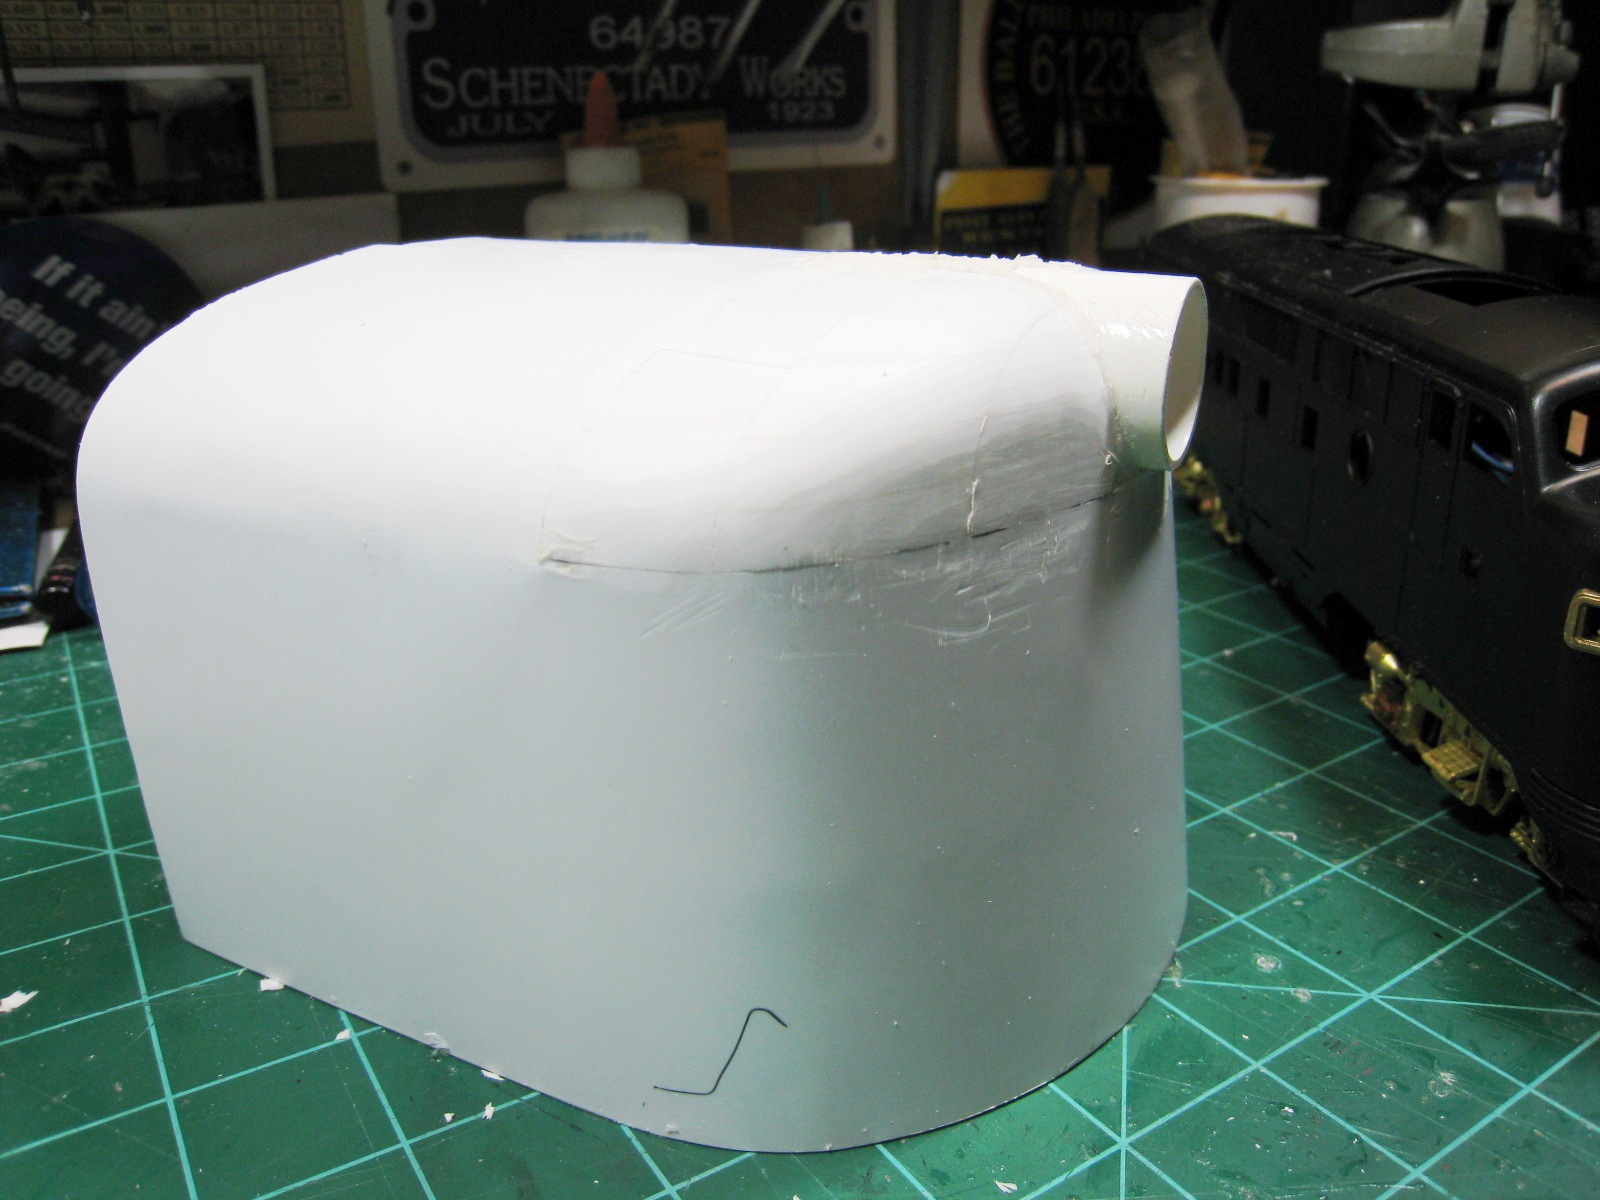
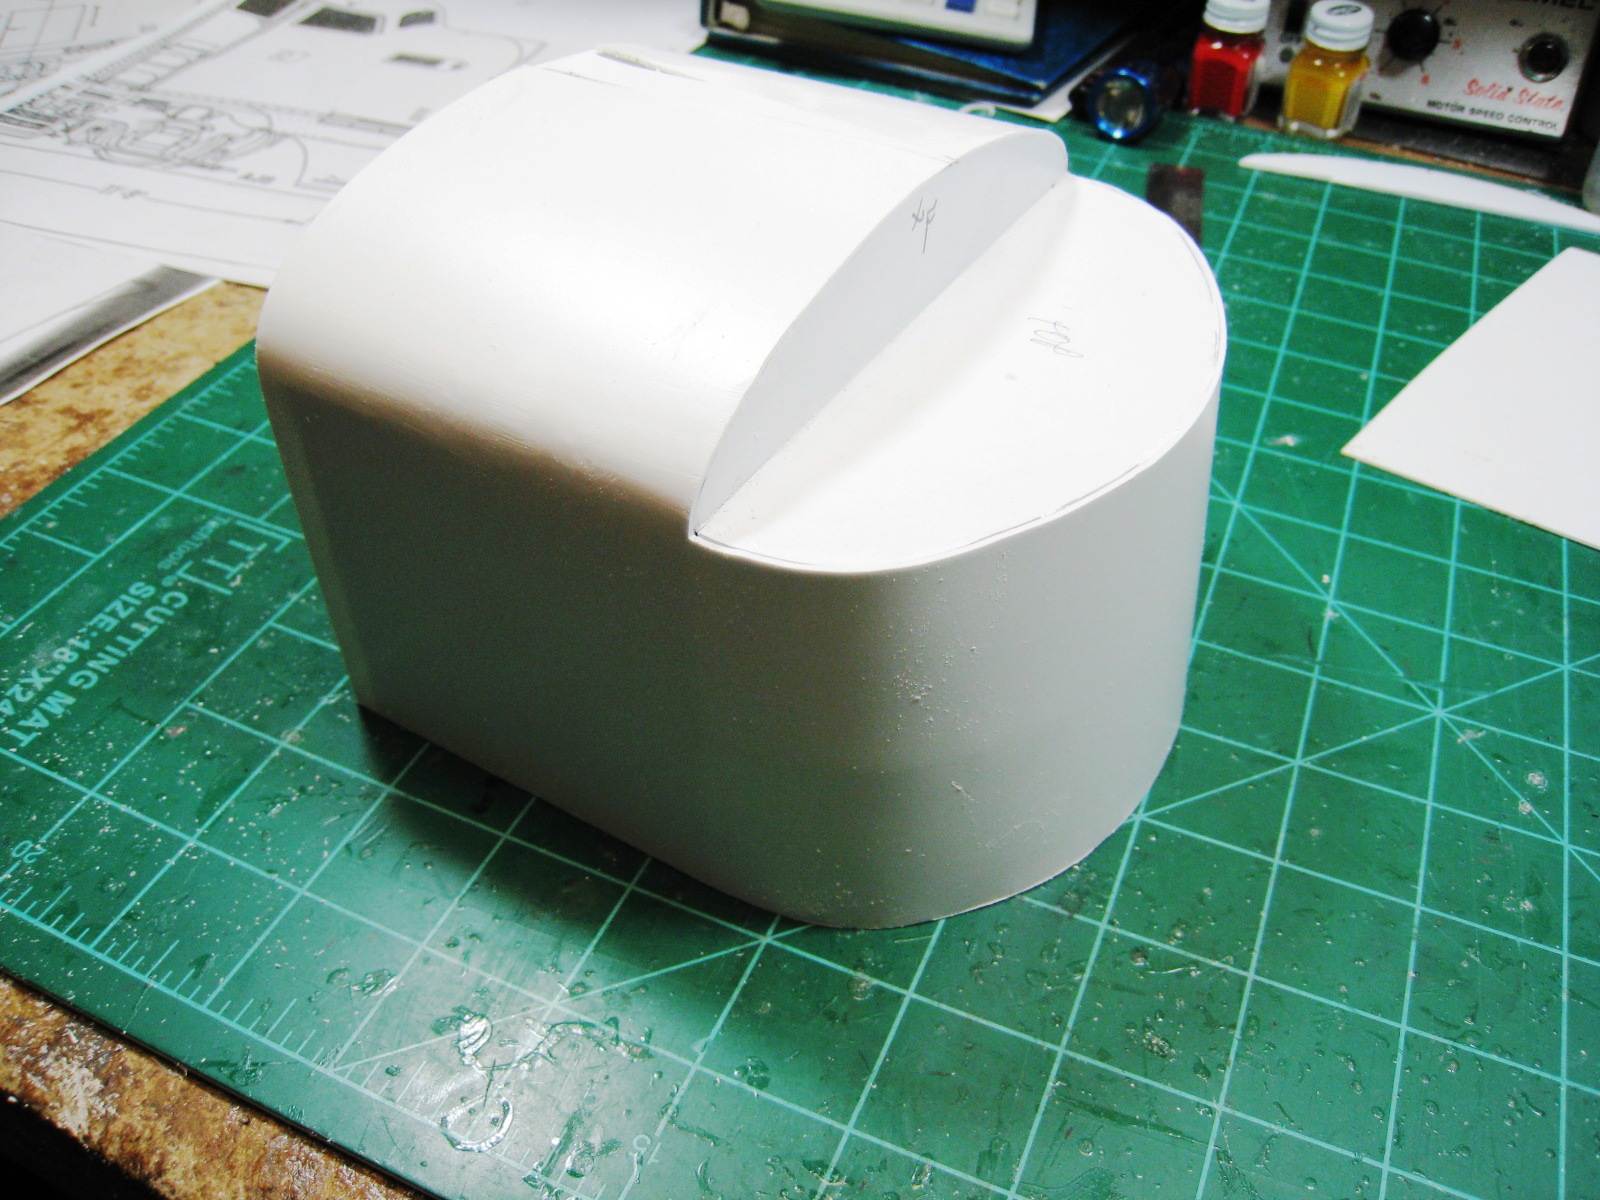
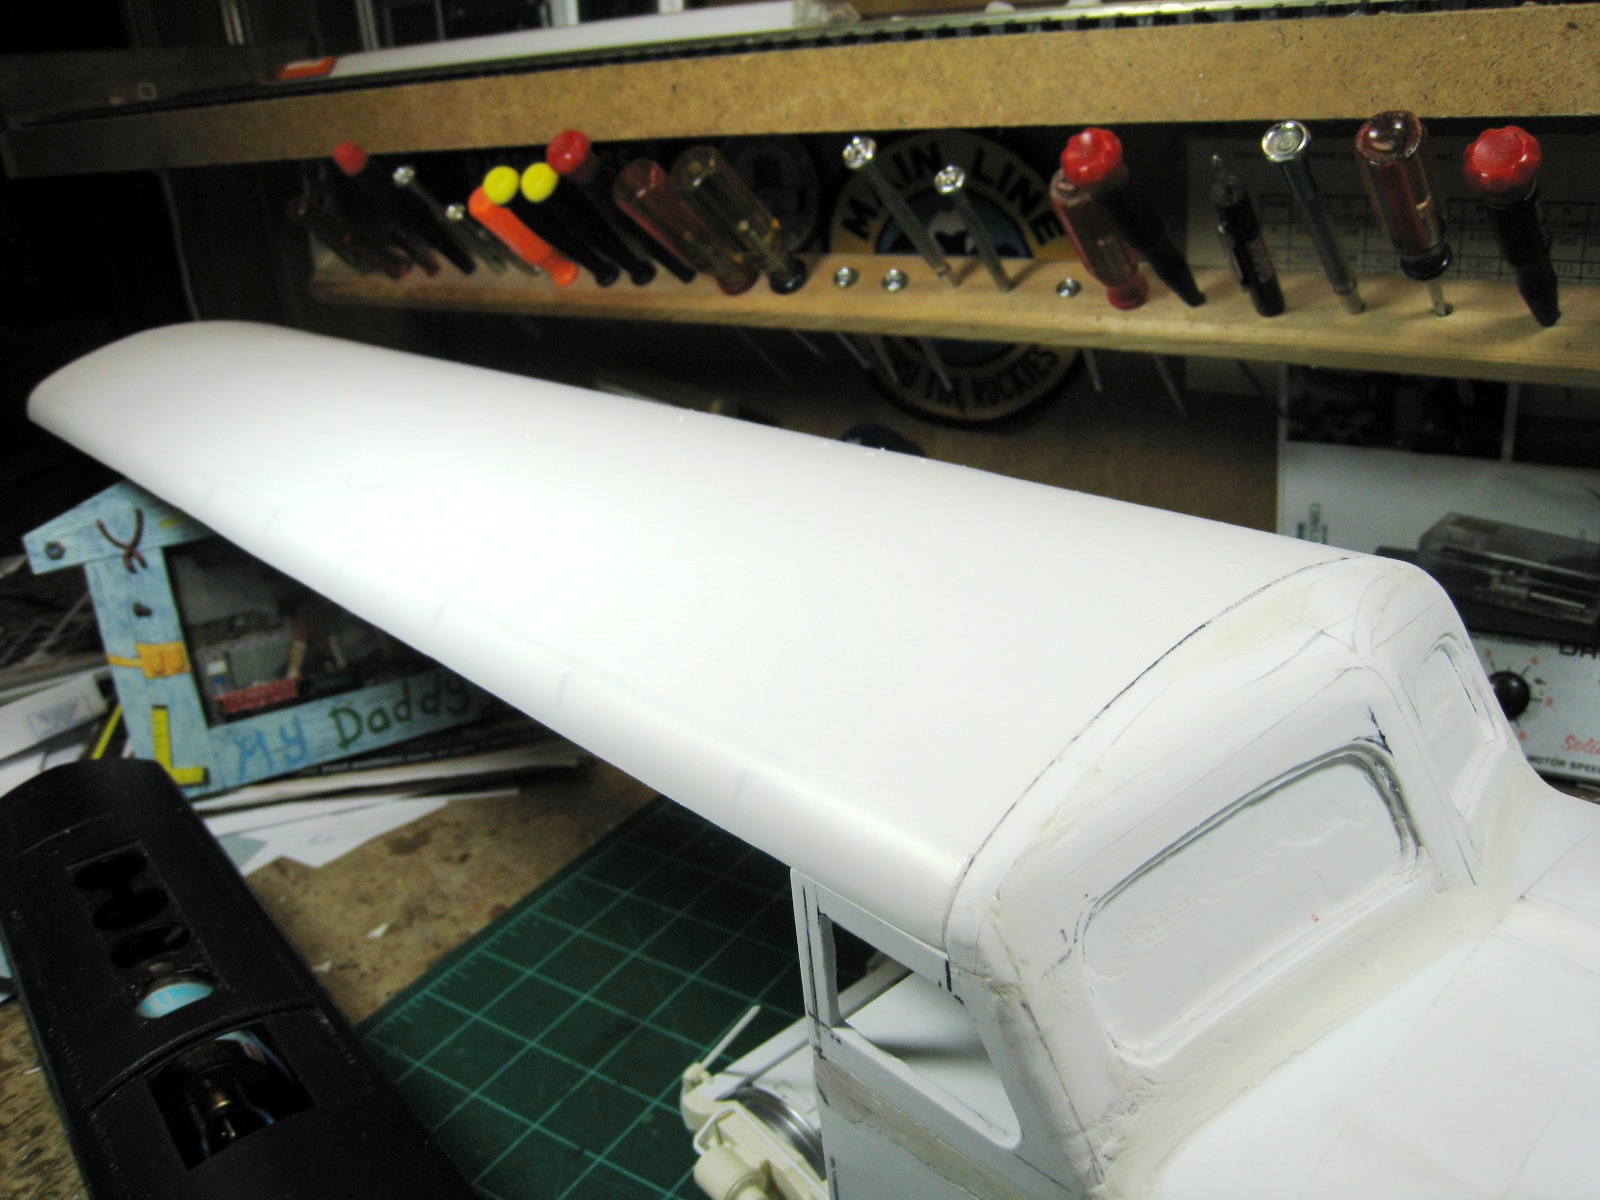
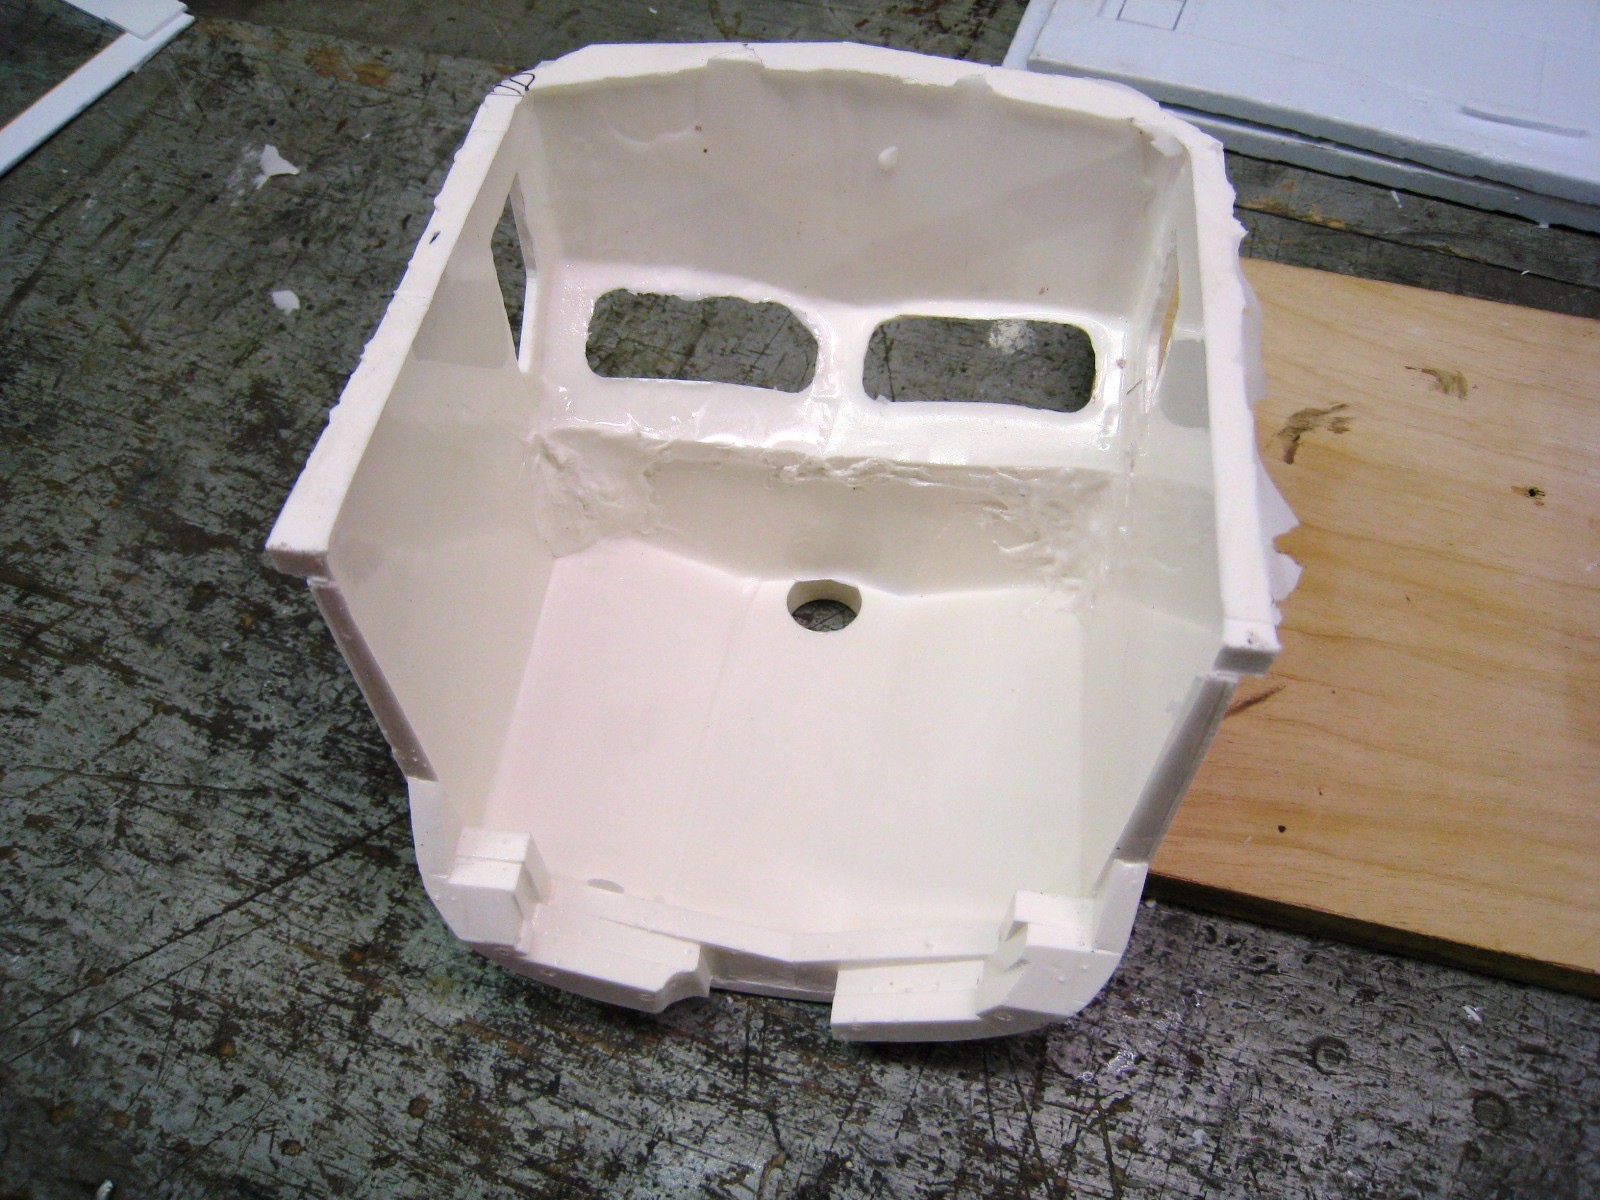
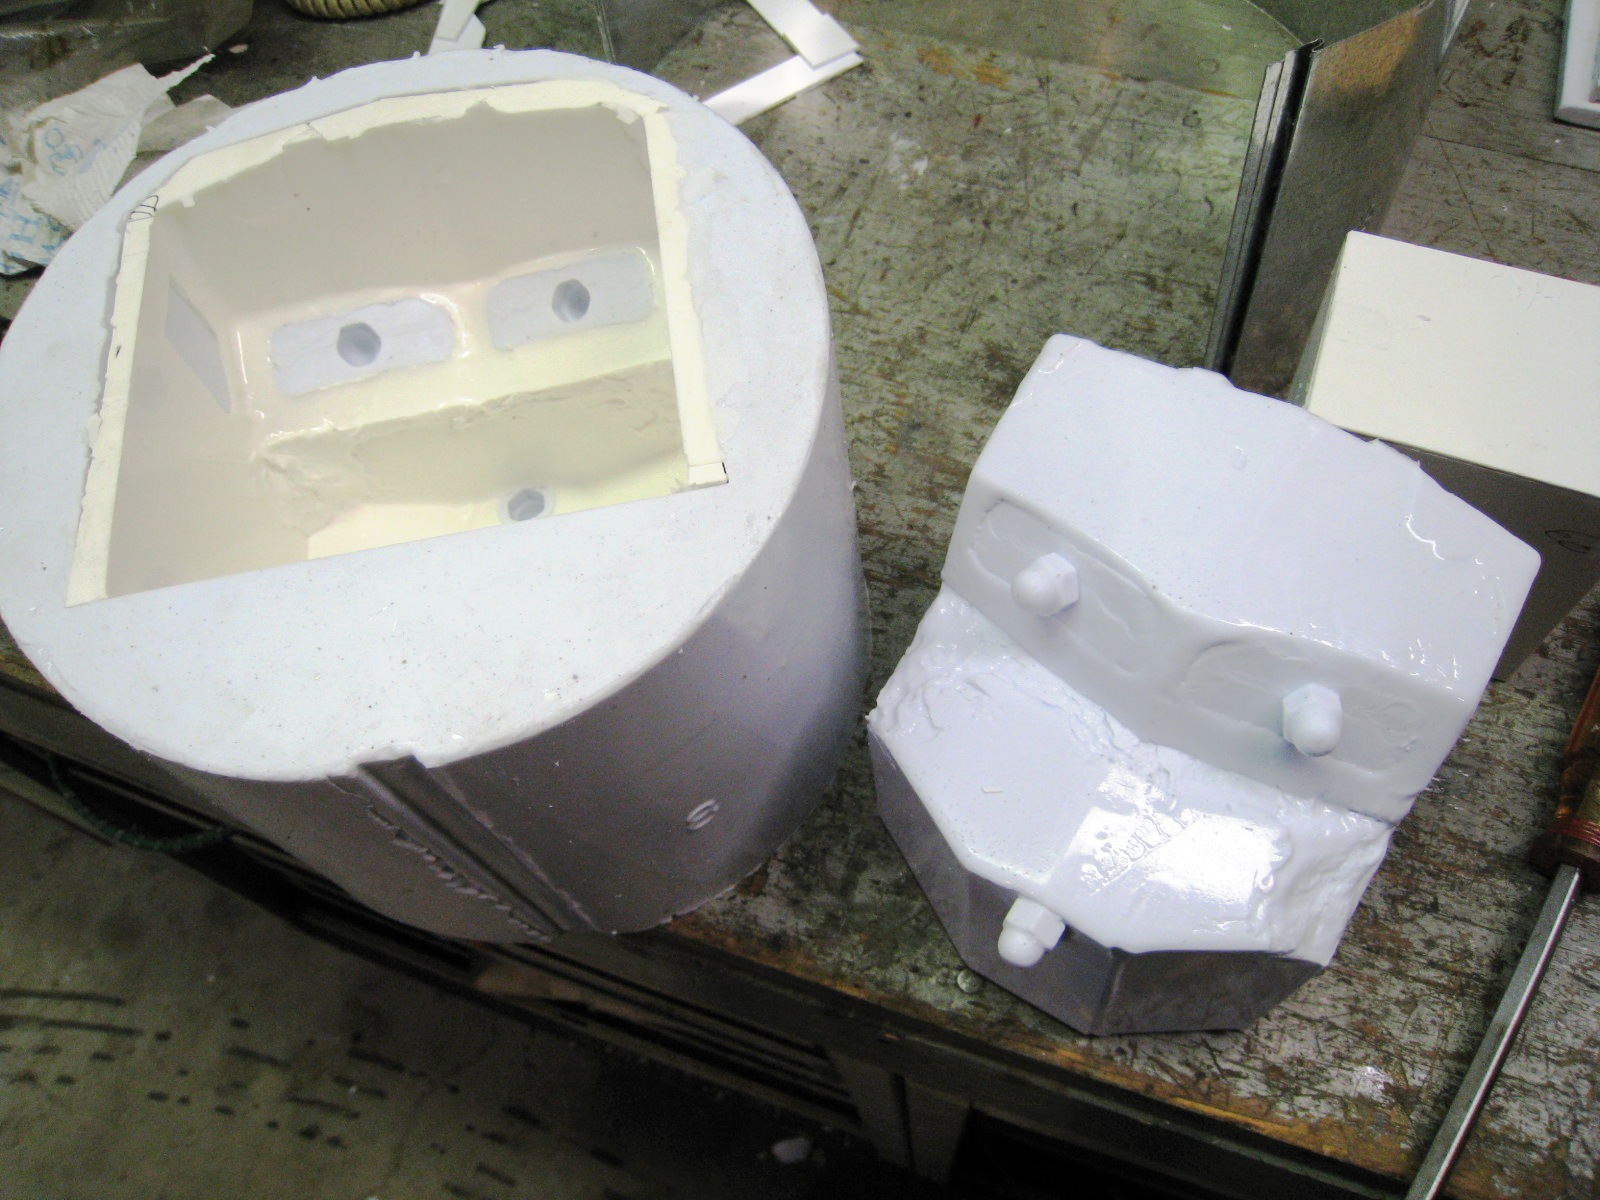
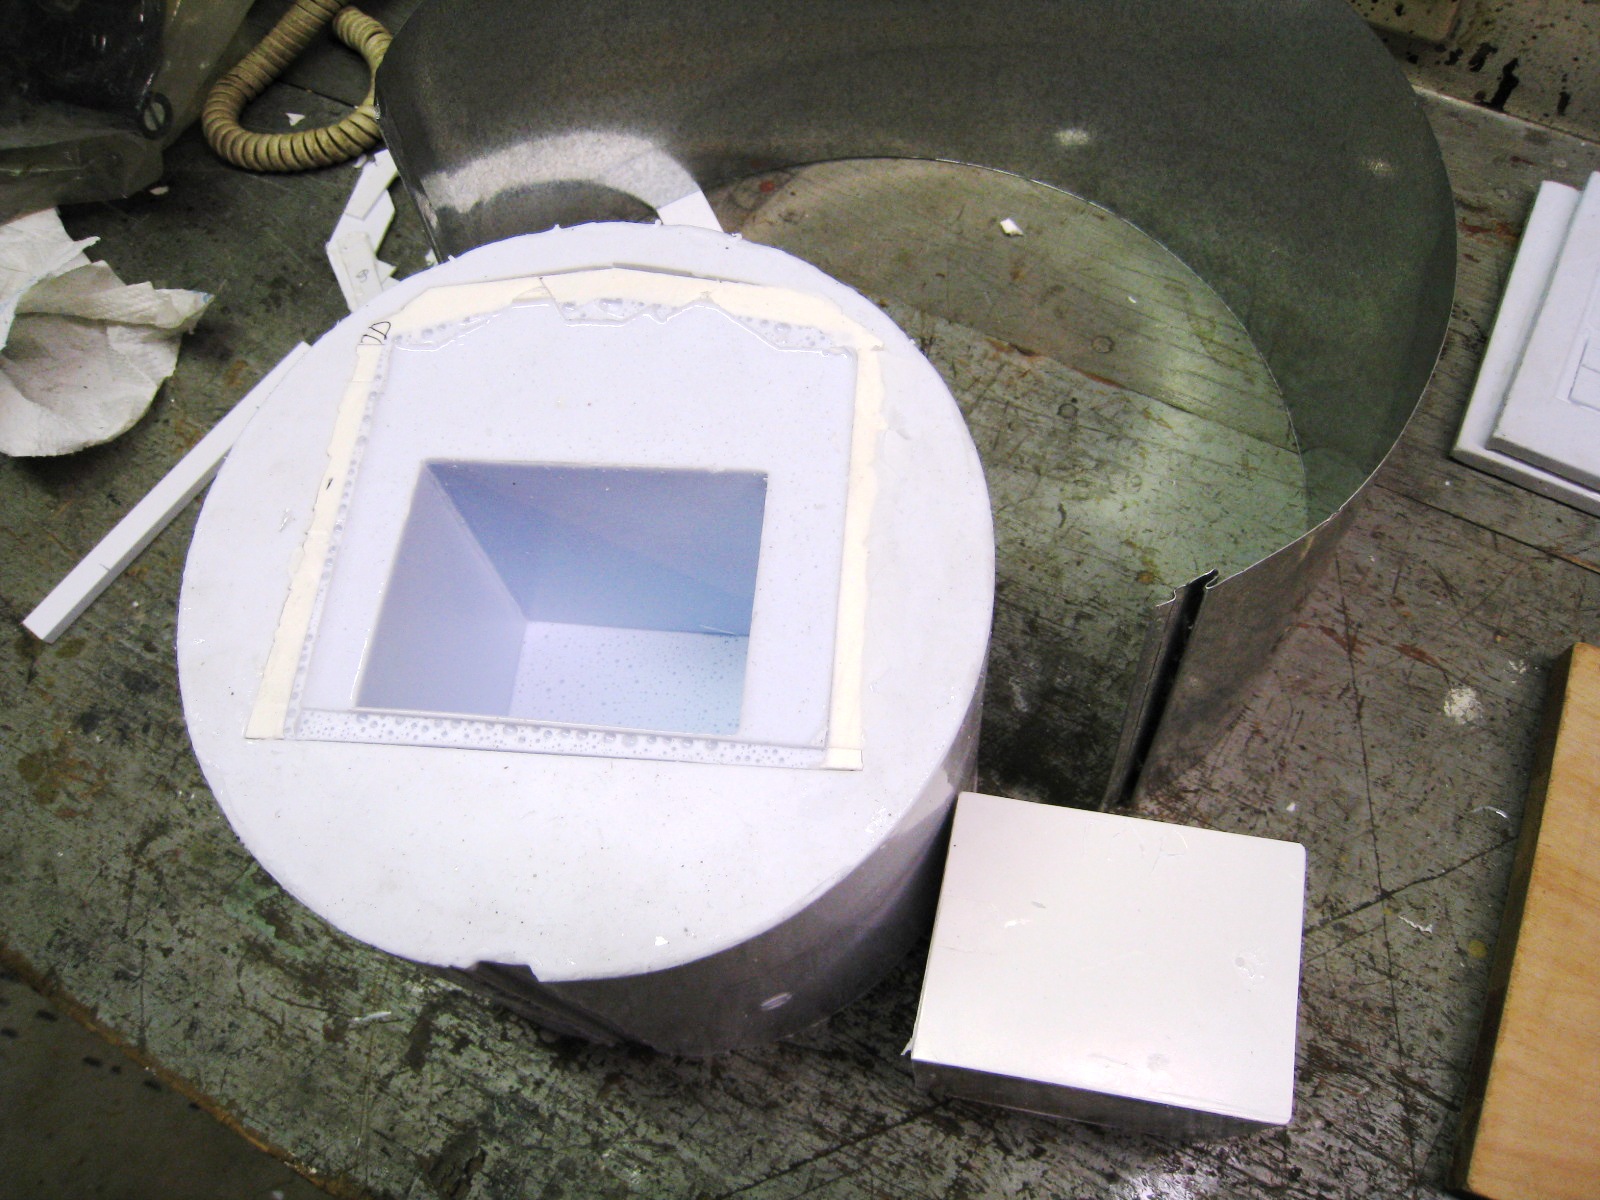
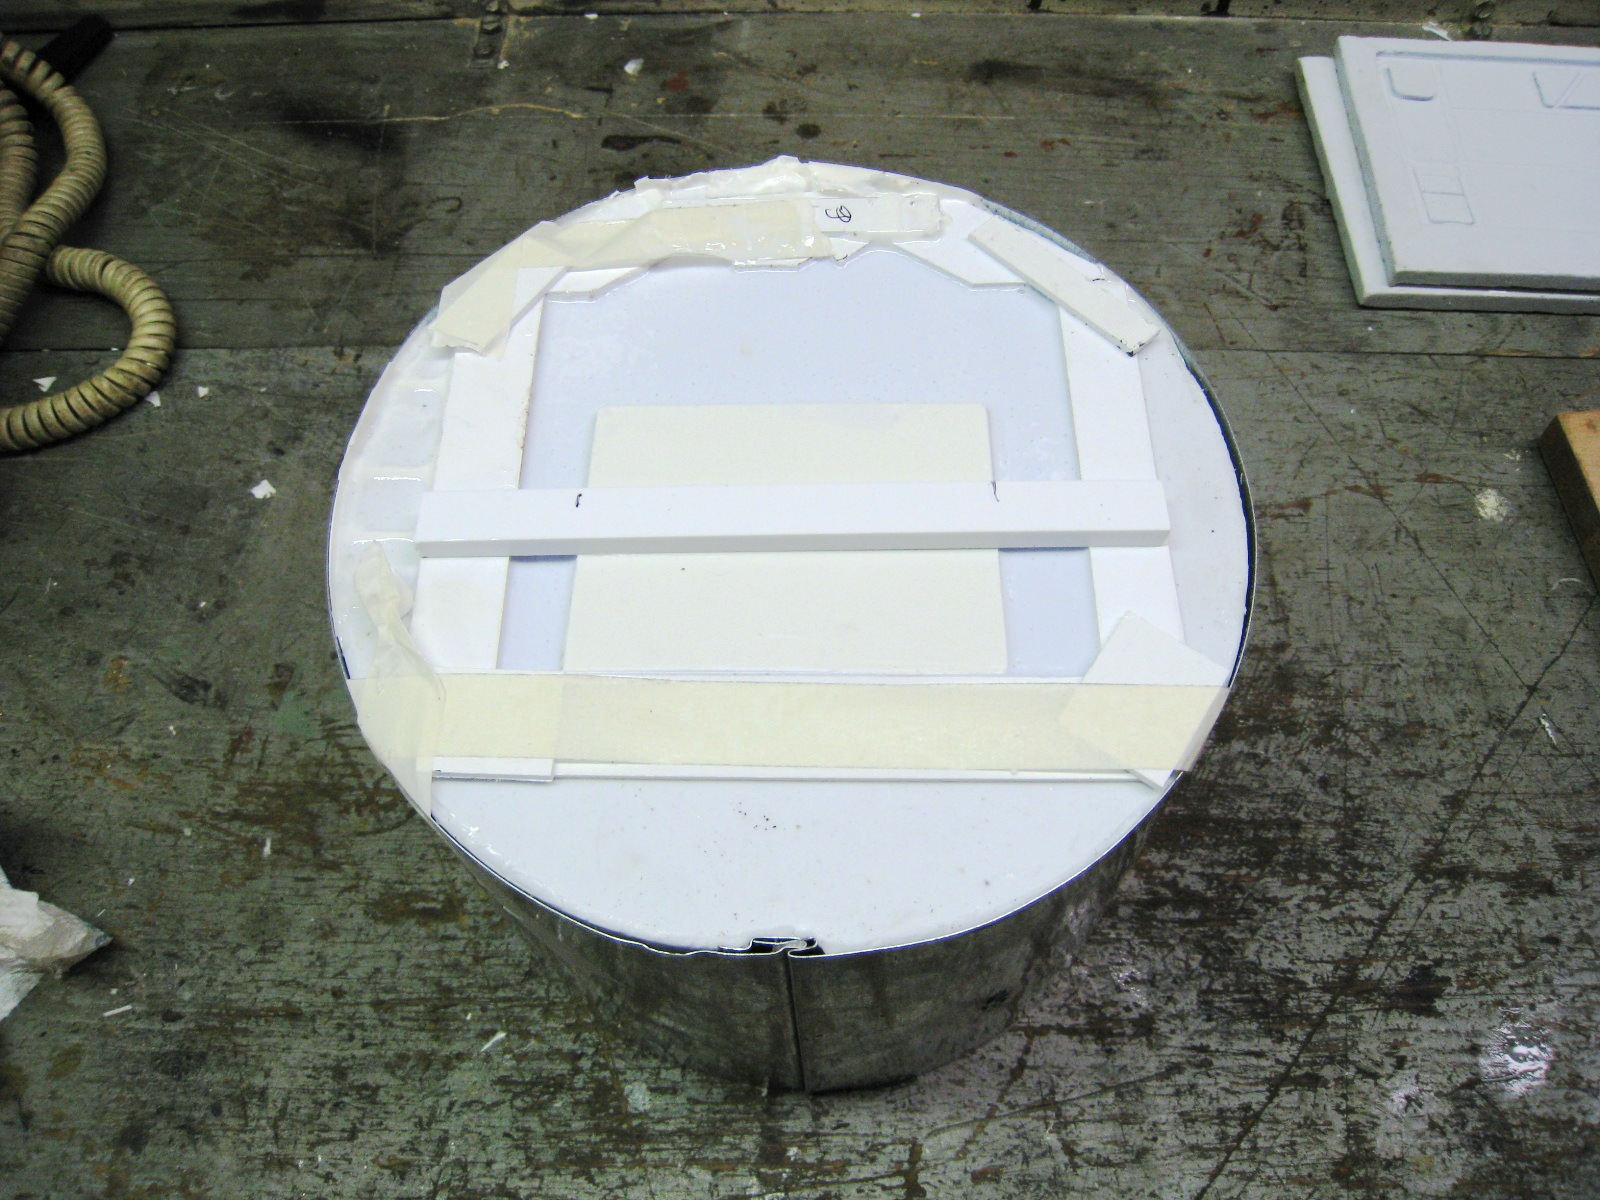
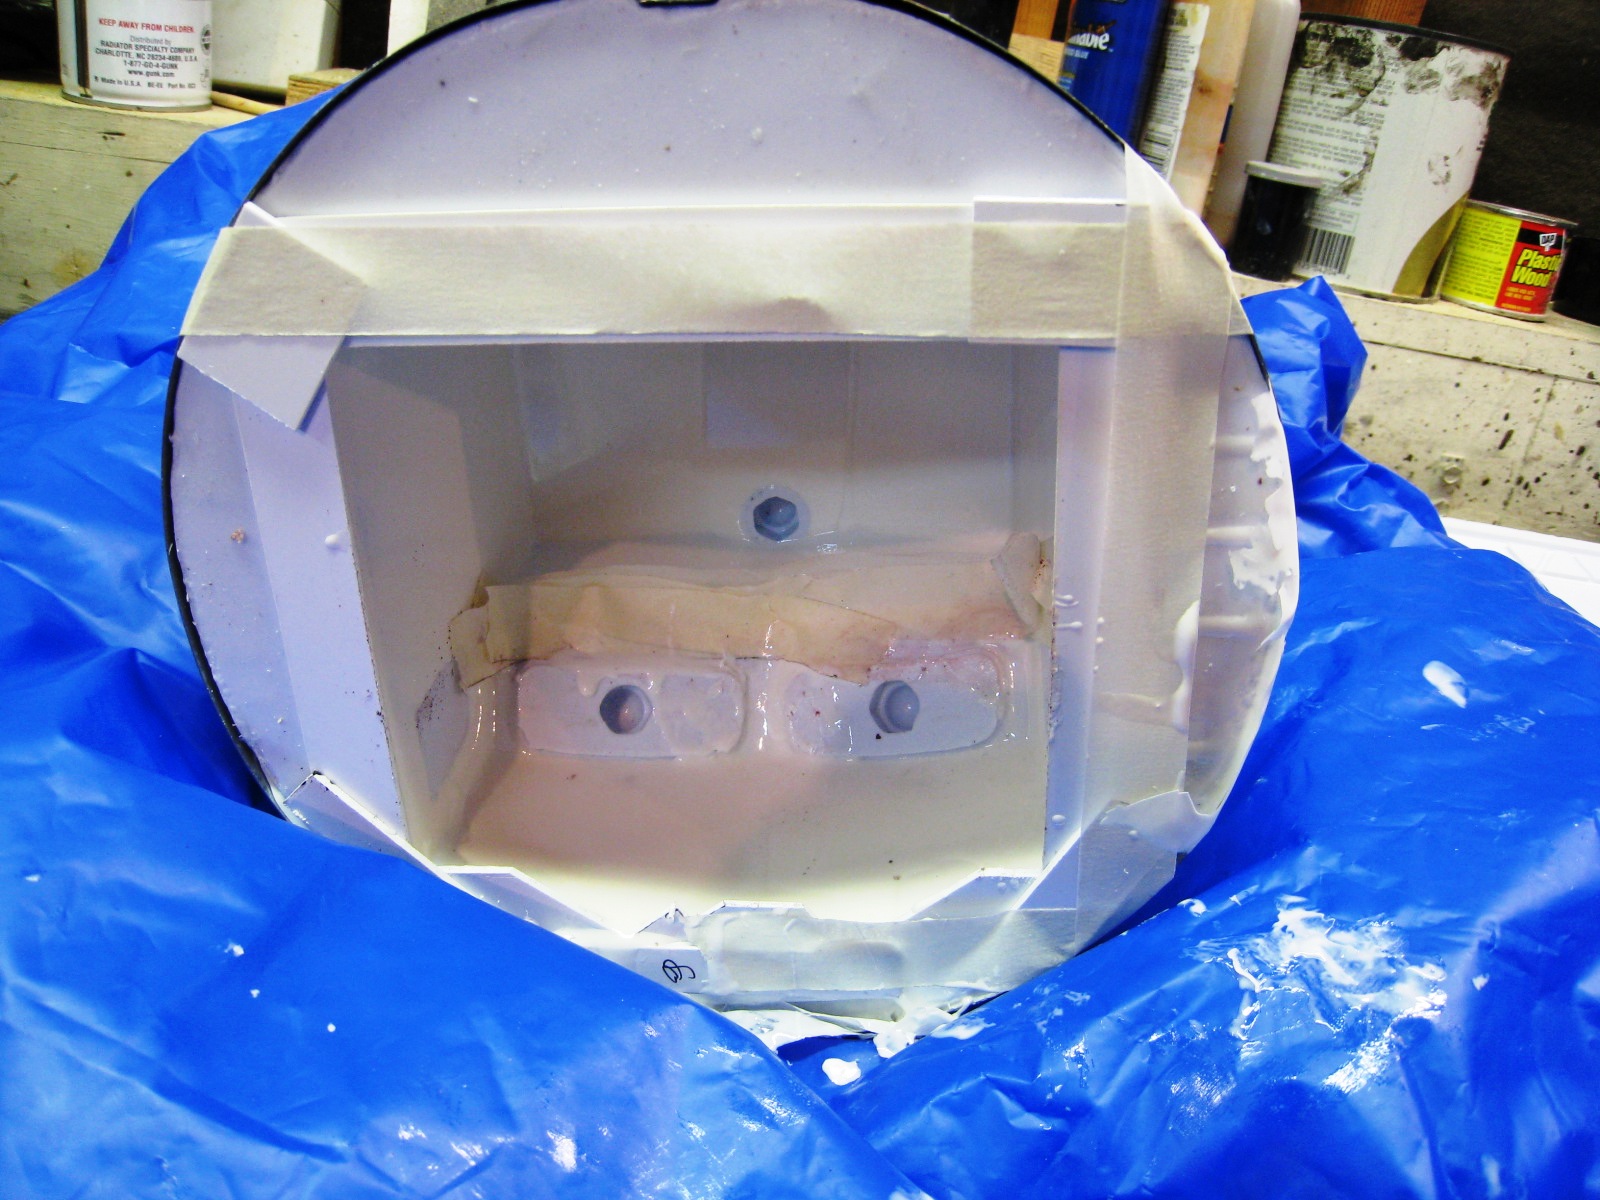
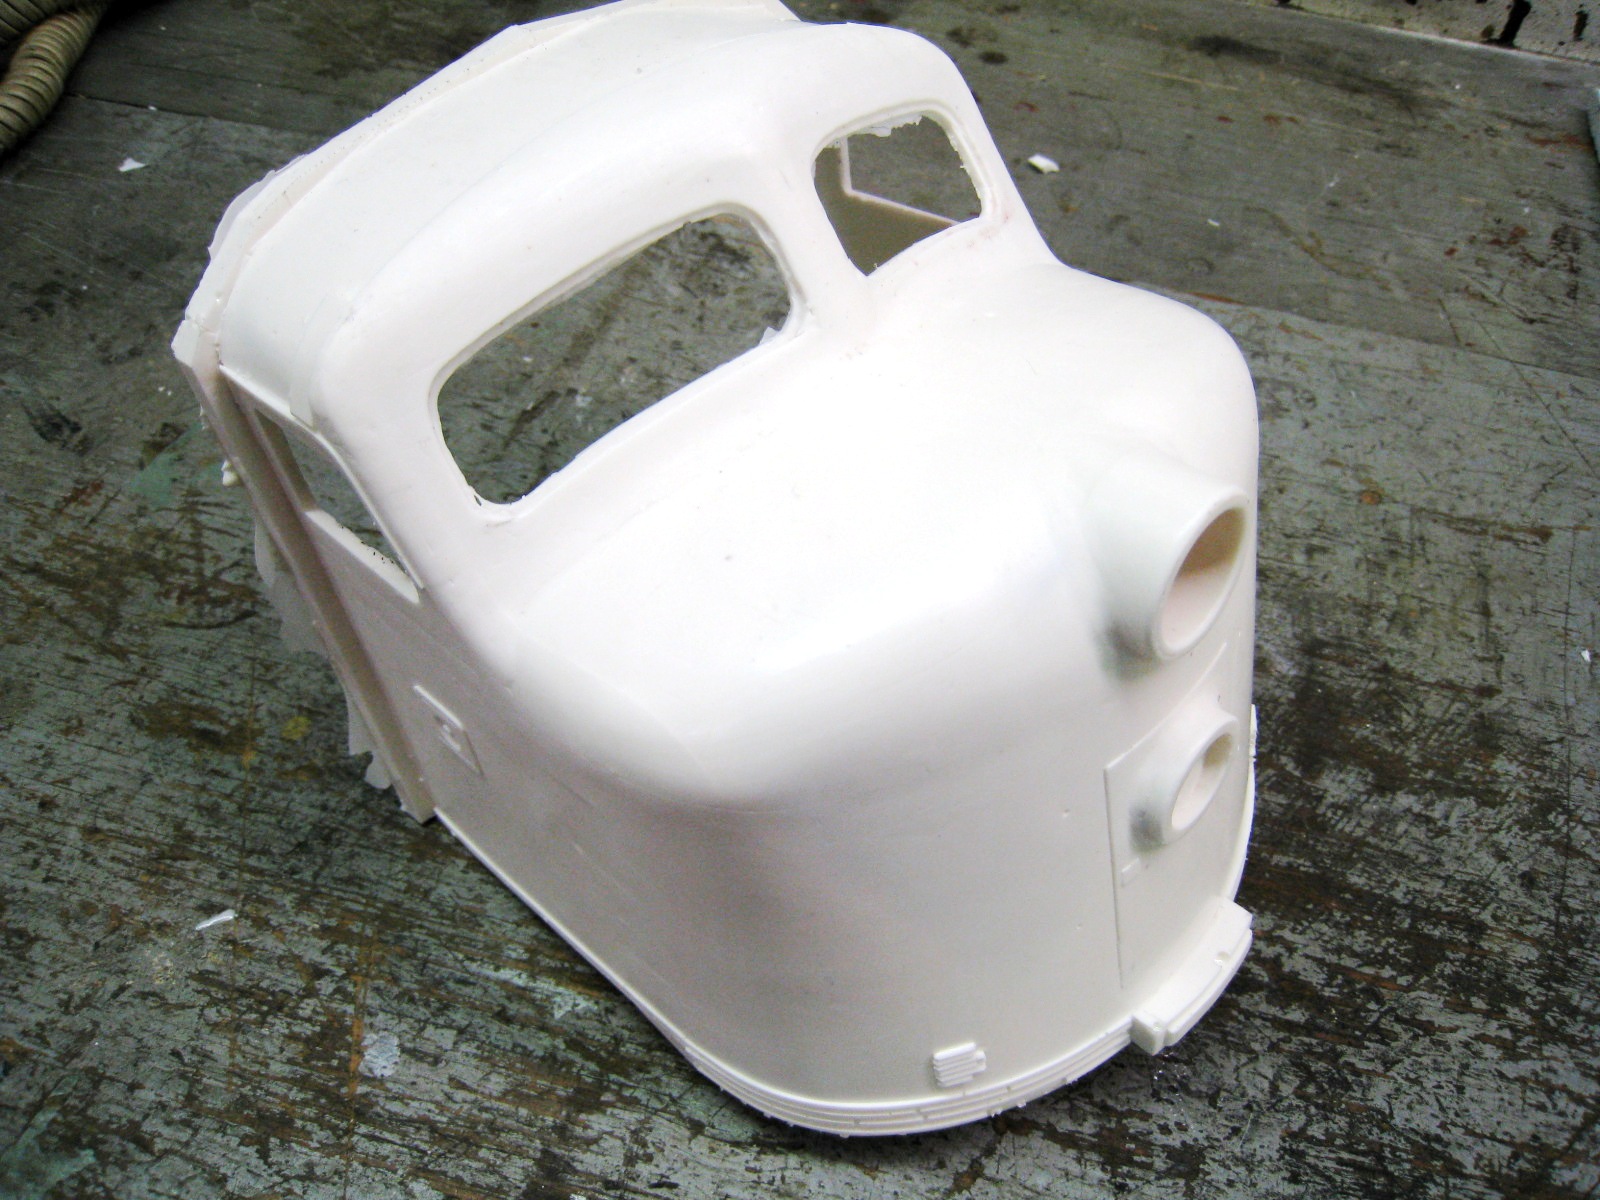
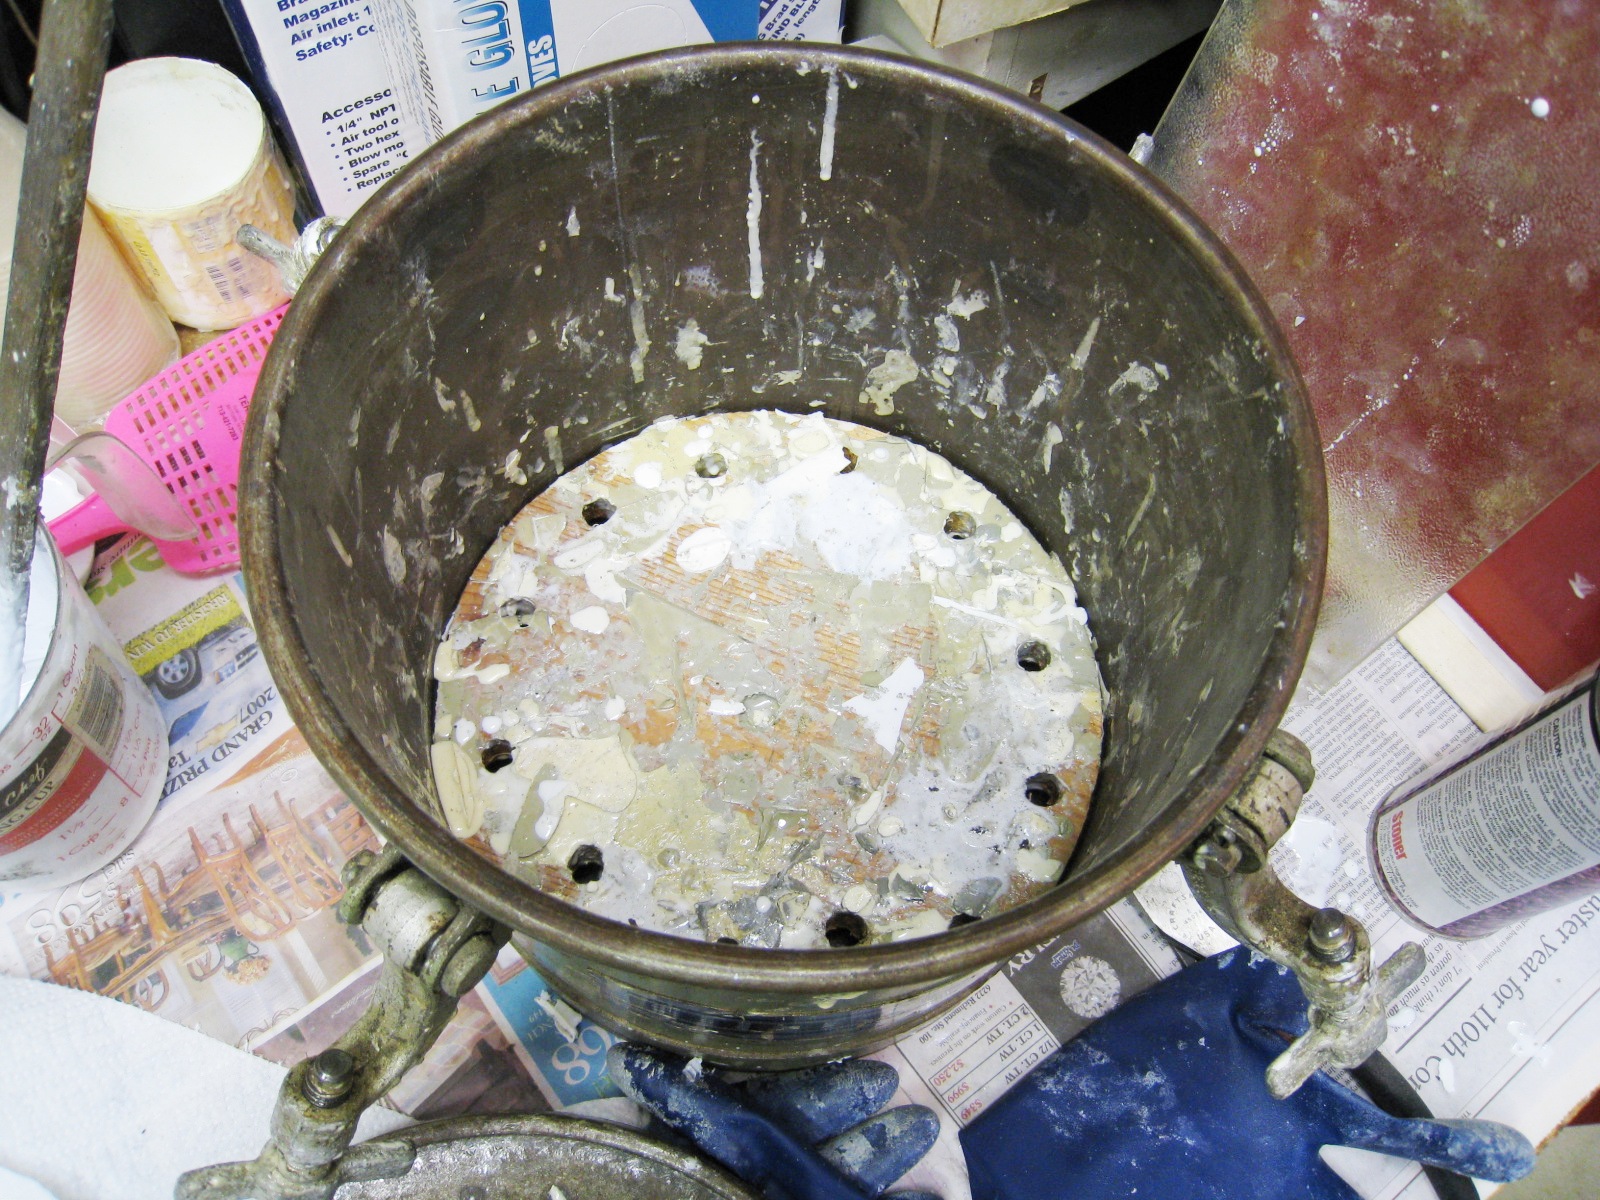
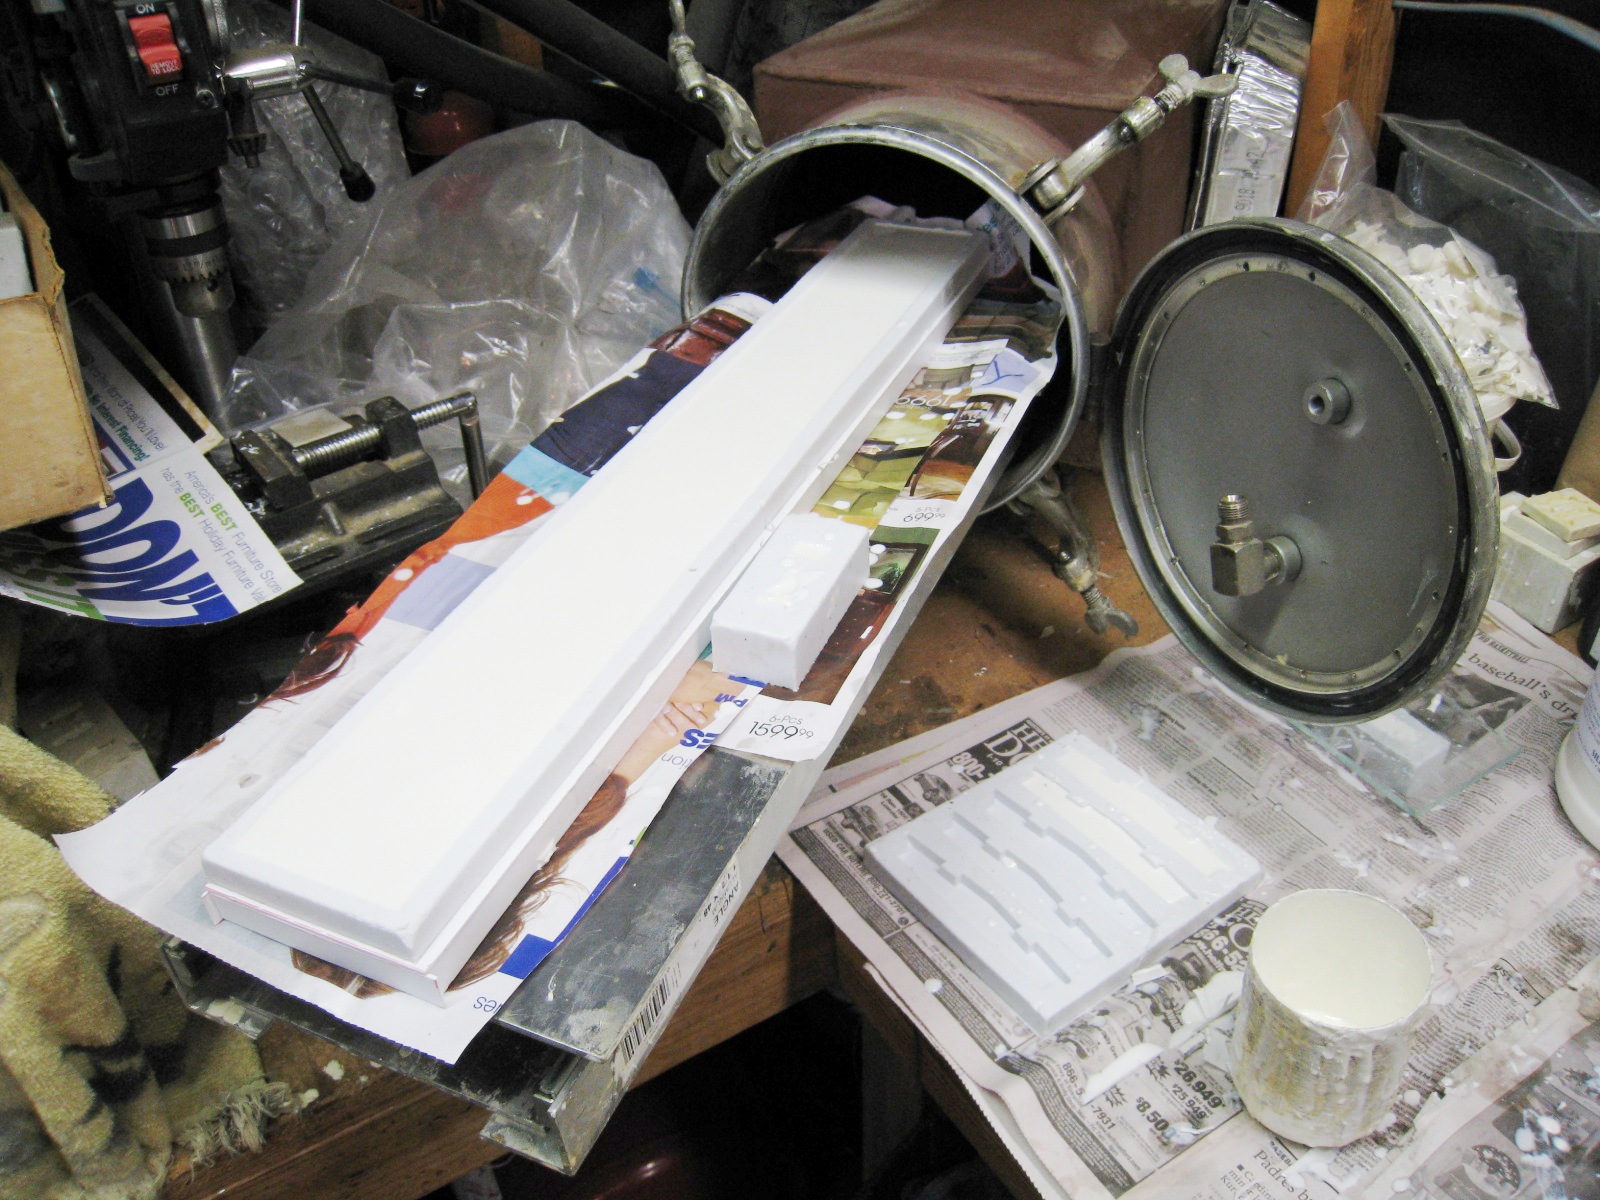
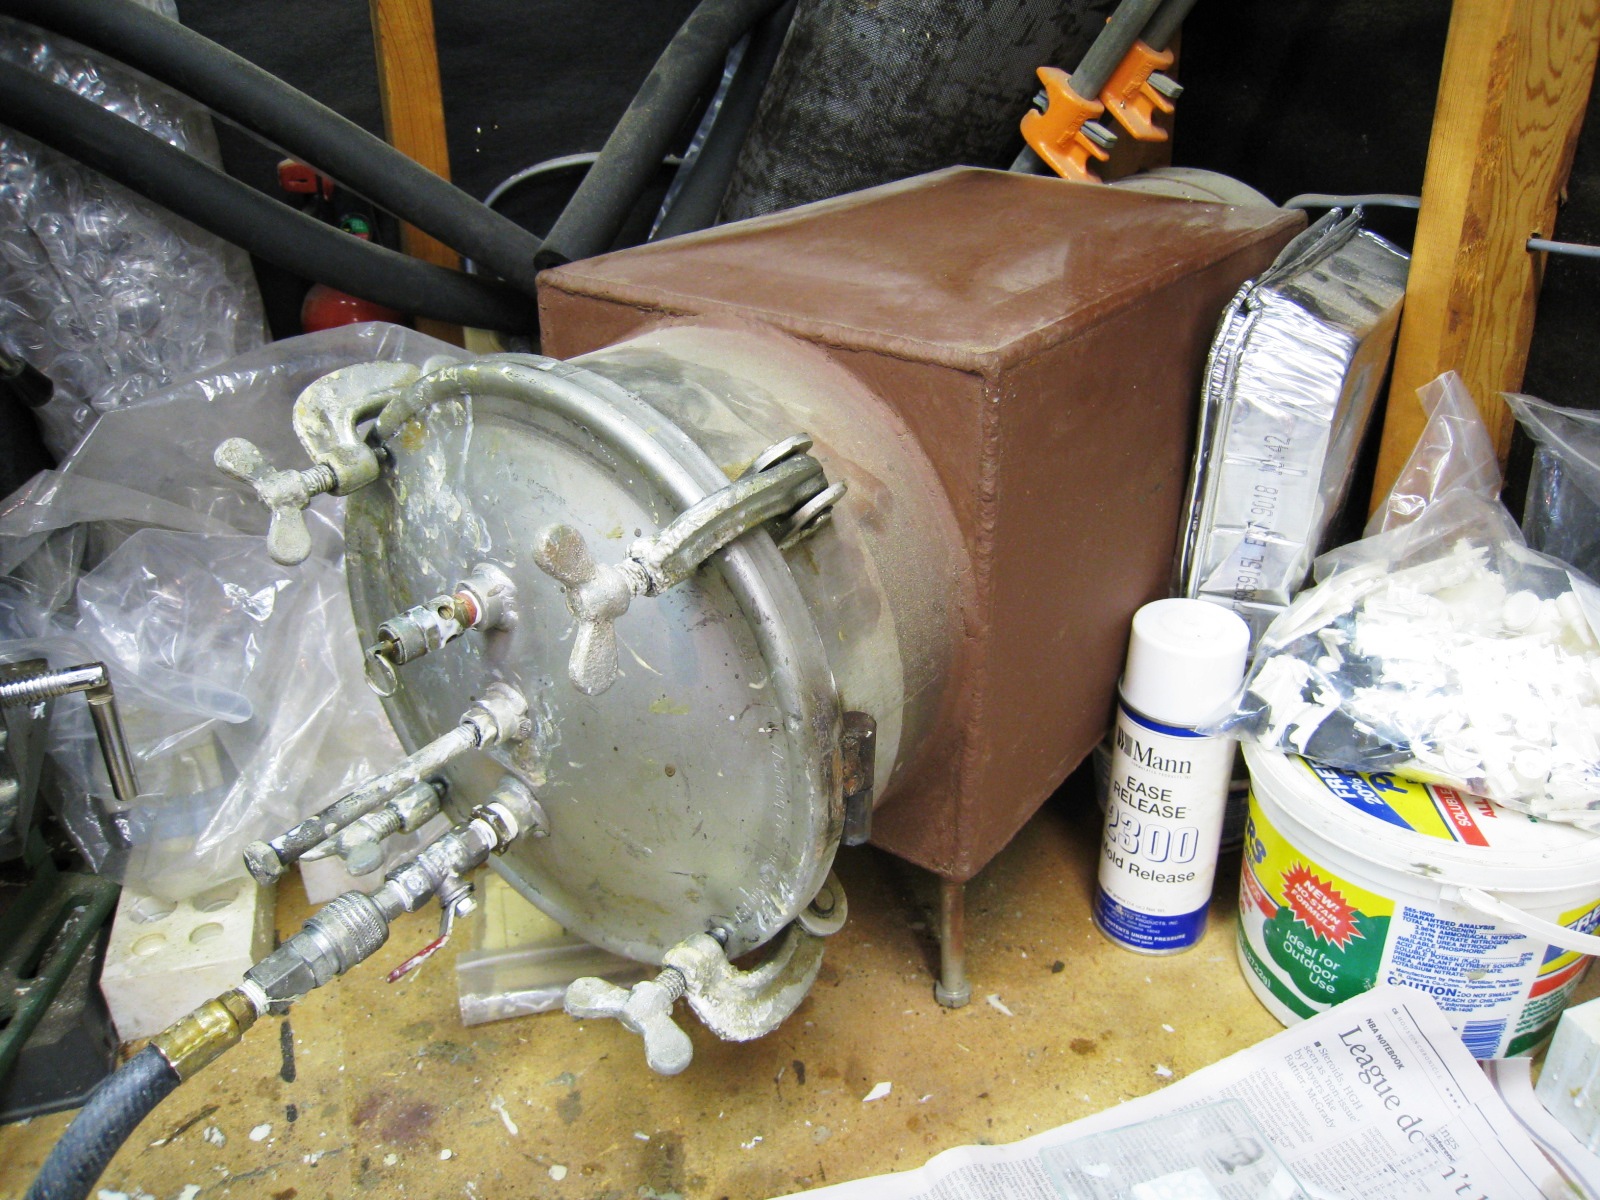
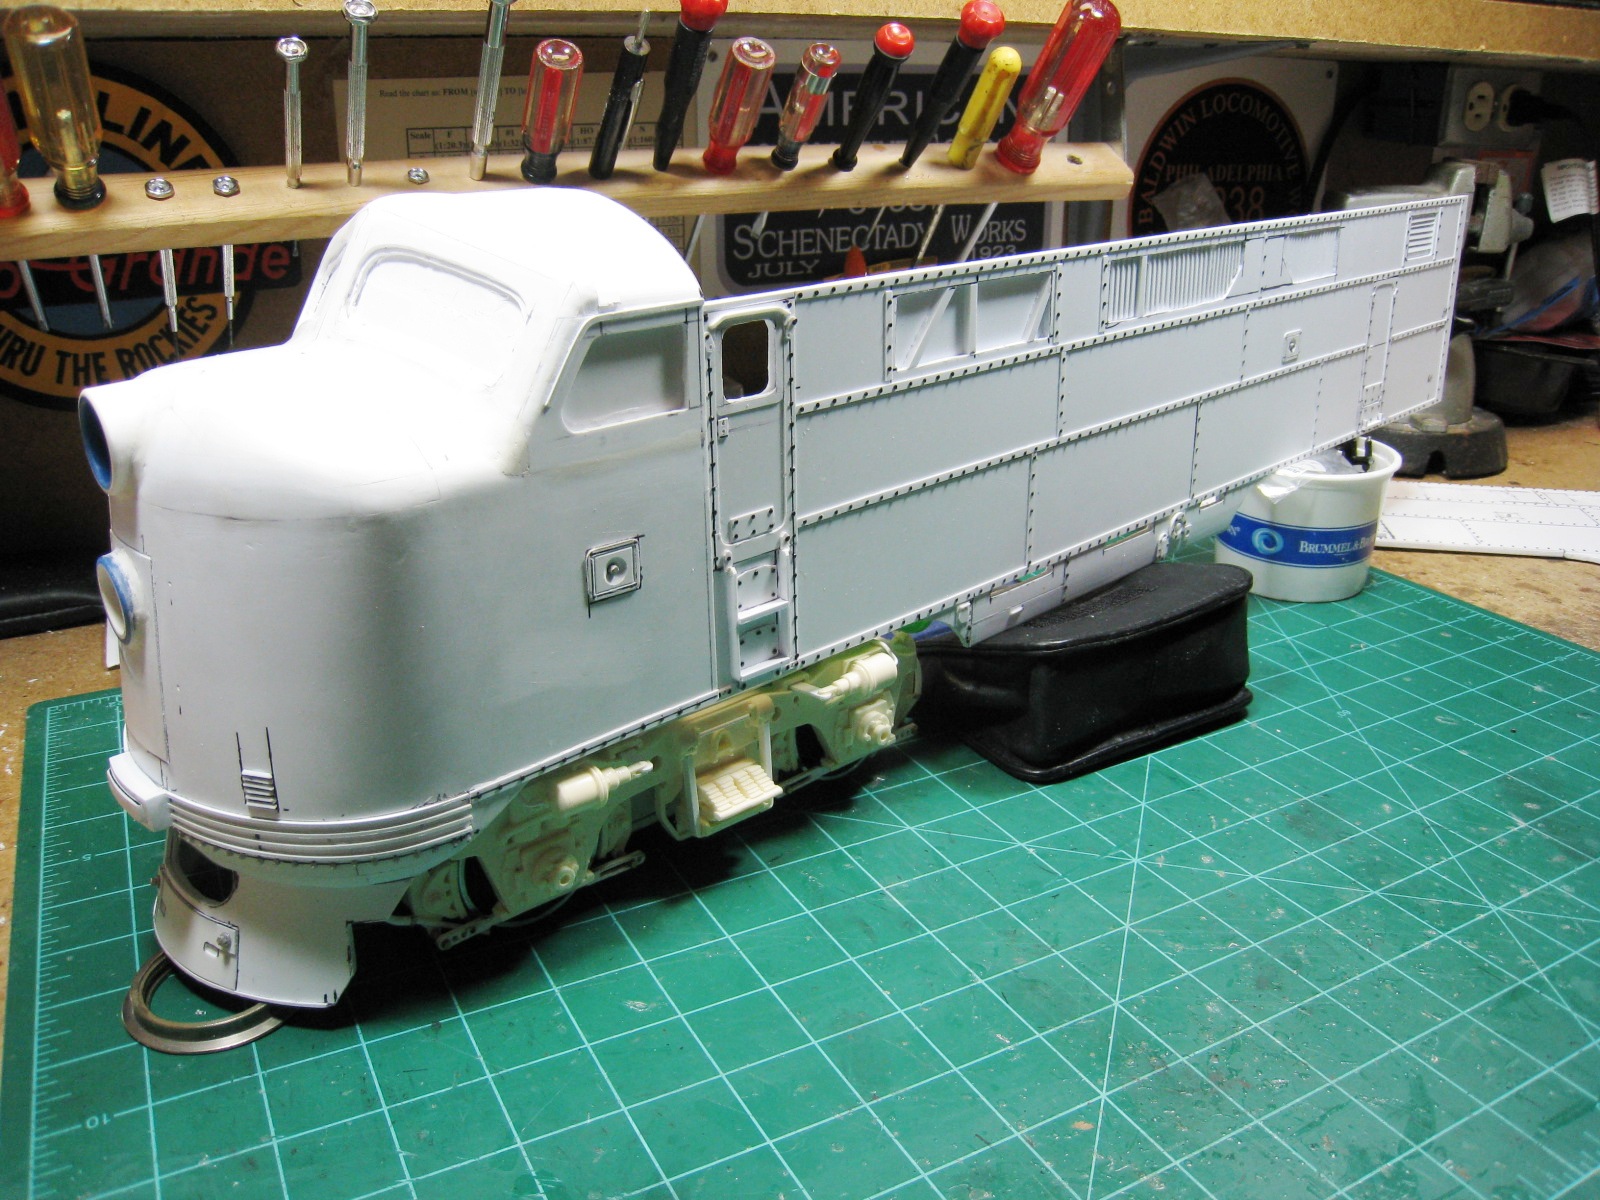
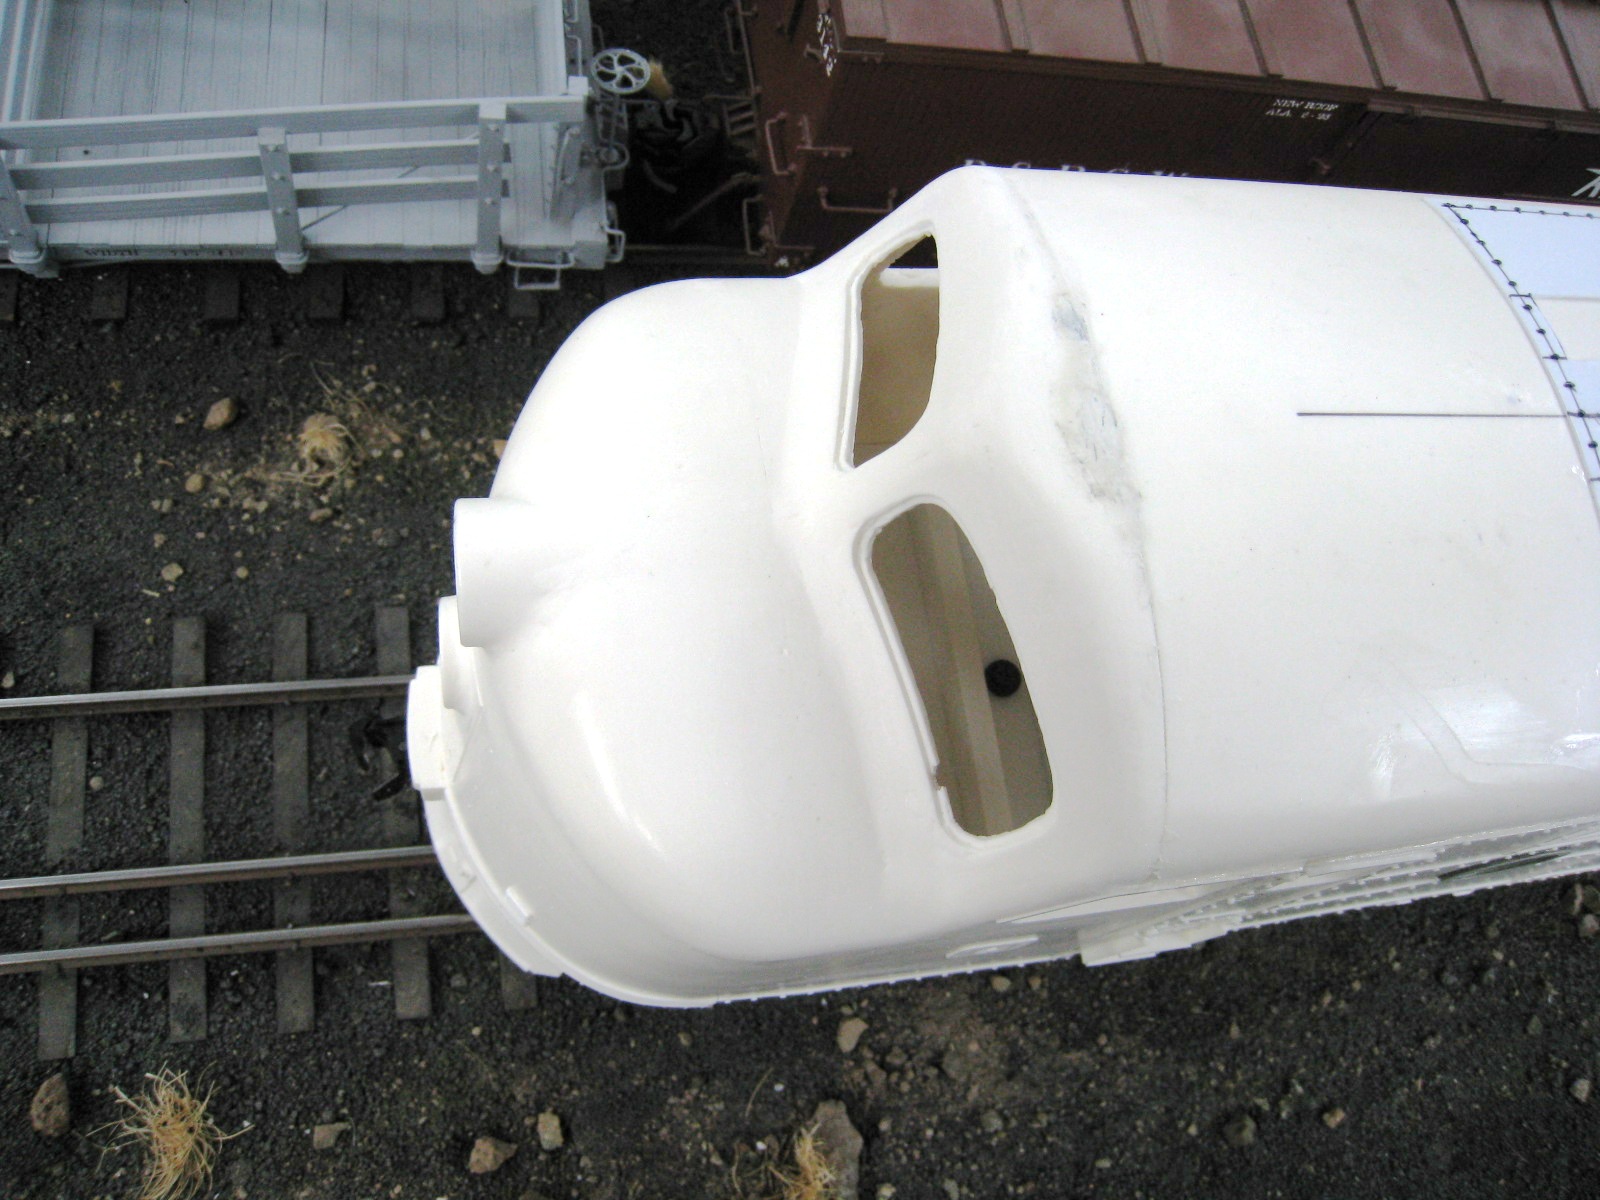
Making That Bull Dog Snout "Ward Hammond helped me with the sizes and shapes of the base plates that are the general shape of the nose. I add blocks between the three plates to space them out and then wrapped the plates with a 40 thou sheet to form the nose. I then added the top couture arches and bent the 40 thou sheet over the top and glued them together. Over the top of the 40 thou, I added a 20 thou sheet to make it smooth. Once all trimmed up, I started adding solid blocks of plastic strip 1/4" thick, around the 1" tube for the head light, to build up the area where the shaping was to be done. Once I roughed it in, I scrapped it with a #11 Exacto blade to take off the material. It made a big mess, but worked ok. I have to putty up some holes and re-sand the entire nose next. . .This has been one of the most difficult projects that I have attempted to build. There are just so few square corners to work off of. Once I get the master done, I will fill the back of it solid with plaster or clay and then build a box for it to rest in. O course the pilot will be off of it and all the holes will be filled when I pour rubber over it. Once the outside mold is done, I will remove the master and turn the mold over. A little at a time, and at different angles I will pour resin in the mold to make the casting about 3/16" thick. I will then fill the interior with rubber and a plug to make the outside mold. I will use plastic strips to hold the two molds apart when I pour the keeper castings. I will cut a few sprus off the casting and glue it to the rest of the sides and roof, to make the body from there. You get the idea, very labor intensive. This thing makes any steam loco project, a piece of cake! Why did the Rio Grande have to buy those diesels anyway? I would have been easier to just stay steam..." And here's the pattern.
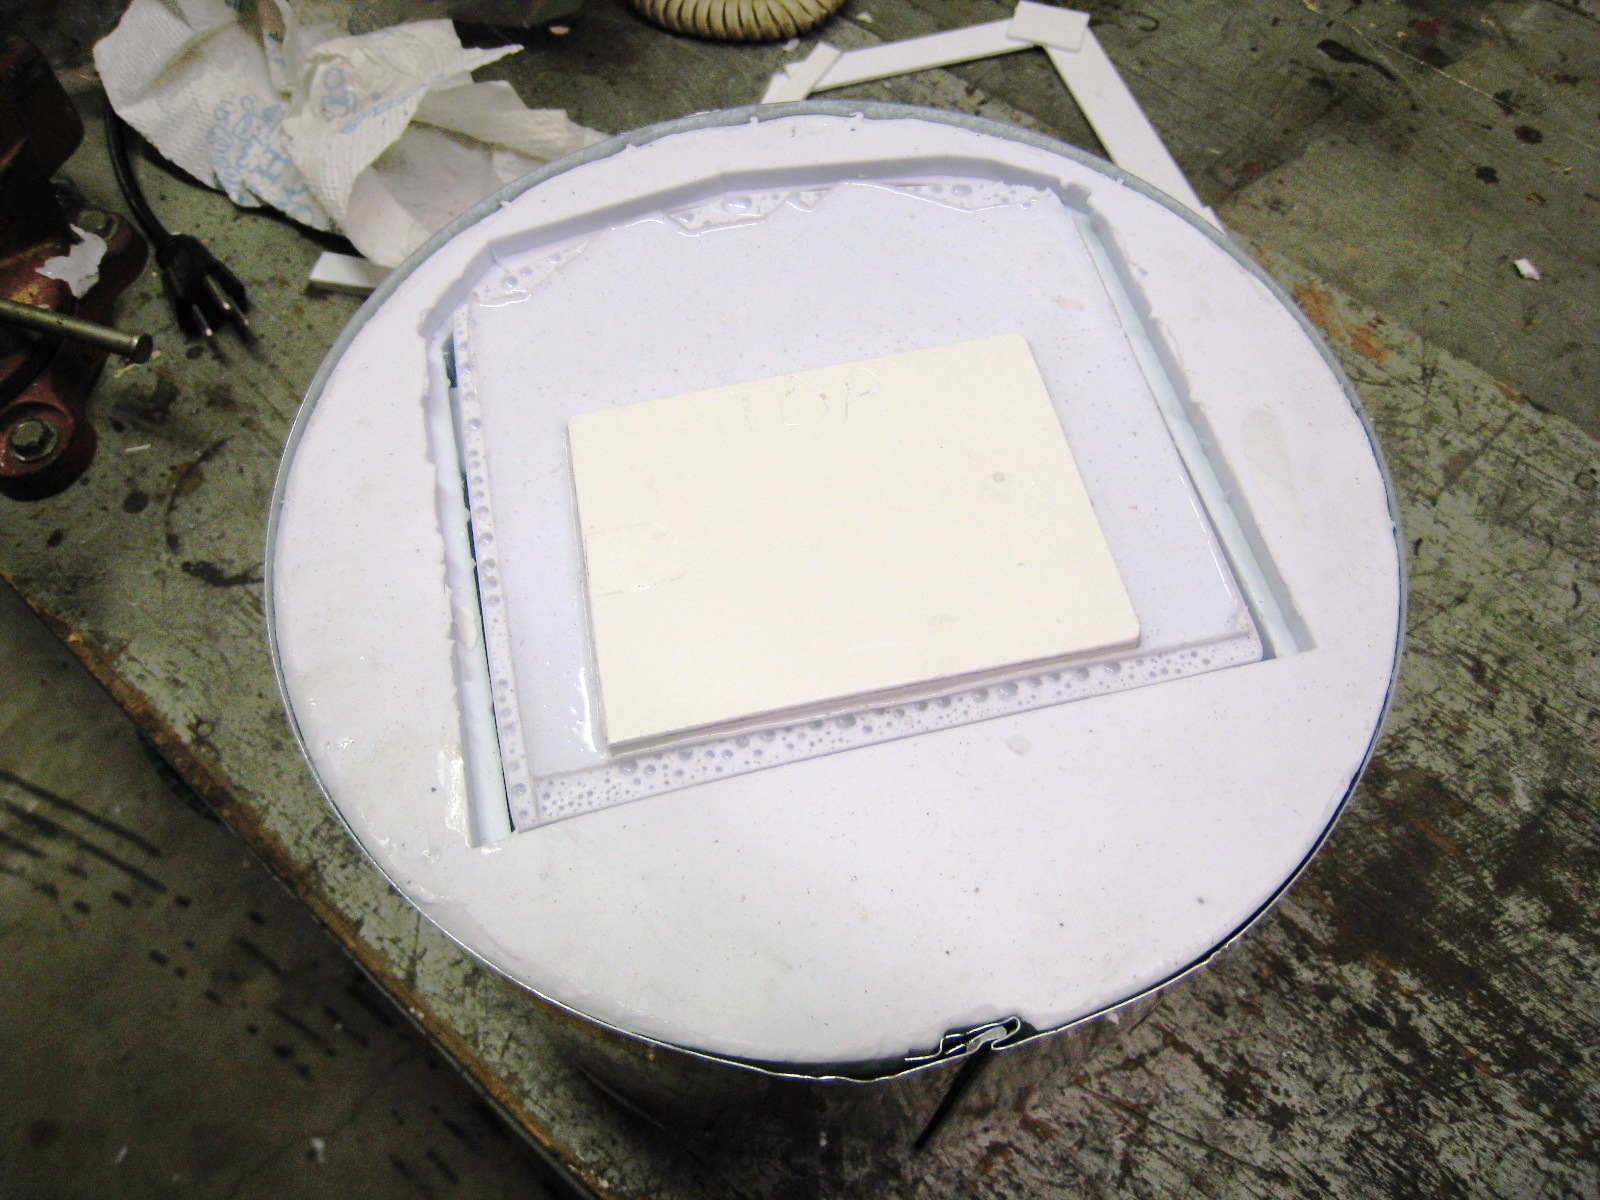
Next, Barry made the rubber mold and insert for the
bulldog snout. He writes,
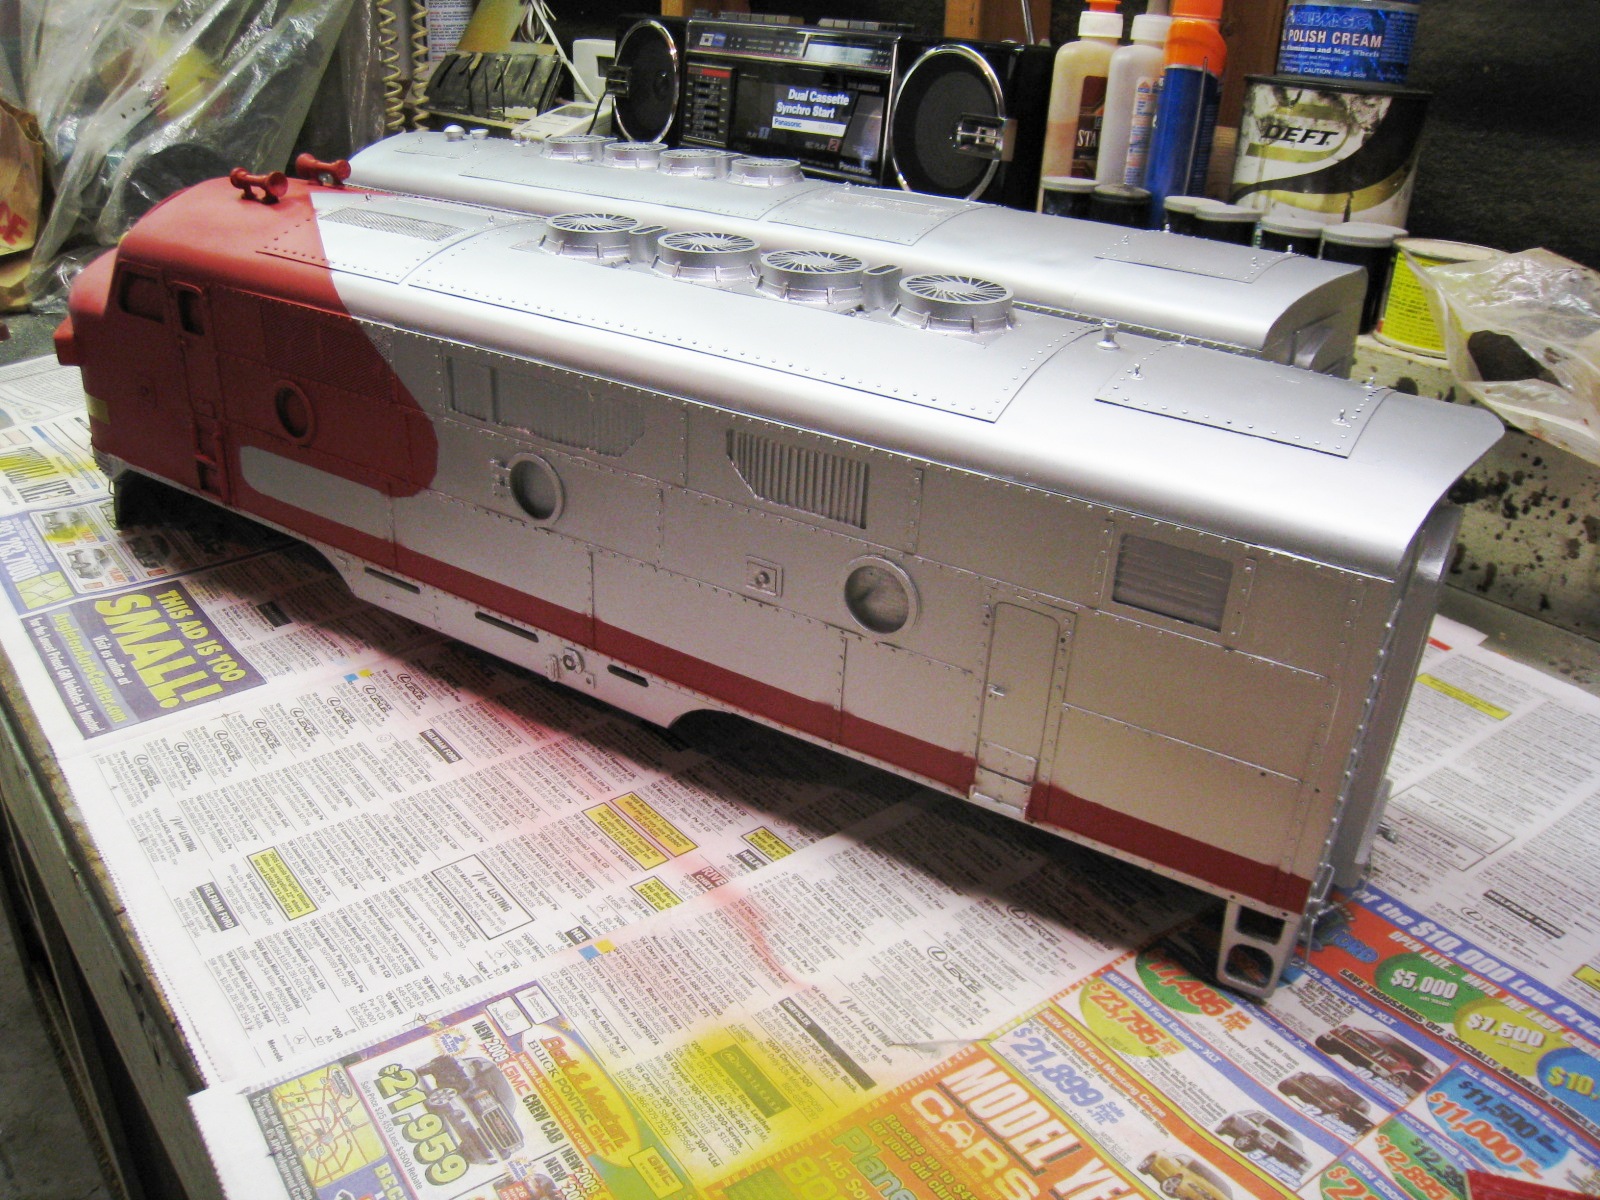
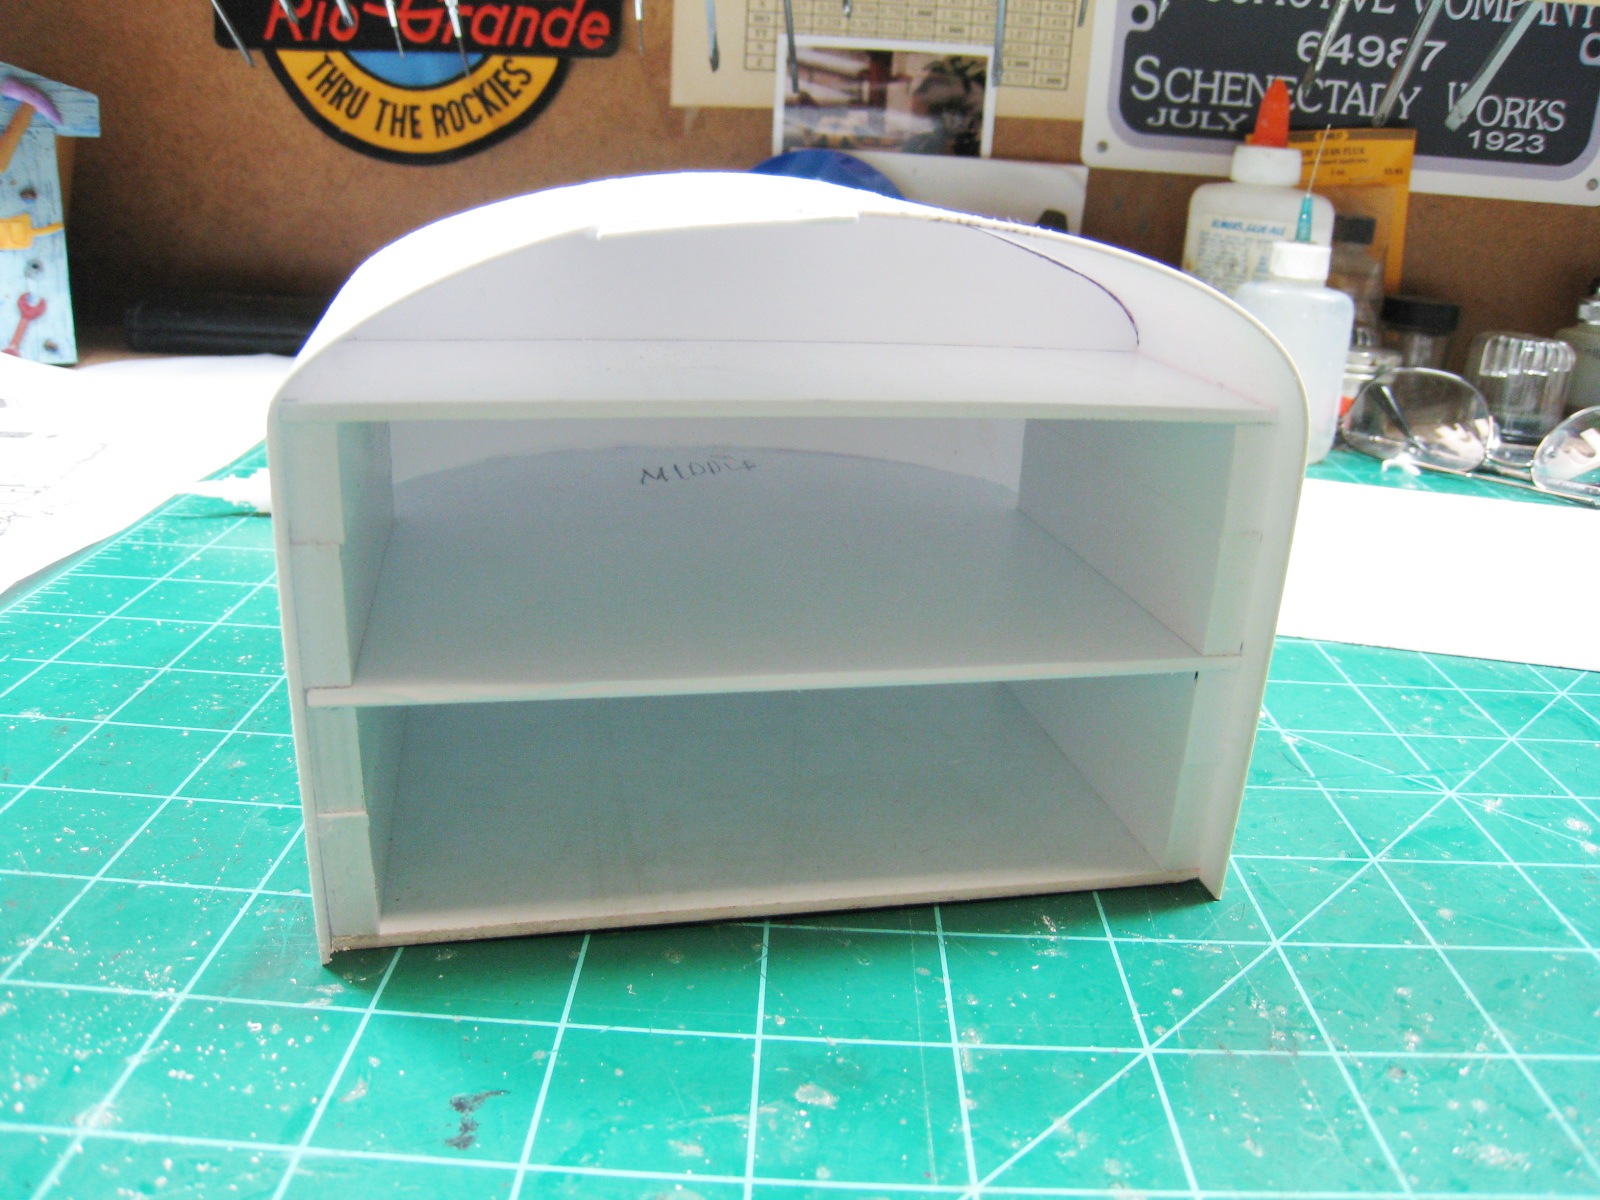
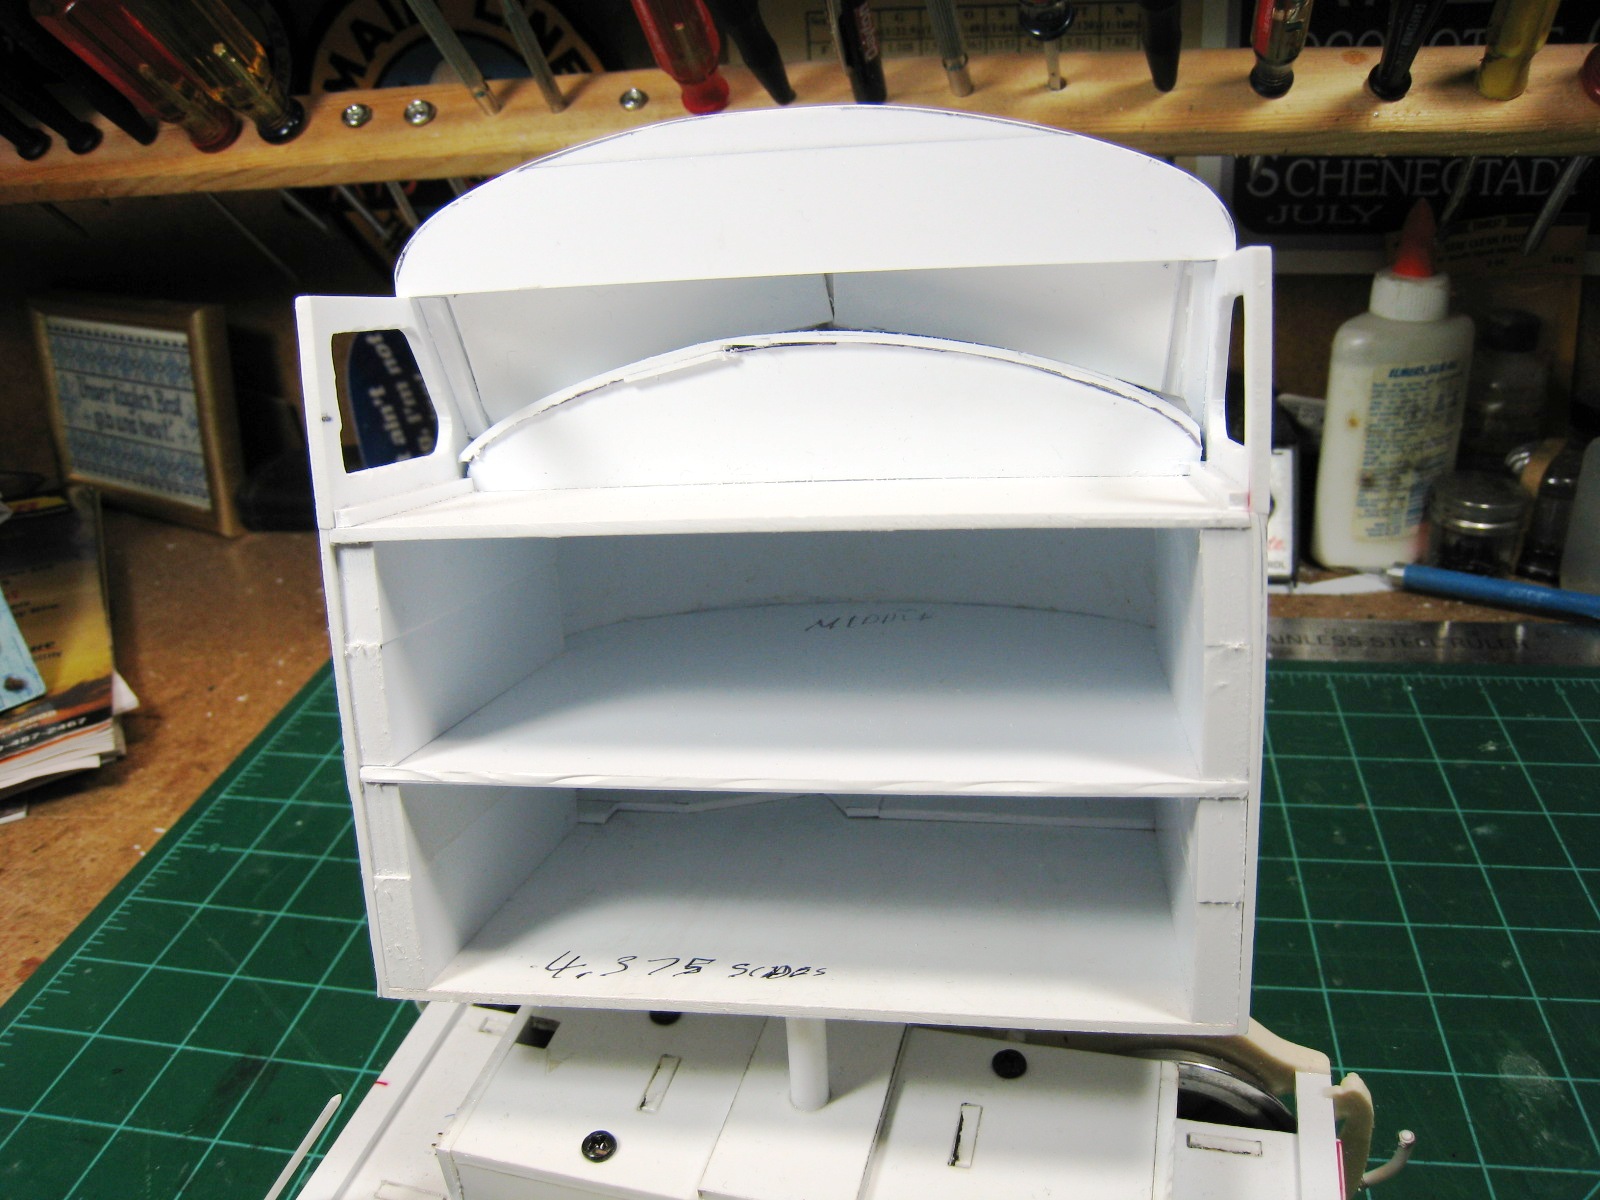
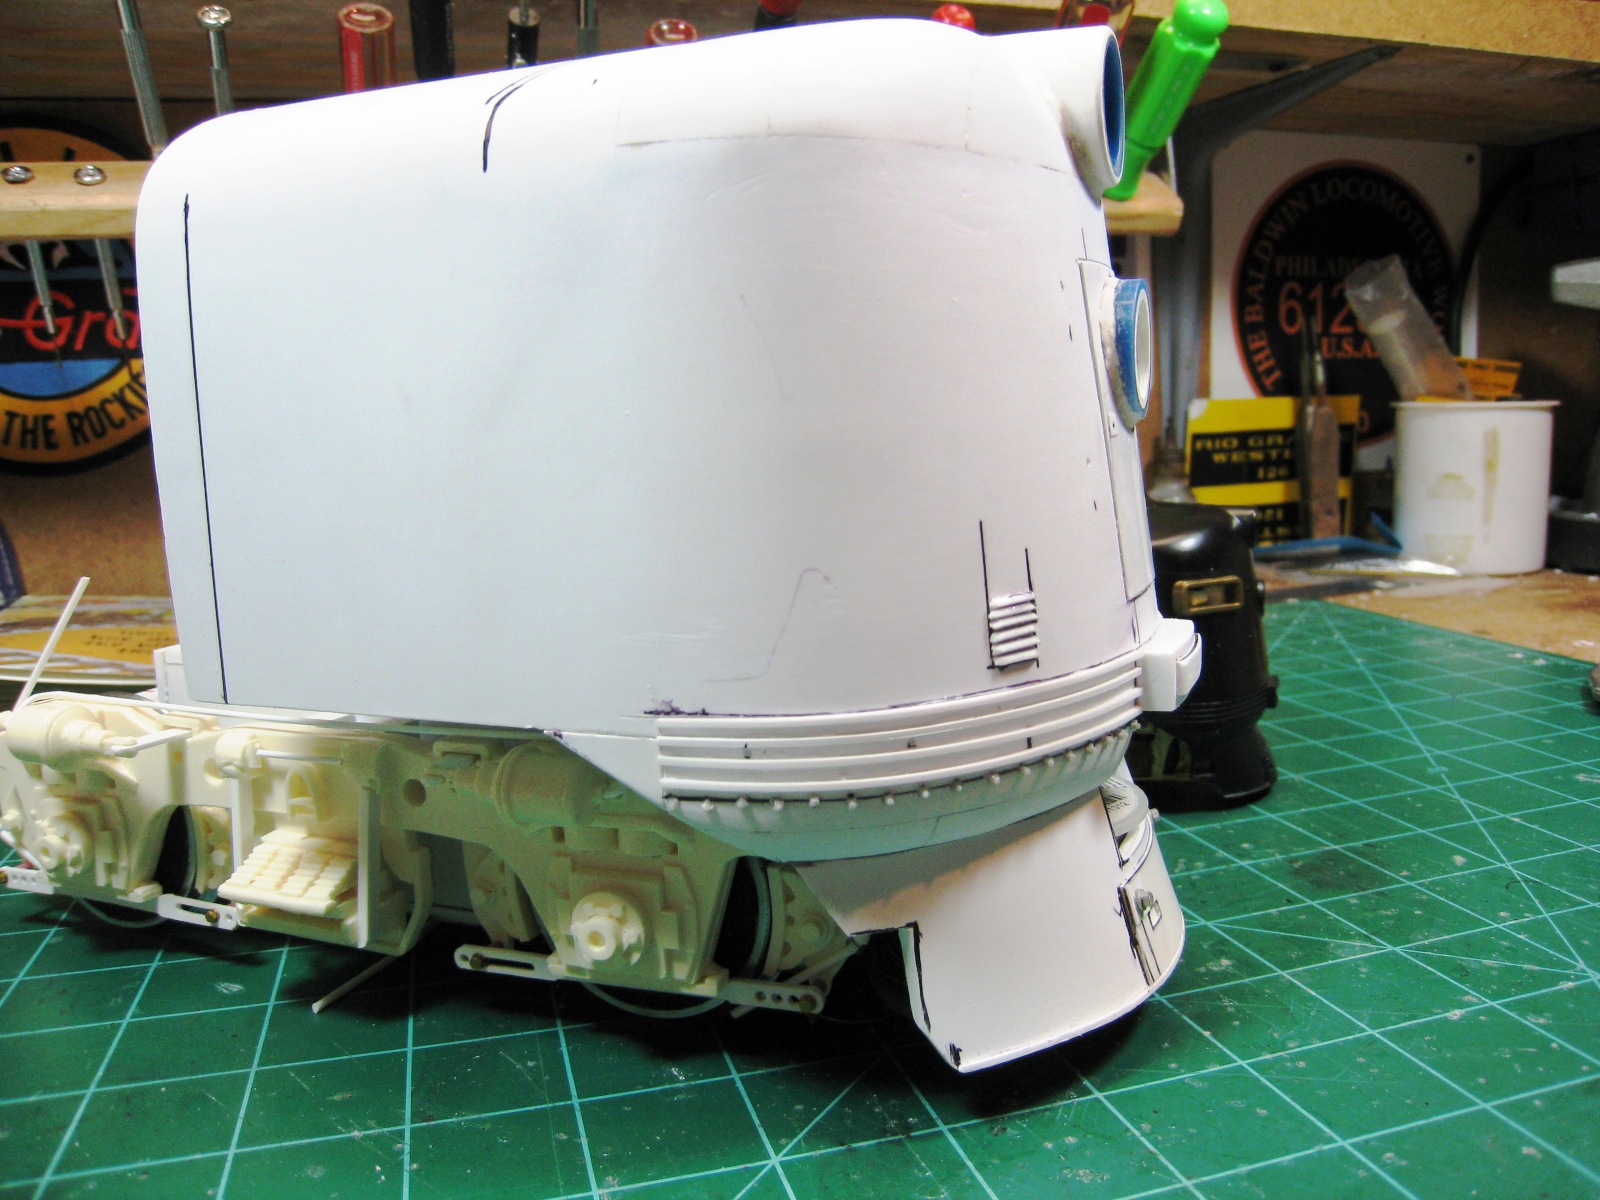
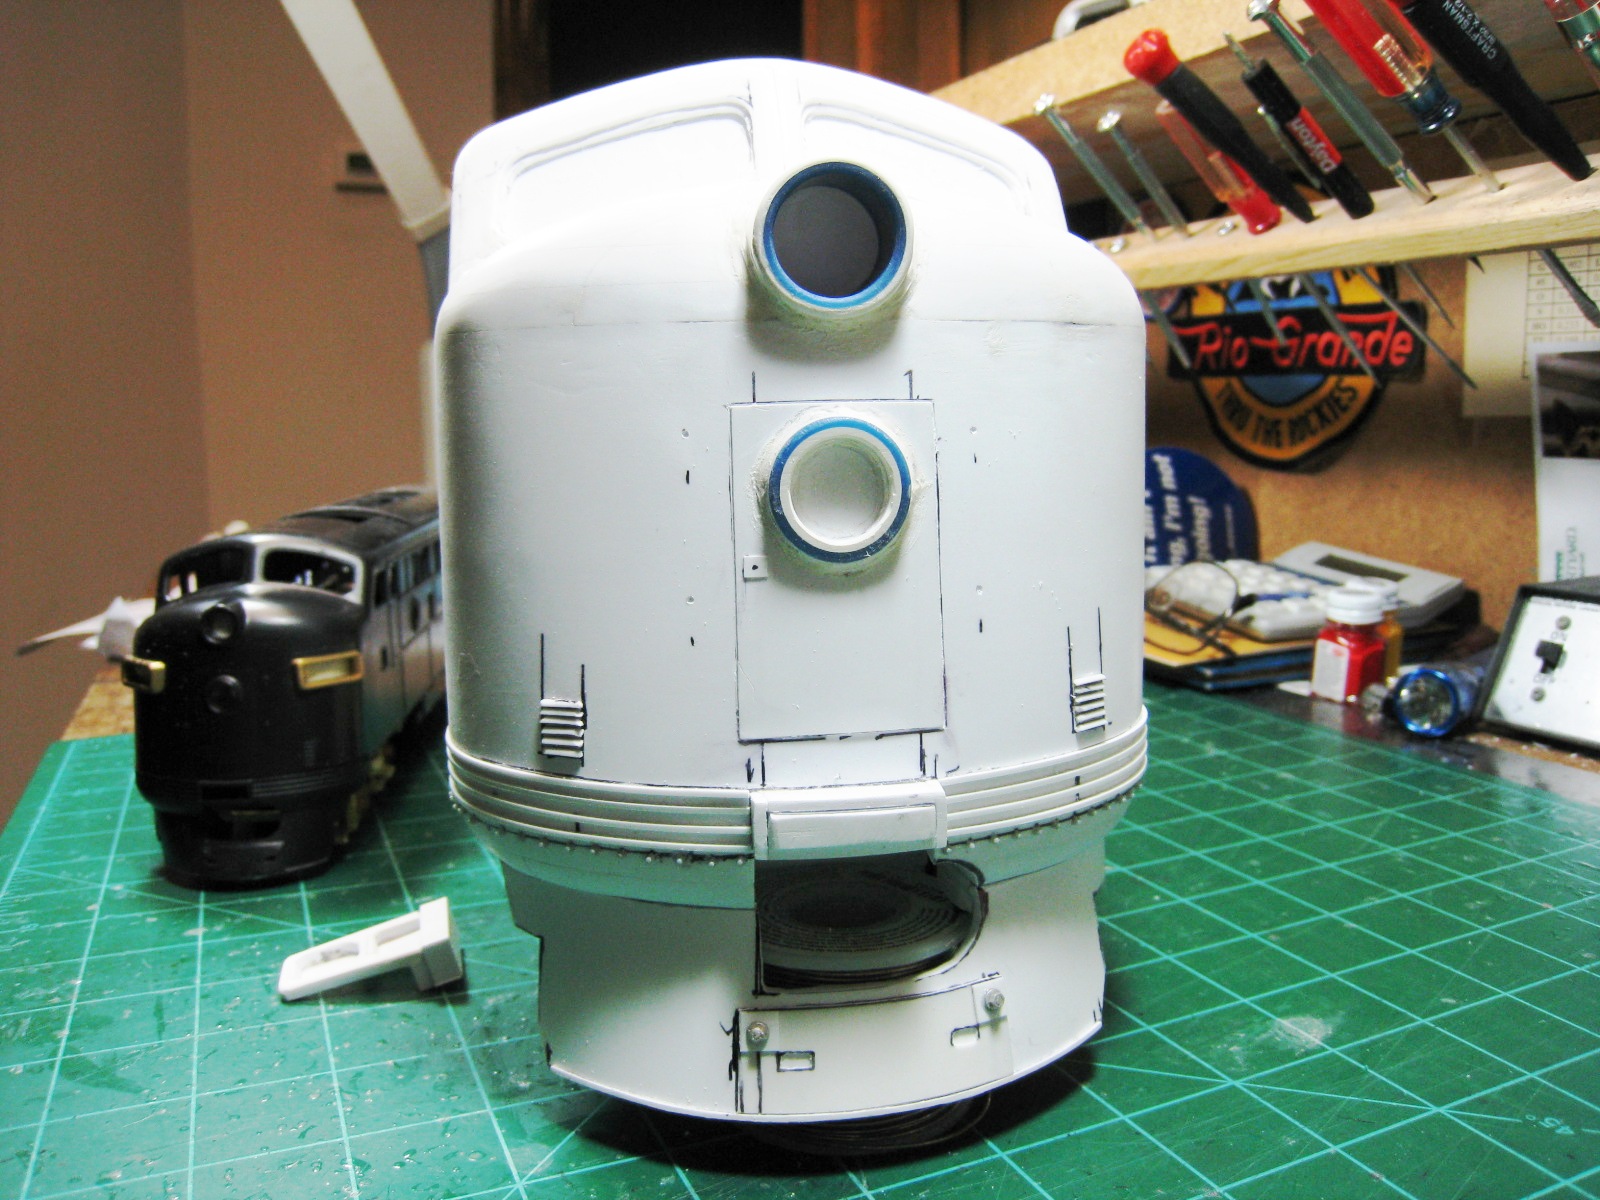
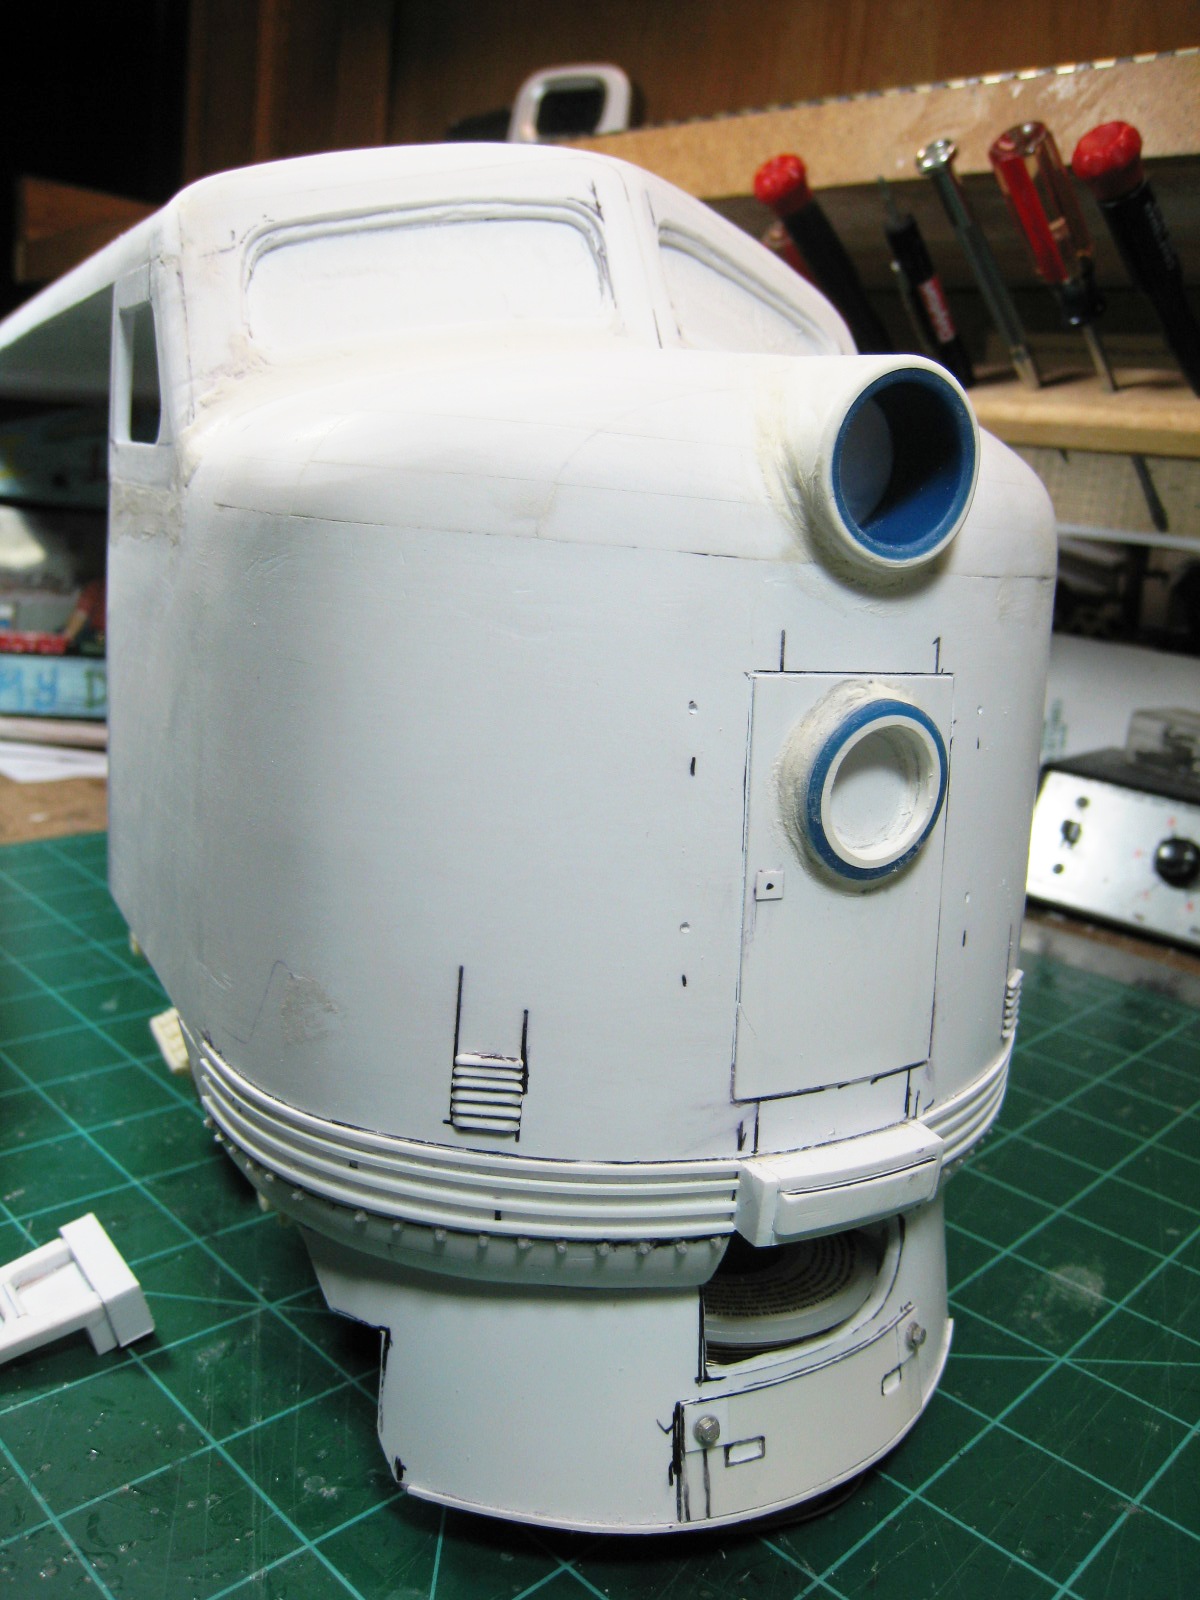
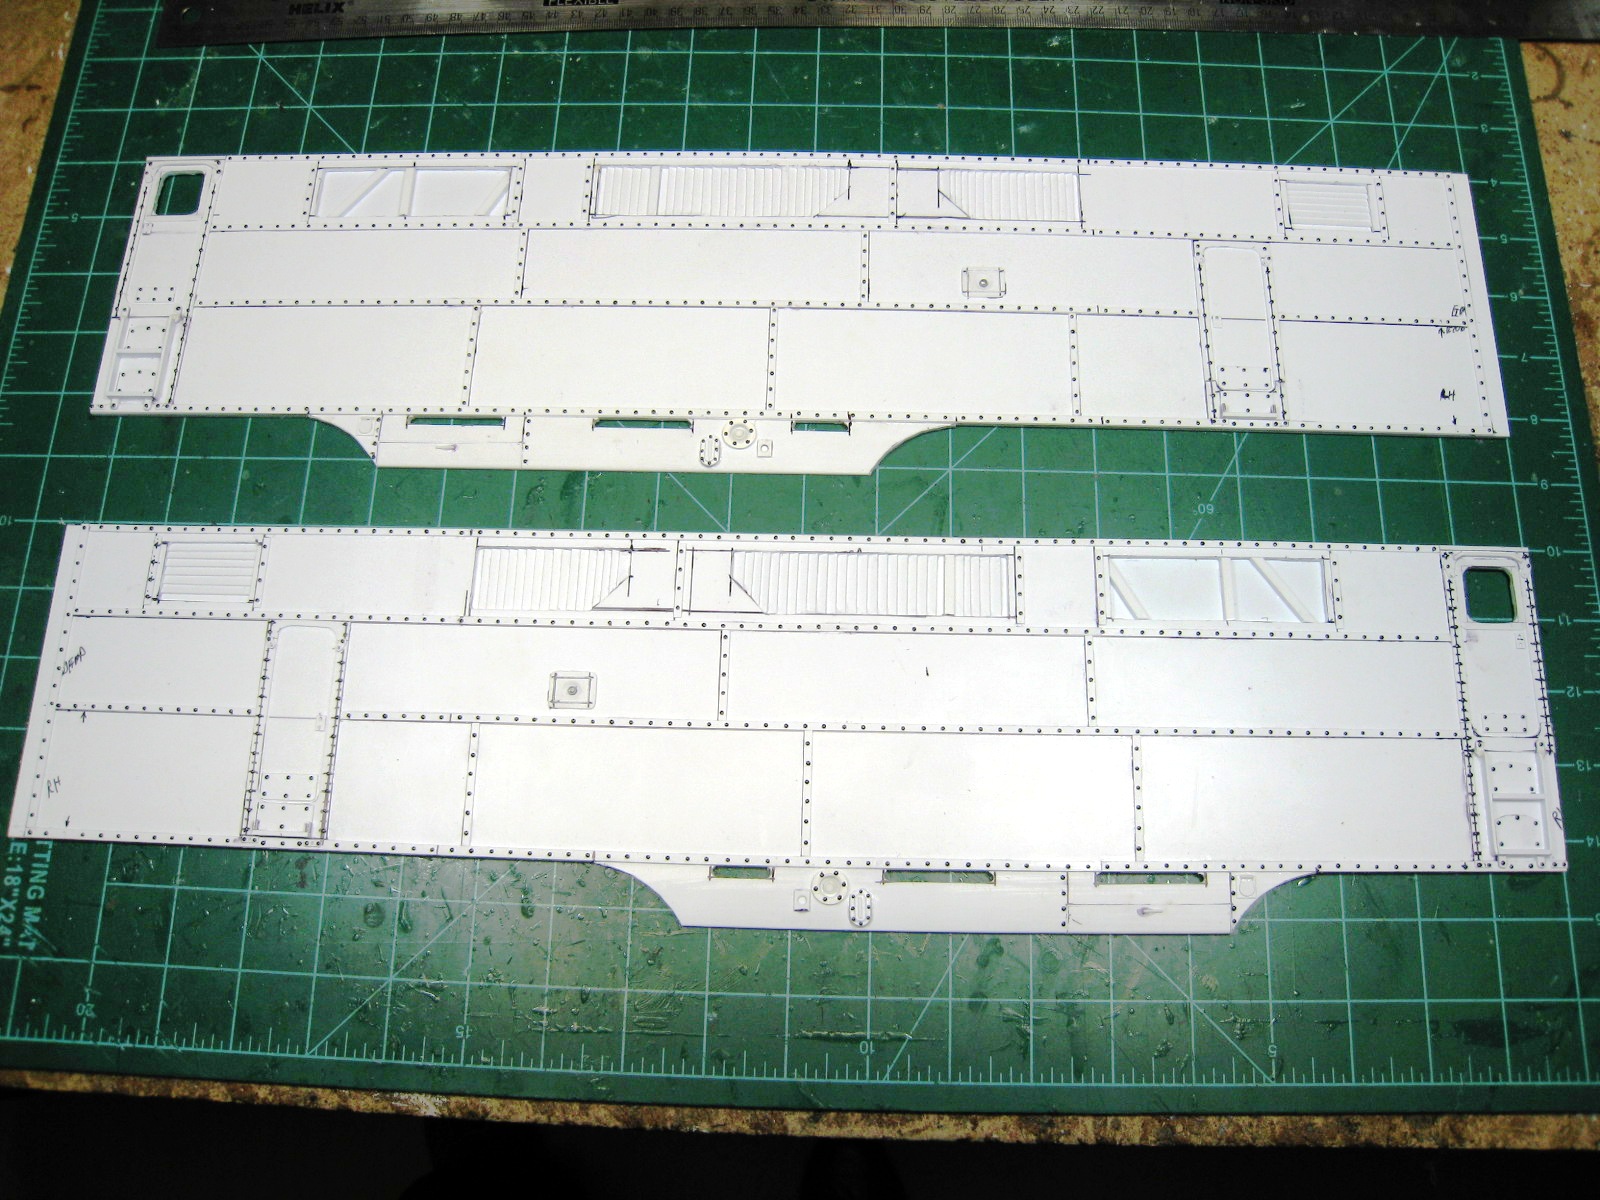
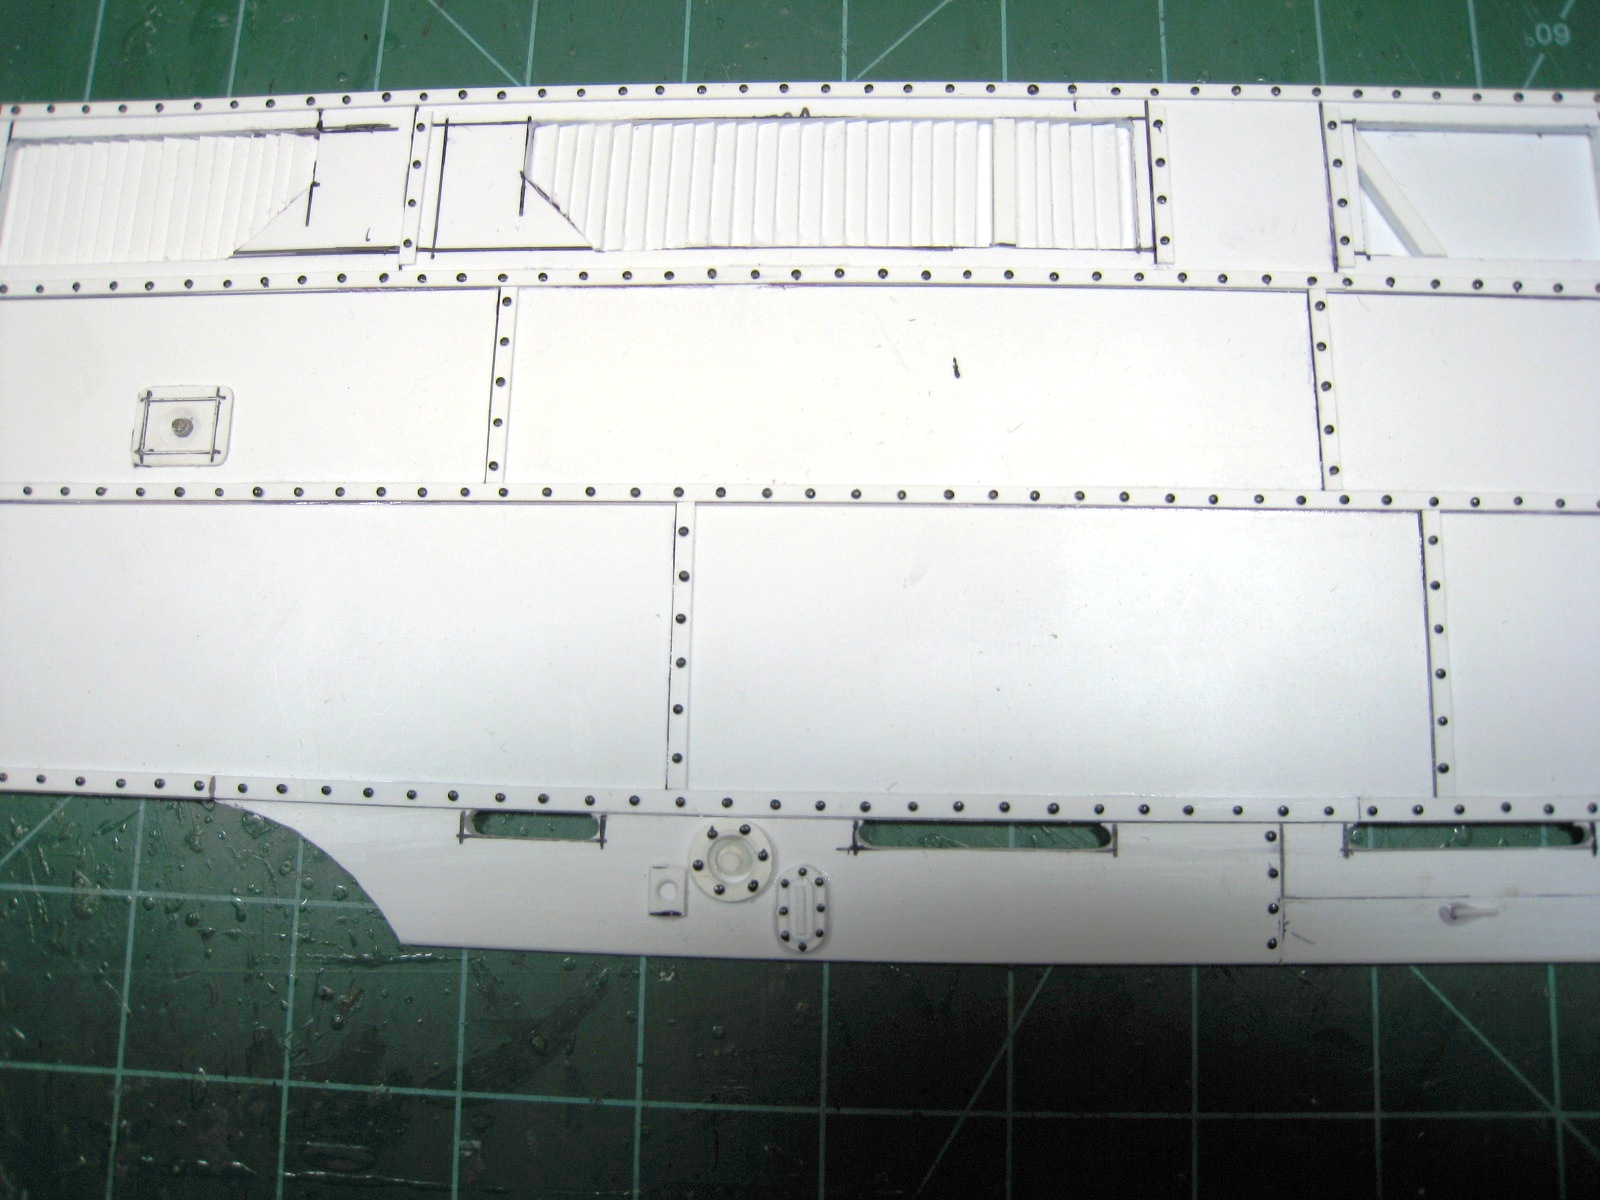
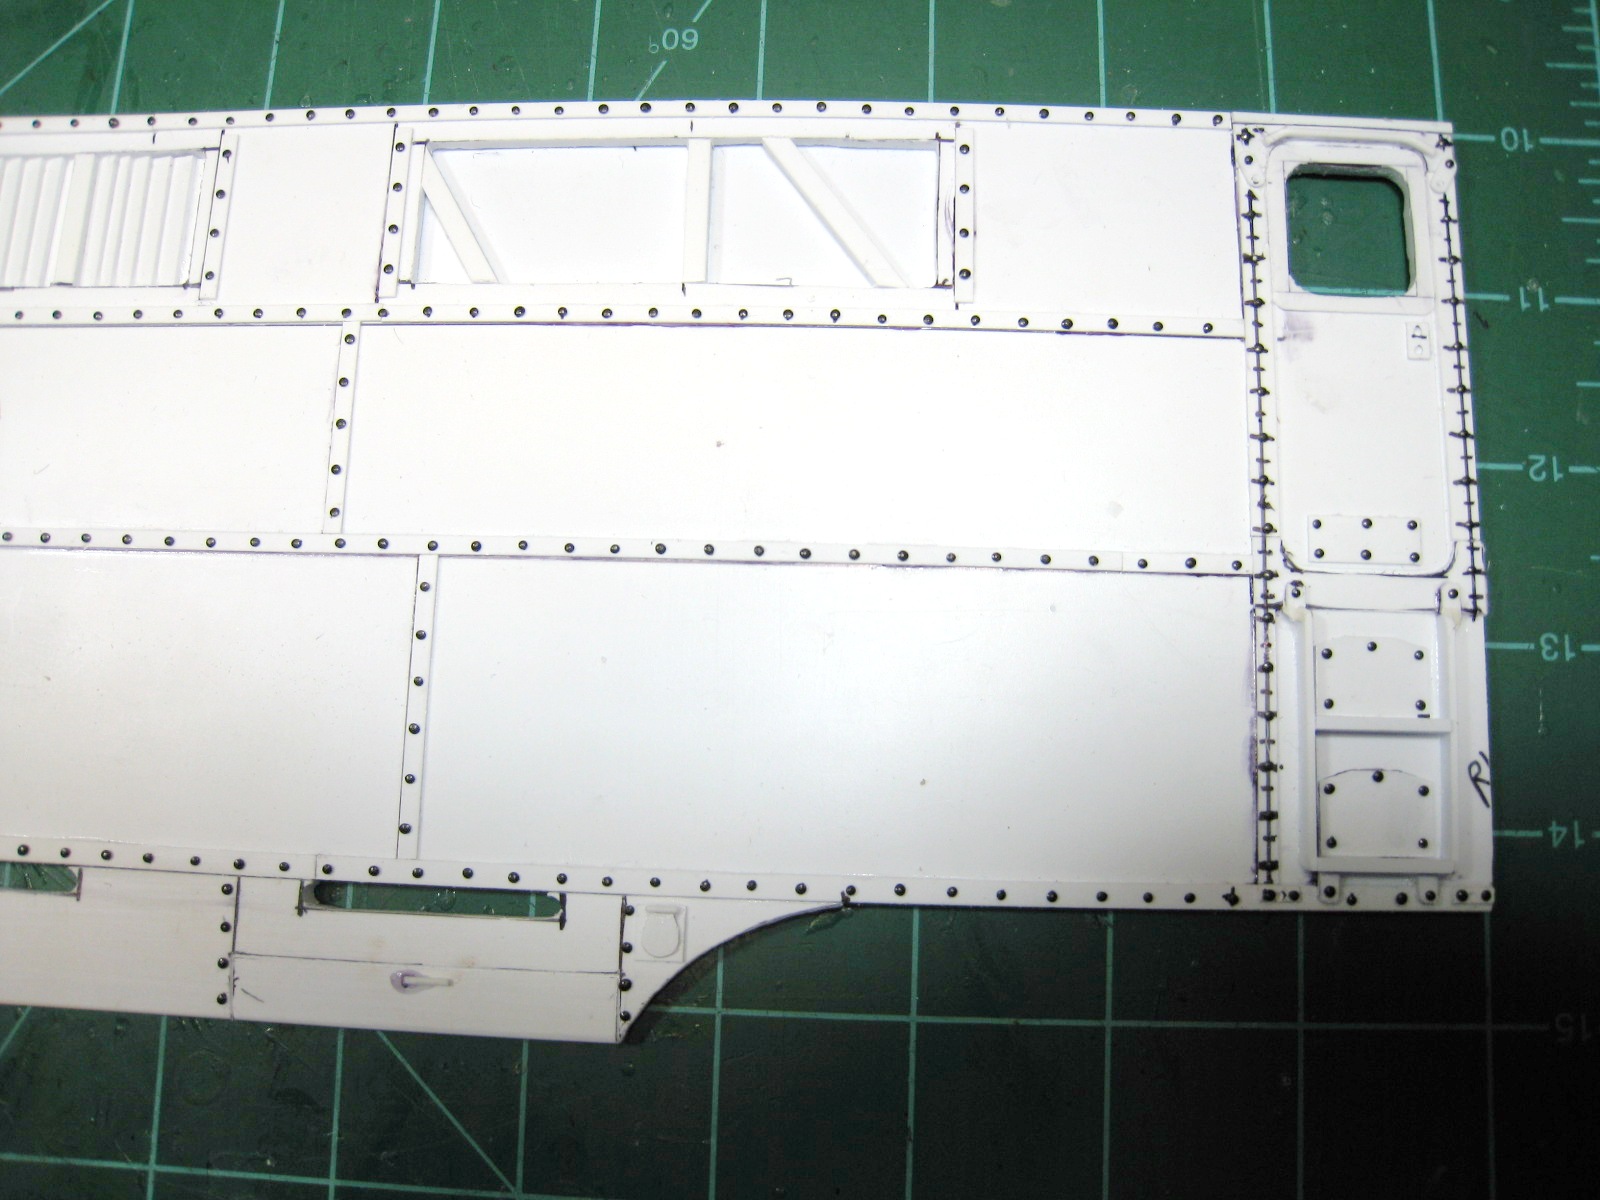
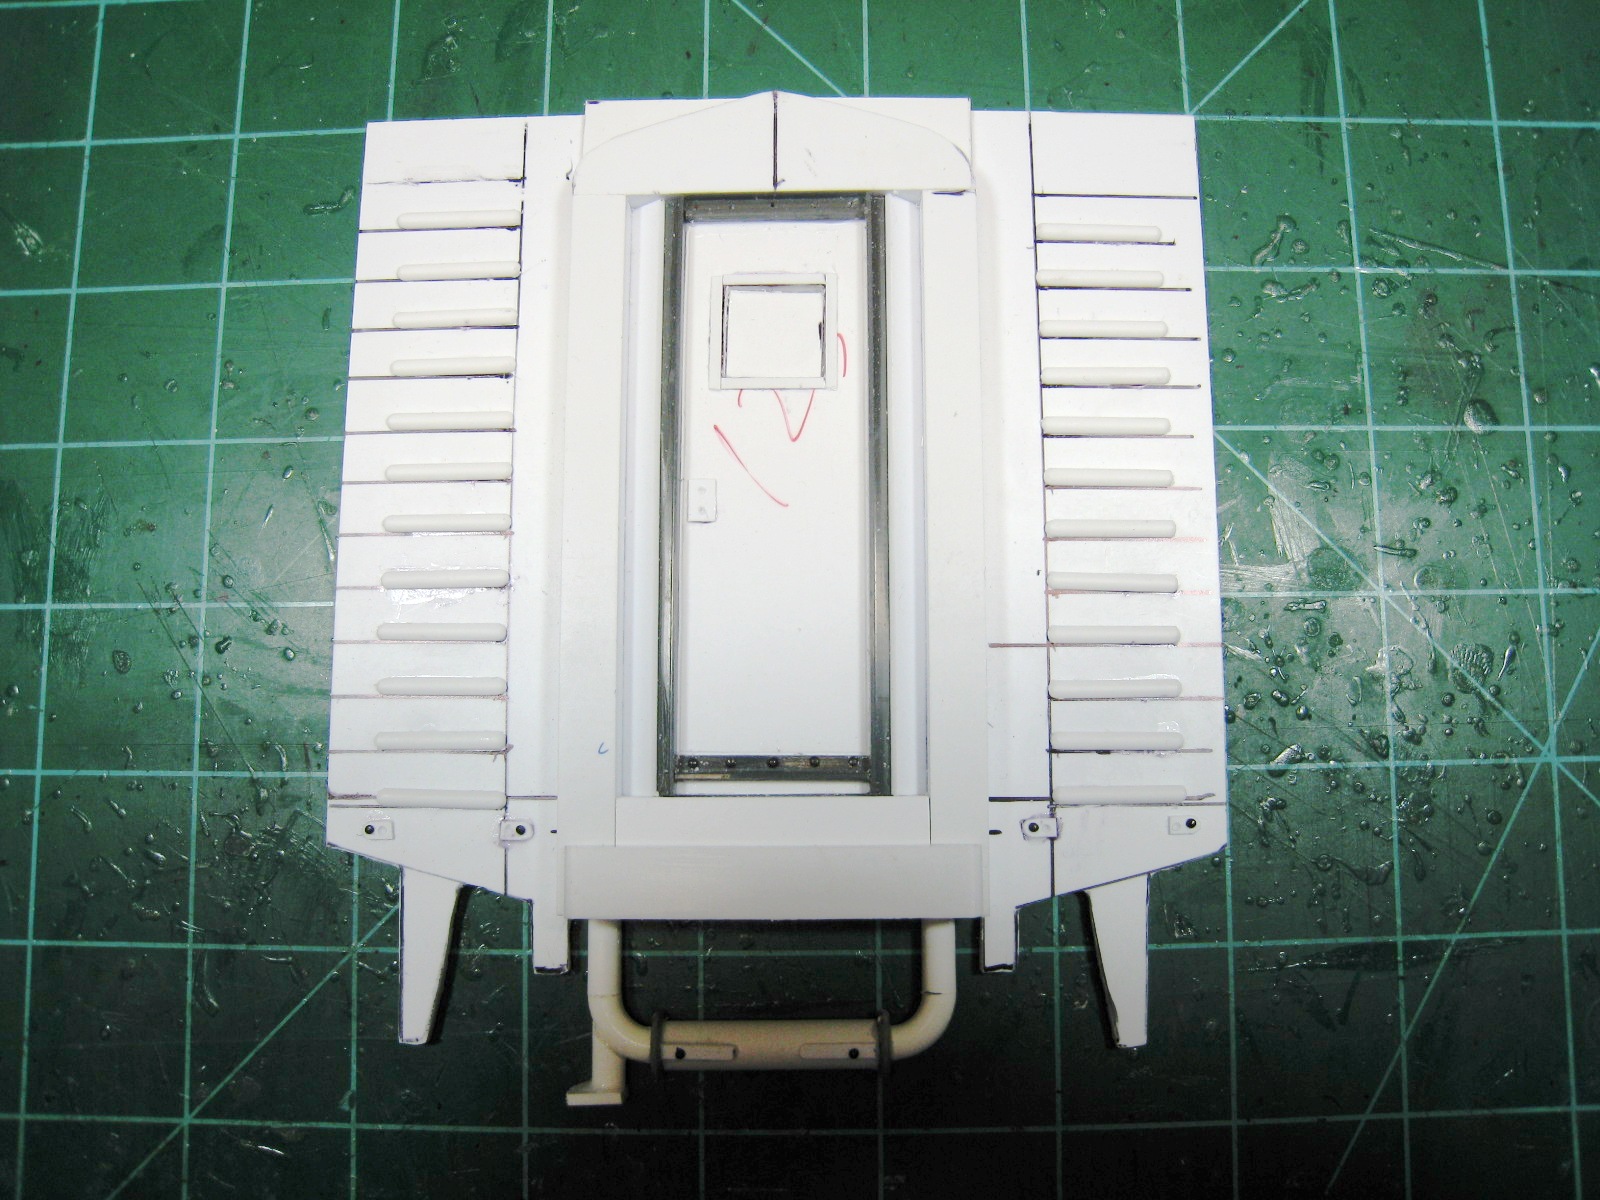
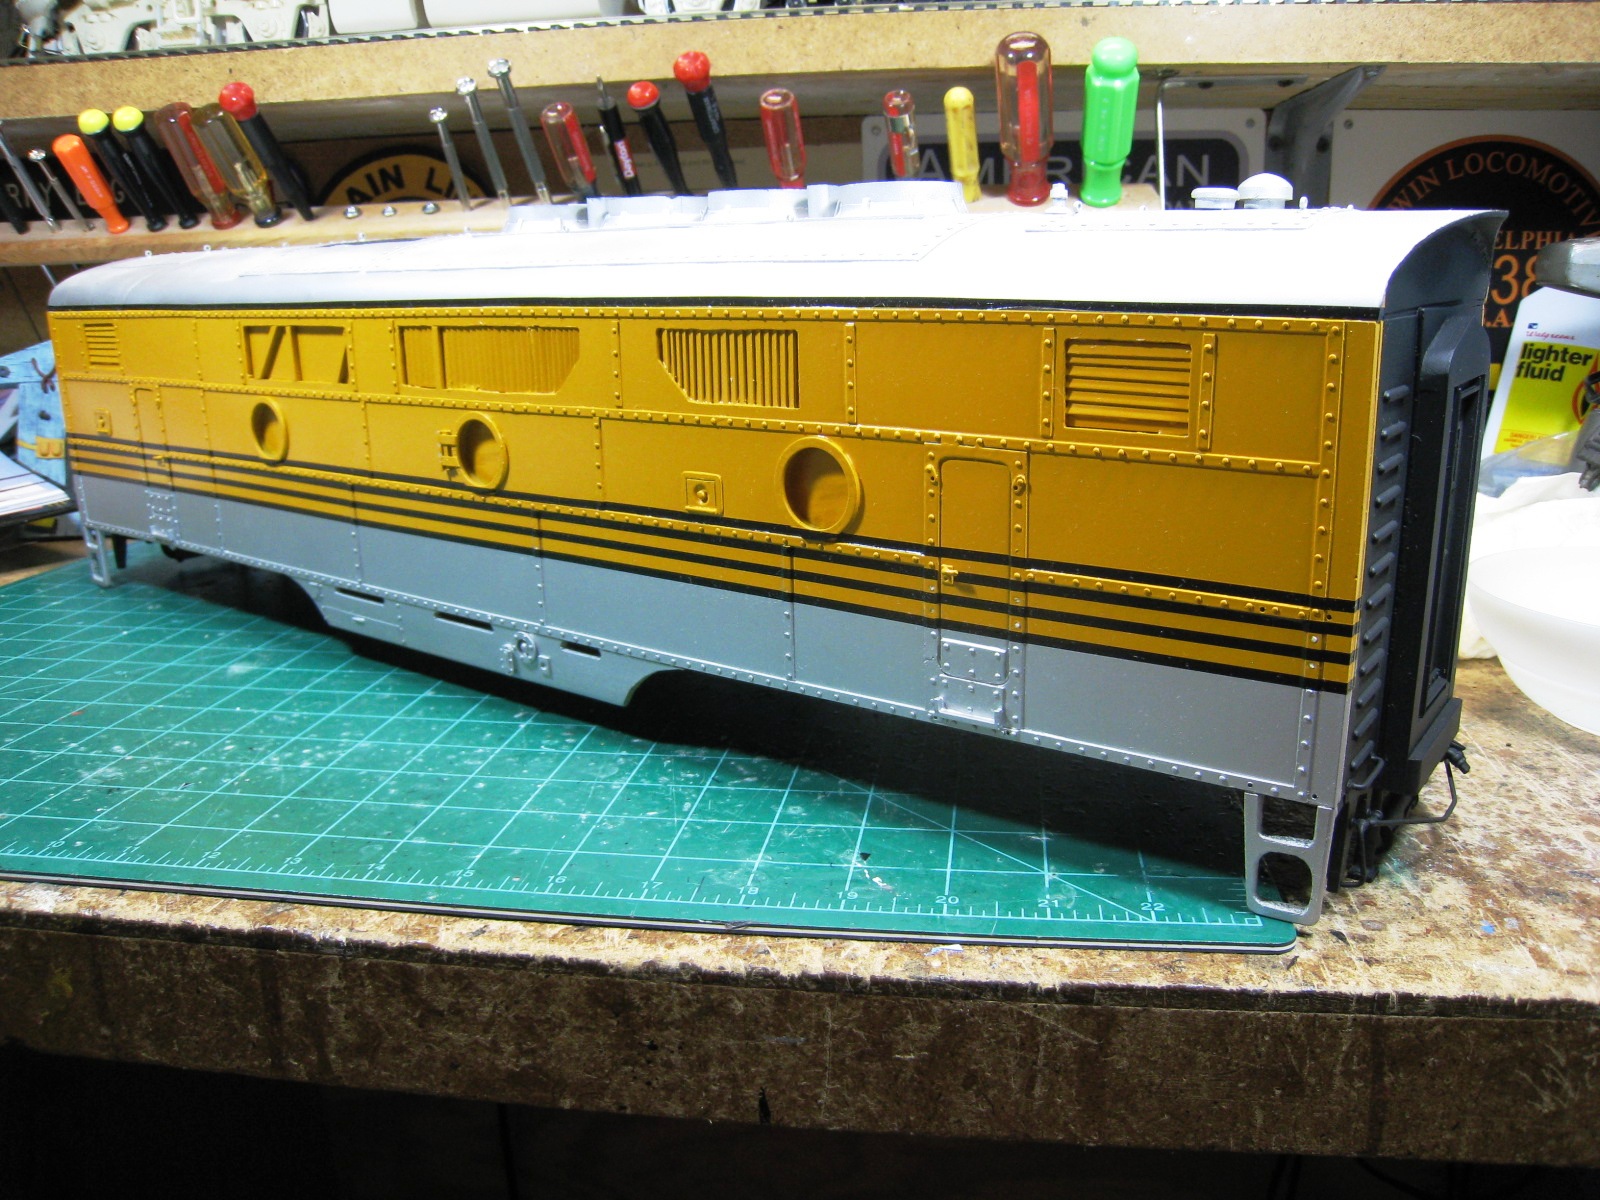
Carbody Sides & Ends "There is still much more to do, and the roof sections are just laying on the top of the body. The roof will have to be milled off to accept the fan assembles. I worked on the B unit first, because I ran out of rubber while making the nose casting for the A unit. Hope to have the materials soon, so that I can get the A unit together by early next week. This project has really tested my skills as a caster and model builder. It has not been easy, but I am pleased with how it is shaping up. The nose casting will be the ultimate test of this project, if it comes out well. When it is all said and done, I will have spent over $400 in rubber alone for this project, not to mention the urethane for the castings. I sometimes wonder if it is worth it! "
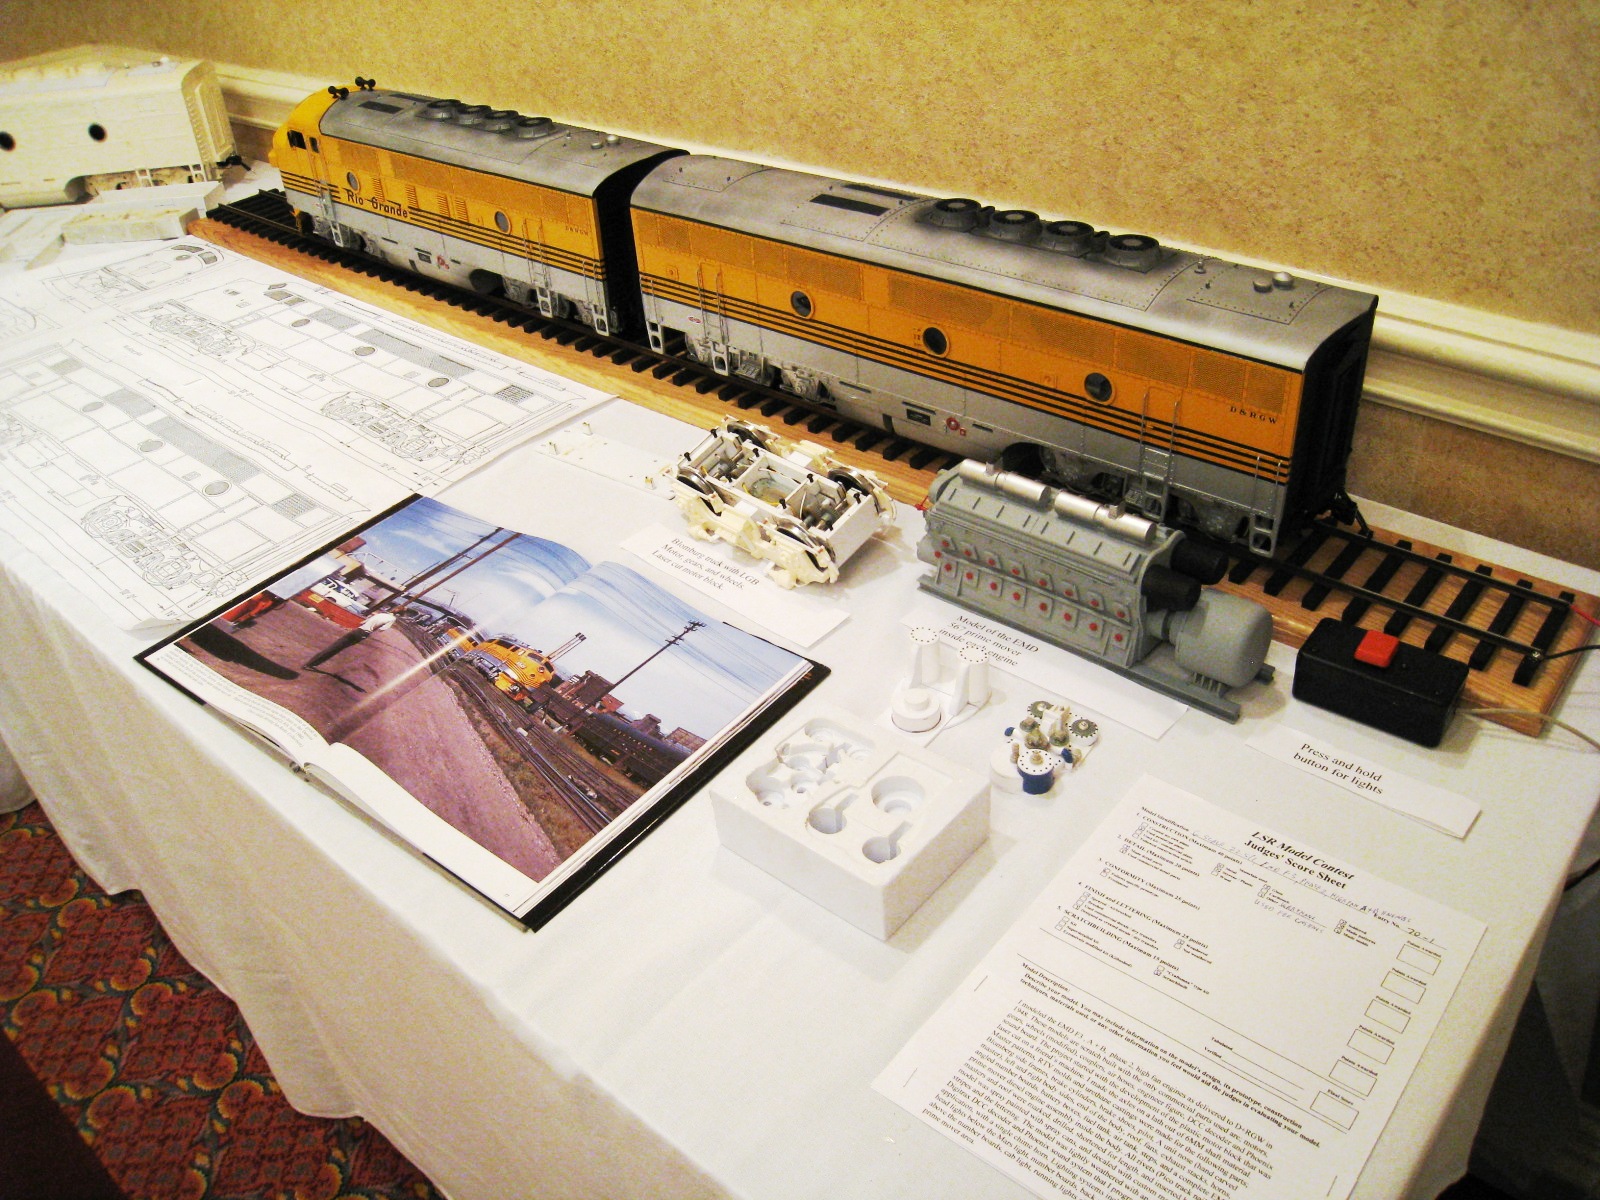
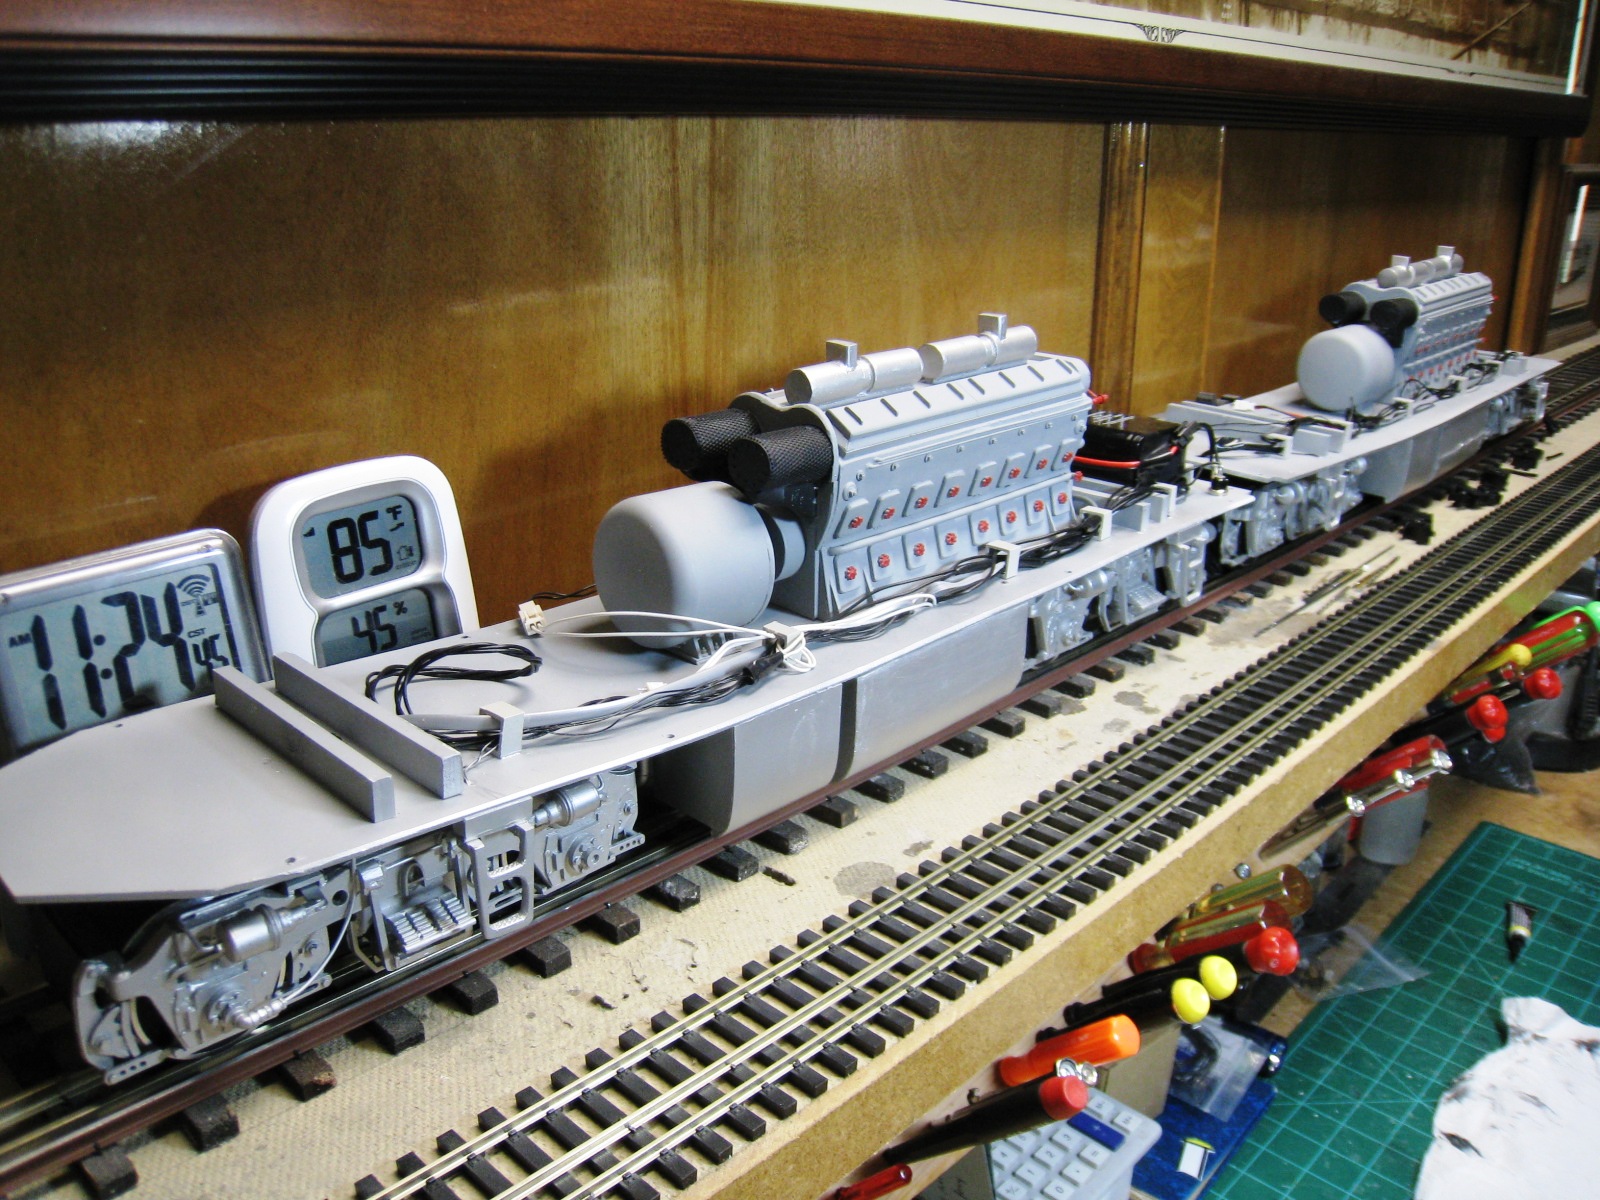
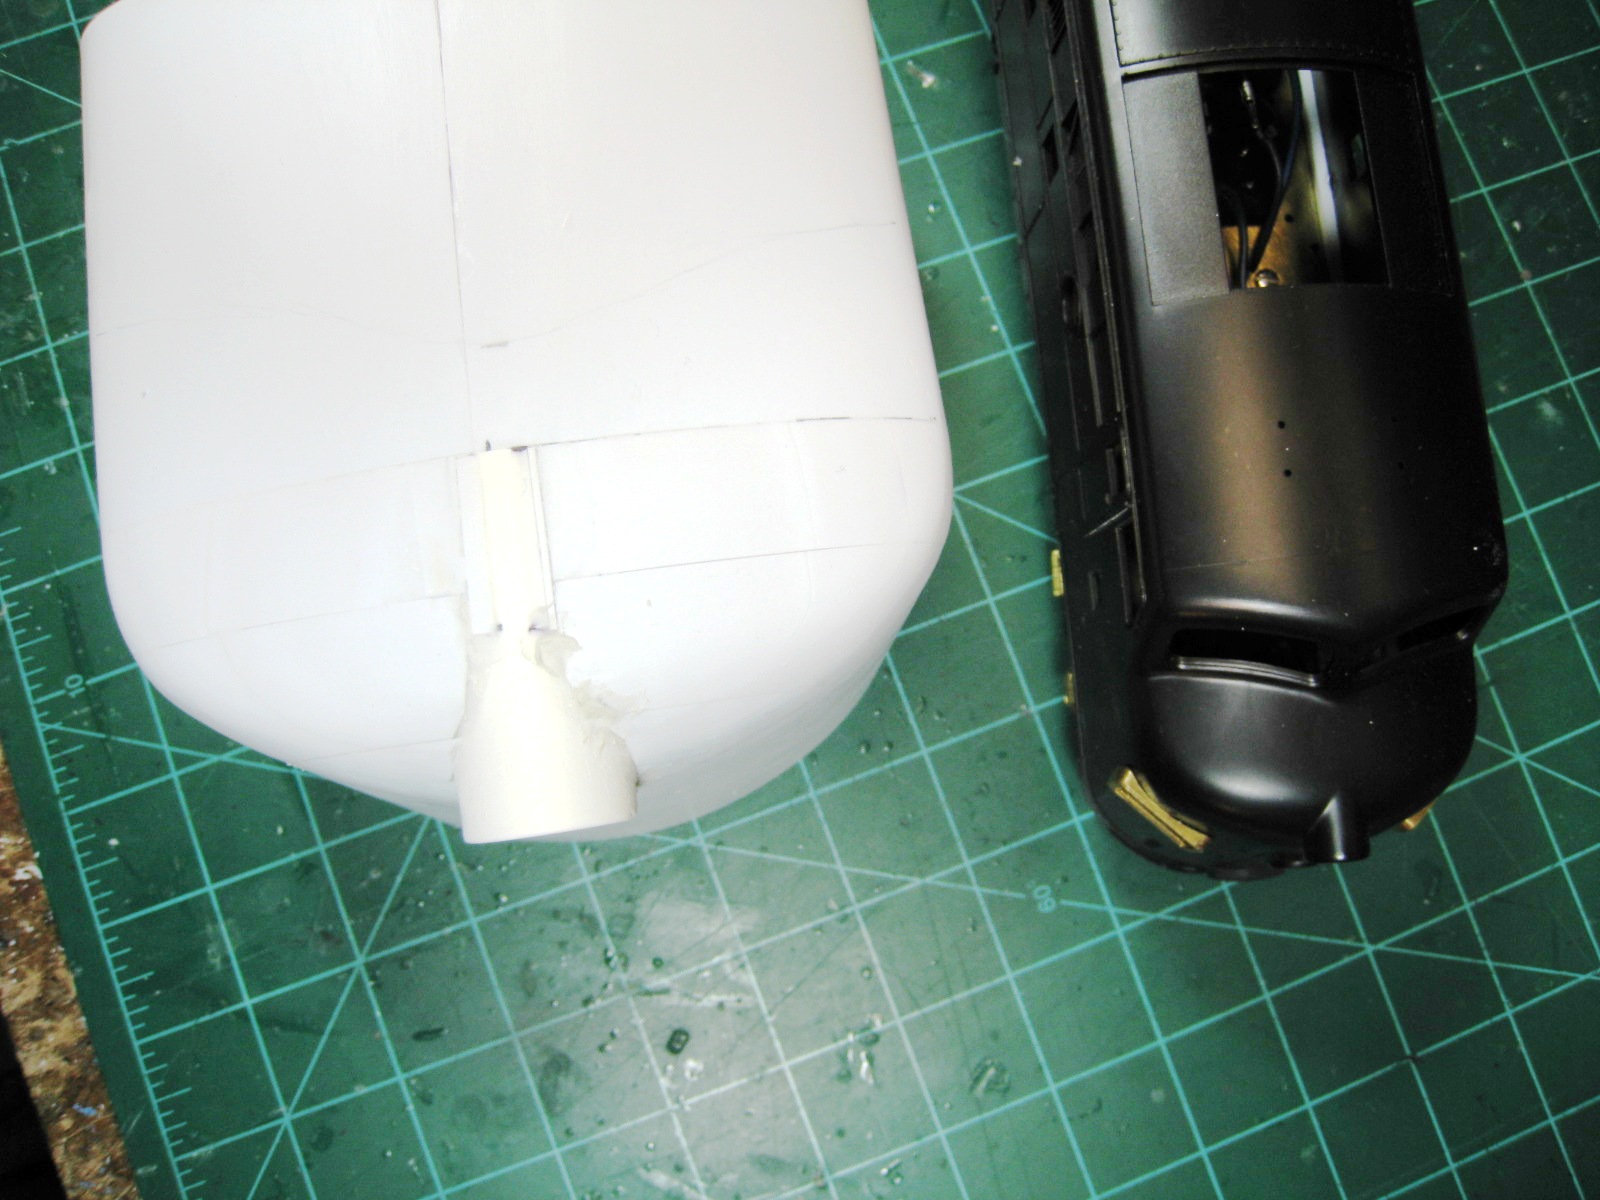
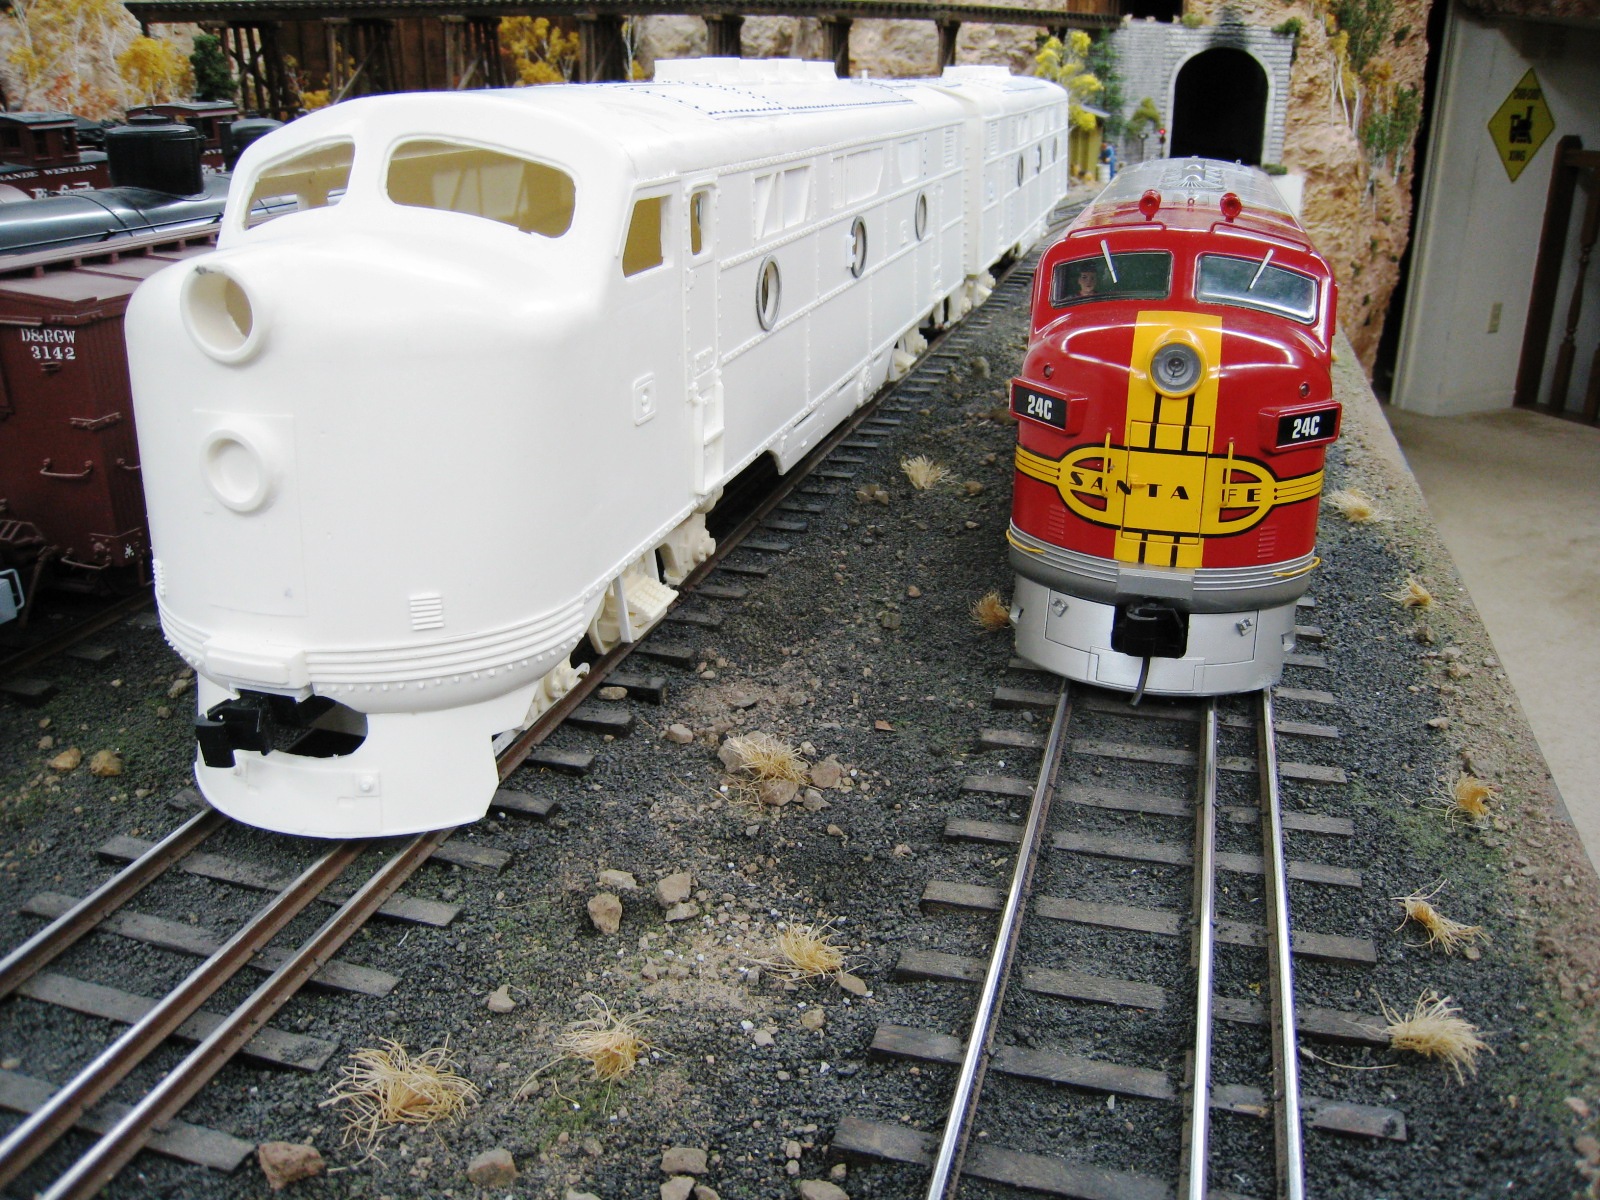
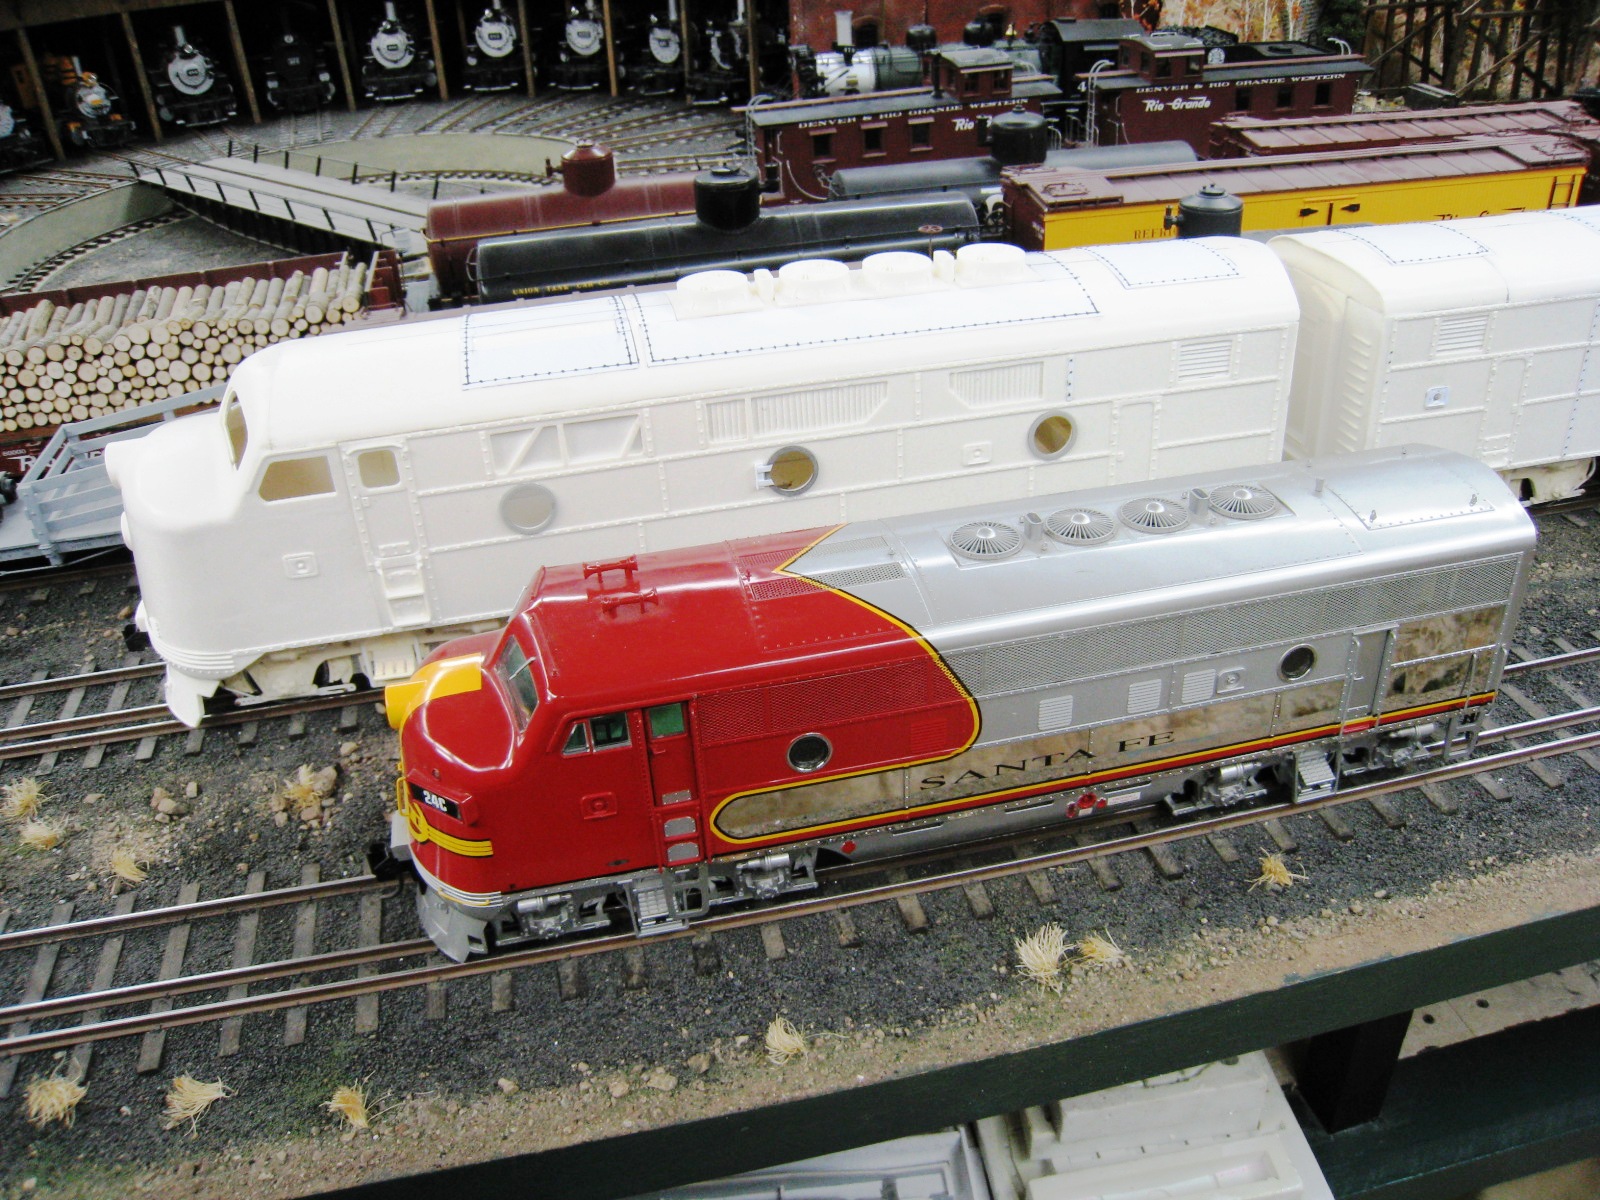
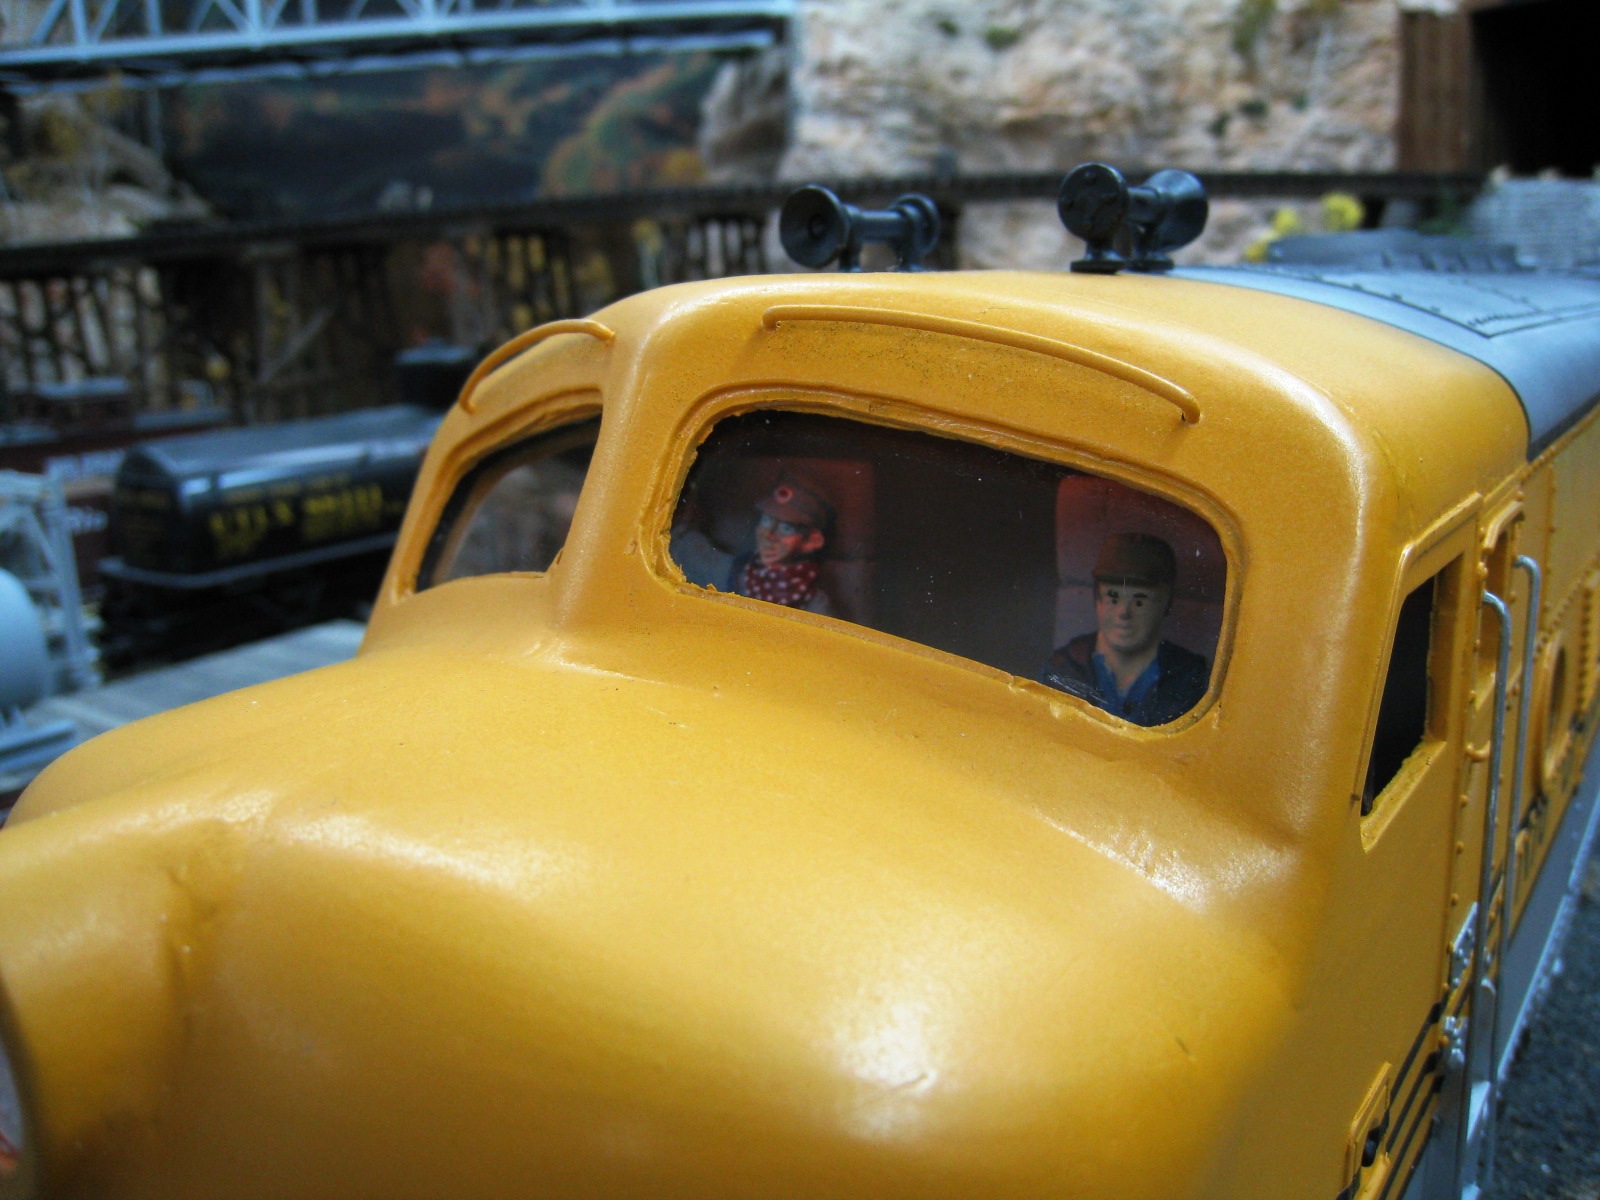
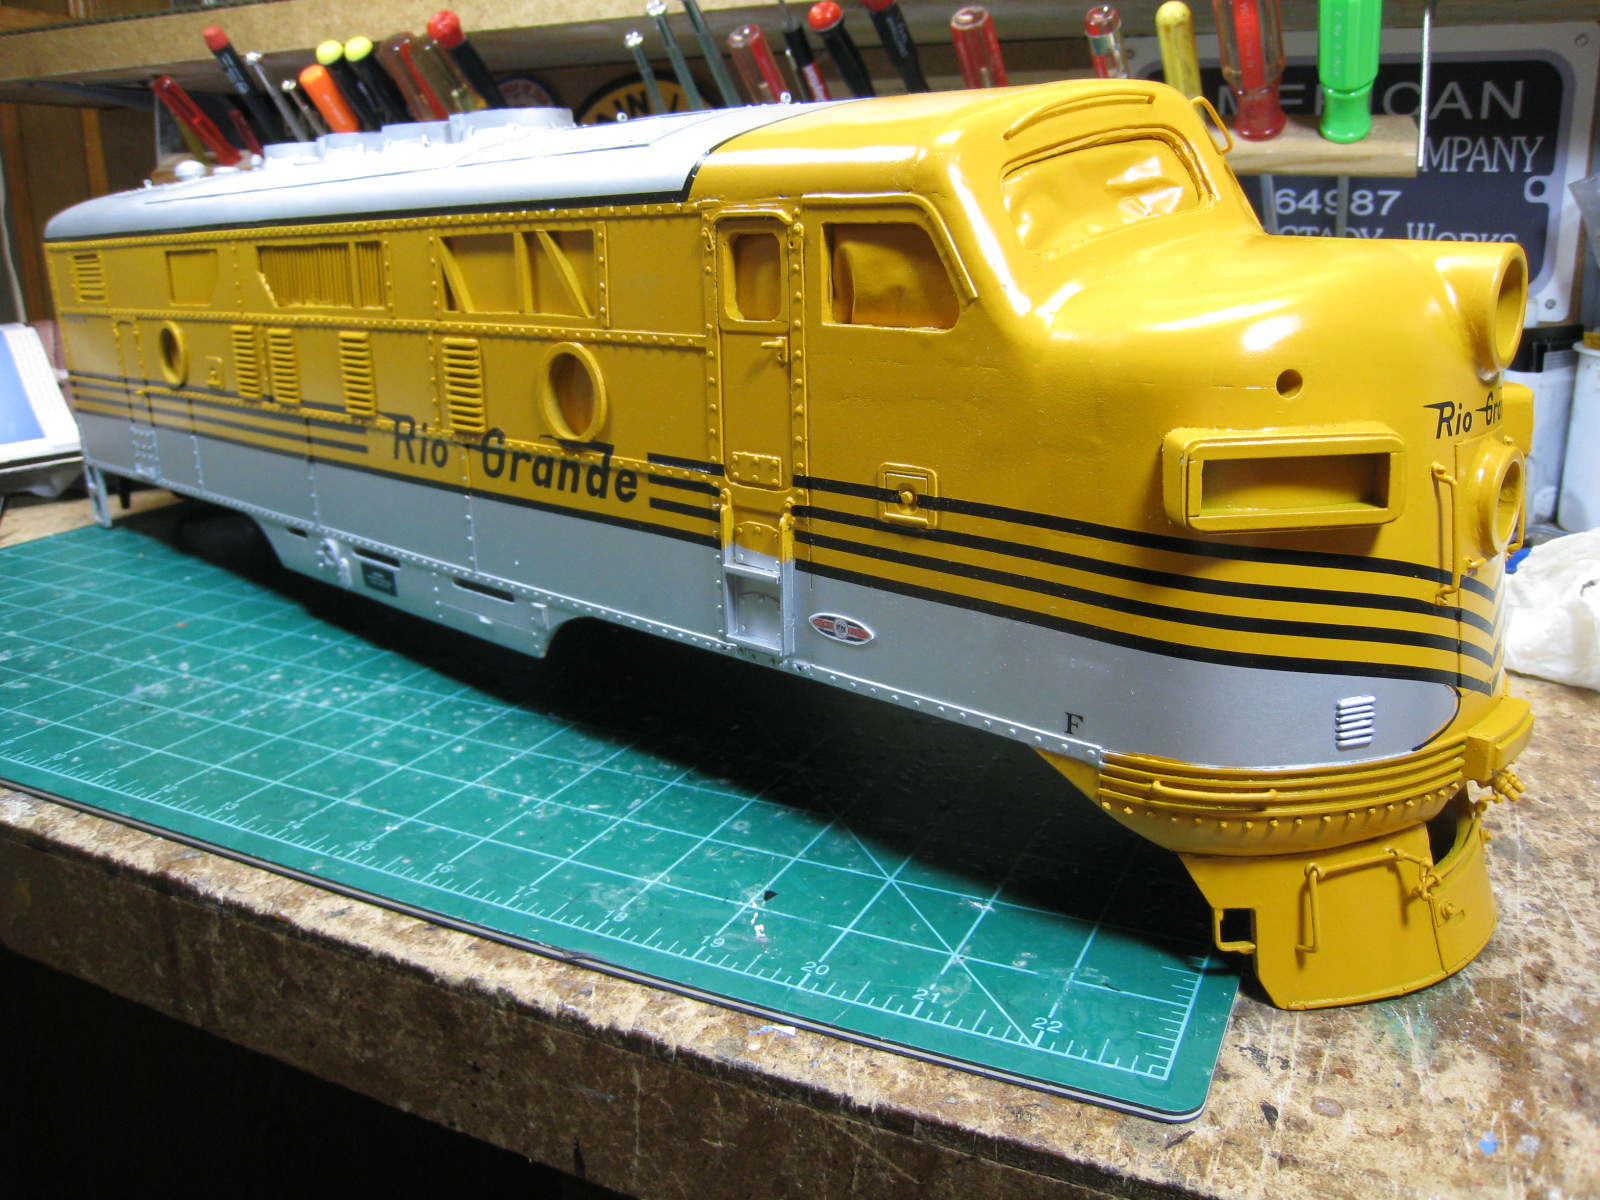
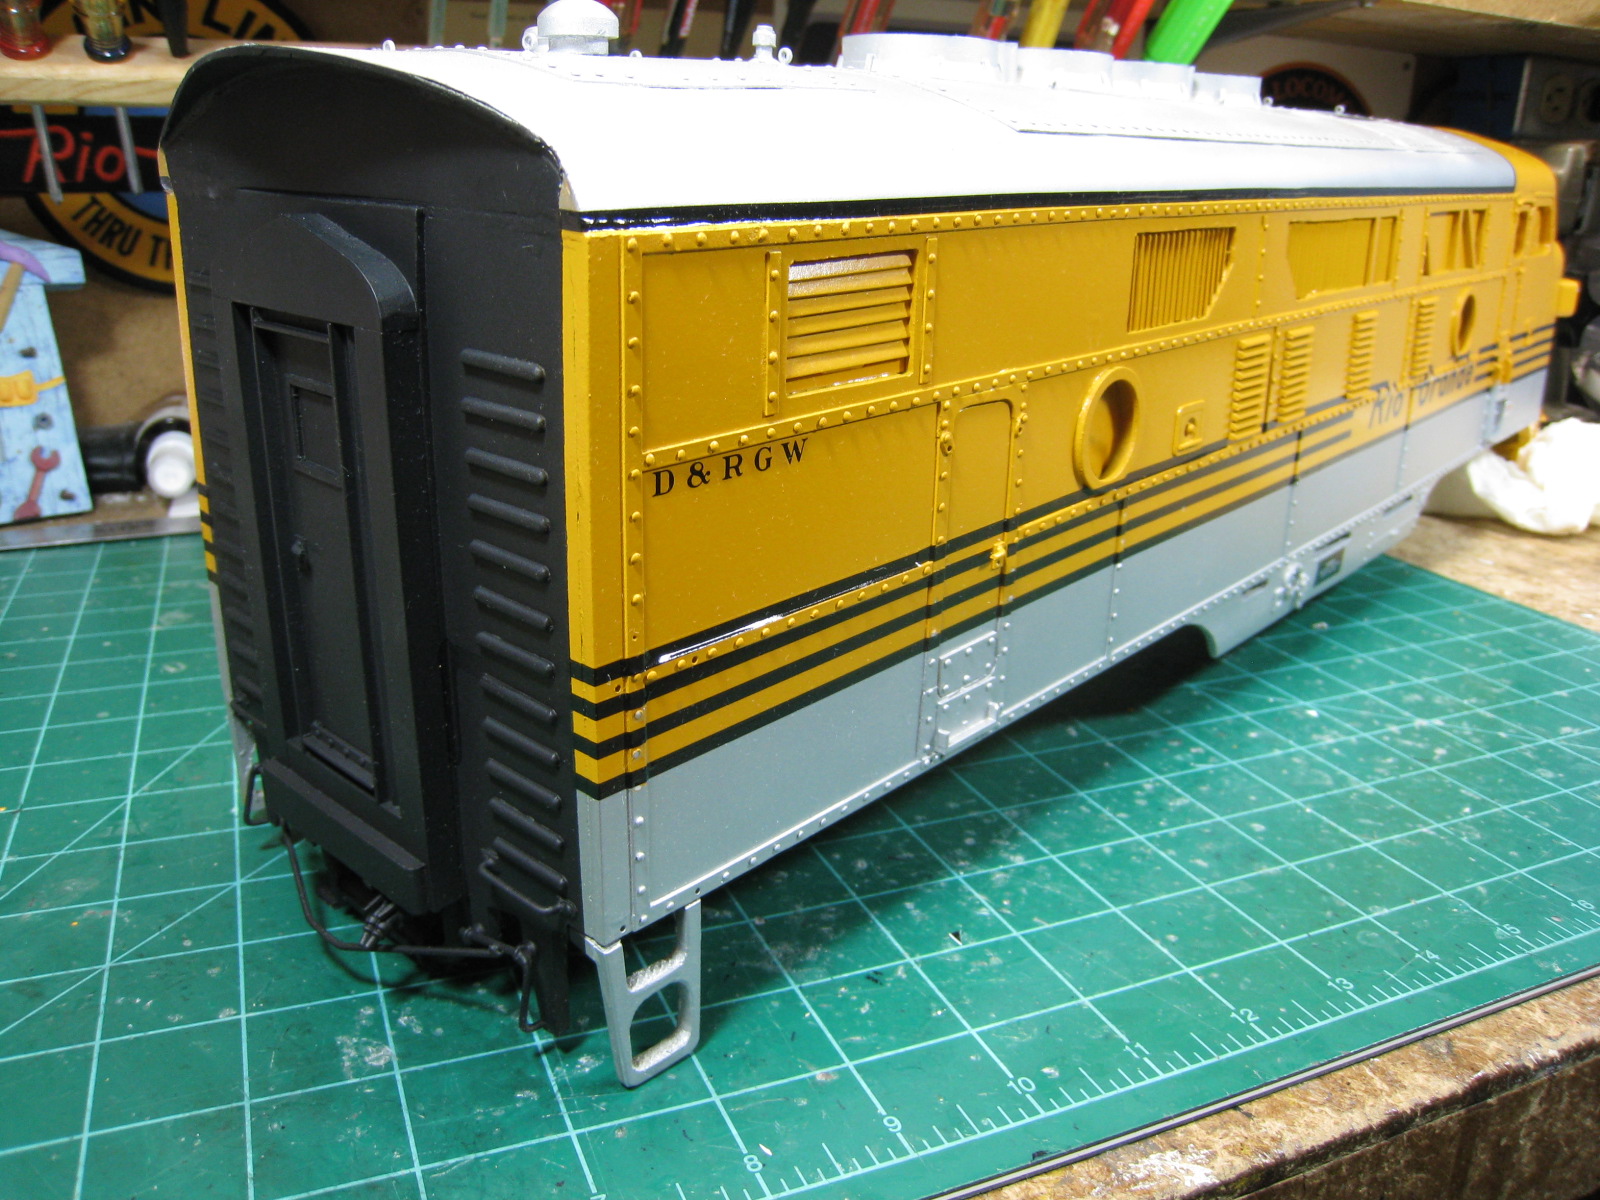
Putting It All Together "I am pleased how well the castings came together to form the body. Through the magic of Super Glue, urethane, and Bondo, (the stuff that dreams are made of) the A and B units rolled down the track today. Of course there is much more to do, including making the masters for the cab interior, the 567 engine inside and the tanks & battery boxes below. I was asked a question, as to why I did not just use an USA Trains F3, instead of making my own. A couple of the pictures show a USA Trains model next to mine. Mine is 1:22.5 and the USA Trains F3 is 1:29 scale. Big difference!"
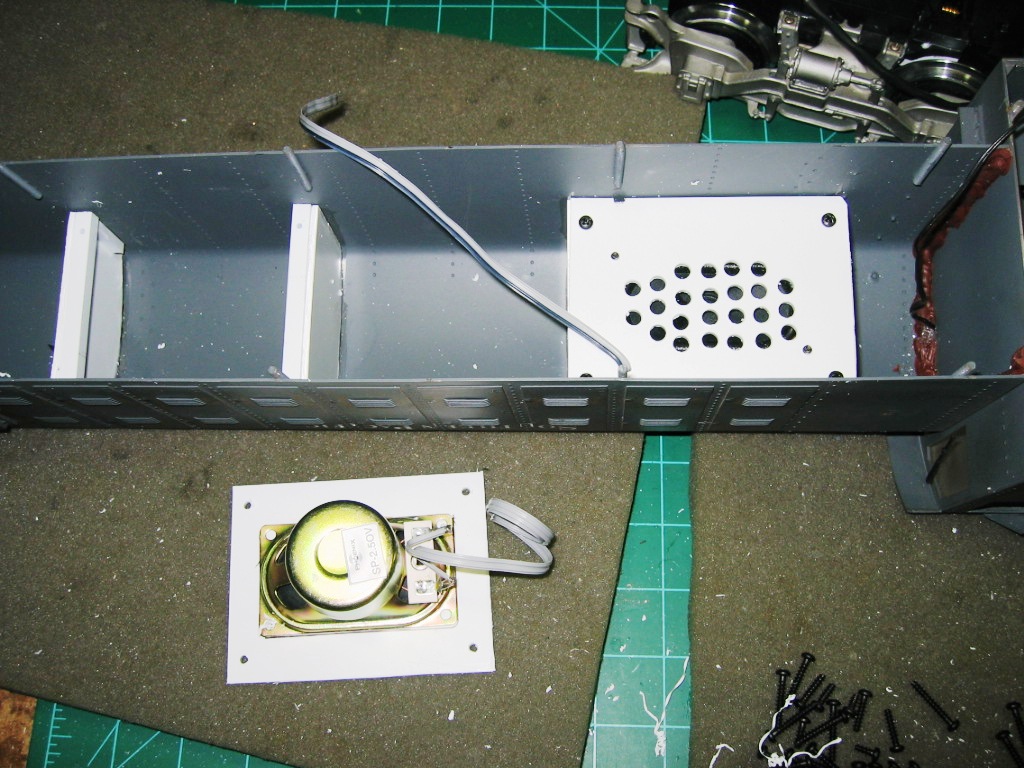
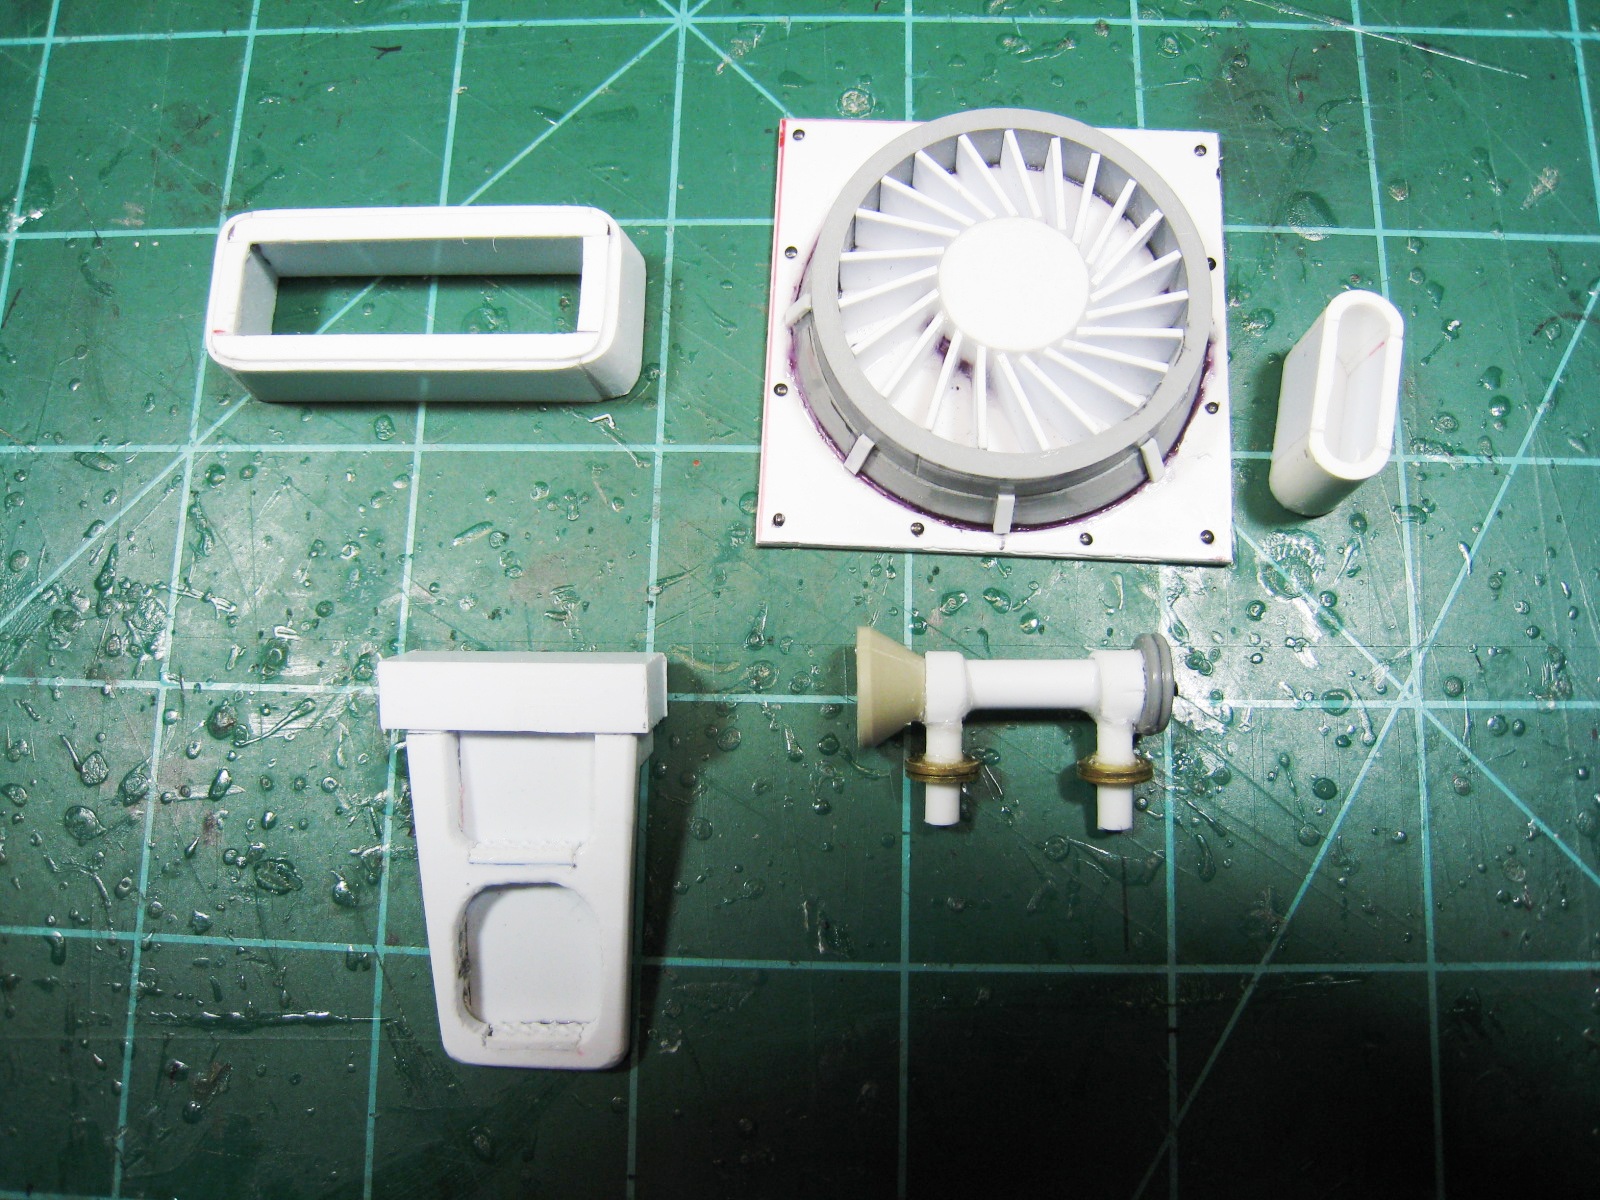
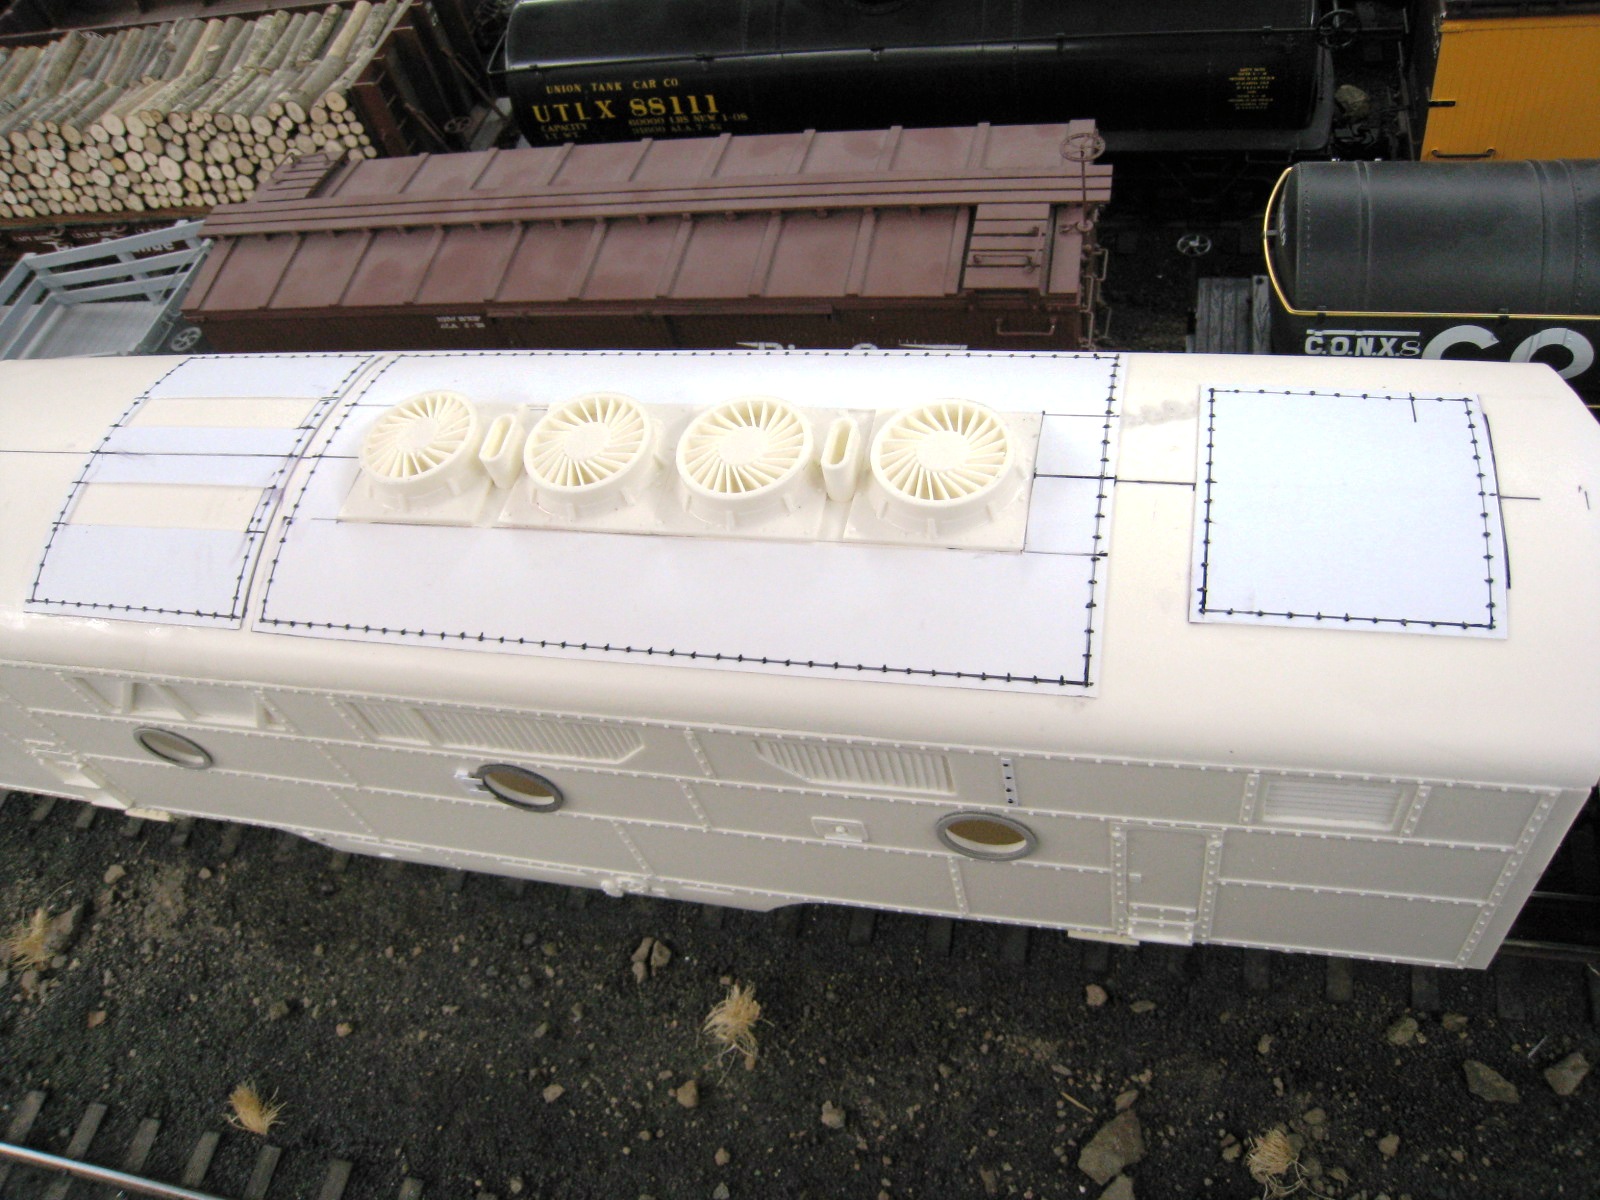
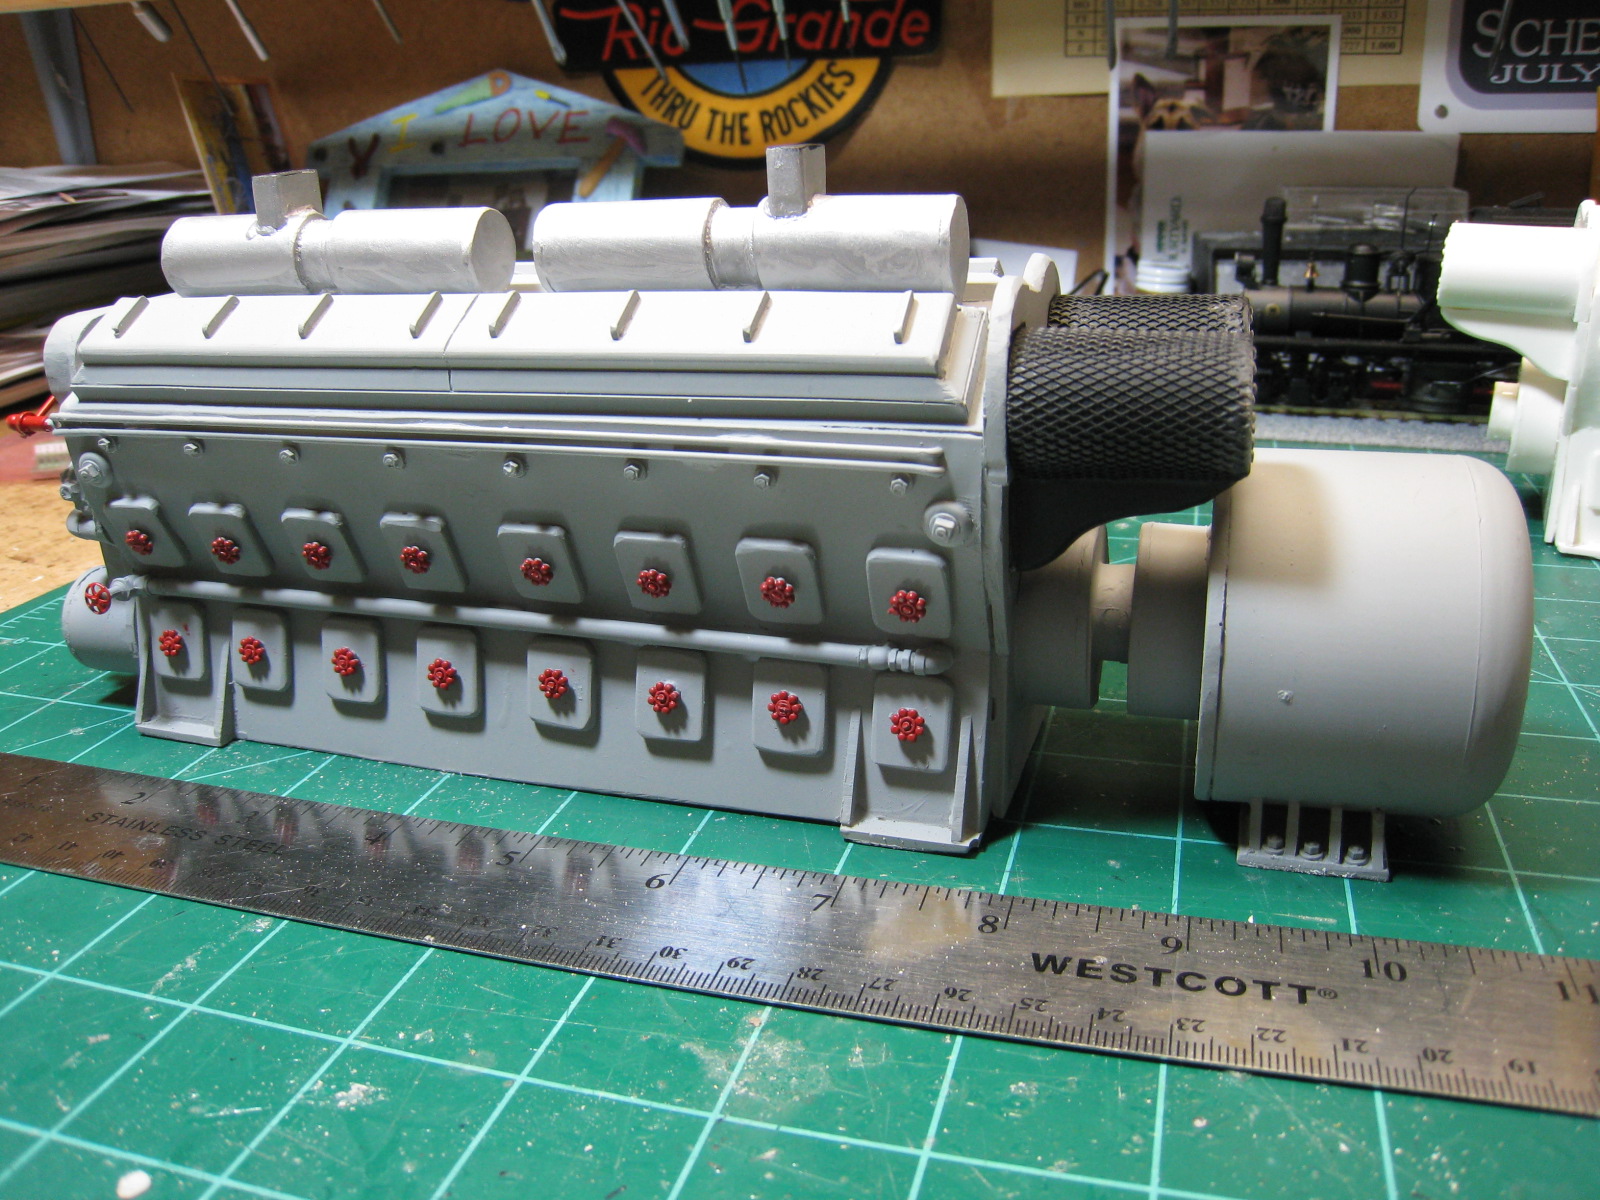
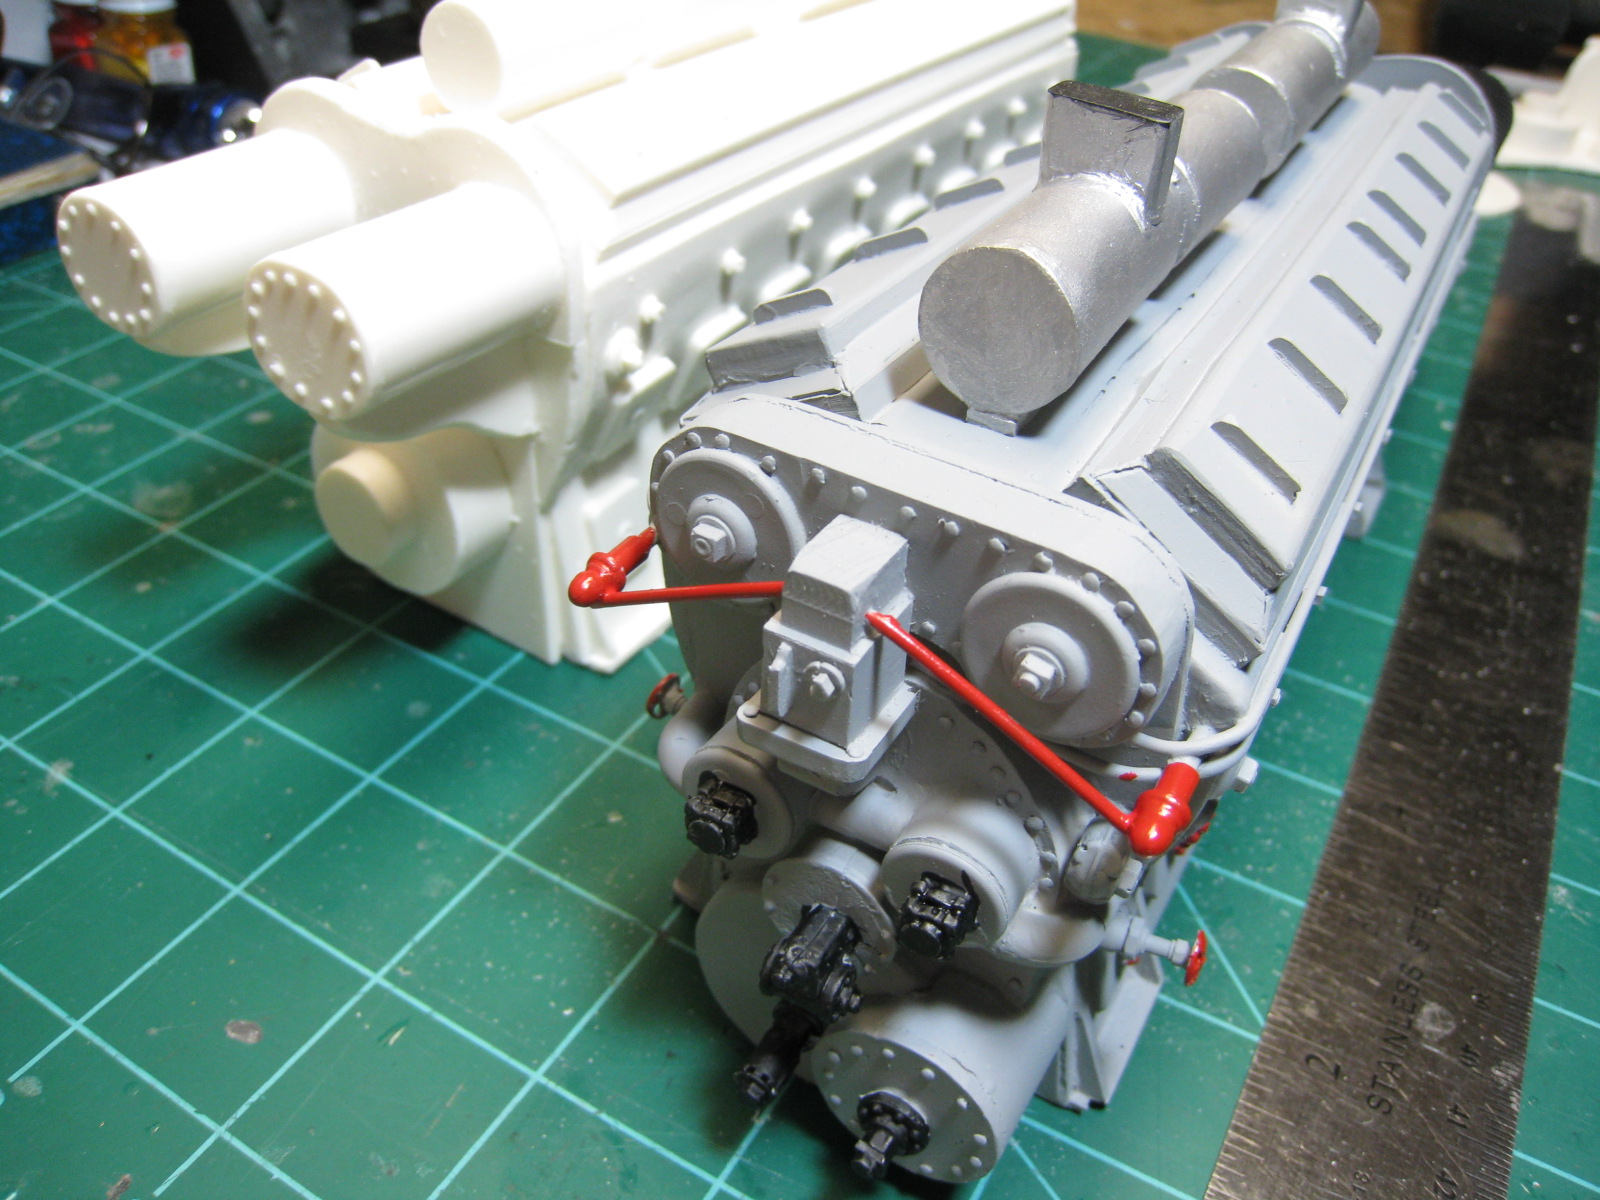
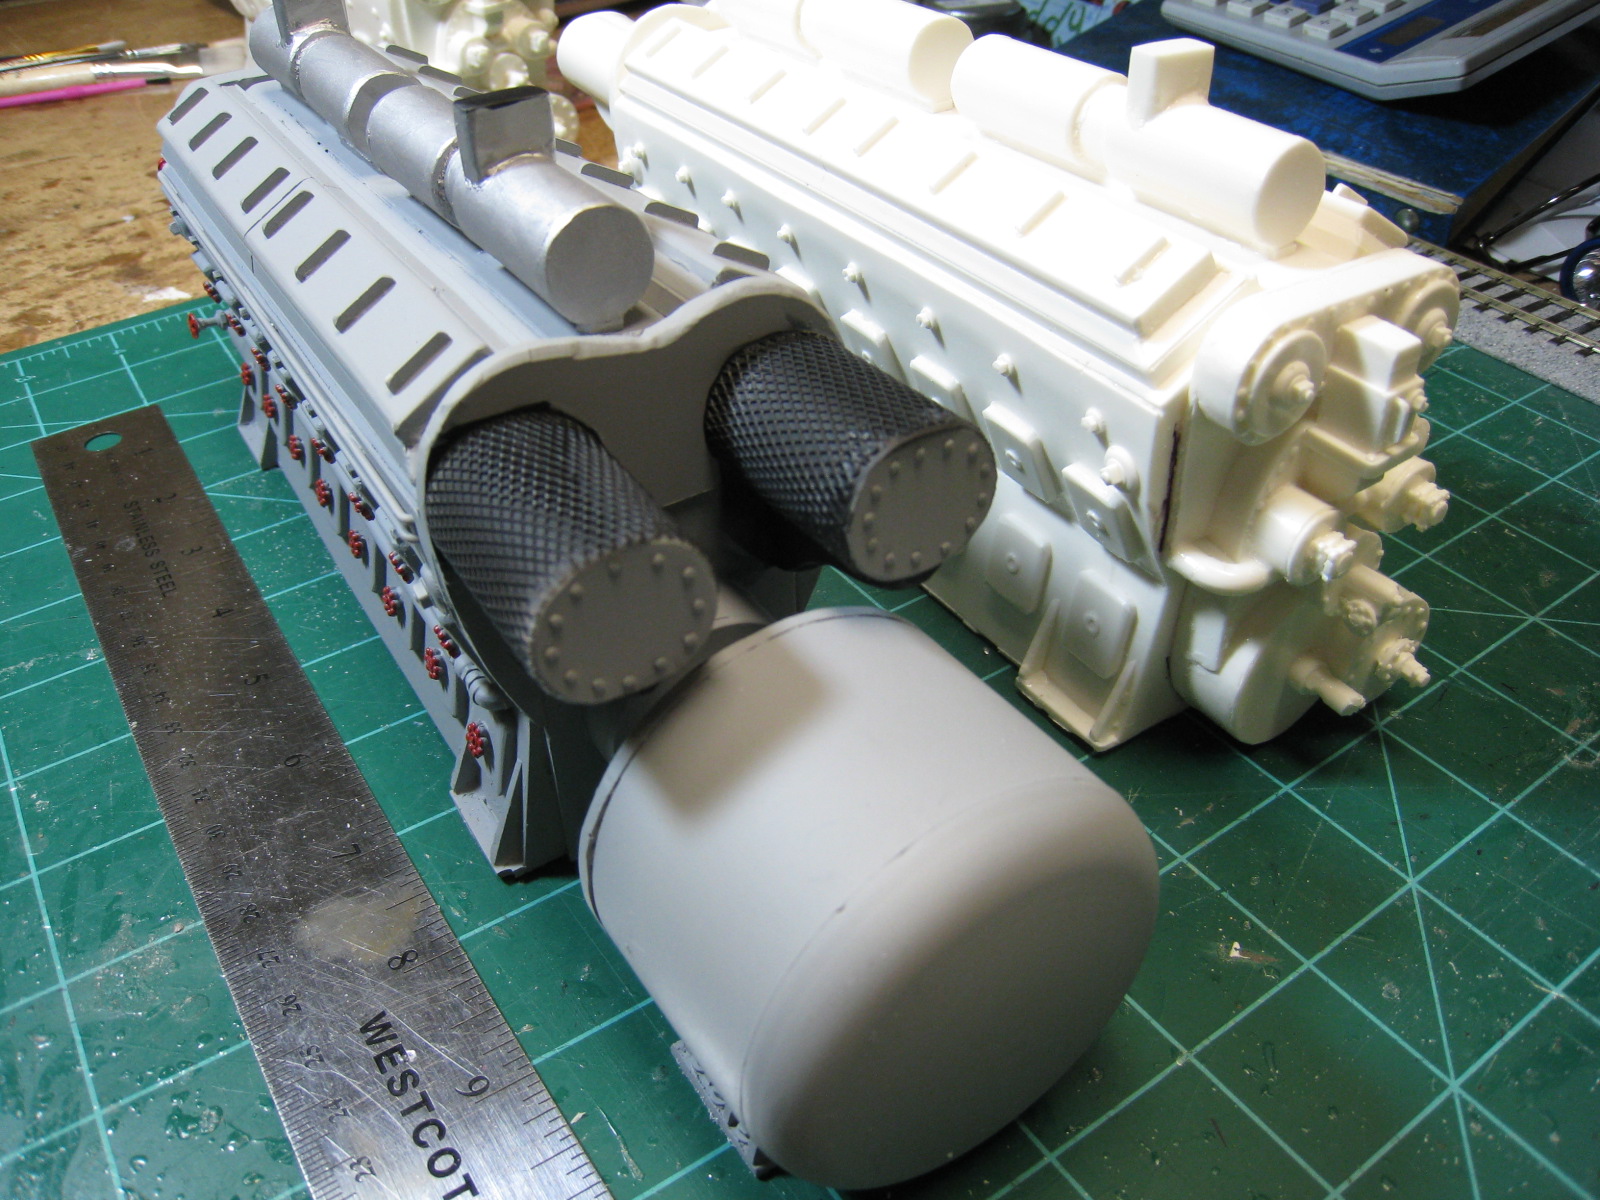
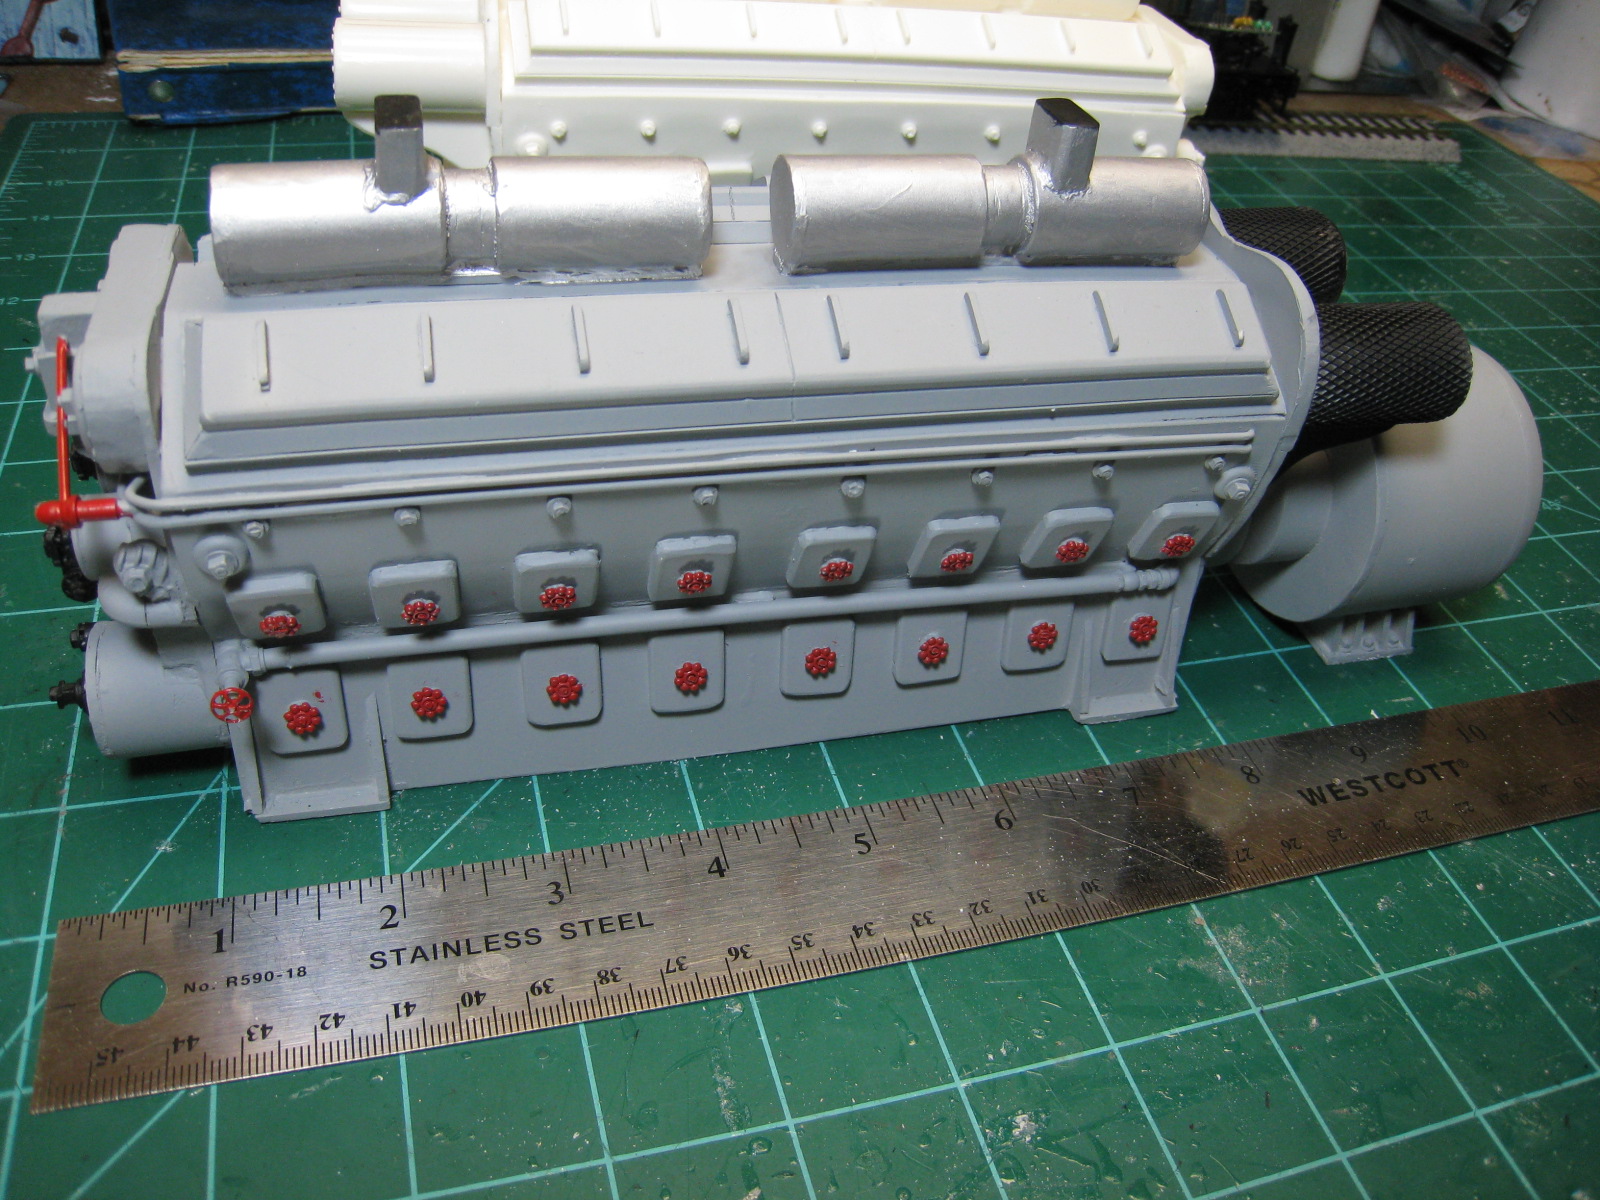
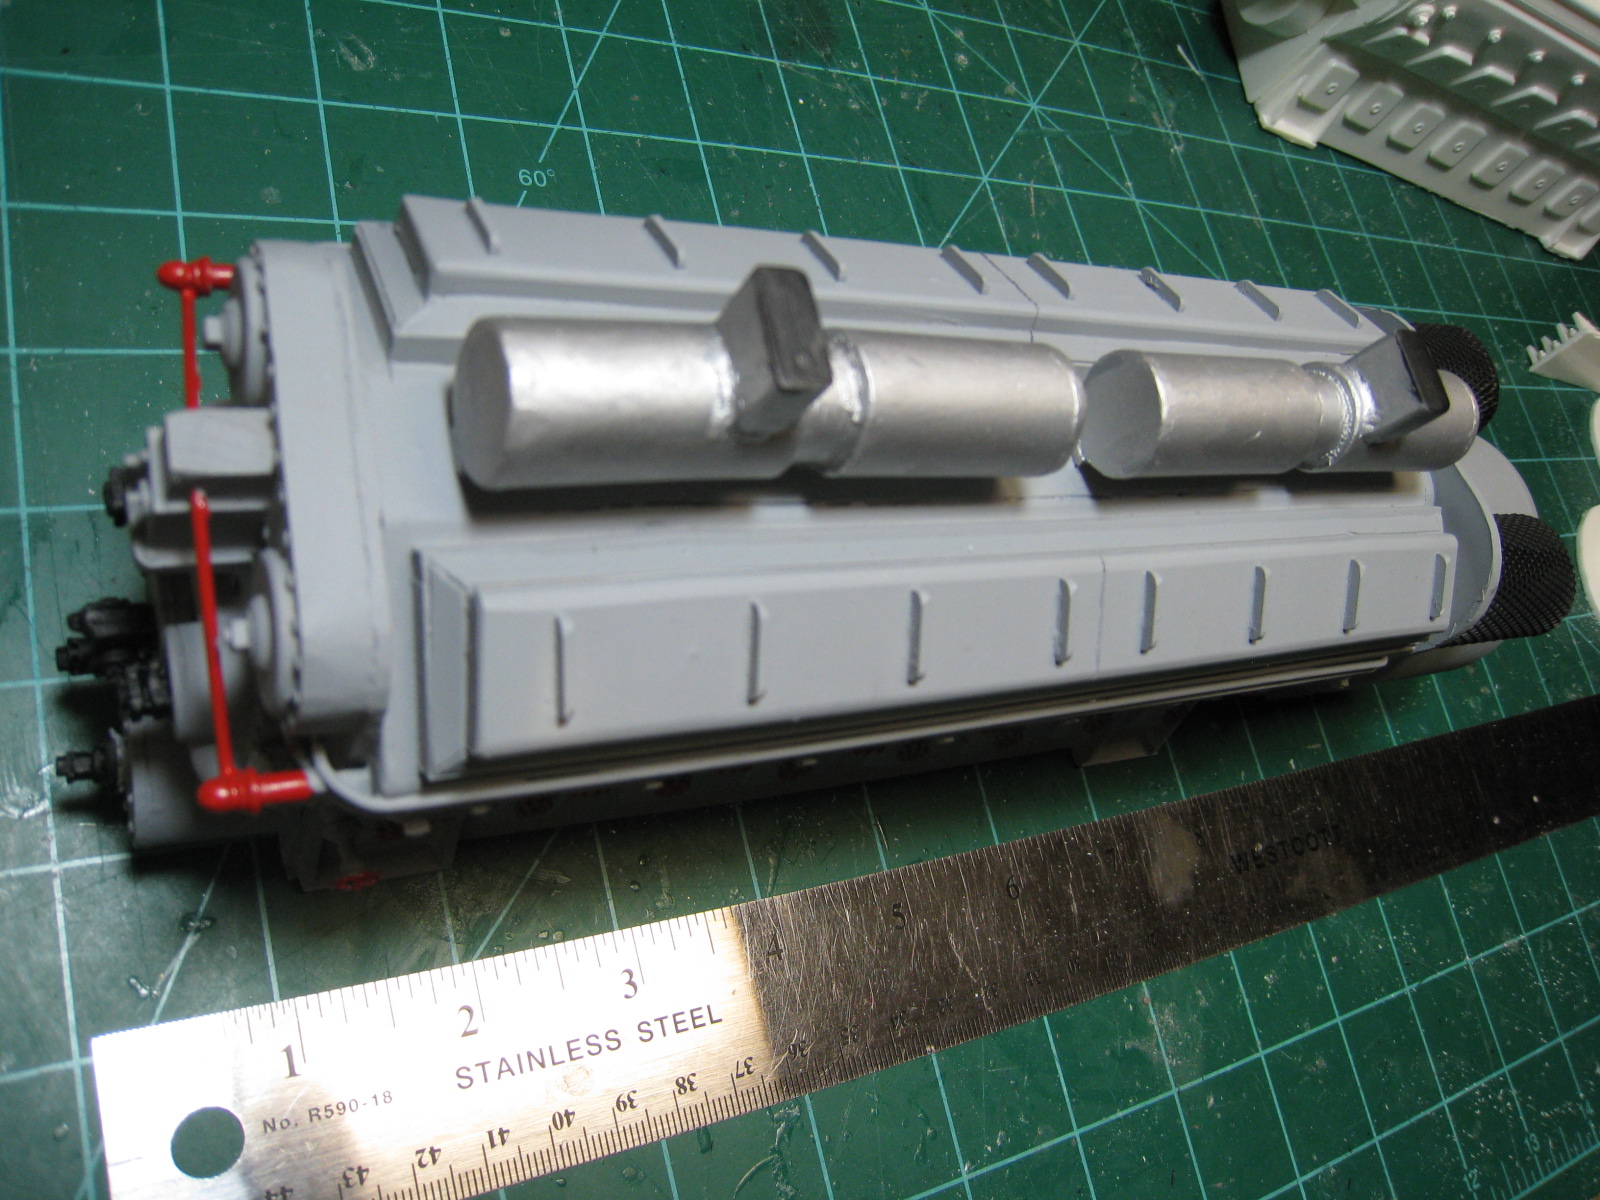
The 567B Prime Movers "I decided that the engines needed to have a prime mover inside the body, because the port holes are one inch in diameter, and if it is lighted inside, you should be able to see it through the holes. I used a Walther's HO model and pictures of the real thing to make the masters from. I used a 1.5" PVC end cap to model the generator, the rest is a solid casting with two pieces of wood in the main block to take up space and reduce the amount of casting resin. I added some I beams to the bottom of three of them, to use as flat car loads. I have made eleven of the engines so far, and will sell some on E-Bay later.I am pleased with how they turned out and they add weight to the F units (not that they need it)."
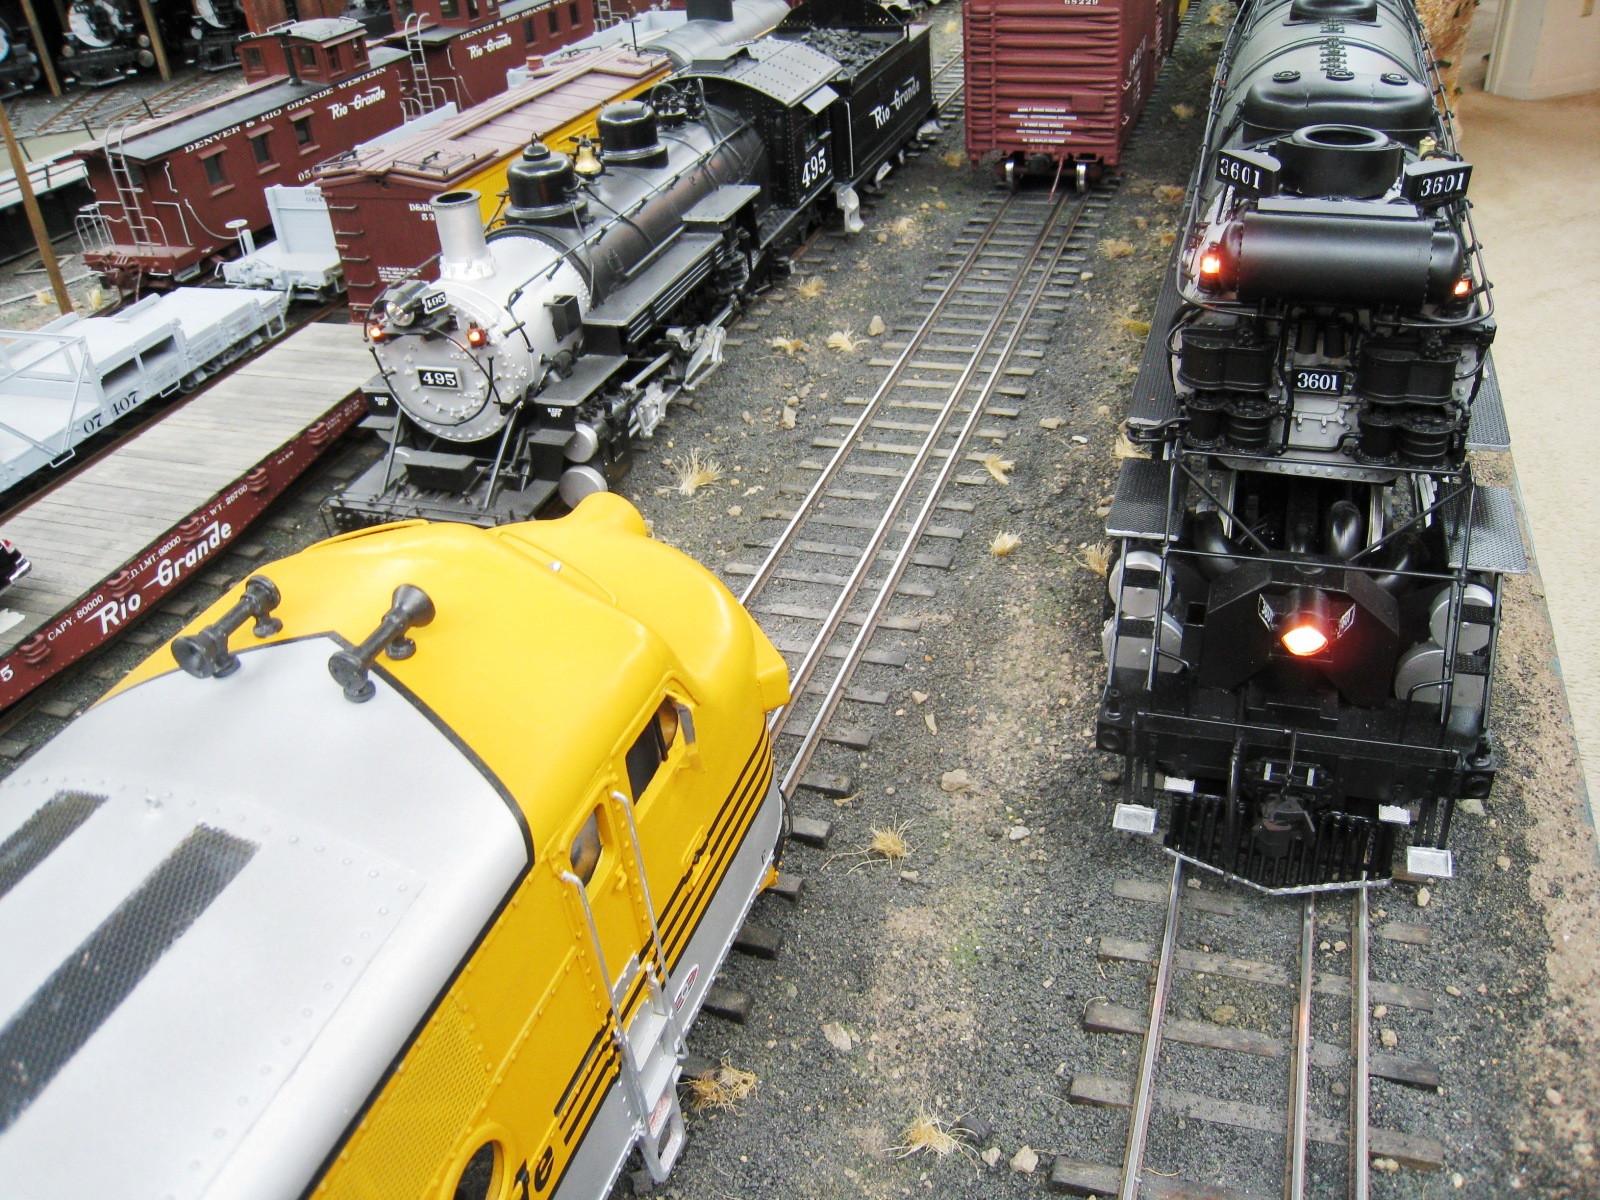
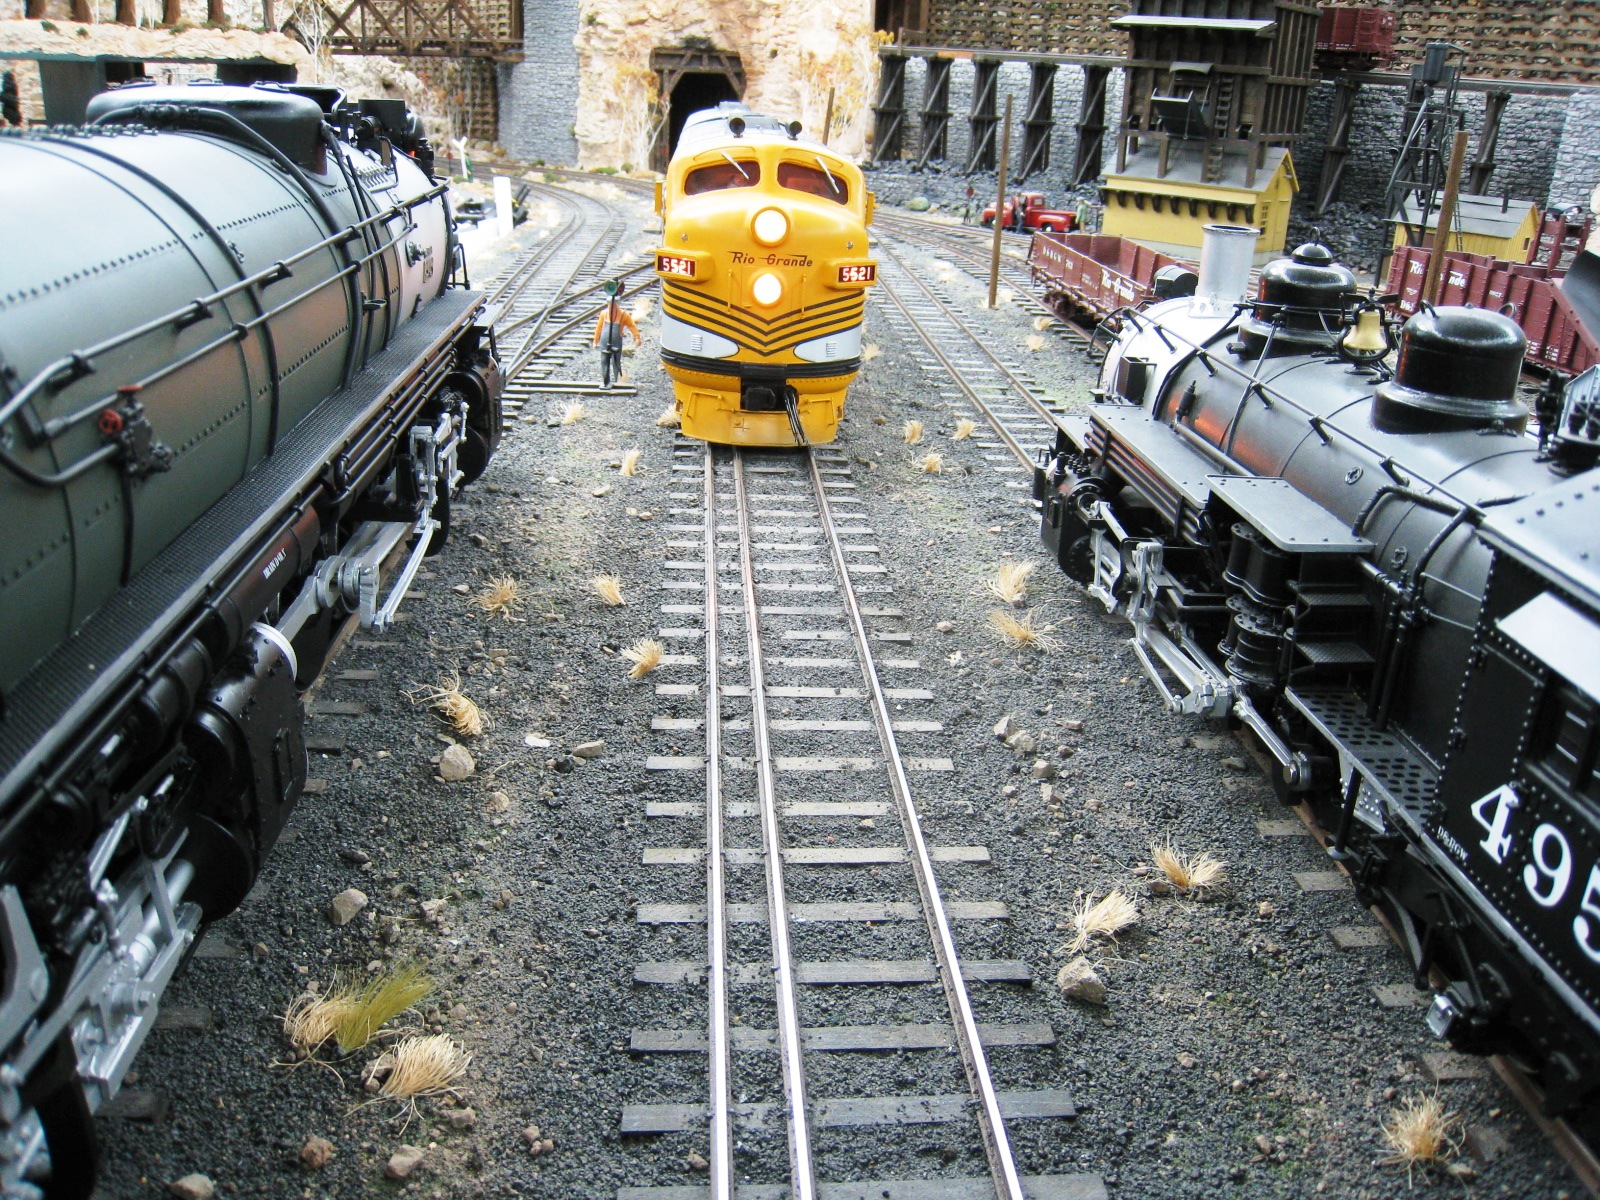
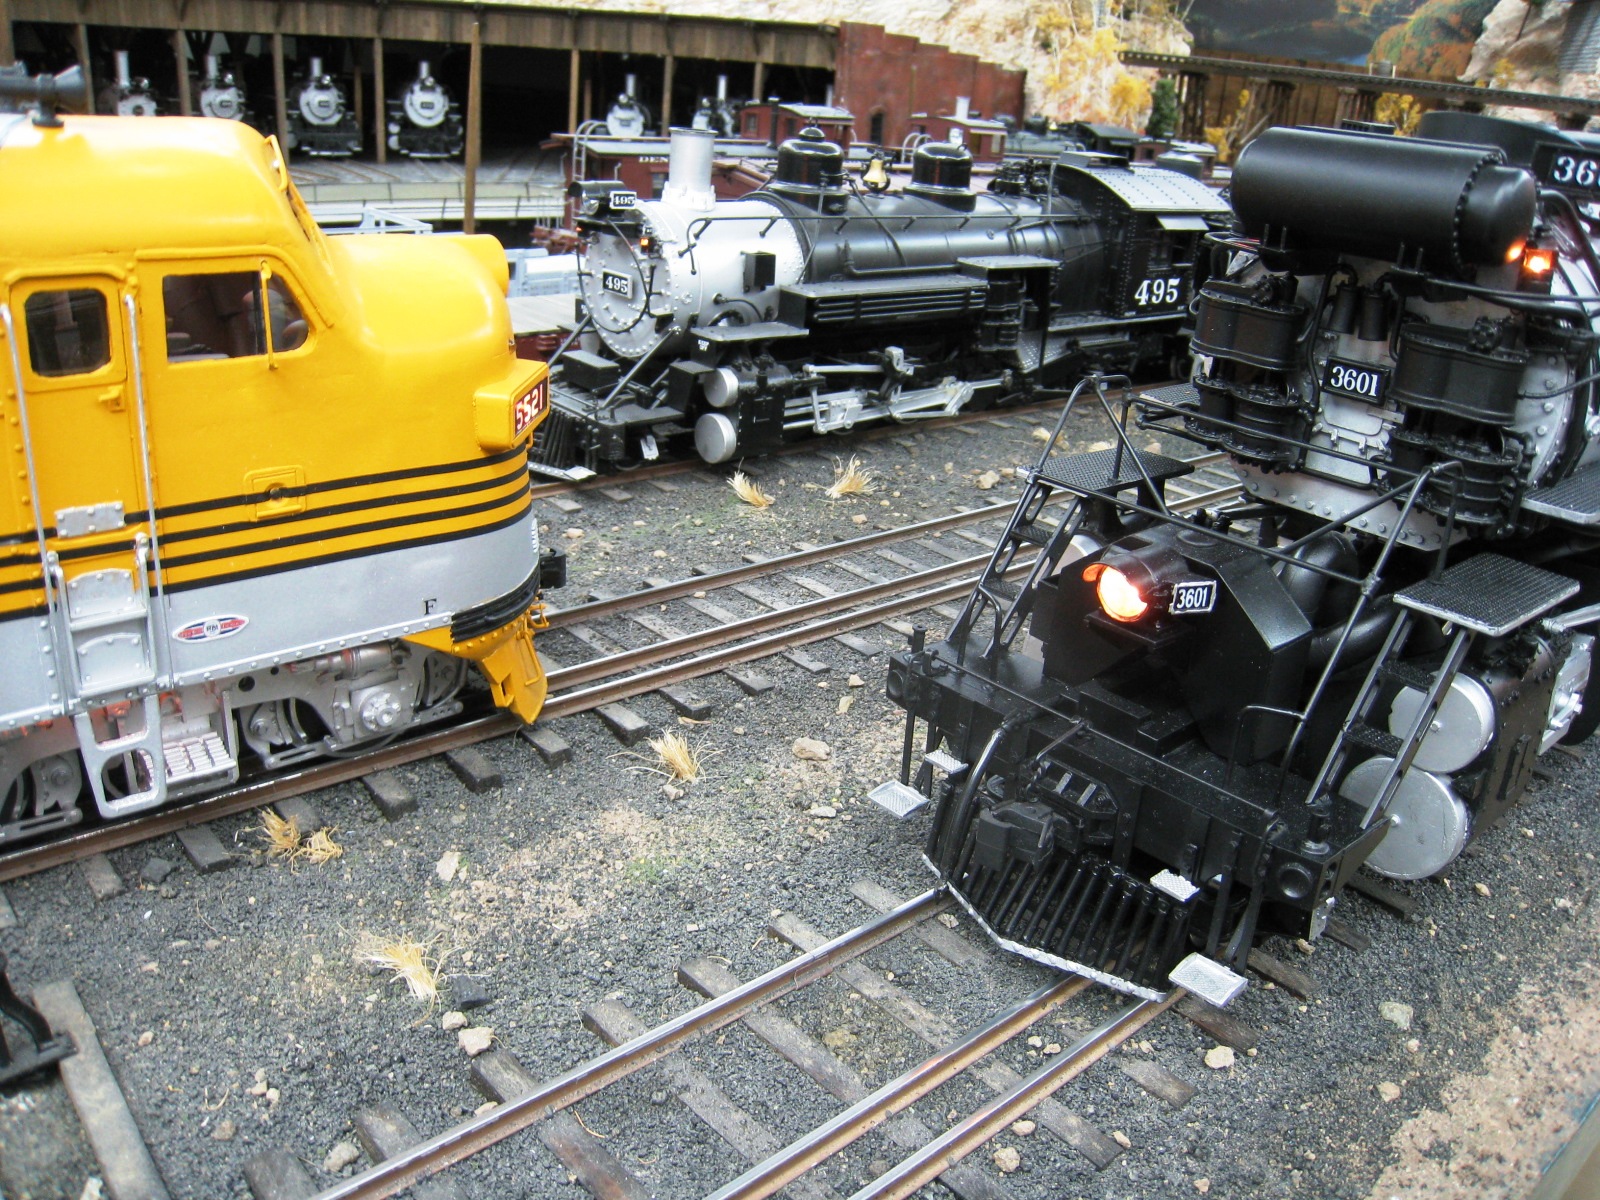
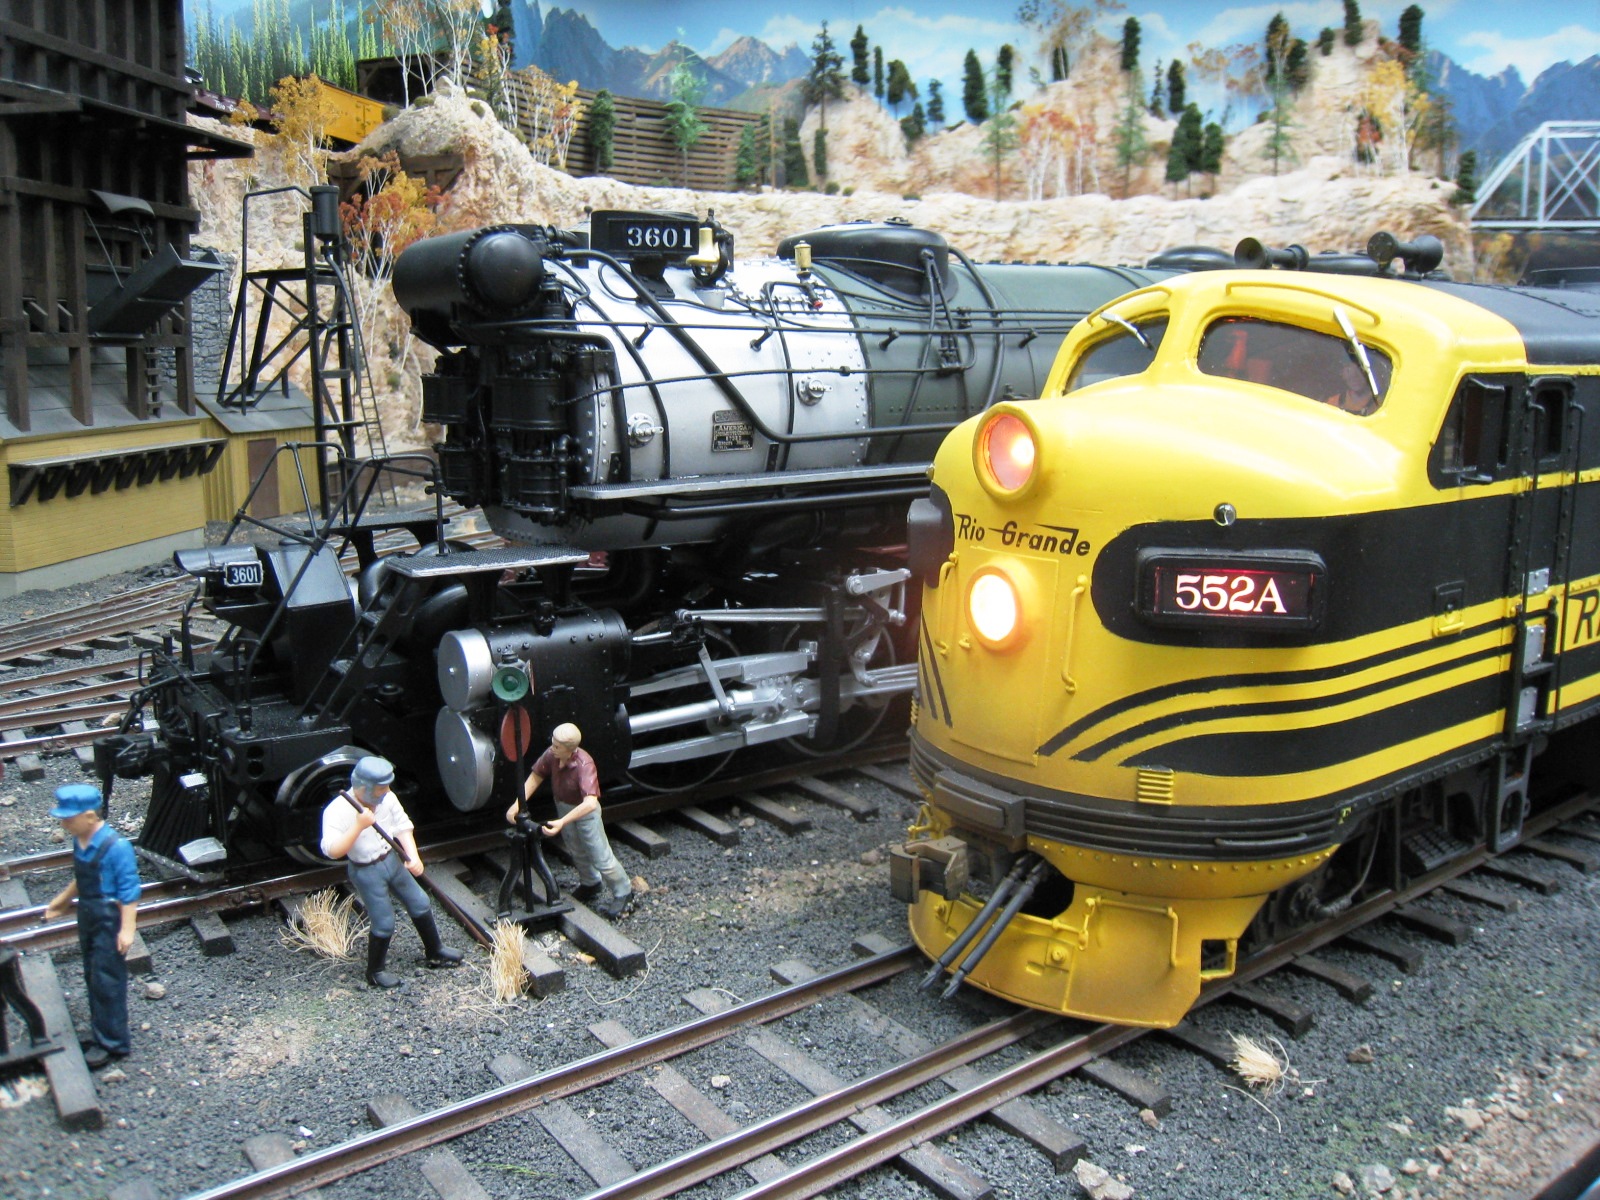
And here are pics of the largest power
on the Colorado & Western. Note how the K-37, the largest locomotive
on the narrow gauge, is utterly dwarfed by the
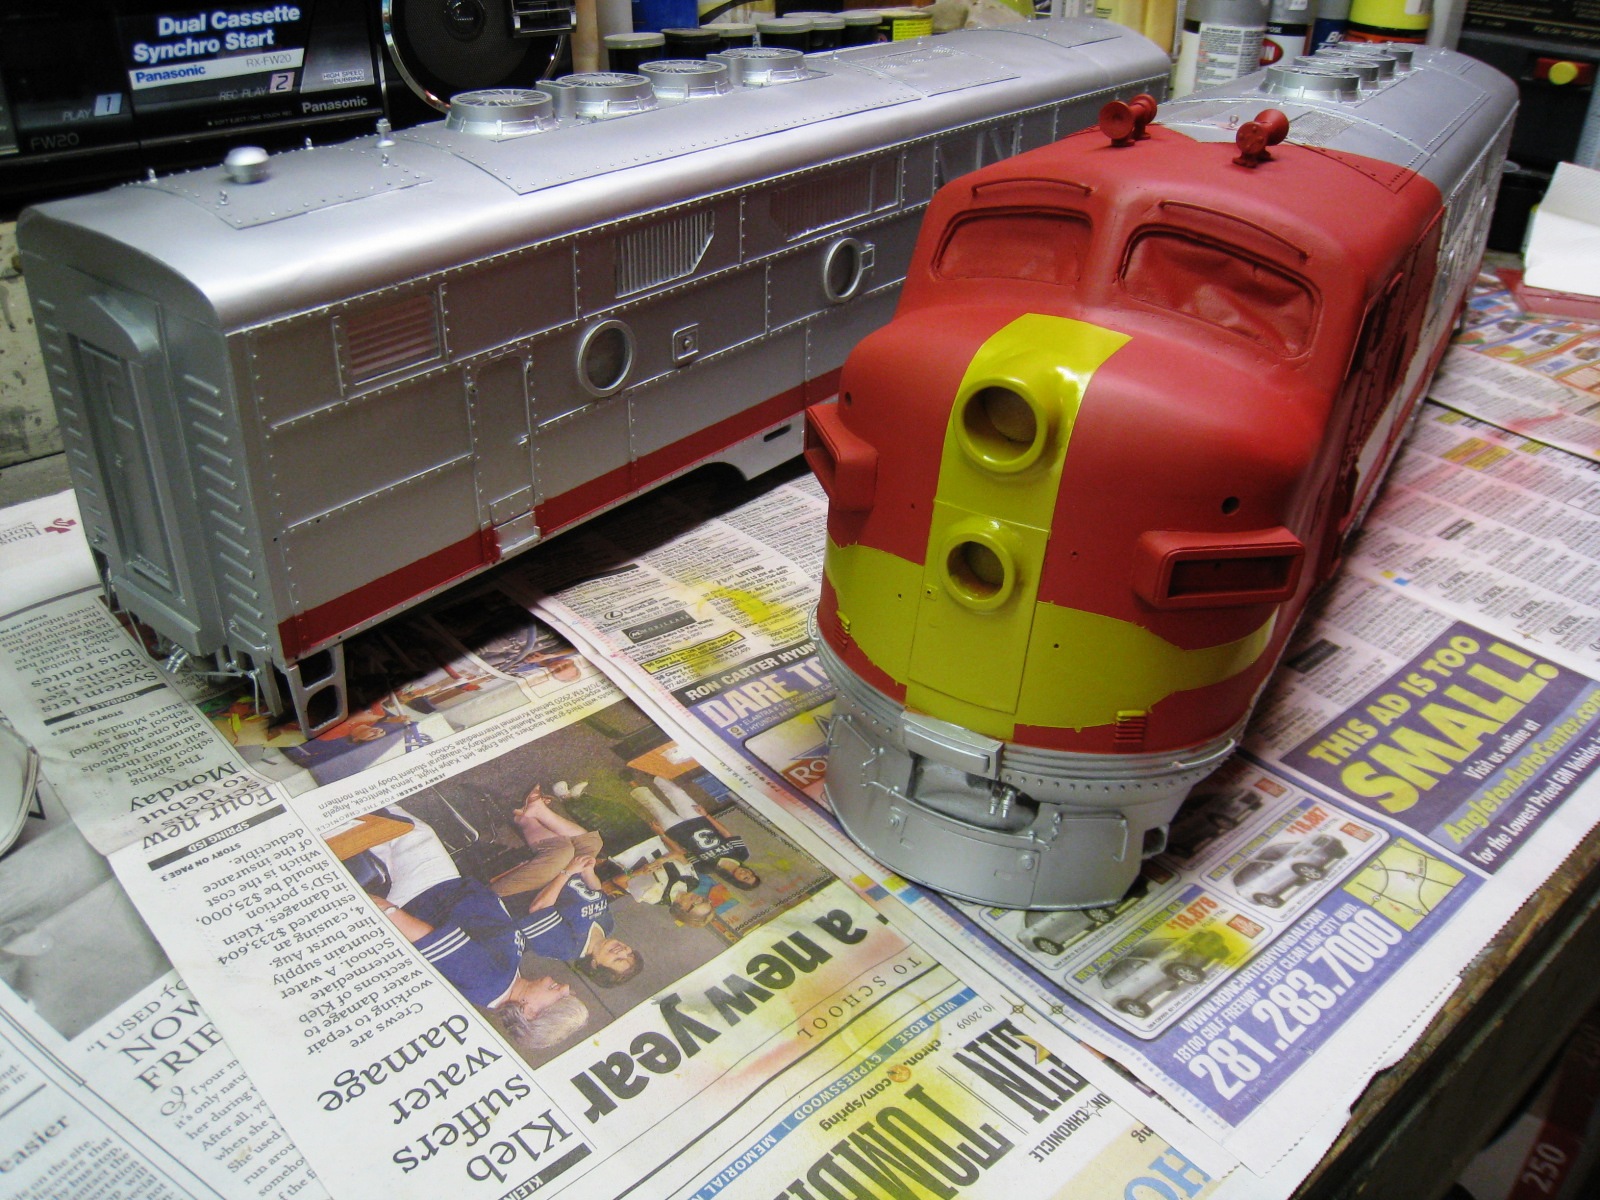
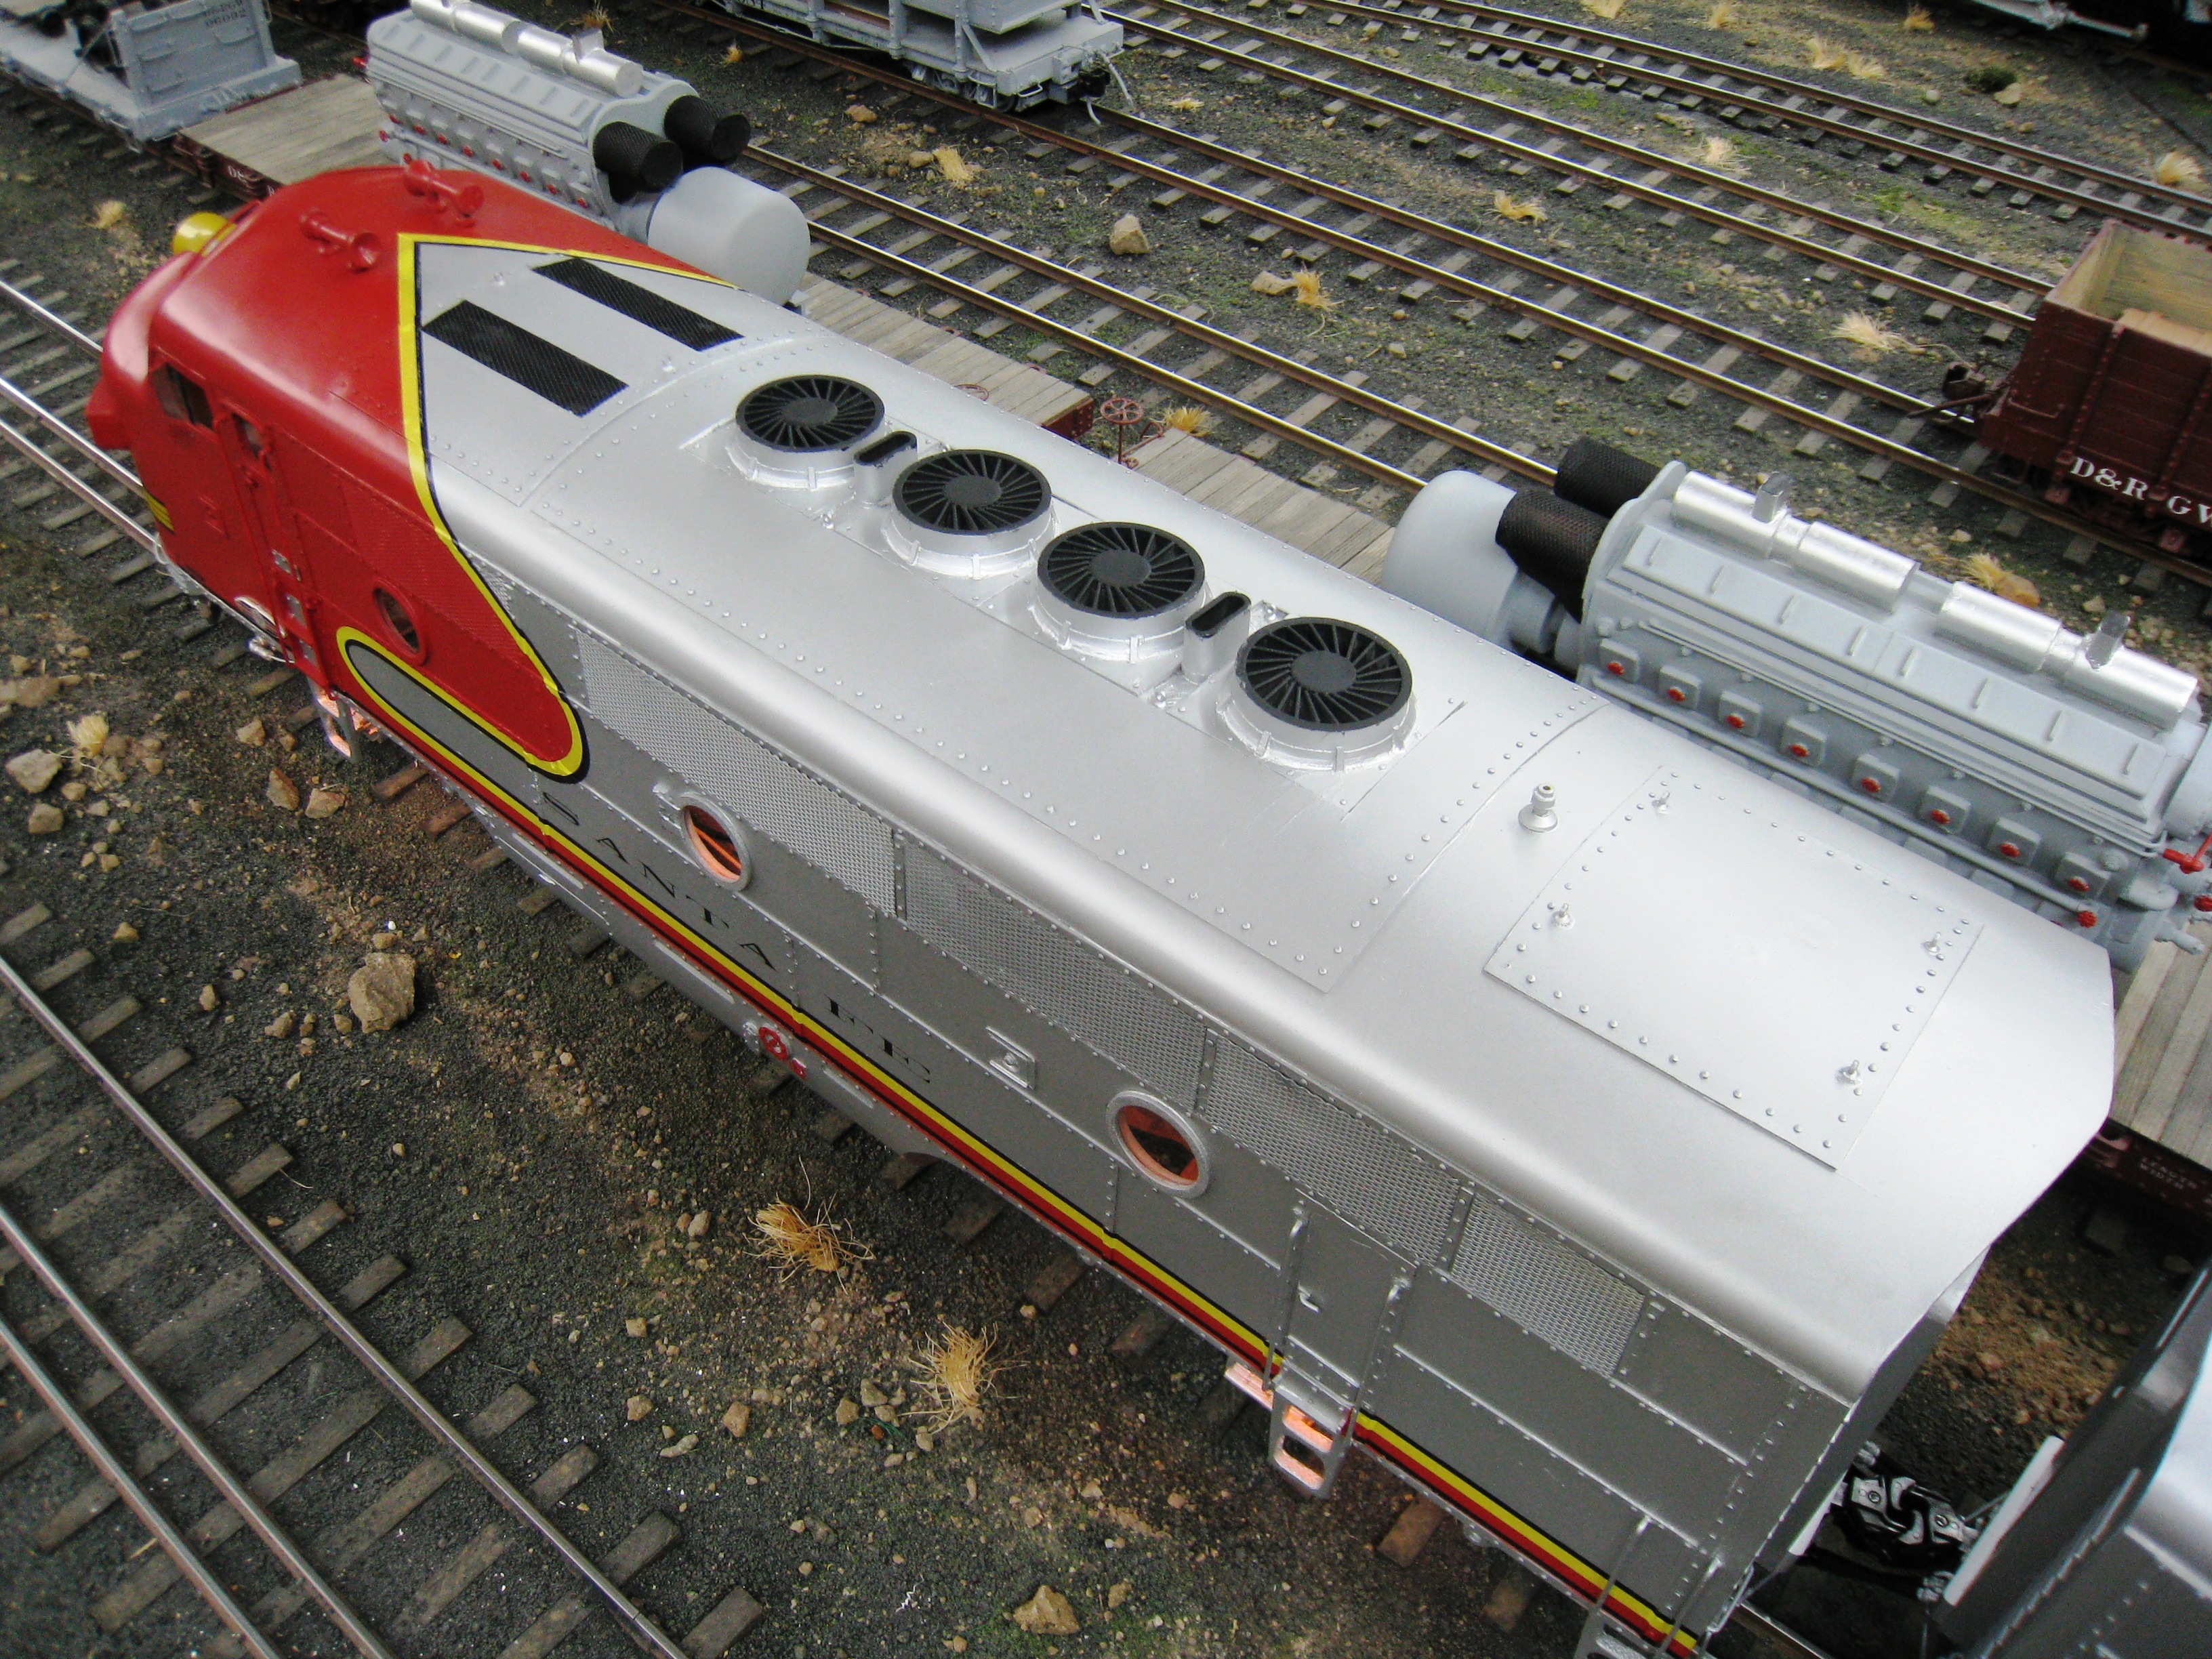
Barry painted two of the F units in the original D&RGW paint scheme as well:
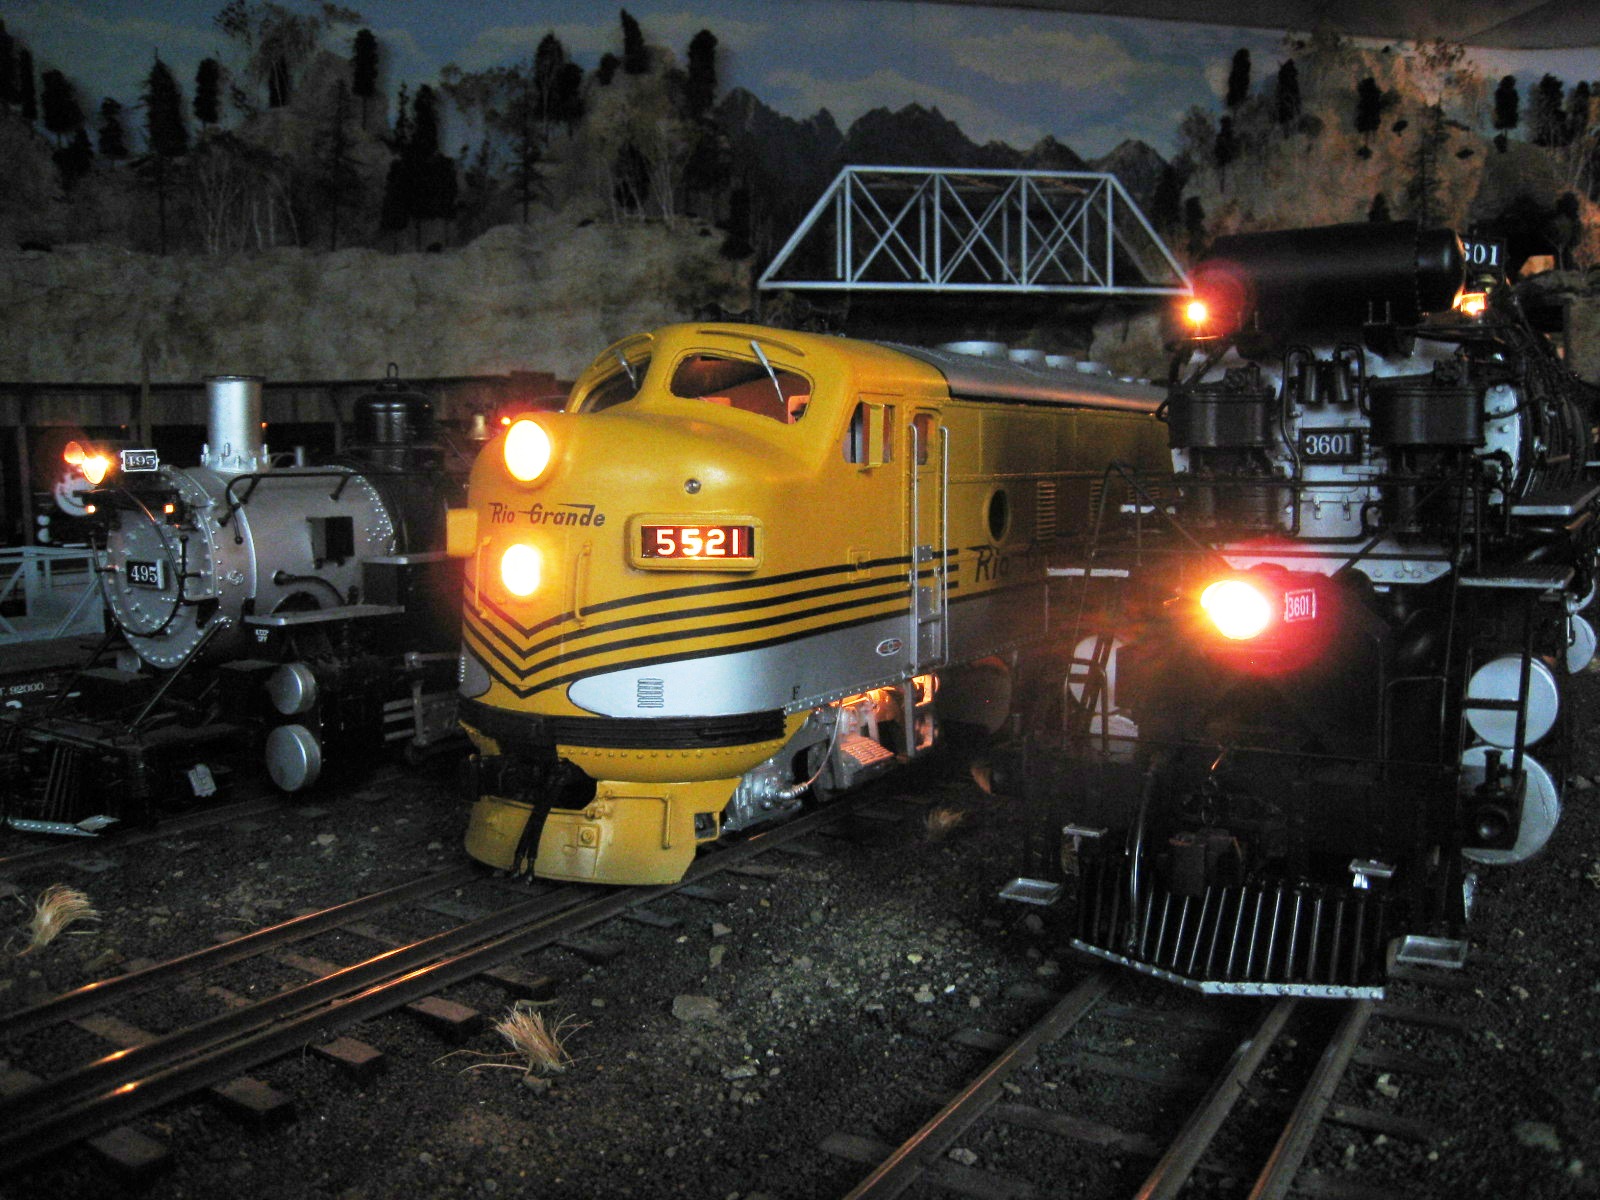
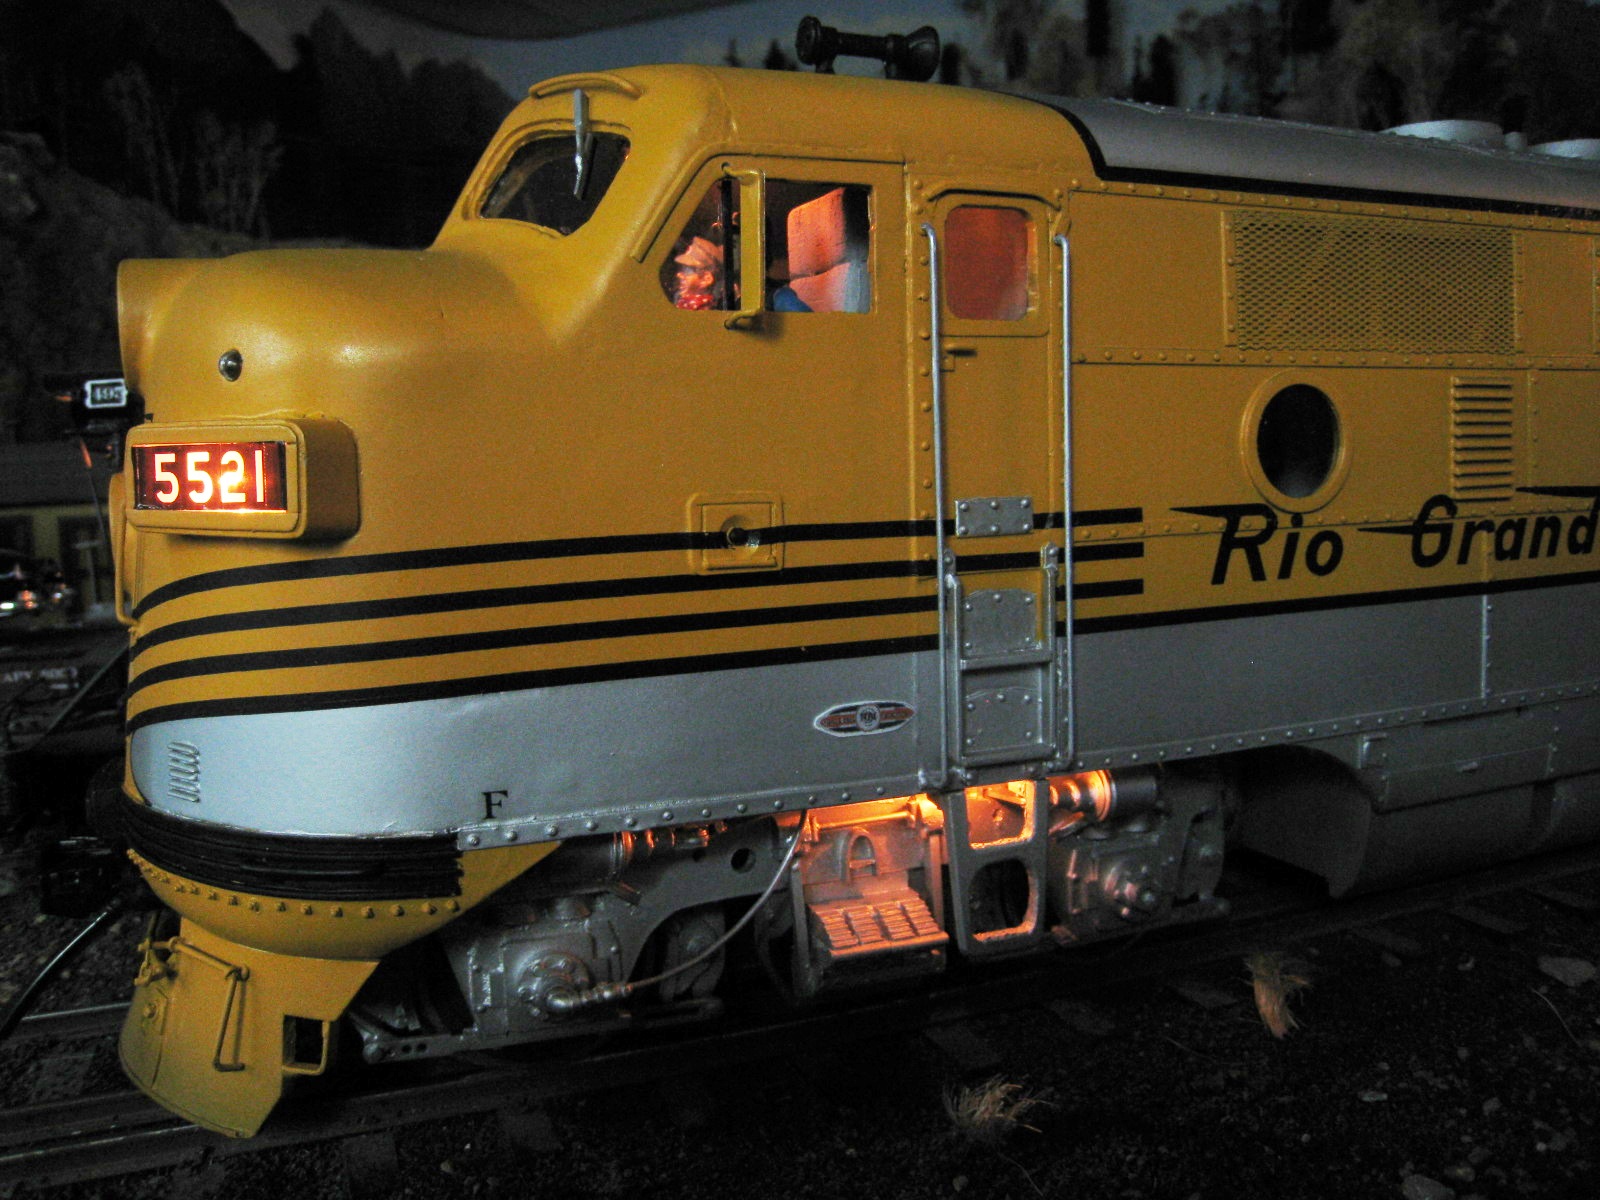
Barry concludes with a bit of reverie:
There was many happy faces at BLW when the boys in the shop rolled
out the first completed F unit A, B set to the Colorado and Western
Railroad. After so many months of labor and exceeded budget cost,
the first multi-stripe engines are a reality. The engines are the
most extensive casting engine of any BLW to date. They feature
lighted interior, so that the prime mover is exposed through the
port holes. The side steps and trucks are also lighted. The top
light on the nose is a Mars light, while the headlight has dual
bulbs. The number boards have lights behind them, and the LED's
above them turn red while the engine backs up. There is a light in
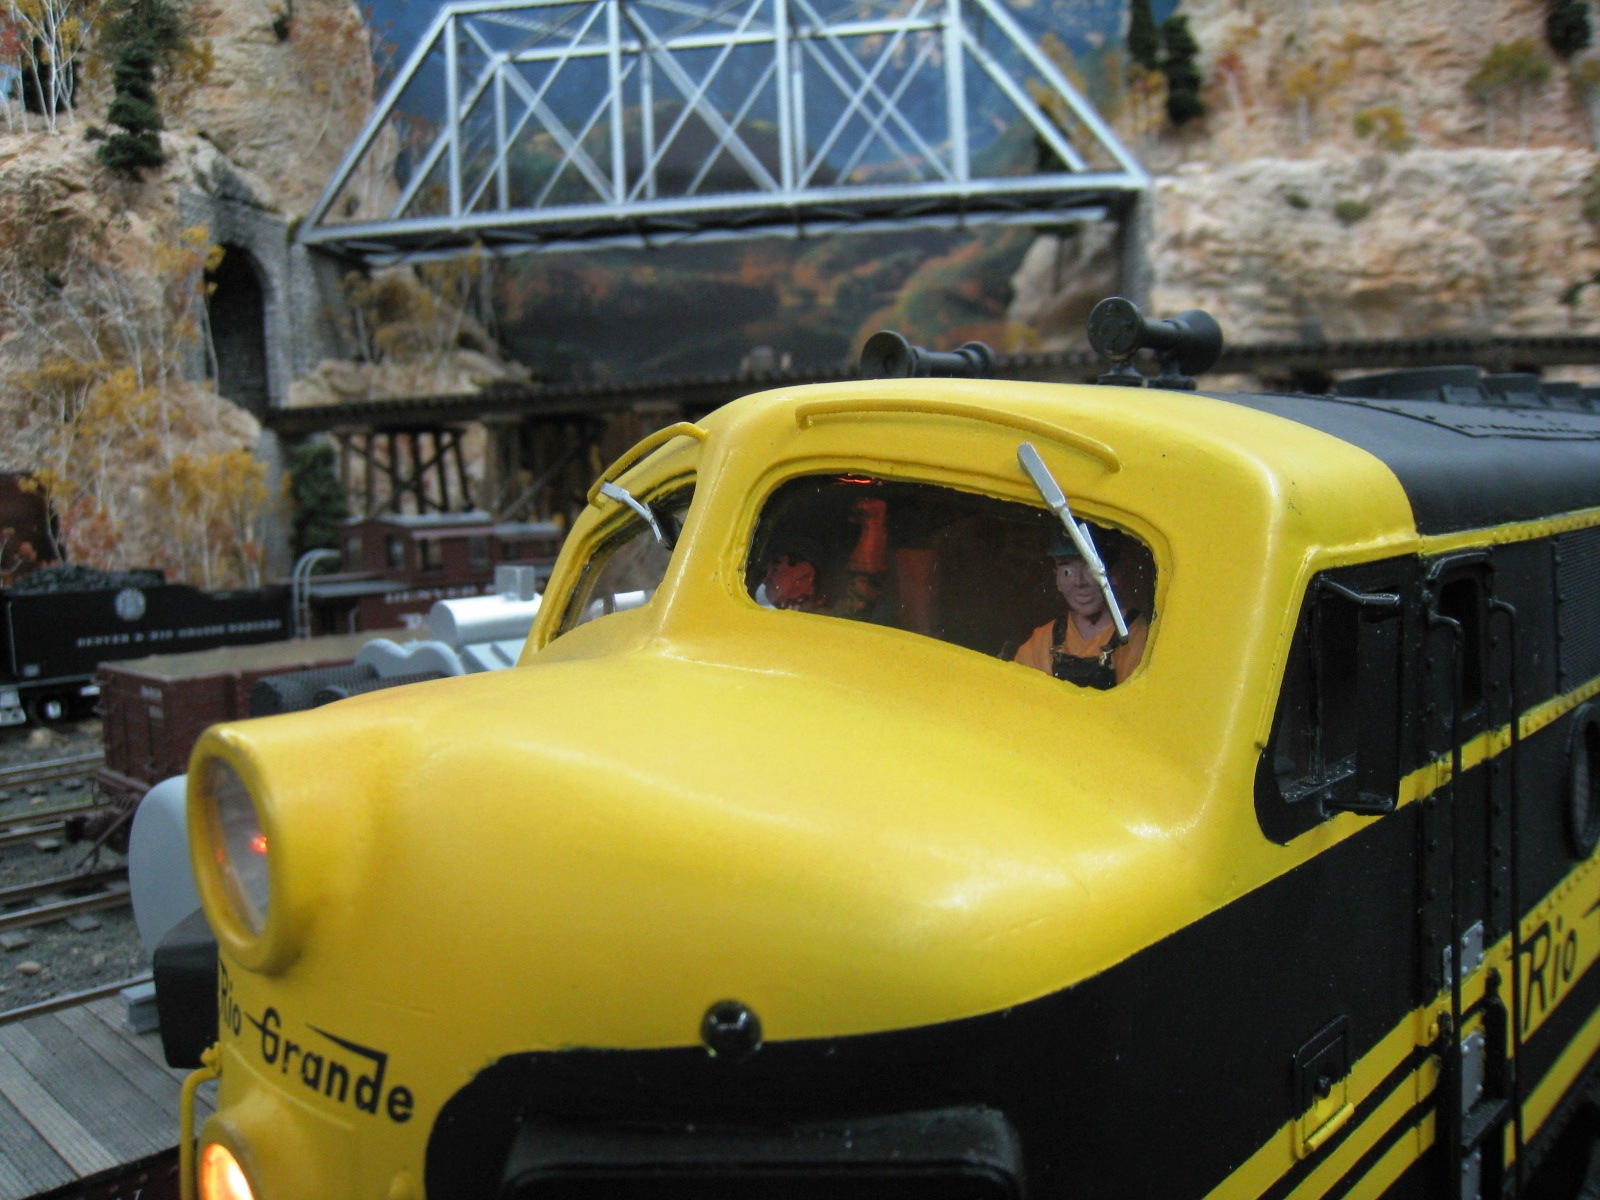
the cab to see the look on the engineer's face. The Phoenix sound
comes out of both A and B units, and brings the units to life. These
engines are painted as released to D&RGW, with only light weathering
on the roofs and trucks. |
||
|
Last update: 26 October 2009
|
| Copyright 2004-2009 CumberlandModelEngineering.com. All Rights Reserved |
.JPG)
.JPG)


.jpg)
.jpg)
.JPG)


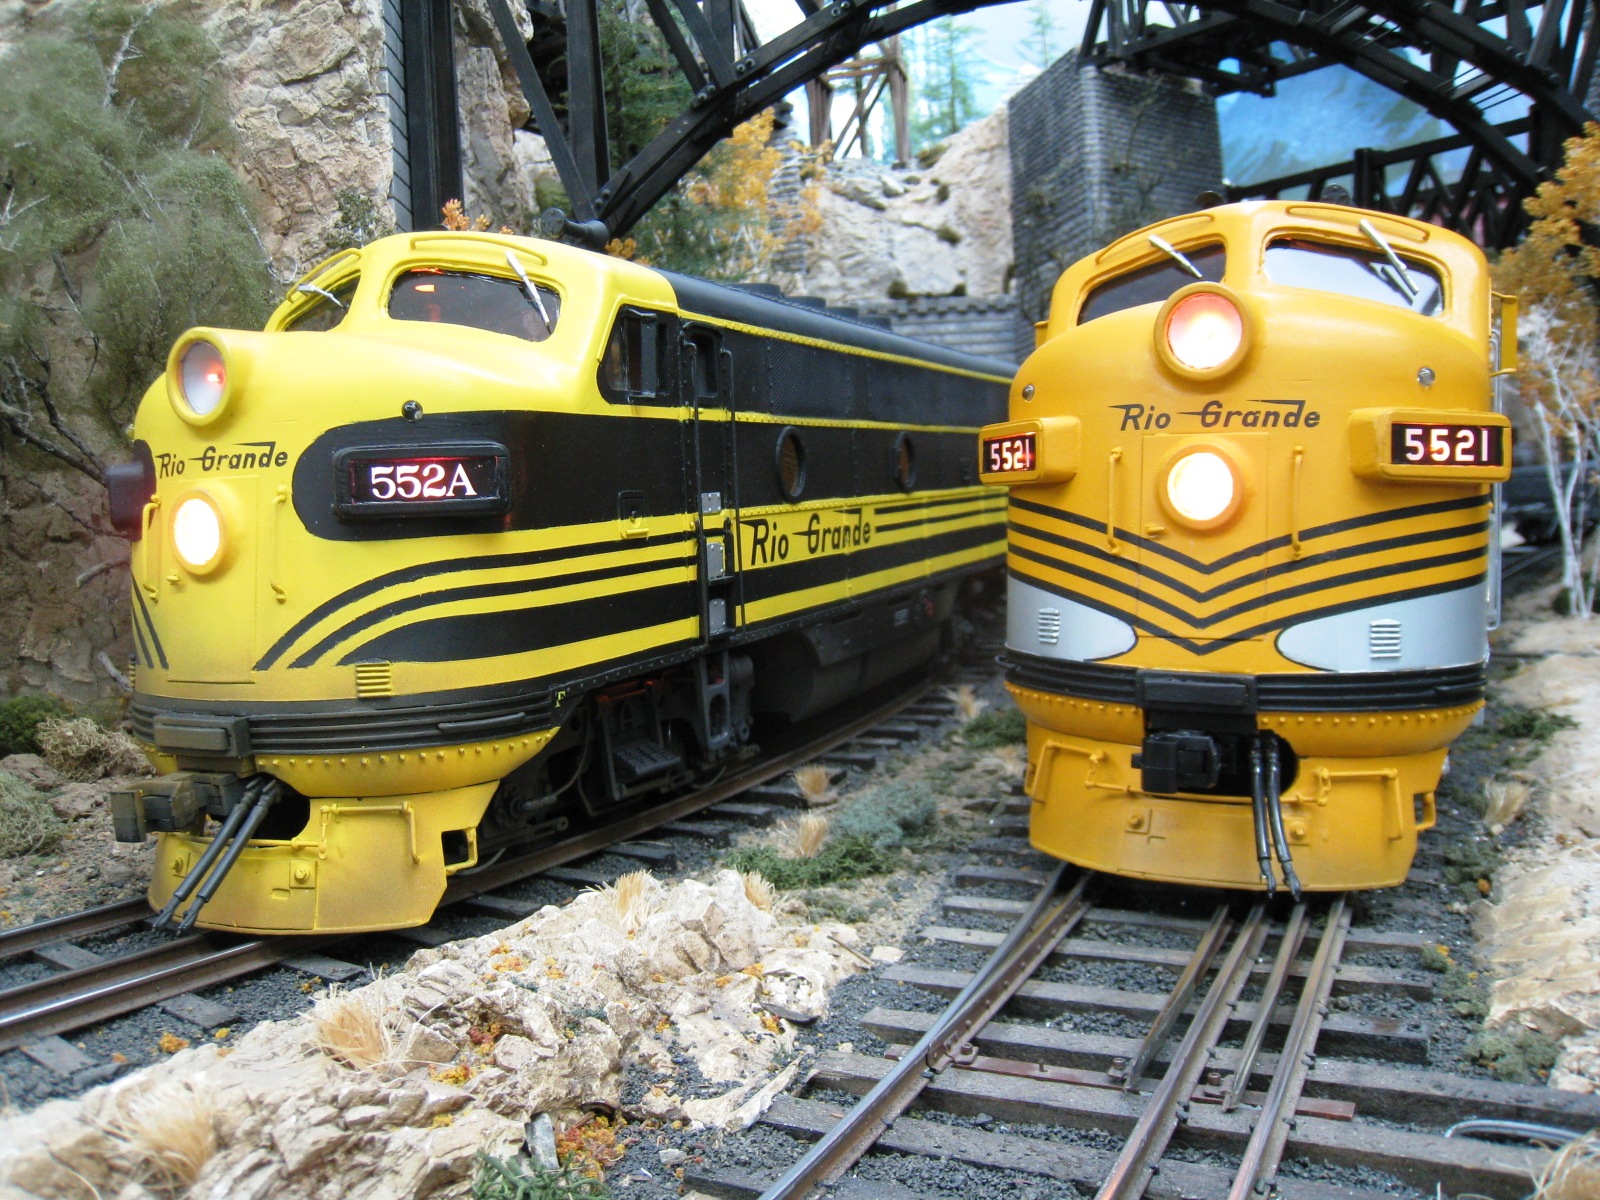
.JPG) The Completed Locomotives
The Completed Locomotives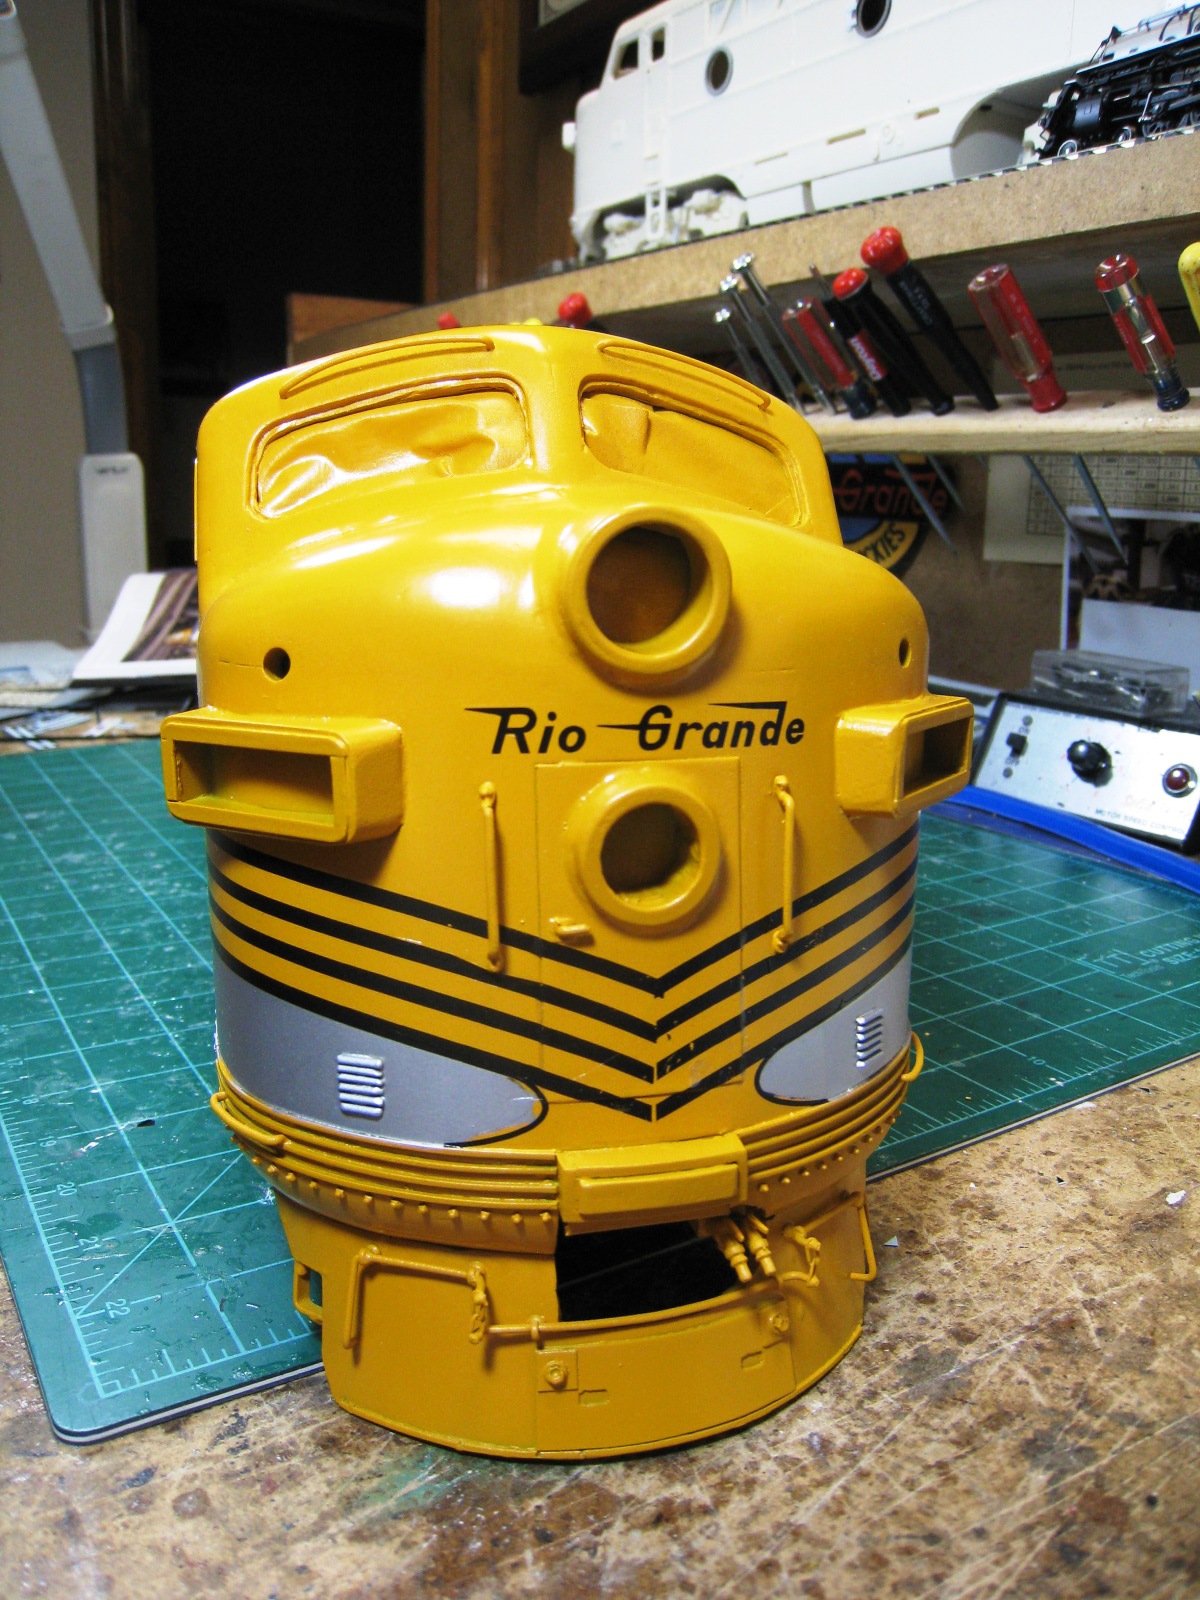


.JPG) F units and the L-131
2-8-8-2:
F units and the L-131
2-8-8-2: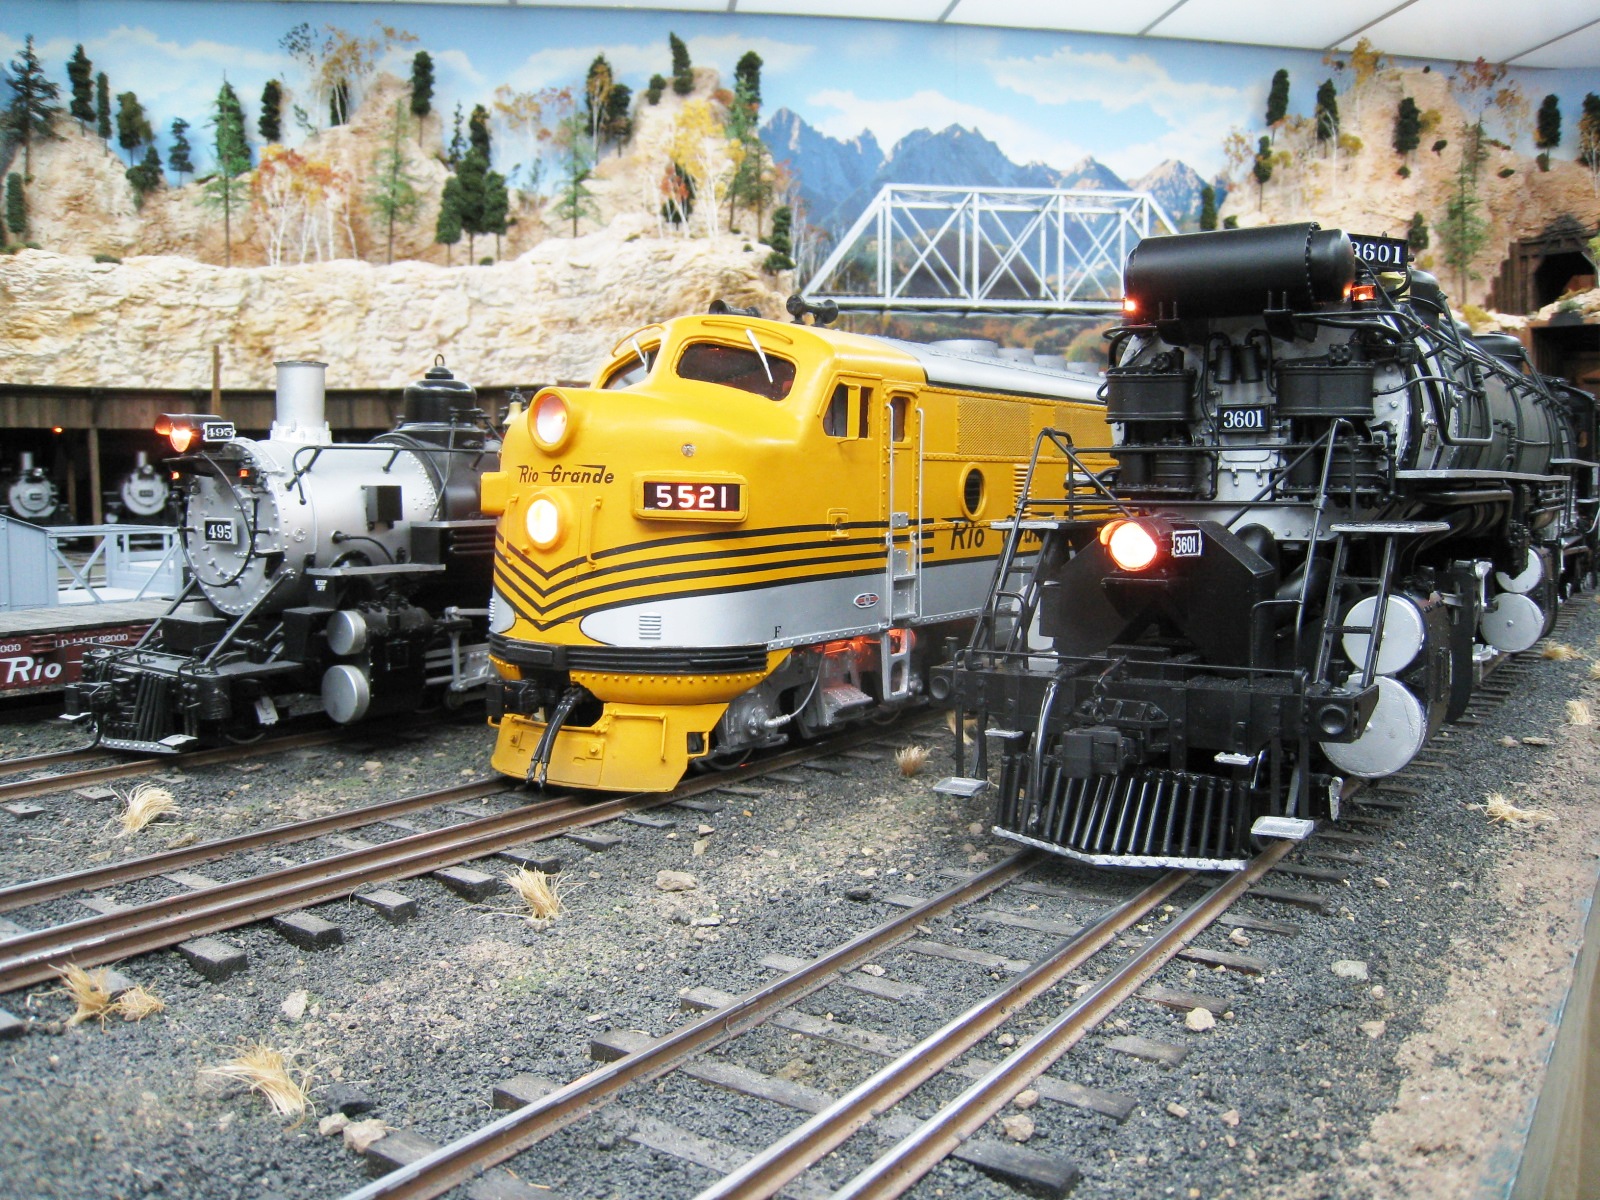
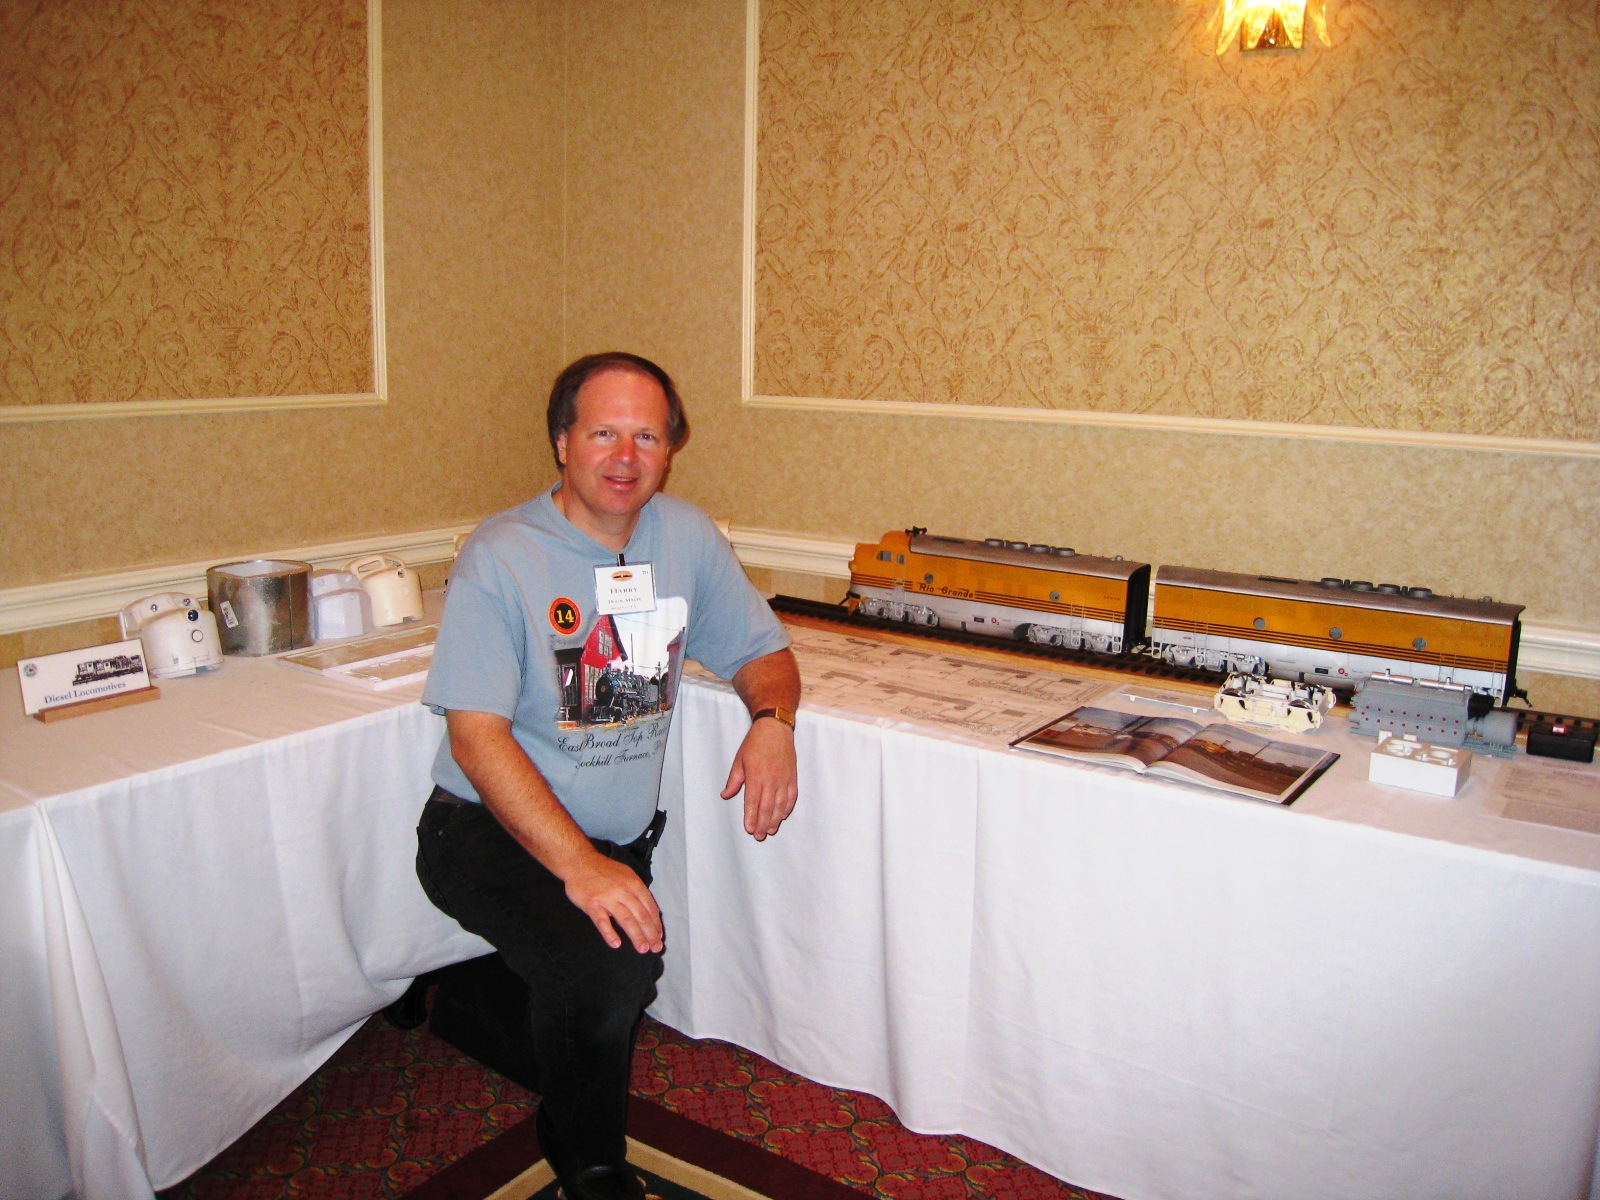
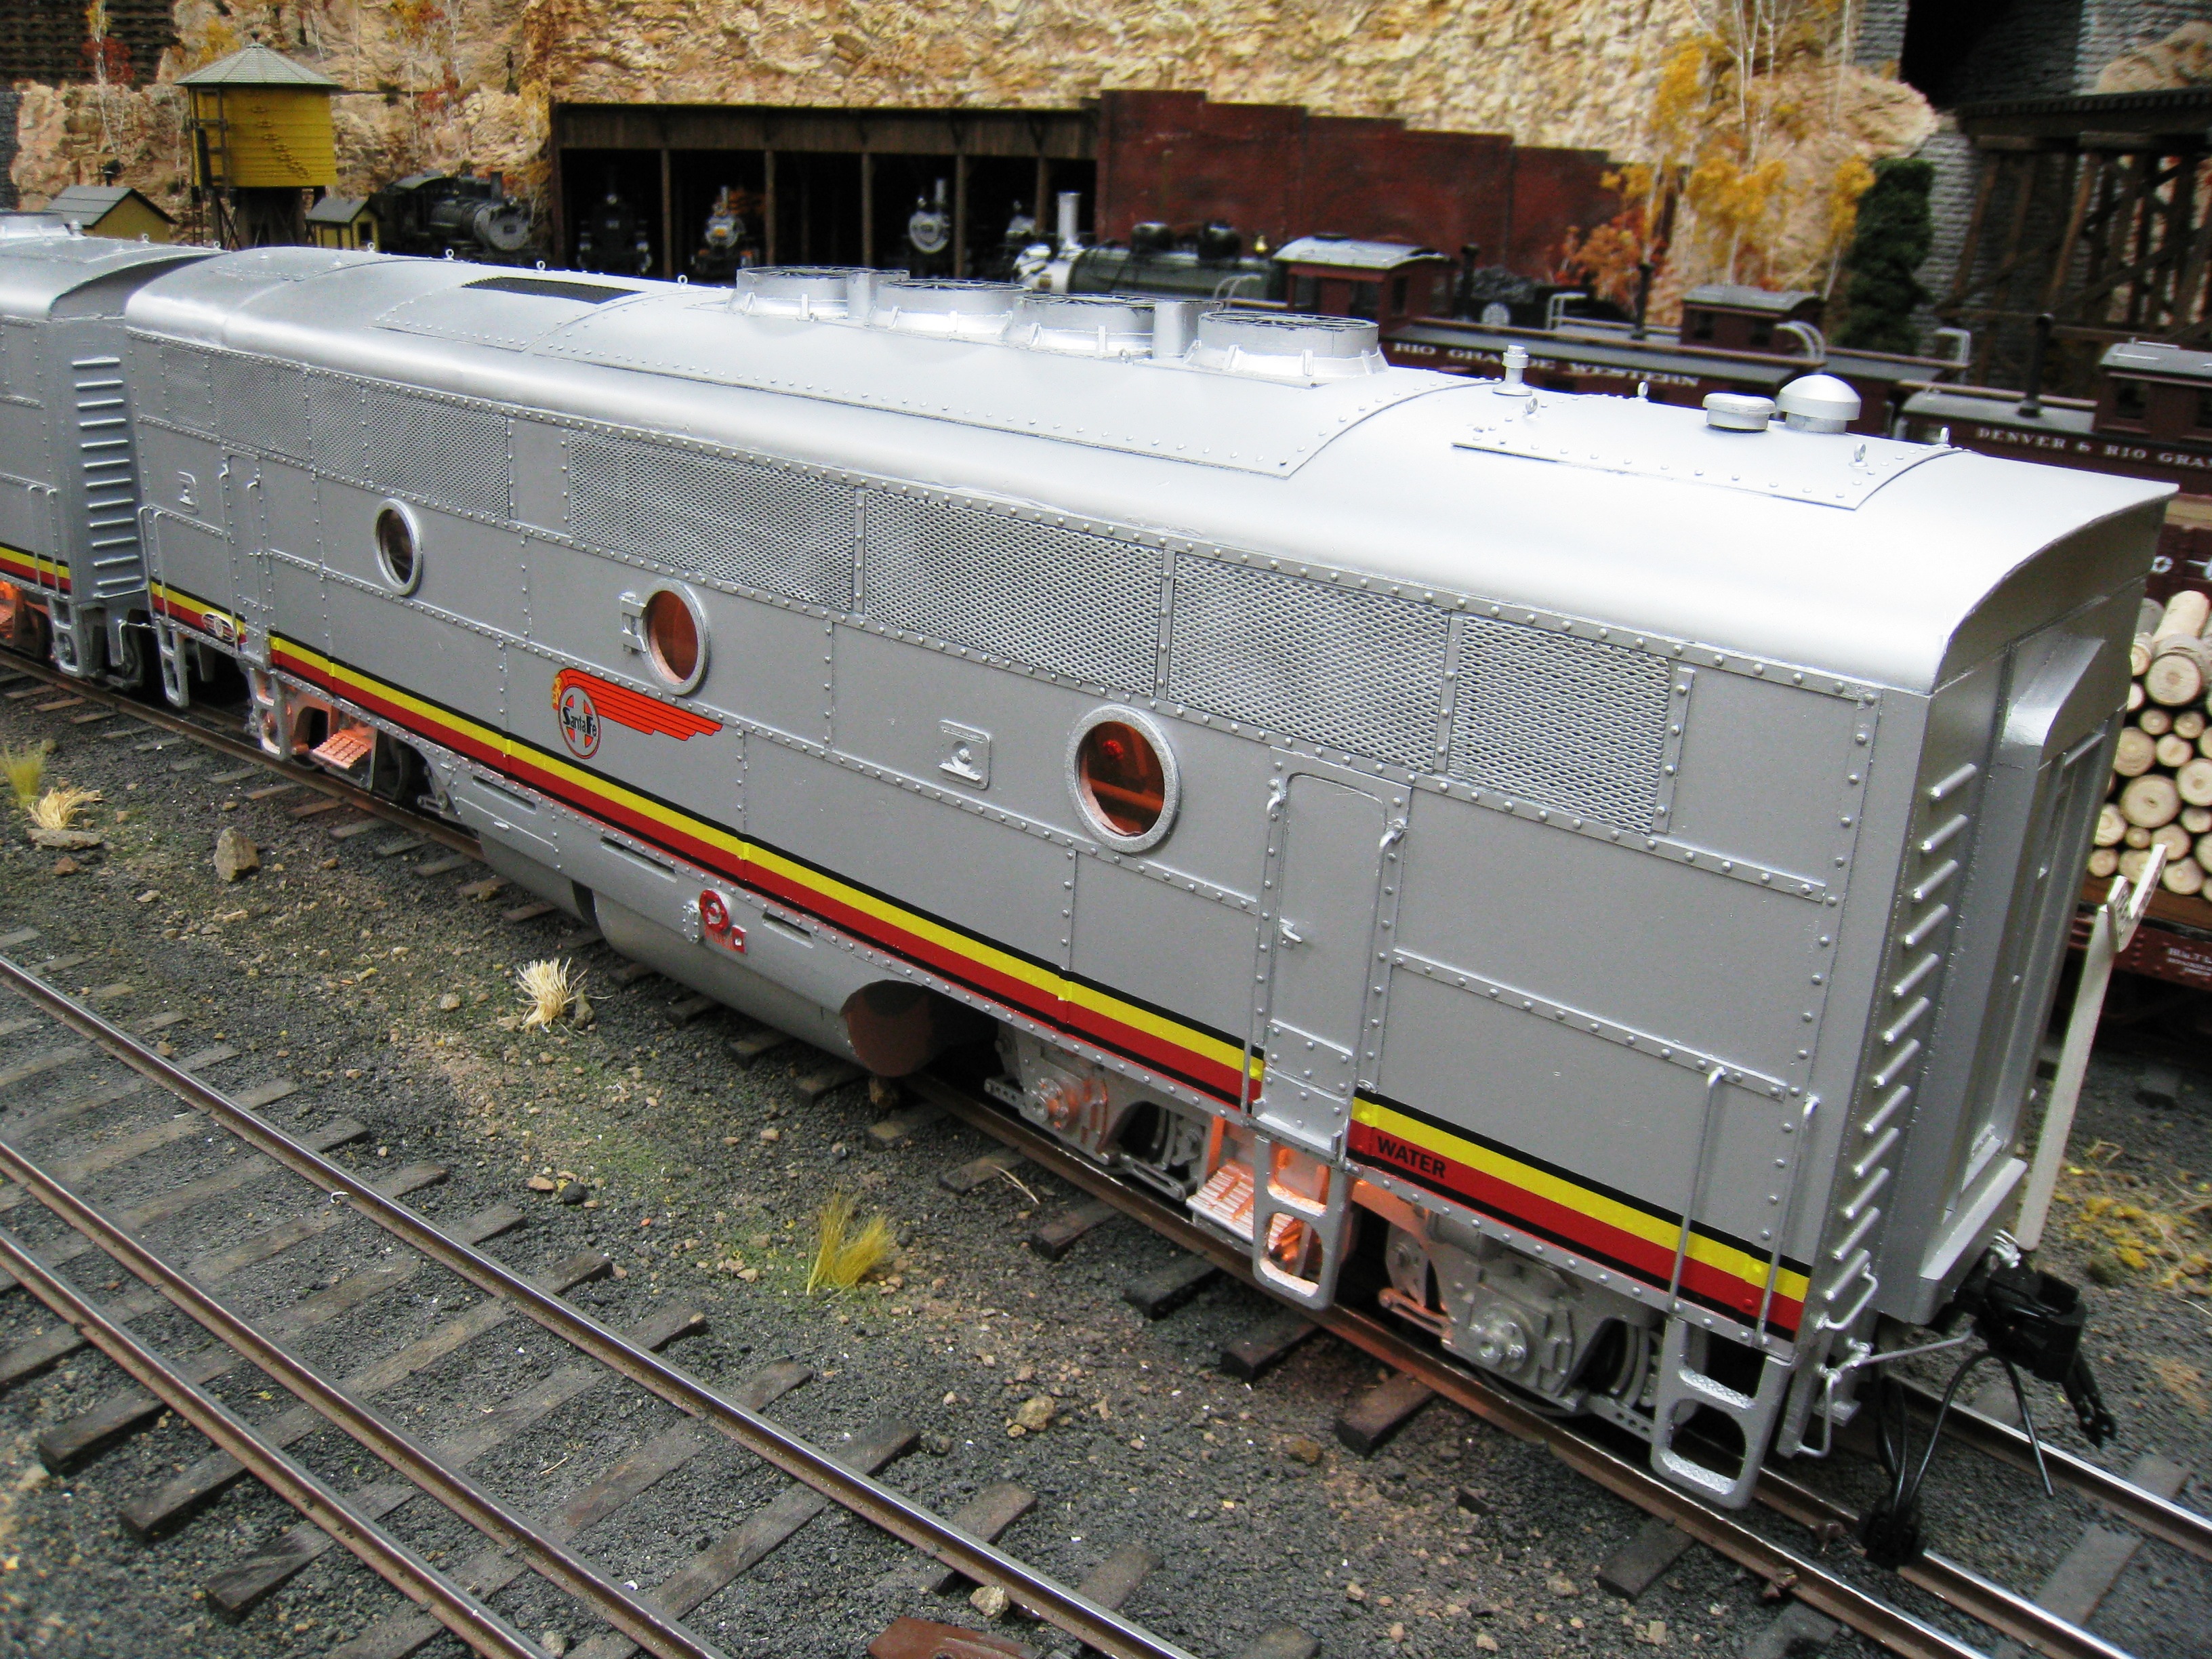
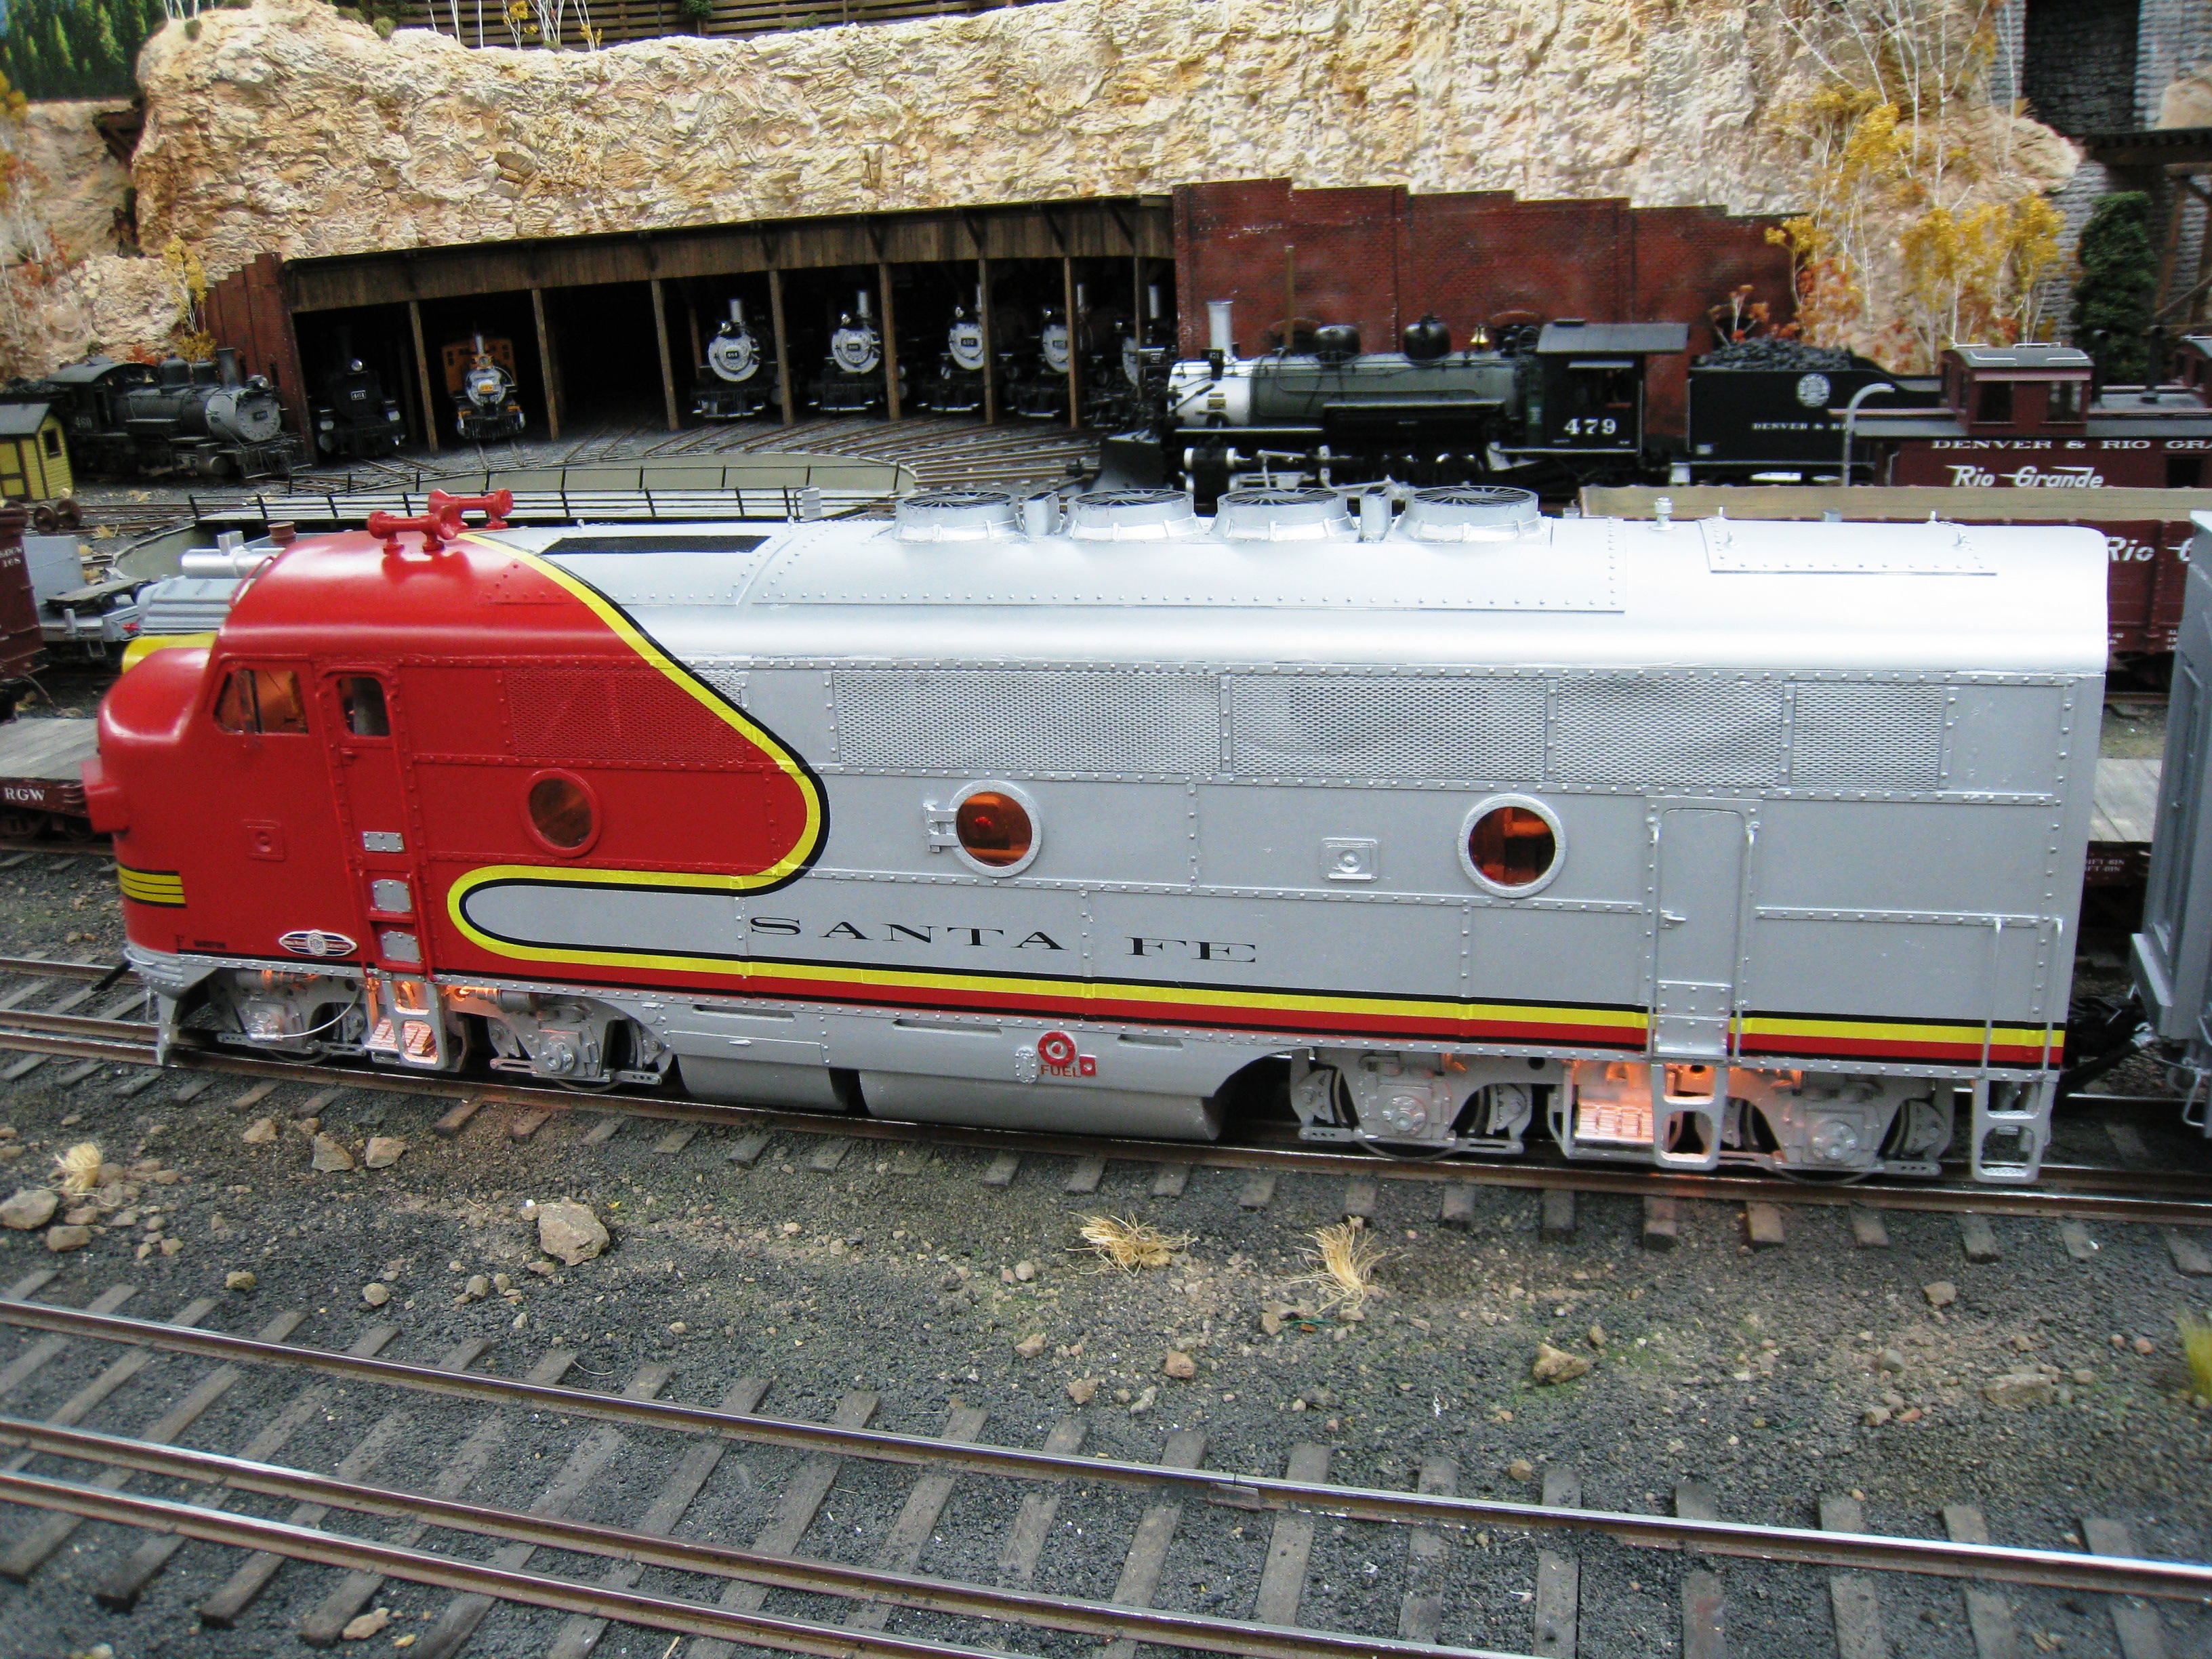
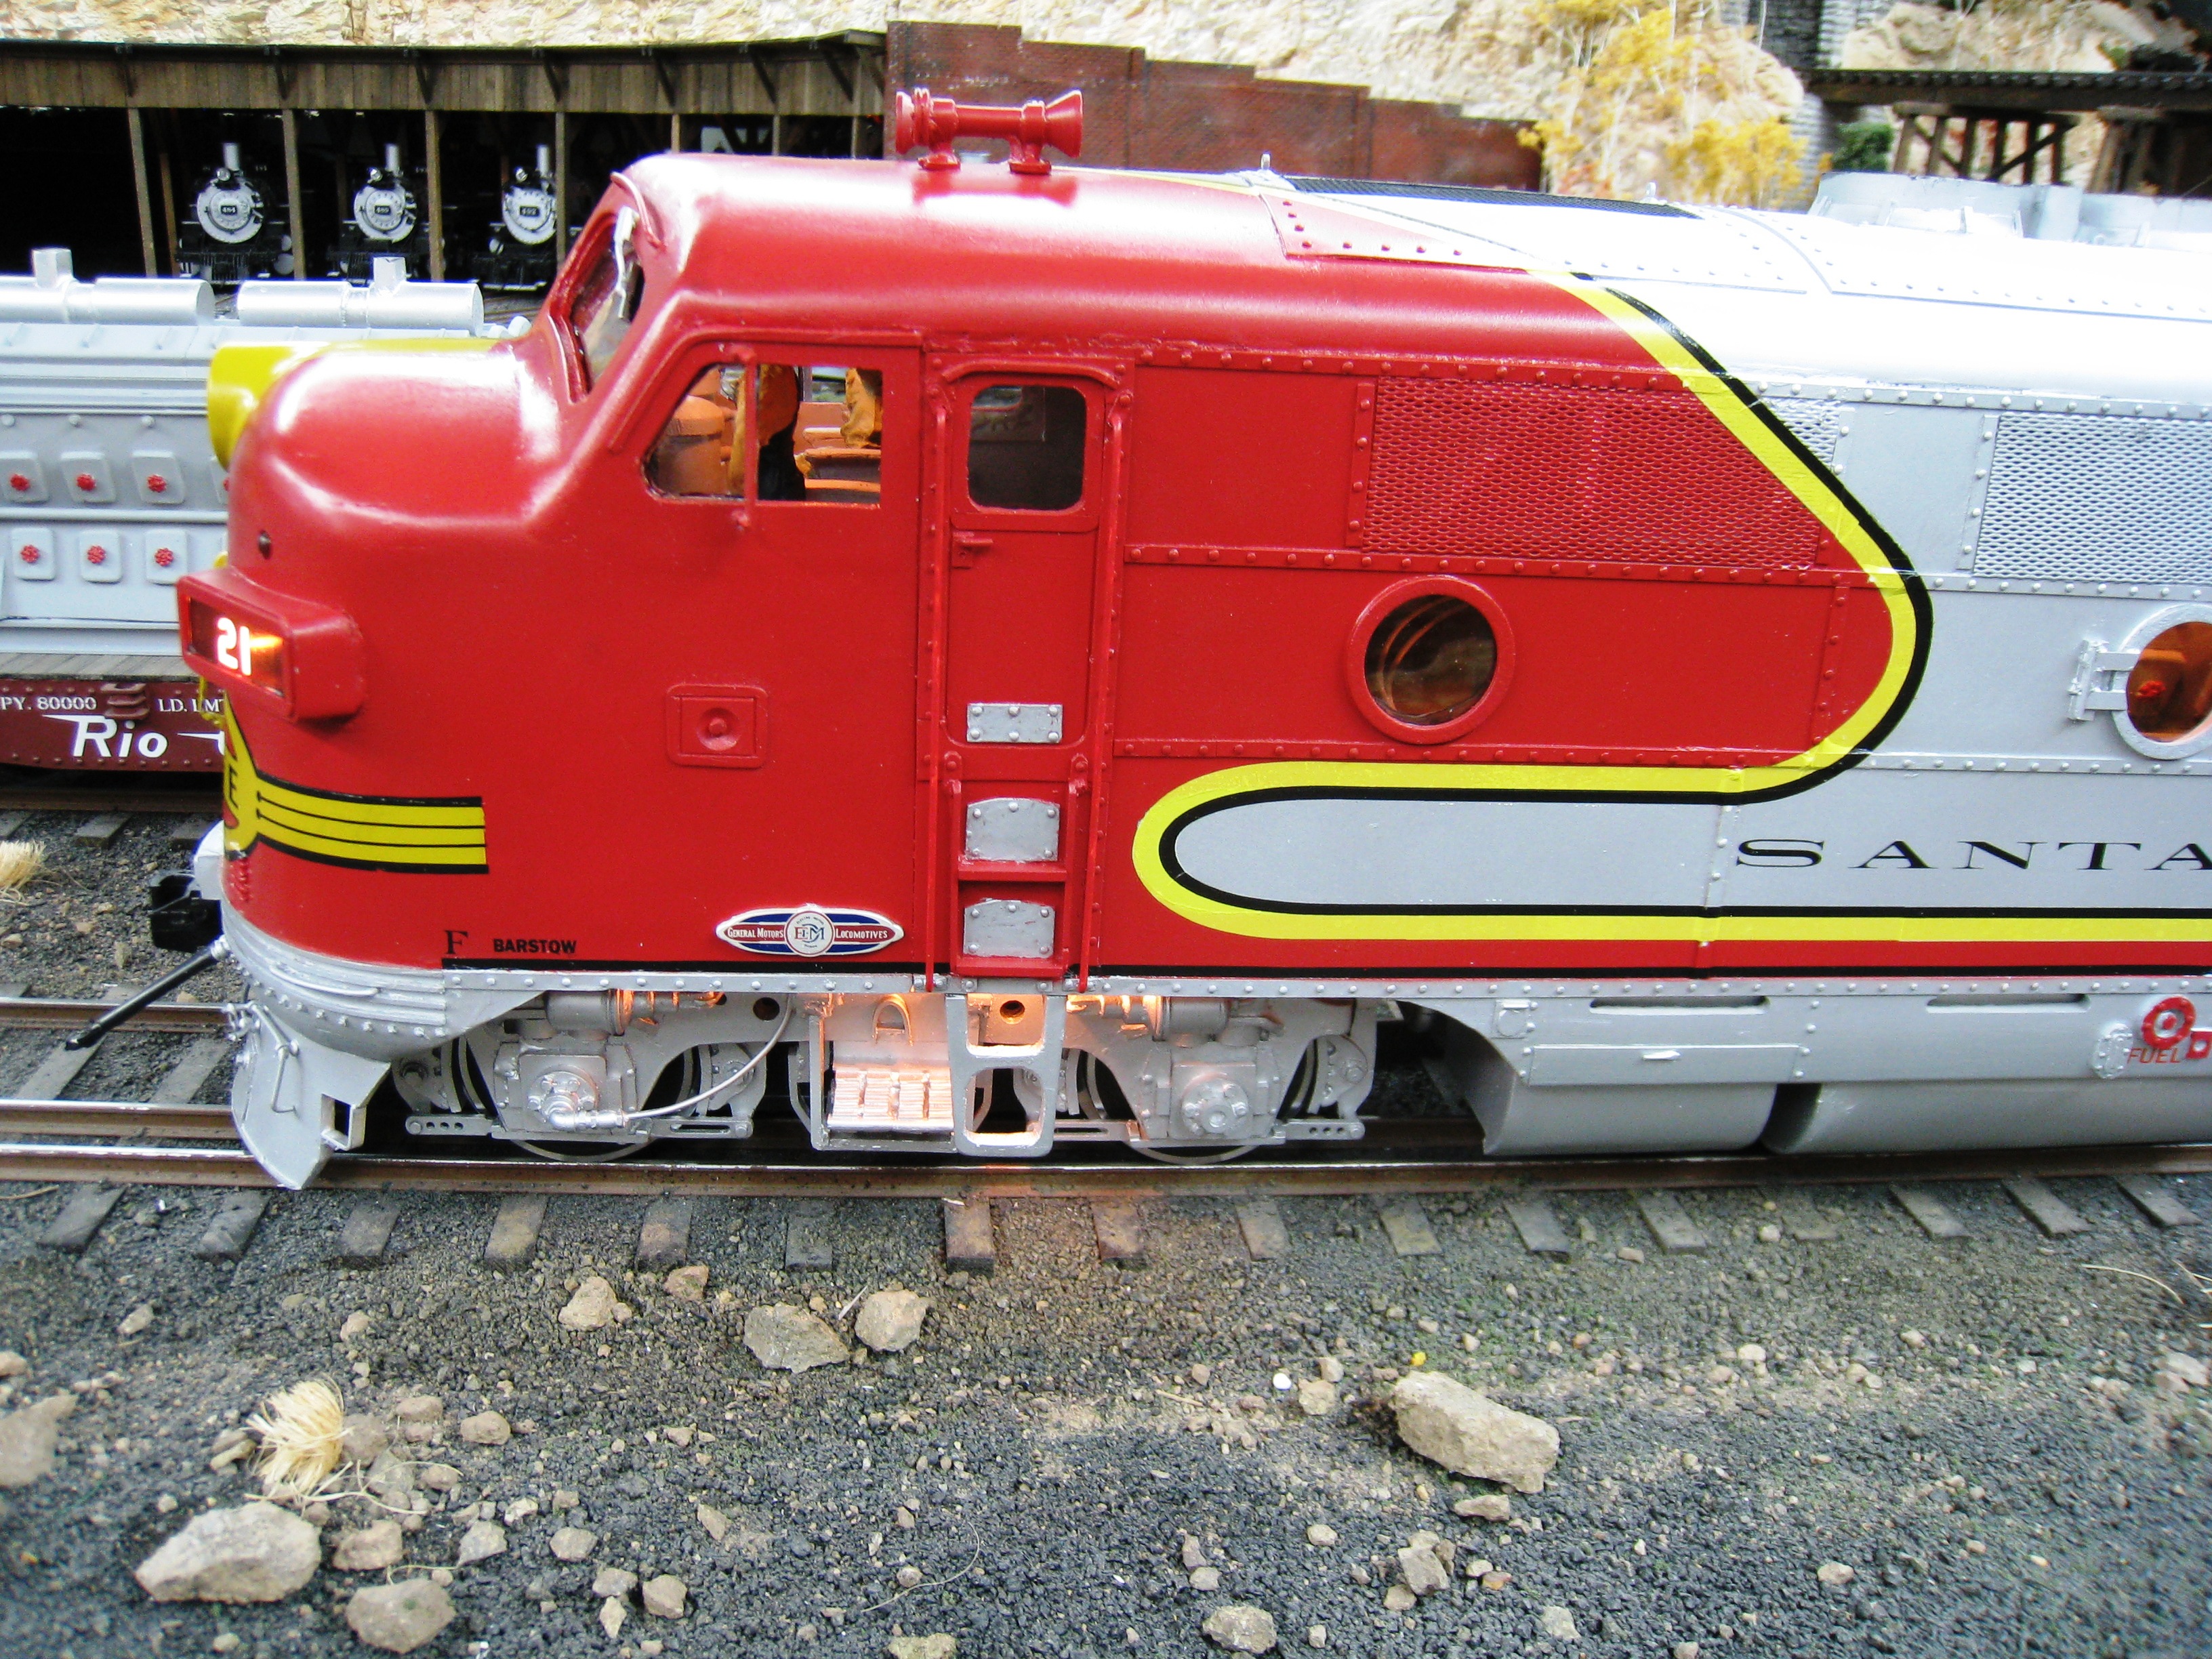
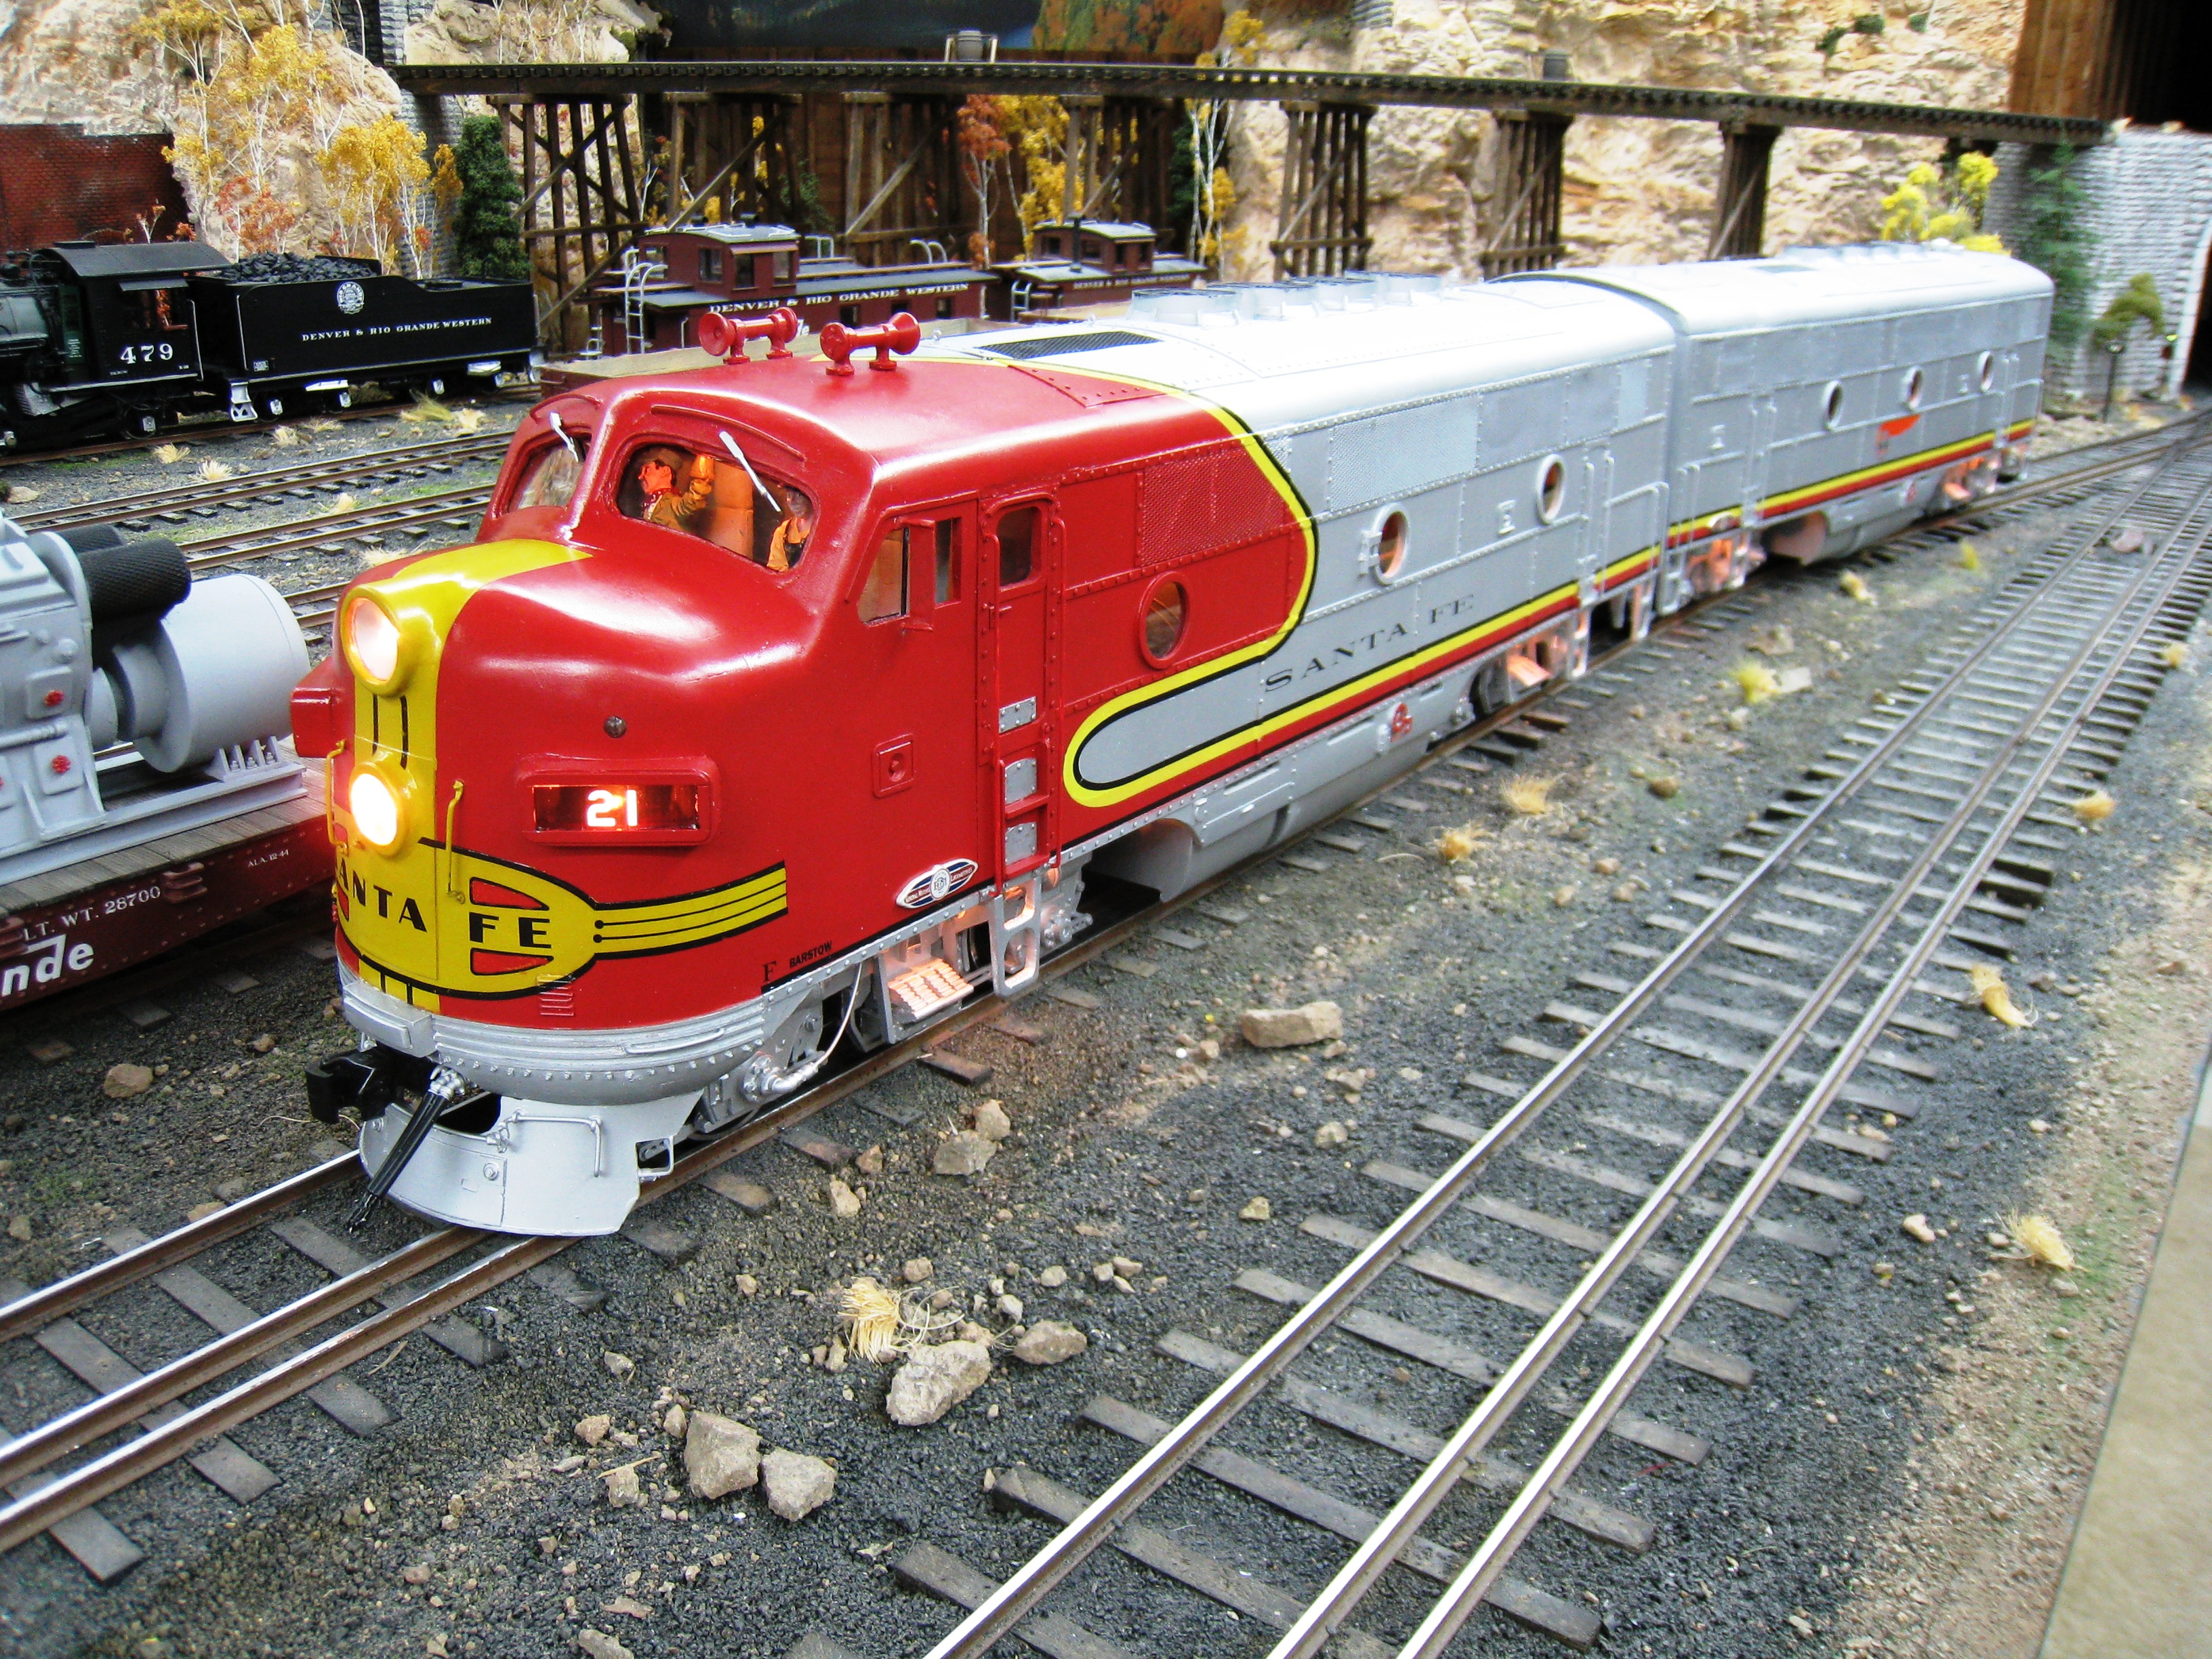
.JPG) The F units even made an appearance at
the Lone Star Regional NMRA convention in mid-2009. And there is
another A-B set in the works for a customer, Mr. Ron Thomas of
Columbus, Ohio, who prefers the classic Santa Fe warbonnet paint
scheme! Barry says, "The units are strictly DC powered, but have a
two amp battery to power the 20+ lights in them at full brightness
all the time. A mars light shines bright in the upper headlight. The
Phoenix sound is strong and they pull the walls down! What more
could you ask for?" These units were completed in October of 2009.
The F units even made an appearance at
the Lone Star Regional NMRA convention in mid-2009. And there is
another A-B set in the works for a customer, Mr. Ron Thomas of
Columbus, Ohio, who prefers the classic Santa Fe warbonnet paint
scheme! Barry says, "The units are strictly DC powered, but have a
two amp battery to power the 20+ lights in them at full brightness
all the time. A mars light shines bright in the upper headlight. The
Phoenix sound is strong and they pull the walls down! What more
could you ask for?" These units were completed in October of 2009.